
Leviton 2611
Leviton Industrial Grade Locking Plug (NEMA L5-30P) Instruction Manual
Model: 2611 | Brand: Leviton
1. Introduction
This manual provides detailed instructions for the safe and proper installation and use of the Leviton 30 Amp, 125 Volt, NEMA L5-30P, 2P, 3W, Locking Plug. Designed for industrial applications, this grounding plug offers superior performance and long-lasting reliability. Please read all instructions carefully before proceeding with installation or use.
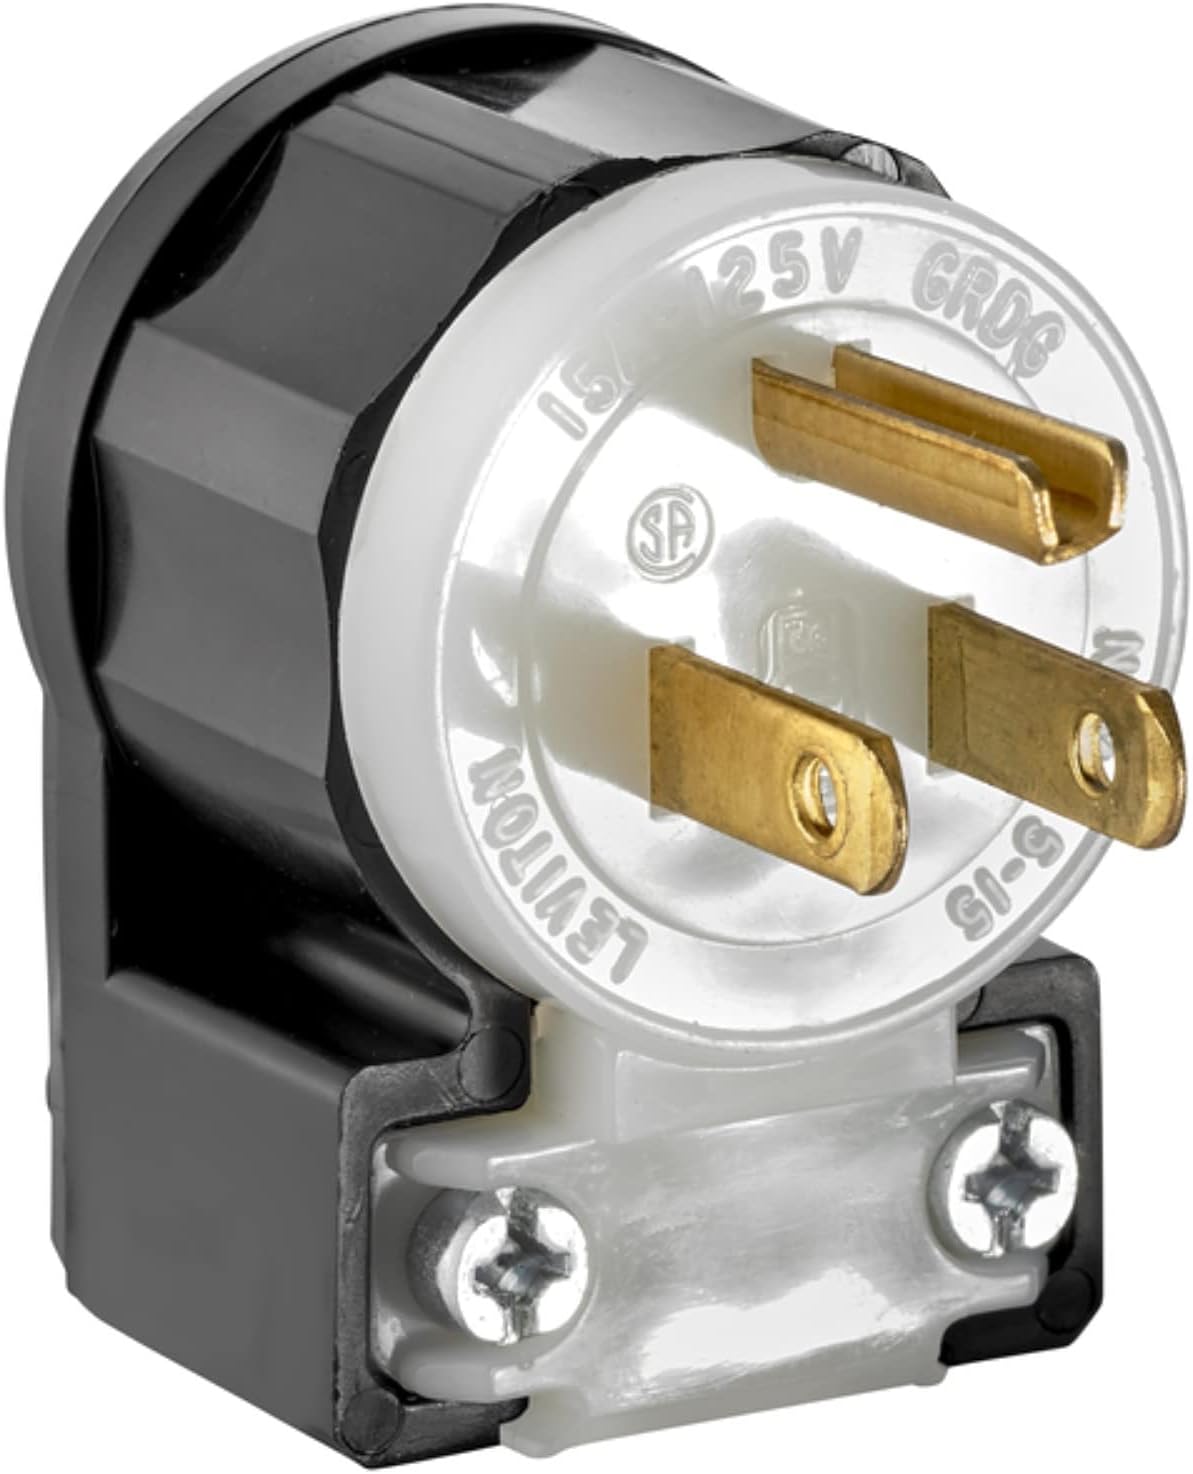
Figure 1: Leviton 2611 Industrial Grade Locking Plug
2. Safety Information
WARNING: Shock Hazard. To avoid risk of serious injury or death, turn power off at the circuit breaker before wiring any electrical device.
- Always disconnect power at the circuit breaker or fuse box before installing or servicing the plug.
- Ensure all wiring connections are secure and comply with local electrical codes.
- Do not use this device if it appears damaged.
- This product is designed for specific voltage and amperage ratings. Do not exceed these ratings.
- If you are unsure about any part of the installation process, consult a qualified electrician.
3. Installation Instructions
Follow these steps to properly wire the Leviton locking plug to your cable. Ensure power is disconnected before beginning.
Video: How to Wire a Leviton Black and White Plug and Connector. This video demonstrates the wiring process for Leviton industrial-grade plugs, including the 2611 model.
- Prepare for Wiring: Before starting, ensure power to the cable is OFF at the circuit breaker. Identify the NEMA configuration, amperage, and voltage stamped on the plug's faceplate.
- Disassemble the Plug:
- Using a Phillips head screwdriver, loosen the quick screws on the faceplate and carefully remove the faceplate from the body housing.
- Loosen the two strain relief screws on the strain relief mechanism.
- Prepare the Cable:
- Feed the cable through the strain relief and then through the body housing.
- Strip the cord jacket according to the diagram on the instruction sheet (typically about 1.5 inches). Remove the stripped cord jacket.
- Cut the green (ground) wire to approximately 1 inch long using wire strippers.
- Strip all remaining wires (typically about 5/8 of an inch) using wire strippers.
- Connect the Wires to the Faceplate:
- Loosen all terminal screws on the faceplate. The green ground screw is in the center.
- Insert the green (ground) wire into the wire well of the green ground screw terminal. Push it in fully and tighten the terminal screw securely with a Phillips screwdriver.
- Insert the white (neutral) wire into the wire well of the silver terminal screw. Push it in fully and tighten the terminal screw securely.
- Connect the remaining three wires (hot wires) to the brass terminals. Insert them into the wire wells and tighten the terminal screws securely.
- Assemble the Plug:
- Slide the faceplate assembly into the body housing. Note the channel guide on the body housing that aligns with the faceplate for proper fit.
- Tighten the quick screws on the faceplate to secure it to the body housing.
- Tighten both screws on the strain relief to secure the cable. If your wire is larger than the groove on the strain relief, a section of the strain relief can be removed to accommodate larger wire sizes.
4. Operating Instructions
Once properly installed, the Leviton locking plug provides a secure electrical connection. To operate:
- Align the plug blades with the corresponding slots on the receptacle.
- Insert the plug fully into the receptacle.
- Twist the plug clockwise to lock it into place, ensuring a secure connection.
- To disconnect, twist the plug counter-clockwise to unlock, then pull straight out from the receptacle.
5. Maintenance
The Leviton locking plug is designed for durability and requires minimal maintenance. Periodically inspect the plug for:
- Signs of physical damage, such as cracks, frayed wires, or bent blades.
- Corrosion or discoloration on the metal contacts.
- Loose connections at the terminal screws or strain relief.
If any damage or loose connections are found, disconnect power immediately and repair or replace the plug as necessary. Clean the plug with a dry cloth; do not use liquid cleaners.
6. Troubleshooting
If the plug is not functioning as expected, consider the following:
- No Power: Check the circuit breaker or fuse for the circuit. Ensure the plug is fully inserted and locked into the receptacle. Verify that the power source is active.
- Loose Connection: Disconnect power and inspect the internal wiring connections within the plug. Tighten any loose terminal screws.
- Overheating: If the plug or receptacle feels hot, immediately disconnect power. This could indicate an overload or a poor connection. Consult a qualified electrician.
- Physical Damage: Any visible damage to the plug body or blades warrants immediate replacement. Do not attempt to use a damaged plug.
7. Specifications
| Feature | Detail |
|---|---|
| Brand | Leviton |
| Model Number | 2611 |
| Amperage | 30 Amps |
| Voltage | 125 Volts |
| NEMA Configuration | L5-30P |
| Poles / Wires | 2 Pole, 3 Wire |
| Grade | Industrial Grade |
| Grounding | Yes |
| Body Material | Super Tough Nylon |
| Blades & Contacts | Solid Brass |
| Color | Black-White |
| Item Weight | 4.5 ounces |
| Product Dimensions | 8 x 8 x 8 inches |
Key Features:
- Resists damage from severe impact, abrasion, and chemicals.
- NEMA and Non-NEMA configurations available.
- Improved conductivity, low resistance, low heat, and long life.
- Internal wiring chambers isolate individual conductors to prevent flashover, arcing, and stray strands of wire.
- Deep slotted triple drive face module and cord clamp screws.
8. Warranty and Support
Warranty: This Leviton product is backed by a Limited Lifetime Warranty. For detailed warranty terms and conditions, please refer to the official Leviton website or contact customer support.
Customer Support: For technical assistance, troubleshooting, or warranty claims, please contact Leviton customer service. Visit the official Leviton website for contact information and additional resources.
Official Leviton Website: www.leviton.com
Related documents2611


Ask a question about this manual
Ask about setup, troubleshooting, compatibility, parts, safety, or missing instructions. Manuals+ will review the question and use this page’s manual context to help answer it.