Introduction
This manual provides detailed instructions for the setup, operation, and maintenance of your Aiwa HV-MX100 Hi-Fi Multi-System VCR. The HV-MX100 is designed for versatile video playback and recording, featuring a 4-head VCR, a built-in 181-channel cable TV-ready NTSC tuner, and compatibility with PAL and SECAM TV signals. It includes MTS (Multi-channel TV Sound) for stereo and SAP broadcasting, and a Hi-Fi system for optimal audio quality.
Safety Information
CONSUMER ALERT:
This television receiver has only an analog broadcast tuner and will require a converter box after February 17, 2009, to receive over-the-air broadcasts with an antenna because of the U.S.'s transition to digital broadcasting. Analog-only TVs should continue to work as before with cable and satellite TV services, gaming consoles, VCRs, DVD players, and similar products. For more information, call the Federal Communications Commission at 1-888-225-5322 (TTY: 1-888-835-5322), or visit the commission's digital-television Web site at: www.dtv.gov.
To prevent electric shock, do not open the VCR casing. Refer all servicing to qualified service personnel.
Product Overview
Front Panel and Remote Control
The front panel of your Aiwa HV-MX100 VCR provides essential controls for playback, recording, and system selection. The included remote control offers convenient access to all functions from a distance.

Image: Front view of the Aiwa HV-MX100 VCR, showcasing the tape slot, control buttons, output system selectors (NTSC, PAL, SECAM), and the included remote control and audio/video cables.
Rear Panel Connections
The rear panel houses various input and output ports for connecting the VCR to your television and other audio/video equipment.

Image: Rear panel of the Aiwa HV-MX100 VCR, displaying RF in/out, composite AV in/out, S-Video in/out, and SCART connector for various audio and video connections.
Setup
1. Unpacking
Carefully remove the VCR and all accessories from the packaging. Ensure you have the VCR unit, remote control (with batteries), and any included cables.
2. Connecting to a Television
Your VCR offers several connection options:
- RF Connection: Connect an RF cable from the VCR's RF OUT jack to your TV's antenna/cable input. Connect your antenna or cable TV line to the VCR's RF IN jack.
- Composite AV Connection: Use RCA cables (yellow for video, red/white for audio) to connect the VCR's AV OUT jacks to your TV's AV IN jacks.
- S-Video Connection: For improved picture quality, connect an S-Video cable from the VCR's S-VIDEO OUT jack to your TV's S-VIDEO IN jack. You will still need to connect RCA cables for audio.
- Front AV Input: For temporary connections (e.g., camcorder, game console), use the AV input jacks located on the front of the VCR.
3. Power Connection
Plug the VCR's power cord into a standard electrical outlet. The VCR supports auto voltage (100V-240V).
Operating Instructions
1. Basic Playback
- Insert a VHS tape into the tape slot.
- Press the PLAY button on the VCR or remote control.
- The VCR will automatically detect the video system (NTSC, PAL, SECAM) and display it. If needed, manually select the output system using the buttons on the front panel.
- Use STOP, PAUSE, REWIND, and FAST FORWARD for tape control.
2. Recording
The HV-MX100 allows for both instant and timer recording.
- Instant Recording: Insert a recordable tape and press the REC button. Press STOP to end recording.
- Timer Recording: Refer to the on-screen display menu for programming timer recordings. This VCR typically supports up to 6 program memories.
3. Tuner Operation
The VCR features a built-in 181-channel cable TV-ready NTSC tuner. Use the CHANNEL buttons on the VCR or remote to select channels. The VCR can also receive PAL and SECAM signals.
4. MTS and Hi-Fi Audio
The VCR is equipped with MTS for decoding stereo and SAP (Second Audio Program) broadcasting signals, and a Hi-Fi system for superior audio quality during playback and recording. Ensure your TV or audio system is also capable of Hi-Fi stereo for optimal sound.
5. On-Screen Display (OSD)
Access the VCR's settings and programming features through the on-screen display. Use the remote control's menu navigation buttons to adjust settings such as language, tuner setup, and timer recording.
Maintenance
1. Cleaning the Exterior
Wipe the VCR's exterior with a soft, dry cloth. Do not use liquid cleaners or abrasive materials, as they may damage the finish.
2. Head Cleaning
Over time, VCR heads can accumulate dust and debris, leading to poor picture or sound quality. Use a dry-type VCR head cleaning cassette periodically. Follow the instructions provided with the cleaning cassette.
Troubleshooting
- No Power: Ensure the power cord is securely plugged into a working outlet.
- No Picture/Sound: Check all audio and video cable connections between the VCR and your TV. Ensure your TV input is set to the correct AV channel or tuner input. Verify the output system selected on the VCR matches your TV's capabilities.
- Tape Not Playing/Ejecting: Ensure the tape is inserted correctly. If the tape is jammed, do not force it; consult a service technician.
- Poor Picture Quality: Clean the VCR heads using a cleaning cassette. Check the tape condition.
- Remote Control Not Working: Replace the batteries in the remote control. Ensure there are no obstructions between the remote and the VCR's remote sensor.
Specifications
- Model Number: HV-MX100
- Brand: Aiwa
- Power Consumption: 26W
- Power Supply: AC 100V-240V, 50Hz/60Hz (Auto Voltage)
- Video Systems: PAL/SECAM/MESECAM/NTSC 3.58/M-PAL/N-PAL conversion
- Audio: Hi-Fi Stereo, MTS compatible
- Tuner: 181-channel cable TV-ready NTSC tuner
- Dimensions: Approximately 17 x 4 x 14.5 inches
- Weight: Approximately 11.7 pounds
- Special Features: Converts PAL, SECAM, and NTSC signals.
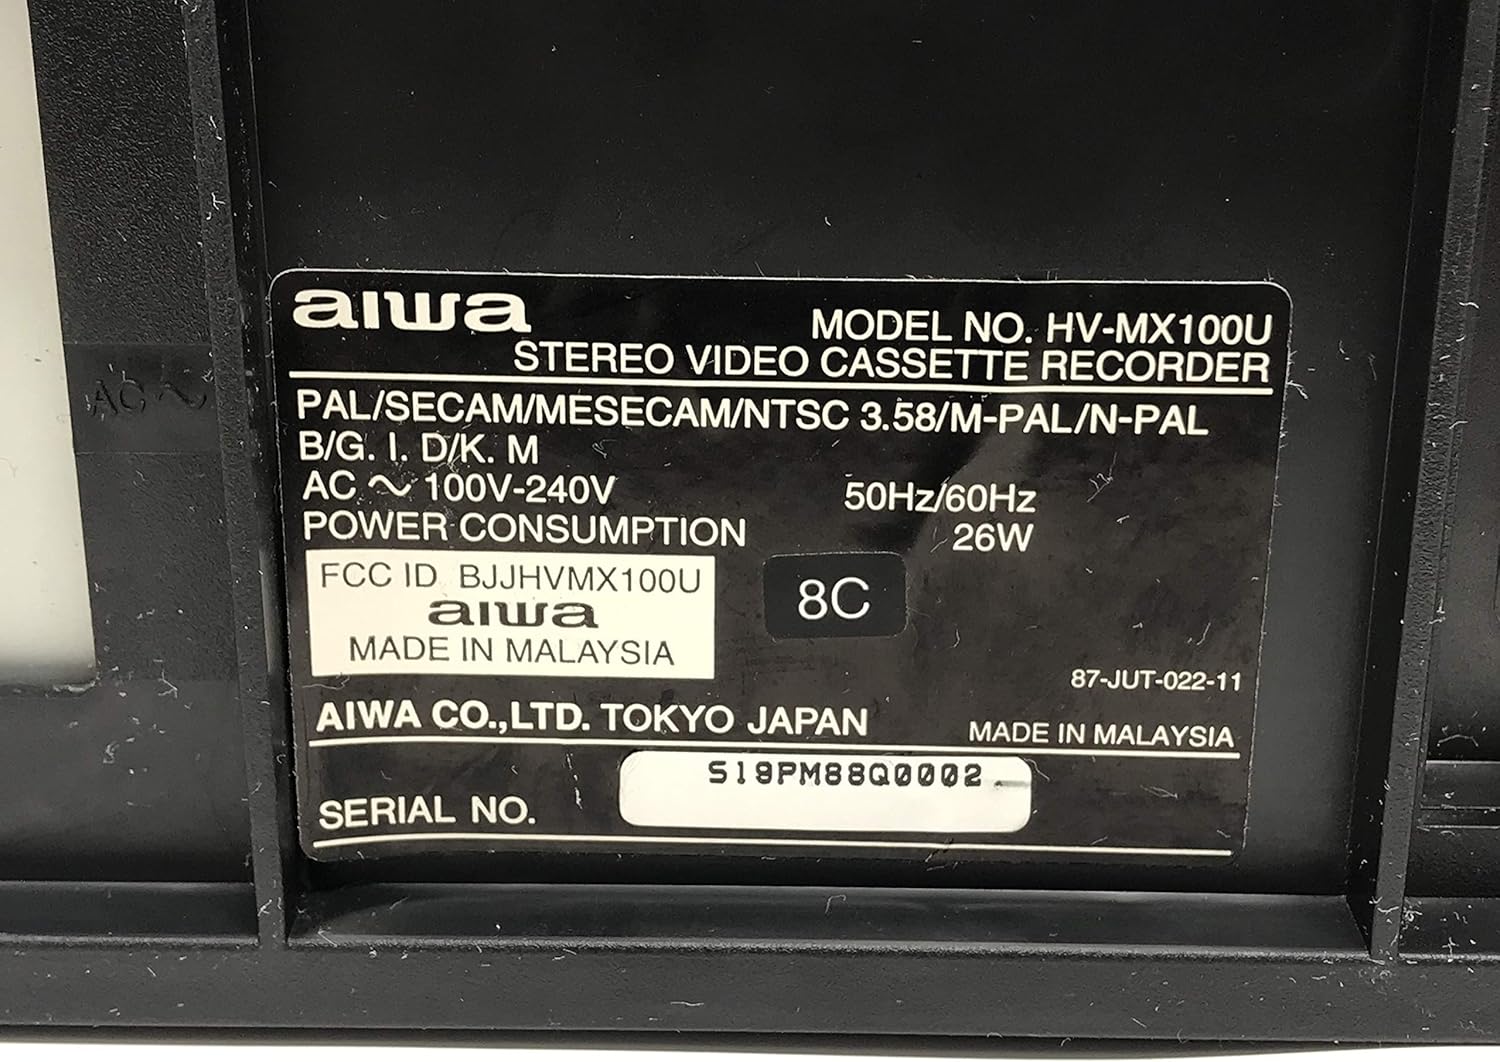
Image: Close-up of the model label on the rear of the Aiwa HV-MX100 VCR, showing model number, power requirements, and manufacturing details.
Warranty and Support
For warranty information and technical support, please refer to the documentation included with your purchase or contact Aiwa customer service. Specific warranty terms may vary by region and retailer.
What's in the Box
The standard package for the Aiwa HV-MX100 VCR typically includes:
- Aiwa HV-MX100 VCR Unit
- Remote Control (with batteries)
- Printed Operating Instructions (this manual)