Introduction
The Minolta Dynax 505si Super and 505si are advanced autofocus SLR cameras designed for 35mm film photography. This manual provides detailed instructions on the camera's features, setup, operation, and maintenance, enabling you to capture high-quality images effectively. A thorough understanding of your camera's functions is crucial for maximizing its photographic potential.
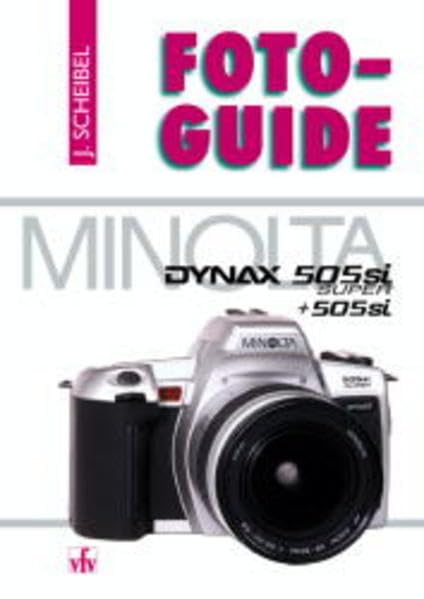
Image: Minolta Dynax 505si Super camera, a representative visual of the camera model discussed in this manual.
1. Setup
1.1 Battery Installation
The Dynax 505si Super and 505si cameras require two CR2 lithium batteries. Ensure correct polarity during installation.
- Open the battery chamber cover, typically located on the bottom of the camera body.
- Insert two CR2 lithium batteries, aligning them with the polarity indicators inside the chamber.
- Close the battery chamber cover securely until it latches.
1.2 Film Loading
These cameras are designed for standard 35mm film cartridges.
- Open the camera back by sliding the latch located on the side of the camera body.
- Place a 35mm film cartridge into the film chamber on the left side.
- Pull the film leader across to the orange mark on the take-up spool on the right. Ensure the film perforations engage with the sprocket teeth.
- Close the camera back firmly. The camera will automatically advance the film to the first frame, indicated by '1' in the frame counter.
1.3 Lens Attachment
The Minolta Dynax 505si Super and 505si utilize Minolta A-mount lenses.
- Remove the body cap from the camera and the rear lens cap from the lens.
- Align the red dot on the lens barrel with the red dot on the camera body's lens mount.
- Insert the lens into the camera mount and rotate it clockwise until it clicks securely into place.
2. Operating Instructions
2.1 Power On/Off
Locate the power switch, typically positioned near the shutter button. Slide it to the 'ON' position to activate the camera. Slide it to 'OFF' when not in use to conserve battery life.
2.2 Shooting Modes
The mode dial on the top of the camera allows selection of various shooting modes:
- Program AE (P): The camera automatically sets both aperture and shutter speed for optimal exposure.
- Shutter Priority AE (S): You select the shutter speed, and the camera automatically sets the appropriate aperture.
- Aperture Priority AE (A): You select the aperture, and the camera automatically sets the appropriate shutter speed.
- Manual (M): You have full control to set both aperture and shutter speed independently.
- Scene Modes: Pre-programmed settings optimized for specific photographic situations (e.g., Portrait, Landscape, Sports, Macro).
2.3 Focusing
The camera offers both autofocus (AF) and manual focus (MF) capabilities.
- Autofocus: Half-press the shutter button to activate the autofocus system. The camera will focus on the subject within the active AF area. A focus confirmation indicator will appear in the viewfinder.
- Manual Focus: Set the lens or camera to MF mode. Rotate the focusing ring on the lens until the subject appears sharp and clear in the viewfinder.
2.4 Exposure Compensation
Exposure compensation allows you to intentionally lighten or darken your images from the camera's metered exposure. This is typically adjusted using a dedicated button or dial, often marked with a '+/-' symbol. Adjust in increments (e.g., +/- 0.5 EV) to achieve desired results.
2.5 Flash Operation
The camera features a built-in pop-up flash. Press the flash button to deploy it. Available flash modes typically include Auto Flash, Fill-flash, Red-eye Reduction, and Flash Off, which can be selected via the camera's controls.
3. Maintenance
Proper maintenance ensures the longevity and optimal performance of your camera.
- Cleaning: Use a soft, lint-free cloth to gently wipe the camera body. For the lens, use a specialized lens brush to remove dust, followed by a lens cleaning solution applied to a microfiber cloth. Avoid touching the lens surface directly with your fingers.
- Storage: Store the camera in a dry, cool environment, away from direct sunlight, high humidity, and extreme temperatures. If storing for extended periods, remove the batteries to prevent leakage.
- Film Handling: Always load and unload film in subdued light to prevent accidental exposure and fogging of the film.
4. Troubleshooting
Refer to the table below for common issues and their solutions.
| Problem | Solution |
|---|---|
| Camera does not power on. | Check battery installation and ensure batteries are fresh. Replace batteries if necessary. |
| Film does not advance or frame counter shows 'E'. | Ensure film is correctly loaded and the camera back is securely closed. Check if the film leader is properly engaged with the take-up spool. |
| Autofocus is not working or is slow. | Verify that the lens or camera is not set to Manual Focus (MF). Ensure there is sufficient light and contrast in the scene for the AF system to operate effectively. Clean lens contacts if necessary. |
| Flash does not fire. | Check if the flash is popped up and if the flash mode is set to 'Flash Off'. Ensure batteries have sufficient power. |
5. Specifications
Key technical specifications for the Minolta Dynax 505si Super / 505si cameras:
- Camera Type: 35mm SLR (Single-Lens Reflex) with built-in motor drive and autofocus.
- Lens Mount: Minolta A-mount.
- Film Type: 35mm DX-coded film (ISO 25-5000 auto-setting), manual ISO setting (ISO 6-6400).
- Shutter Speed: Electronically controlled vertical-travel focal-plane shutter, 30 seconds to 1/2000 second, plus Bulb.
- Metering System: TTL (Through-The-Lens) 14-segment honeycomb-pattern metering.
- Autofocus System: TTL phase-detection autofocus with wide focus area.
- Flash: Built-in pop-up flash, Guide Number 12 (at ISO 100 in meters).
- Power Source: Two CR2 lithium batteries.
- Dimensions: Approximately 138.5 (W) x 90 (H) x 58.5 (D) mm (body only).
- Weight: Approximately 350g (body only, without batteries).
6. Warranty and Support
For detailed information regarding warranty coverage, service, and technical support for your Minolta Dynax 505si Super or 505si camera, please refer to the official documentation provided at the time of purchase. You may also visit the Minolta (now Sony Alpha) support website for current resources. Retain your proof of purchase for any warranty claims.


