![]() Live User GUIDE
Live User GUIDE
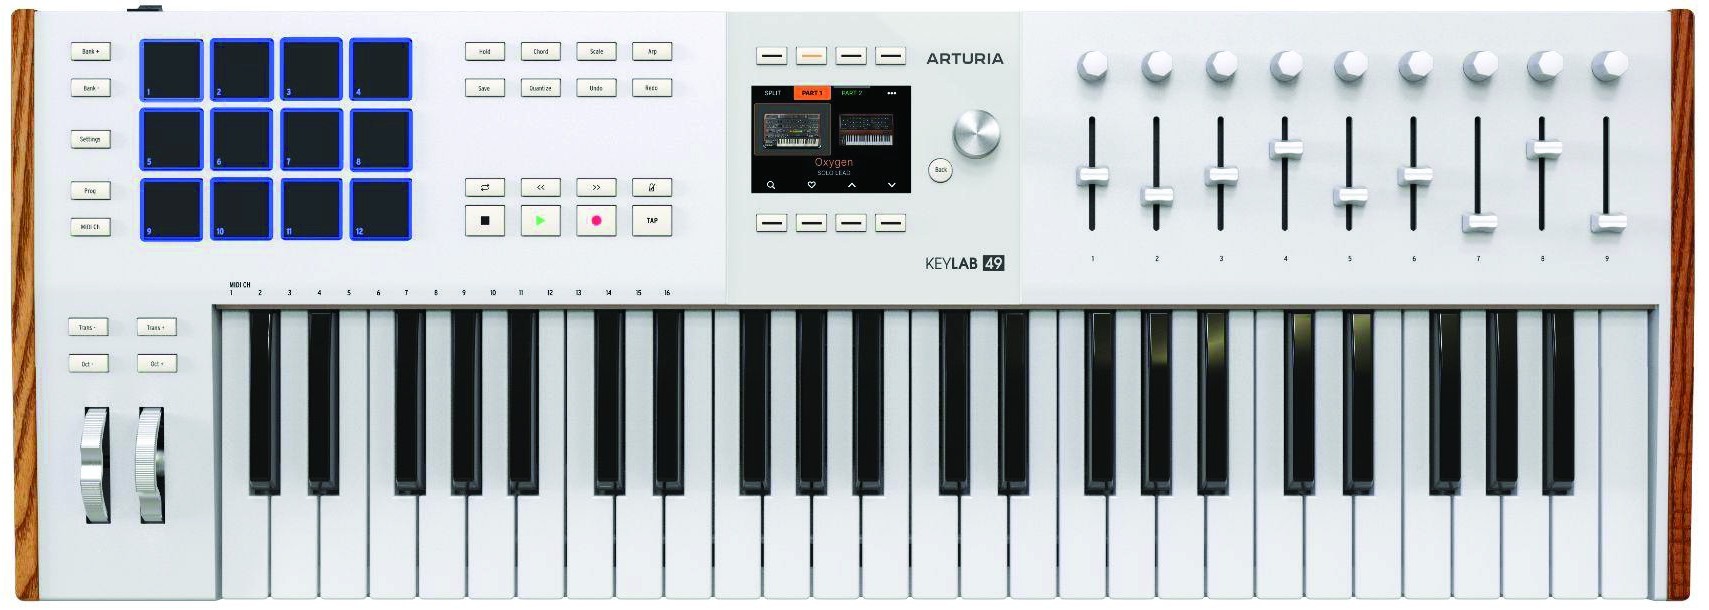
KeyLab mk3
 Live
Live
Setting up your unit
You’ll need the latest version of Live to be able to use the Integration script for KeyLab
If you manage to install the latest version of Live, here are the steps:
- Connect your KeyLab and select DAW program (Prog. button).
- Open Live
- The KeyLab should automatically be detected and ready to use.
If the KeyLab is not detected:
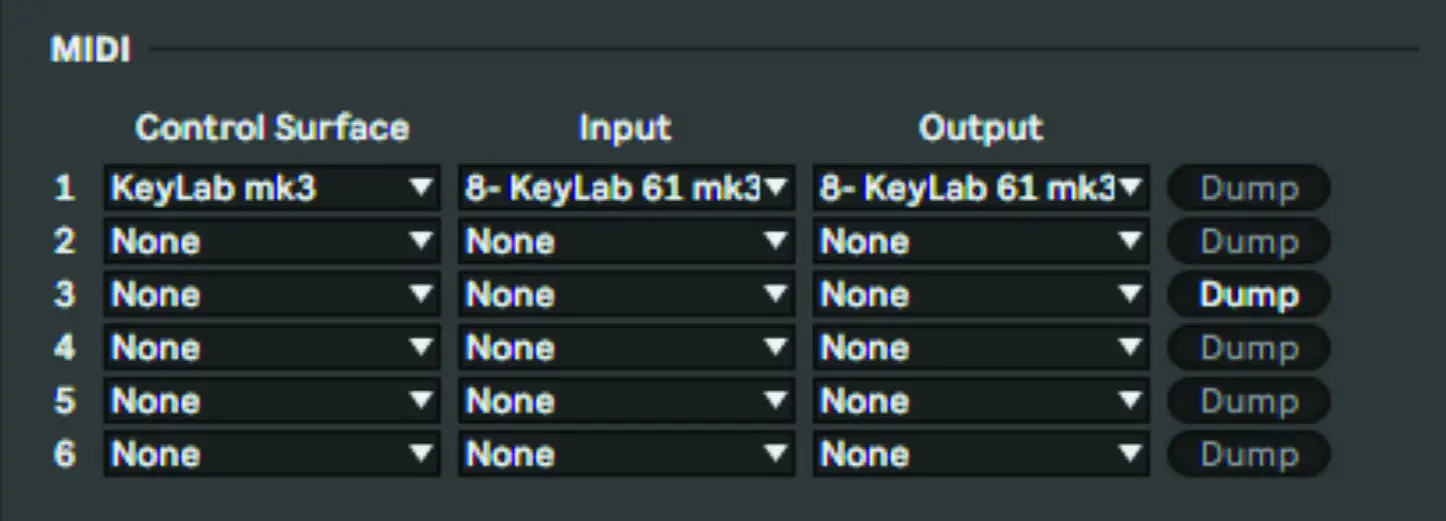
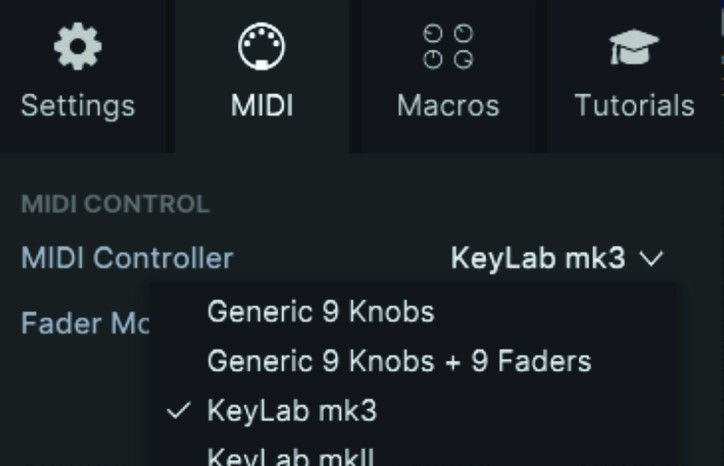
- Go to Live MIDI settings (Options / Preferences / Link Tempo MIDI tab)
- In the MIDI part, select your control surface (KeyLab mk3)
- Set the right In and out Port (“KeyLab xx mk3 DAW” / “KeyLab xx mk3 DAW”)
- The KeyLab Essential should be detected and ready for Live.
Script features
Transport control and DAW commands:
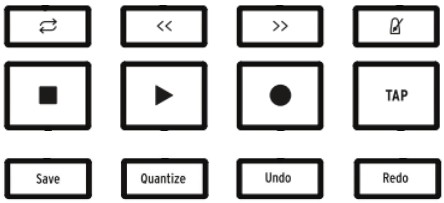
- Loop / Fast Forward / Rewind / Metronome
- Stop / Play / Record / Tap Tempo
- Save / Quantize / Undo / Redo
Main encoder:
Navigates in the tracks
Main encoder click:
- Enters Analog Lab mode if the selected track contains an Arturia plugin
Knobs 1 8:
- Control some parameters of the current focused plugin (Device)
- Control the pan of the focused track (Mixer)
Faders 1 8:
- Control the parameter of the plugin on the selected track (Device)
- Control the volume of the selected track (Mixer)
Knob 9 and fader 9:
- Control the volume and the pan of the selected track
Contextual buttons:
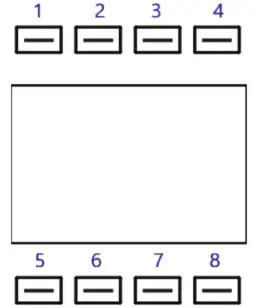
- Contextual 1: Selects Device mode
- Contextual 2: Selects Mixer mode
- Contextual 3: Previous scene
- Contextual 4: Next scene
- Contextual 5: Toggle mute state of the selected track
- Contextual 6: Toggle solo state of the selected track
- Contextual 7: Toggle arm state of the selected track
- Contextual 8: Launch the selected scene
Stop the selected scene (long press)
Device mode:
- The 8 first encoders control the 8 parameters of the selected device page.
- Hold “Device” and turn the main encoder to control other devices of the selected track with the encoders and faders
Mixer mode:
- The 8 first encoders/faders control the pan/volume of the selected set of 8 tracks.
- Hold “Mixer” and turn the main encoder to control other set of 8 tracks with the encoders and faders
- Knob 9 and Fader 9 always control the volume and the pan of the selected mixer track.
Pads Bank DAW:
- The 8 pads correspond to the 8 clips of the 4 first tracks and 2 first scenes started from the clip selected.
- Live will display a 4×3 rectangle, the top left corner matches the 1st clip of the 1st track
- In other banks mode, Pads send notes.
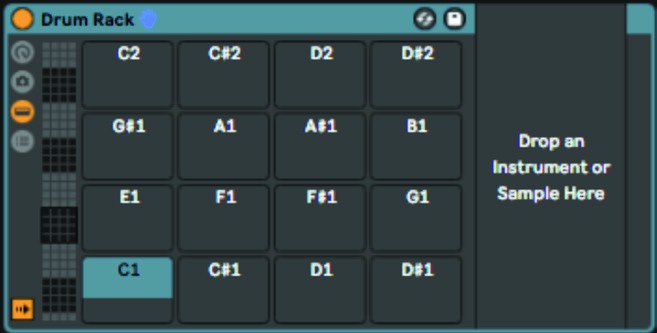
Pad Bank A/B/C/D:
- Pressing the pads will triggers sounds
- The Drum Machine plugin is already mapped.
- The Pad LEDs match the one you selected in the plugin for your sounds
Arturia Plugins:
- If you are using Arturia software, make sure the correct device is selected when you open the plugin
You can enter Arturia Mode to have perfect control over Arturia software in two ways : - Pressing on the main encoder on a track that contains an Arturia Plugin
- Press Prog + Arturia
- When an Arturia software is selected, you can manage the plugin as you would do in standalone (Navigation, selection and FX).
Documents / Resources
 |
ARTURIA KeyLab mk3 MIDI Controller [pdf] User Guide KeyLab mk3 MIDI Controller, KeyLab mk3, MIDI Controller, Controller |
 |
ARTURIA KeyLab mk3 MIDI Controller [pdf] User Guide KeyLab mk3, KeyLab mk3 MIDI Controller, MIDI Controller, Controller |
 |
ARTURIA KeyLab mk3 MIDI Controller [pdf] User Guide KeyLab mk3, KeyLab mk3 MIDI Controller, MIDI Controller, Controller |


