

 Labelife APP User Guide
Quick Start Video
You can get more comprehensive and detailed instruction videos in the following ways:
Way 1: Official website.
Way 2: Search the brand names on YouTube
Way 3: Open Labelife App > Setting -> Tutorial videos
App download
- Search “Labelife” on App Store or Google Play to get the app.

- Or please scan the QR Code to download the App.
 https://www.aimotech.com/labelife/analysis.html
Printer connection
- Turn your printer on and load label.
- Turn on smartphone Bluetooth and search printer in the Labelife App (NOT on the Bluetooth setting of your phone).
- Open Labelife App.

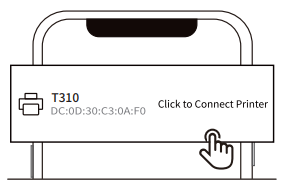
- Click the ”
 ” to search for the device
- Connect immediately.
- When you see the green tick appear, the printer is successfully connected.
 Note: Some Android needs to tuna on the GPS permission
Print a 4 x 6 inches PDF file
You can get your PDF file from your Commerce website or app.
We provide a fake label to practice printing on, Which you can find from:
Way 1: Official website
Way 2: Download the T310 driver
Download the PDF from the official website with your smartphone or Send the PDF to your smartphone via “Facebook’, “WhatsApp”, “Skype”
- “Open PDF” -> “IMPORT PDF”

- You can import PDF in either of these ways.
Methods 1
(1) Choose your PDF from “File Manager” (“files” on 10S device)
 (2) Choose your file to import.
 Methods 2
(1) Open file from any software Click the share button
 (2) Select the “Labelife” app to open and import for printing

- Click “PDF processing”-> Choose the size of your pdf file and click “CONFIRM”.

- Click “Print”->”Print”

What you can do with Labelife?
- You can change your label size from 8.5″ x11″ to 4″ x6″ (or 4″ x4″ for FBA) with Labelife that generates your labels.

- You can cropping Amazon ASIN barcodes with Labelife from 8.5″ x11″ to your need label size.

- Create your own customized labels

More feature
- Open Labelife App.
Click “Setting” - Click “Tutorial Video” to learn more feature with video

- Choose the feature you interesting.
 More feature and video tutorial will be updated.
Documents / Resources
 | Labelife App |
References
- User Manualmanual.tools
Published: July 24, 2023
Updated: July 25, 2023
saludos estoy tratando de imprimir en un label 2×2 y la imagen no me queda centralizada, que debo hacer. La impresora termica es AM243 (243BT)
How can I center an image when printing on 2x2 labels using the Labelife app and the AM243 (243BT) printer?
To ensure your image is centered on a 2x2 label using the Labelife app, please follow these steps:
For more detailed visual guidance, you can access the Tutorial Video section within the Labelife app by going to Setting > Tutorial Video.
Read the full Q&A page