ANJIELO SMART KW06 2-Wire Digital Video Intercom Kit

Product Usage Instructions
Monitor Features and Functions
The monitor comes with a touch screen display, WiFi connectivity, and various features such as taking photos or videos, human detection, and inter-monitor communication.
APP Registration and Login
To use the accompanying app, users need to register and login. The app allows for device management, family setup, and remote interaction with visitors.
Kit Contents and Assembly
The kit includes components like the intercom panel, monitors, RFID badges, connectors, and power supply. Follow the provided instructions to assemble and install the system.
Intercom Panel and Monitor Setup
Connect the intercom panel to the monitors using the provided wires and power supply. Ensure proper connections for seamless communication and functionality.
Wiring and Camera Integration
Properly wire the intercom panel and monitors to share power supply. Integrate cameras into the system for enhanced security and monitoring capabilities.
FAQ
- Q: How many Onvif cameras can be connected in the same LAN?
- A: Up to 24 Onvif cameras can be connected in the same LAN for comprehensive surveillance coverage.
- Q: How can I unlock the gate or door using the system?
- A: Long press the ‘Exit’ button for 3 seconds to open the gate. For the lock, quickly press the designated button for unlocking.
Features
Monitor
- 7” or 10.1” 1024 x 600px IPS touch screen
- Micro SD card class 10 up to 512GB
- 2.4 GHz WiFi IEEE 8111 b/g/n
- Current consumption: 150mA, Power consumption: 3.5W
- 7inch monitor dimensions: 119 (h) x 188 (w) x 18.5 (d) mm
- 10.1inch monitor dimensions: 158 (h) x 242(w) x 18.5 (d) mm
- Video decoding: H.264
- Take photo or video, twin controls for lock and gate, human detection, weather
- Monitor can talk to another monitor
- Video recording or take photo when human detection or call
Intercom panel
- CMOS colour sensor 2Mega pixels
- Viewing angle: Horizontal ~130°/ Diagonal ~165°
- Current consumption: 220mA,Power consumption: 5.5W
- IR CUT no color deviation (4 IR LEDs)
- Camera with wide dynamic range
- Camera distortion correction to avoid video stretching and bending
- Human detection and setting Motion zone
- RFID: 13.56MHz – 100 badges max.
- IP55
- Operating temperature: -30°C / +70°C
- Dimensions: 129(h) x 53 (w) x 33 (d) mm
Connect
- 1 Intercom panel and 2 monitors share one power supply
- 2 wires no polarity to connect intercom panel and monitors
- Connect up to 24 Onvif cameras in the same LAN
APP
- Main monitor connects to “Tuya Smart” or “Smart Life” App
- 20 App users connect to the APP, users can talk to visitors anytime and anywhere, take photo or video, monitor, unlock lock and gate, cloud storage
- Video recording or take photo when human detection or call
- Search “Tuya Smart” or “Smart Life” from APP store or Google Play
- Scan the QR code on the menu of monitor to download
APP register & login
- Please register first when using the APP for the first time.
- After logging into the APP, please create a family and add devices.
In the lower right corner of the APP homepage, click “Me” -> “Home Management” -> “Create a home”, fill in the information.
The user who adds the device will become the family owner and set up a home owner or general member. - Once the home owner adds the door phone, the home members will add the door phone automatically, home members can unlock lock and gate, but shared accounts cannot unlock.
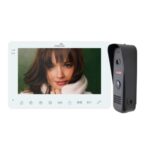
Kit contents

Intercom panel & Monitor


Wiring
- 1 Intercom panel and up to 2 monitors share 24V 1A power supply.
- Connect up to 24 Onvif cameras or RTSP cameras in the same LAN.
- The additional monitor needs to be connected to same WiFi as main monitor, then camera add to list of additional monitor.
- Long press ‘Exit’ 3 seconds to open the gate, quickly press to open the lock

| Distance
Wire rod |
 |
 |
| Telephone cable ( D 0.3mm) | 20 meters | Not recommended |
| 2wires RVV (D 0.5mm) | 100 meters | 15 meters |
| 2wires RVV (D 0.75mm) | 120 meters | 15 meters |
| 2wires RVV (D 1.5mm) | 150 meters | 15 meters |
| Standrad Category 5 cable (Twist pair) | 150 meters | 15 meters |
Product installation
The Intercom panel is installed at a height of 1.6 meters, try to avoid the sunshine and rain, fixed the intercom panel on the wall, wooden board, door.

- Use drill bits to drill three holes, use anchors if install intercom panel on brick or concrete.
- Separate the corner mounting bracket then fix the back to the wall
- Adjust viewing angle by 30 to 55° then fix the top and bottom screws
- Fix the weather-proof shield to corner mounting bracket with two screws
- Put the intercom panel to the weather-proof shield
- Fix the bottom screws of weather-proof shield
- Fix the wall bracket to the wall with two screws
- Insert the MicroSD card into the slot of monitor(if no MicroSD card is inserted)
- Connect the 2-core port to the monitor and connect the Lock, Gate, Door exit
- Connect the monitor to a 24V 1A Plug-In Adapter or DIN rail transformer
- Hang the monitor on the wall bracket
Monitor interface

 Connected to WiFi & strength
 Not connected to WiFi
 No TF card inserted
  TF card inserted
 Human detection is off
 Human detection is on
 Do Not Disturb or ringtone volume is 0
  Ringtone volume >=1
- Intercom function between monitors (additional monitor connected)
 Monitor the intercom panel
  The Intercom panel is not connected
 Unanswered records
  Human detection logs
- if cameras are connected, view the camera

 Do not disturb, the monitor’s ringtone muted when someone call
 Ringtones for 4 time periods
- ‘Setting’-> ‘Ringtones’
Set the ringtone for 4 time periods, which will cycle every 24 hours. If the user needs to rest for 2 time periods, the ringtone volume can be set to 0 during these 2 time periods.
- ‘Setting’-> ‘Intercom panel’
 Click on <Add RFID badges>, Intercom panel will turn on green light, swipe RFID badges to be activated, quickly swipe badge to open the lock, hold the badge for 3 seconds to open the gate.
 - ‘Setting’-> ‘Monitor’
- Languages include: English, 简体中文, Deutsch, Español, Français, Italiano,
Nederlands, Polski, Português, Русский, Türkçe, یسراف ,ةيبرعلا ةغللا - Touch tone

- SD card capacity: Remaining capacity/ Total capacity, Format SD
- System restart
- Reset all settings
- Update the software of monitor
- Languages include: English, 简体中文, Deutsch, Español, Français, Italiano,
- More settings
 Human detection Turn on/off Human detection, Alarm interval time, Alarm sensitivity level, Record mode
 Time Setting the time
 WLAN Connect to WiFi
 Screen Adjust screen brightness and setting screensaver time
 Camera
 Search Onvif camera
  enter RTSP info on the same LAN
- Smartphone application
First set up WiFi on the main monitor, then click on of the menu of monitor
Click “+” on APP -> “Scan” QR Code
Door1, CCTV 1,CCTV 2, …. CCTV is camera 
Click on <Unlink account>![]()
if connect other user already. 
FCC WARNING
This device complies with part 15 of the FCC Rules. Operation is subject to the following two conditions
- This device may not cause harmful interference, and
- This device must accept any interference received, including interference that may cause undesired operation.
Any changes or modifications not expressly approved by the party responsible for compliance could void the user’s authority to operate the equipment.
NOTE: This equipment has been tested and found to comply with the limits for a Class B digital device, pursuant to Part 15 of the FCC Rules. These limits are designed to provide reasonable protection against harmful interference in a residential installation. This equipment generates, uses and can radiate radio frequency energy and, if not installed and used in accordance with the instructions, may cause harmful interference to radio communications. However, there is no guarantee that interference will not occur in a particular installation. If this equipment does cause harmful interference to radio or television reception, which can be determined by turning the equipment off and on, the user is encouraged to try to correct the interference by one or more of the following measures
- Reorient or relocate the receiving antenna.
- Increase the separation between the equipment and receiver.
- Connect the equipment into an outlet on a circuit different from that to which the receiver is connected.
- Consult the dealer or an experienced radio/TV technician for help.
To maintain compliance with FCC’s RF Exposure guidelines, This equipment should be installed and operated with minimum distance between 20cm the radiator your body: Use only the supplied antenna.
Documents / Resources
 |
ANJIELO SMART KW06 2-Wire Digital Video Intercom Kit [pdf] User Manual KW06, KW06 2-Wire Digital Video Intercom Kit, 2-Wire Digital Video Intercom Kit, Digital Video Intercom Kit, Video Intercom Kit, Intercom Kit, Kit |