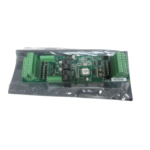
Allen-Bradley MicroLogix 1200 16 Point DC Input Module

Specifications
- Product: MicroLogix 1200 16-point DC Input Module
- Catalog Number: 1762-IQ16
- Environment: Suitable for industrial environments with Pollution degree 2(a) and circuits not exceeding Over Voltage Category II(b) (IEC 60664-1)
Summary of Changes
This publication contains the following new or updated information. This list includes substantive updates only and is not intended to reflect all changes.
| Topic | Page |
| Updated template | throughout |
| Added Inclusive Language acknowledgment | 2 |
| Updated Environmental Specifications | 10 |
| Updated Certifications | 11 |
| Updated Additional Resources | 11 |
Product Overview
The MicroLogix™ 1200 16-point DC input module is suitable for use in an industrial environment when installed in accordance with these instructions. Specifically, this equipment is intended for use in clean, dry environments (Pollution degree 2(a)) and to circuits not exceeding Over Voltage Category II(b) (IEC 60664-1)(c).
MicroLogix 1200 16-point DC Input Module

ATTENTION: Do not remove the protective debris strip until after the module and all other equipment in the panel near the module are mounted and wiring is complete. Once wiring is complete, remove the protective debris strip. Failure to remove the strip before operating can cause overheating.
ATTENTION: Electrostatic discharge (ESD) can damage semiconductor devices inside the module. Do not touch the connector pins or other sensitive areas.
- Pollution Degree 2 is an environment where, normally, only non-conductive pollution occurs except that occasionally a temporary conductivity that is caused by condensation is expected.
- Over Voltage Category II is the load-level section of the electrical distribution system. At this level, transient voltages are controlled and do not exceed the impulse voltage capability of the product’s insulation.
- Pollution Degree 2 and Over Voltage Category II are International Electrotechnical Commission (IEC) designations.
ATTENTION: Read this document and the documents listed in the Additional Resources section about installation, configuration and operation of this equipment before you install, configure, operate or maintain this product. Users are required to familiarize themselves with installation and wiring instructions in addition to requirements of all applicable codes, laws, and standards.
Activities including installation, adjustments, putting into service, use, assembly, disassembly, and maintenance are required to be carried out by suitably trained personnel in accordance with applicable code of practice. If this equipment is used in a manner not specified by the manufacturer, the protection provided by the equipment may be impaired.
Environment and Enclosure
ATTENTION: This equipment is intended for use in a Pollution Degree 2 industrial environment, in Overvoltage Category II applications (as defined in EN/IEC 60664-1), at altitudes up to 2000 m (6562 ft) without derating.
This equipment is not intended for use in residential environments and may not provide adequate protection to radio communication services in such environments.
This equipment is supplied as open-type equipment for indoor use. It must be mounted within an enclosure that is suitably designed for those specific environmental conditions that are present and appropriately designed to help prevent personal injury resulting from accessibility to live parts. The enclosure must have suitable flame-retardant properties to help prevent or minimize the spread of flame, complying with a flame spread rating of 5VA or be approved for the application if nonmetallic. The interior of the enclosure must be accessible only by the use of a tool. Subsequent sections of this publication may contain more information regarding specific enclosure type ratings that are required to comply with certain product safety certifications.
In addition to this publication, see the following:
- Industrial Automation Wiring and Grounding Guidelines, publication 1770-4.1, for more installation requirements.
- NEMA Standard 250 and EN/IEC 60529, as applicable, for explanations of the degrees of protection provided by enclosures.
Prevent Electrostatic Discharge
ATTENTION: This equipment is sensitive to electrostatic discharge, which can cause internal damage and affect normal operation. Follow these guidelines when you handle this equipment:
- Touch a grounded object to discharge potential static.
- Wear an approved grounding wriststrap.
- Do not touch connectors or pins on component boards.
- Do not touch circuit components inside the equipment.
- Use a static-safe workstation, if available.
- Store the equipment in appropriate static-safe packaging when not in use.
North American Hazardous Location Approval
The following information applies when operating this equipment in hazardous locations.
Products marked “CL I, DIV 2, GP A, B, C, D” are suitable for use in Class I Division 2 Groups A, B, C, D, Hazardous Locations and nonhazardous locations only. Each product is supplied with markings on the rating nameplate indicating the hazardous location temperature code. When combining products within a system, the most adverse temperature code (lowest “T” number) may be used to help determine the overall temperature code of the system. Combinations of equipment in your system are subject to investigation by the local Authority Having Jurisdiction at the time of installation.
WARNING: Explosion Hazard
- Do not disconnect equipment unless power has been removed or the area is known to be nonhazardous.
- Do not disconnect connections to this equipment unless power has been removed or the area is known to be nonhazardous. Secure any external connections that mate to this equipment by using screws, sliding latches, threaded connectors, or other means provided with this product.
- Substitution of components may impair suitability for Class I Division 2.
- If this product contains batteries, they must only be changed in an area known to be nonhazardous.
- All wiring must comply with N.E.C. article 501-4(b).
- The interior of the enclosure must be accessible only by the use of a tool.
- For applicable equipment (relay modules, and so on), exposure to some chemicals may degrade the sealing properties of materials used in the following devices: Relays, Epoxy. It is recommended that you must periodically inspect these devices for any degradation of properties and replace the module if degradation is found.
WARNING: Special Conditions for Safe Use
- This product must be installed in an enclosure. All cables connected to the product must remain in the enclosure or be protected by conduit or other means.
- The local programming terminal port is intended for temporary use only and must not be connected or disconnected unless the area is free of ignitable, concentrations of flammable gases or vapors.
ATTENTION
Remove power before removing or installing this module. When you remove or install a module with power applied, an electric arc may occur. An electric arc can cause personal injury or property damage by:
- Sending an erroneous signal to your system’s field devices, causing unintended machine motion
- Causing an explosion in a hazardous environment
- Causing permanent damage to the module’s circuitry. Electrical arcing causes excessive wear to contacts on both the module and its mating connector. Worn contacts may create electrical resistance.
- Do not remove the protective debris strip until after the module and all other equipment near the module is mounted and wiring is complete. Once wiring is complete and the module is free of debris, carefully remove protective debris strip. Failure to remove the strip before operating can cause overheating.
- During panel or DIN rail mounting of all devices, be sure that all debris (metal chips, wire strands, and so on) is kept from falling into the module. Debris that falls into the module could cause damage when power is applied to the module.
IMPORTANT Any illustrations, charts, sample programs, and layout examples that are shown in this publication are intended solely for the purposes of example. Since there are many variables and requirements that are associated with any particular installation, Rockwell Automation does not assume responsibility or liability for actual use based on the examples that are shown in this publication.
Module Description
| Description | Description | ||
| 1 a | Upper panel mounting tab | 5 | Pull loop |
| 1 b | Lower panel mounting tab | 6 | Module door with terminal identification label |
| 2 | I/O diagnostic status indicators | 7 | Bus connector cover |
| 3 | DIN rail latch | 8 | Bus connector with male pins |
| 4 | Flat ribbon cable with bus connector (female pins) | 9 | Terminal block |
 This equipment is sensitive to ESD. Follow ESD prevention guidelines when handling this equipment.
ATTENTION: To comply with UL restrictions, this equipment must be powered from a source compliant with Class 2 or Limited Voltage/Current.
Mount the Module
General Considerations
Most applications require installation in an industrial enclosure to reduce the effects of electrical interference and environmental exposure. Locate your controller as far as possible from power lines, load lines, and other sources of electrical noise such as hard-contact switches, relays, and AC motor drives. For more information on proper grounding guidelines, see the Industrial Automation Wiring and Grounding Guidelines, publication 1770-4.1.
ATTENTION: This product is intended to be mounted to a well-grounded mounting surface such as a metal panel. Additional grounding connections from the power supply’s mounting tabs or DIN rail (if used) are not required unless the mounting surface cannot be grounded. See the Industrial Automation Wiring and Grounding Guidelines, publication 1770-4.1, for additional information.
Mounting Dimensions
Dimensions do not include the mounting feet and DIN rail latches.
Module Spacing
Maintain spacing from objects such as enclosure walls, wireways, and adjacent equipment. Allow 50.8 mm (2 in.) of space on all sides for adequate ventilation, as shown in Figure 2.

IMPORTANT MicroLogix 1200 expansion I/O can be mounted horizontally only.
DIN Rail Mounting
Use one of the following DIN rails to mount the module:
- 35 x 7.5 mm (EN 50 022 – 35 x 7.5)
- 35 x 15 mm (EN 50 022 – 35 x 15)
For environments with greater vibration and shock concerns, use the Panel Mounting method instead of DIN rail mounting.
Before mounting the module on a DIN rail, close the DIN rail latch.
- Press the DIN rail mounting area of the module against the DIN rail. The latch opens momentarily and locks into place.
- Use DIN rail end anchors (Allen-Bradley® part number 1492-EAJ35 or 1492-EAHJ35) for vibration or shock environments.

Panel Mounting
Use the dimensional template shown in Figure 3 to mount the module. The preferred mounting method is to use two M4 or #8 pan head screws per module. You can also use M3.5 or #6 pan head screws, but you may need a washer to achieve a good ground current. Mounting screws are required on every module.

System Assembly
The expansion I/O module is attached to the controller or another I/O module with a flat ribbon cable after mounting as shown in Figure 4.

Use the pull loop on the connector to disconnect modules. Do not pull on the ribbon cable.
Field Wiring Connections
Grounding the Module
In solid-state control systems, grounding and wire routing helps limit the effects of noise due to electromagnetic interference (EMI). Run the ground connection from the ground screw of the controller to the ground bus before you connect any devices. Use 2.5 mm2 (14 AWG) wire. For AC-powered controllers, this connection must be made for safety purposes.
This product is intended to be mounted to a well-grounded mounting surface such as a metal panel. Additional grounding connections from the module’s mounting tabs or DIN rail (if used) are not required unless the mounting surface cannot be grounded. See the Industrial Automation Wiring and Grounding Guidelines, publication 1770-4.1 for additional information.
WARNING: Explosion Hazard
- In Class I Division 2 applications, the bus connector must be fully seated and the bus connector cover must be snapped in place.
- In Class I Division 2 applications, all modules must be mounted in direct contact with each other as shown on page 6. If DIN rail mounting is used, an end stop must be installed ahead of the controller and after the last MicroLogix 1200 expansion I/O module.
- When used in a Class I Division 2, hazardous location, this equipment must be mounted in a suitable enclosure with a proper wiring method that complies with the governing electrical codes.
ATTENTION: To comply with the CE Low Voltage Directive (LVD), all connected I/O must be powered from a source compliant with the Safety Extra Low Voltage (SELV) or Protected Extra Low Voltage (PELV).
WARNING: If you connect or disconnect wiring while the field-side power is On, an electric arc can occur. This could cause an explosion in hazardous location installations. Verify that the power is removed or the area is nonhazardous before proceeding.
Wire the Module
Basic wiring(a) of the 16-point DC input module is shown in Figure 5.

Simplified Input Circuit Diagram

A write-on label is provided with the module. Mark the identification of each terminal with permanent ink, and slide the label back into the door.
ATTENTION: Sinking/Sourcing Inputs
Sourcing/Sinking describes the current flow between the I/O module and the field device. Sourcing I/O circuits supply (source) current to sinking field devices. Sinking I/O circuits are driven by a current sourcing field device. Field devices connected to the negative side (DC Common) of the field power supply are sinking field devices. Field devices connected to the positive side (+V) of the field supply are sourcing field devices.
Wire the Fingersafe Terminal Block

When wiring the terminal block, keep the fingersafe cover in place.
- Route the wire under the terminal pressure plate. You can use the stripped end of the wire or a spade lug. The terminals accept a 6.35 mm (0.25 in.) spade lug.
- Tighten the terminal screw and make sure that the pressure plate secures the wire. Recommended torque for terminal screws is 0.90 N•m (8 lb•in).
If you must remove the fingersafe cover, insert a screwdriver into one of the square wiring holes and gently pry the cover off. If you wire the terminal block with the fingersafe cover removed, you cannot put it back on the terminal block because the wires are in the way.
ATTENTION: Be careful when stripping wires. Wire fragments that fall into a module could cause damage when power is applied. Once wiring is complete, verify that the module is free of all metal fragments.
I/O Memory Mapping
Input Data File
For each input module, the input data file contains the current state of the field input points. Bit positions 0…15 correspond to input terminals 0…15.
| Word | Bit Position | |||||||||||||||
| 15 | 14 | 13 | 12 | 11 | 10 | 9 | 8 | 7 | 6 | 5 | 4 | 3 | 2 | 1 | 0 | |
| 0 | R | R | R | R | R | R | R | R | R | R | R | R | R | R | R | R |
Addressing
The addressing scheme for MicroLogix 1200 expansion I/O is shown in Figure 6.
Figure 6 – Addressing Scheme
(1) I/O on the controller (embedded I/O) is slot 0. I/O added to the controller (expansion I/O) begins with slot 1.
Module Specifications
Input Specifications
| Attribute | Value |
| Number of inputs | 16 |
|
Operating voltage range |
10…30V DC
10…26.4V DC See Derating Chart for Each Input on page 11. |
| Voltage category | 24V DC (sink/source)(1) |
| Bus current draw, max | 70 mA @ 5V DC (0.35 W) |
| Heat dissipation, max | 5.4 W @ 30V DC
4.3 W @ 26.4V DC |
| Signal delay, max | On delay: 8 ms Off delay: 8 ms |
| Off-state voltage, max | 5V DC |
| Off-state current, max | 1.5 mA |
| On-state voltage, min | 10 V DC |
|
On-state current, min |
2.0 mA min @ 10V DC
8.0 mA nom @ 24V DC 12.0 mA max @ 30V DC |
| Nominal impedance | 3kΩ |
| IEC input compatibility | Type 1 |
| Isolated groups | Group 1: Inputs 0…7 Group 2: Inputs 8…15 |
|
Input group to backplane isolation |
Verified by one of the following dielectric tests: 1200V AC for 1 second or 1697V DC for 1 second
75V DC working voltage (IEC Class 2 reinforced insulation) |
| Vendor ID code | 1 |
| Product type code | 7 |
| Product code | 97 |
(1) Sinking/Sourcing Inputs — Sourcing/Sinking describes the current flow between the I/O module and the field device. Sourcing I/O circuits supply (source) current to sinking field devices. Sinking I/O circuits are driven by a current sourcing field device. Field devices connected to the negative side (DC Common) of the field power supply are sinking field devices. Field devices connected to the positive side (+V) of the field supply are sourcing field devices.
General Specifications
| Attribute | Value |
| Dimensions (HxWxD) | Without mounting tabs: 90 x 40.4 x 87 mm (3.54 x 1.59 x 3.43 in.)
With mounting tabs: 110 x 40.4 x 87 mm (4.33 x 1.59 x 3.43 in.) |
| Shipping weight, approx. (with carbon) | 230 g (8.11 oz) |
| Enclosure type rating | IP20 |
|
Wire size |
|
| Wire category(1) | 2 – On signal ports |
| Pilot duty rating | Not rated |
| North American temp code | T3C |
| Terminal screw torque | 0.90 N•m (8 lb•in)(2) |
- Use this Conductor Category information for planning conductor routing. See the Industrial Automation Wiring and Grounding Guidelines, publication 1770-4.1.
- Tighten RTB hold down screws by hand. Do not tighten the screws with a power tool.
Environmental Specifications
| Attribute | Value |
|
Temperature, operating |
IEC 60068-2-1 (Test Ad, Operating Cold),
IEC 60068-2-2 (Test Bd, Operating Dry Heat), IEC 60068-2-14 (Test Nb, Operating Thermal Shock): -20…+65 °C (-4…+149 °F) See Derating Chart for Each Input on page 11. |
|
Temperature, nonoperating |
IEC 60068-2-1 (Test Ab, Unpackaged Nonoperating Cold),
IEC 60068-2-2 (Test Bb, Unpackaged Nonoperating Dry Heat), IEC 60068-2-14 (Test Na, Unpackaged Nonoperating Thermal Shock): -40…+85 °C (-40…+185 °F) |
| Relative humidity | IEC 60068-2-30 (Test Db, Unpackaged Damp Heat): 5…95% non-condensing |
| Vibration | IEC 60068-2-6 (Test Fc, Operating):
5 g @ 10…500 Hz |
| Altitude, operating, max | 2000 m (6562 ft) |
| Shock, operating | IEC 60068-2-27 (Test Ea, Unpackaged Shock): 30 g |
| Shock, nonoperating | IEC 60068-2-27 (Test Ea, Unpackaged Shock): Panel mount – 50 g
DIN mount – 40 g |
| Emissions | EN 61000-6-4 |
|
ESD immunity |
IEC 61000-4-2:
4 kV contact discharges 8 kV air discharges 4 kV indirect |
| Radiated RF immunity | IEC 61000-4-3:
10V/m with 1 kHz sine-wave 80% AM from 80…2700 MHz |
| EFT/B immunity | IEC 61000-4-4:
±2 kV at 5 kHz on signal ports |
| Surge transient immunity | IEC 61000-4-5:
±1 kV line-line(DM) and ±2 kV line-earth(CM) on signal ports |
| Conducted RF immunity | IEC 61000-4-6:
10V rms with 1 kHz sine-wave 80% AM from 150 kHz…80 MHz |
Derating Chart for Each Input

Certifications
| Certification (when product is marked)(1) | Value |
| c-UL-us | UL Listed Industrial Control Equipment, certified for US and Canada. See UL File E322657.
UL Listed for Class I Division 2 Group A,B,C,D Hazardous Locations, certified for U.S. and Canada. See UL File E334470. |
|
CE |
European Union 2014/30/EU EMC Directive, compliant with: EN 61000-6-2; Industrial Immunity
EN 61000-6-4; Industrial Emissions EN 61131-2; Programmable Controllers (Clause 8, Zone A & B) European Union 2014/35/EU LVD, compliant with: EN 61131-2; Programmable Controllers (Clause 11) European Union 2011/65/EU RoHS, compliant with: EN 63000; Technical documentation |
| RCM | Australian Radiocommunications Act, compliant with: EN 61000-6-4; Industrial Emissions |
| KC | Korean Registration of Broadcasting and Communications Equipment, compliant with: Article 58-2 of Radio Waves Act, Clause 3 |
| Morocco | Arrêté ministériel n° 6404-15 du 1 er muharram 1437
Arrêté ministériel n° 6404-15 du 29 ramadan 1436 |
| UKCA | 2016 No. 1091 – Electromagnetic Compatibility Regulations 2016 No. 1101 – Electrical Equipment (Safety) Regulations
2012 No. 3032 – Restriction of the Use of Certain Hazardous Substances in Electrical and Electronic Equipment Regulations |
(1) See the Product Certification link at rok.auto/certifications for Declaration of Conformity, Certificates, and other certification details.
Additional Resources
For more information on the products that are described in this publication, use these resources. You can view or download publications at rok.auto/literature.
| Resource | Description |
| MicroLogix Programmable Controllers Selection Guide, publication 1761-SG001 | Provides information on how to build a MicroLogix system with MicroLogix 1400 controllers and 1762 expansion I/O modules. |
| MicroLogix 1400 Programmable Controllers Installation Instructions, publication 1766-IN001 | Provides information on how to install and use the MicroLogix 1400 programmable controller. |
| MicroLogix 1400 Programmable Controllers User Manual, publication 1766-UM001 | A more detailed description of how to install and use your MicroLogix 1400 programmable controller and expansion I/O system. |
| Industrial Automation Wiring and Grounding Guidelines, publication 1770-4.1 | More information on proper wiring and grounding techniques. |
| Product Certifications website, rok.auto/certifications | Provides declarations of conformity, certificates, and other certification details. |
Rockwell Automation Support
Use these resources to access support information.
| Technical Support Center | Find help with how-to videos, FAQs, chat, user forums, Knowledgebase, and product notification updates. | rok.auto/support |
| Local Technical Support Phone Numbers | Locate the telephone number for your country. | rok.auto/phonesupport |
| Technical Documentation Center | Quickly access and download technical specifications, installation instructions, and user manuals. | rok.auto/techdocs |
| Literature Library | Find installation instructions, manuals, brochures, and technical data publications. | rok.auto/literature |
| Product Compatibility and Download Center (PCDC) | Download firmware, associated files (such as AOP, EDS, and DTM), and access product release notes. | rok.auto/pcdc |
Documentation Feedback
Your comments help us serve your documentation needs better. If you have any suggestions on how to improve our content, complete the form at rok.auto/docfeedback.
Waste Electrical and Electronic Equipment (WEEE)
At the end of life, this equipment should be collected separately from any unsorted municipal waste.
Rockwell Automation maintains current product environmental compliance information on its website at rok.auto/pec.

rockwellautomation.com – — expanding human possibility® AMERICAS: Rockwell Automation, 1201 South Second Street, Milwaukee, WI 53204-2496 USA, Tel: (1) 414.382.2000 EUROPE/MIDDLE EAST/AFRICA: Rockwell Automation NV, Pegasus Park, De Kleetlaan 12a, 1831 Diegem, Belgium, Tel: (32) 2663 0600 ASIA PACIFIC: Rockwell Automation SEA Pte Ltd, 2 Corporation Road, #04-05, Main Lobby, Corporation Place, Singapore 618494, Tel: (65) 6510 6608 UNITED KINGDOM: Rockwell Automation Ltd., Pitfield, Kiln Farm, Milton Keynes, MK11 3DR, United Kingdom, Tel: (44) (1908) 838-800
Allen-Bradley, expanding human possibility, MicroLogix, Rockwell Automation, and TechConnect are trademarks of Rockwell Automation, Inc. Trademarks not belonging to Rockwell Automation are property of their respective companies.
Publication 1762-IN010D-EN-P – October 2024 | Supersedes Publication 1762-IN010C-EN-P – June 2013
Copyright © 2024 Rockwell Automation, Inc. All rights reserved.
FAQ
- Q: Can this module be used in wet environments?
A: No, this module is intended for use in clean, dry environments only. - Q: What should I do if I encounter overheating issues?
A: Check for proper mounting and wiring. Ensure the protective debris strip has been removed after wiring is complete. - Q: How can I prevent damage from electrostatic discharge?
A: Avoid touching connector pins or sensitive areas of the module. Use proper ESD precautions when handling the module.
Documents / Resources
 |
Allen-Bradley MicroLogix 1200 16 Point DC Input Module [pdf] Installation Guide MicroLogix 1200 16 Point DC Input Module, 16 Point DC Input Module, DC Input Module, Module |