![]() www.alfatronelectronics.com
www.alfatronelectronics.com
ALFATRON ELECTRONICS GmbH GERMANY
ALF-C-TB
Ceiling Tile Bridge Instruction Manual
ALF-C-TB Ceiling Tile Bridge
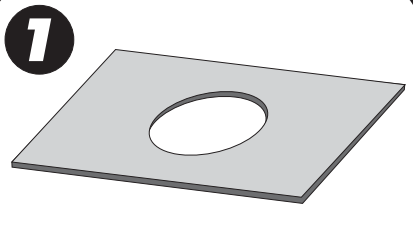
- Make a cut out on the ceiling board, using the ceiling speaker or template for the diameter.
- Mount the speaker from underneath the ceiling board so that the back can sticks out at the top.

- Place both tile bridges on either side of the speaker back can.
Please ensure that they are placed horizontally with the 600mm side of the ceiling tile.

- Move the tile bridges towards each other until they touch the back can sides.

- Twist the speaker brackets out wards so that they rest on the tile bridges flat surface, and then tighten the screws in place.

- Lift your complete assembly with the ceiling tile and install it on the ceiling as you would install a ceiling tile.

- With the self tapping screws provided, lock the assembly to the ceiling rails.

- As an extra precaution, you can attach safety cables to the tile bridge, these need to be able to handle the weight of the assembly and be attached it to the slab to act as a harness should the ceiling rail fail at any point.

Documents / Resources
 |
ALFATRON ALF-C-TB Ceiling Tile Bridge [pdf] Instruction Manual ALF-C-TB, ALF-C-TB Ceiling Tile Bridge, Ceiling Tile Bridge, Tile Bridge |