1. Inleiding
The Parkside PTI 380 B1 Infrared Thermometer is designed for quick and accurate non-contact surface temperature measurements. It is an ideal tool for identifying thermal bridges and areas at risk of mold formation. This manual provides essential information for the safe and proper operation of your device.
2. Veiligheidsinligting
WARNING! Do not look directly into the laser beam. Direct exposure to the laser can cause eye damage.
- Hanteer die toestel altyd versigtig.
- Moenie probeer om die toestel uitmekaar te haal of te verander nie.
- Hou die toestel weg van water en uiterste temperature.
- Ensure proper battery disposal.
3. Produk verbyview
The Parkside PTI 380 B1 features an ergonomic design with a soft-grip handle for comfortable use. It includes an 8-point laser for precise targeting of the measurement area and a color display with audible signals for easy interpretation of results.
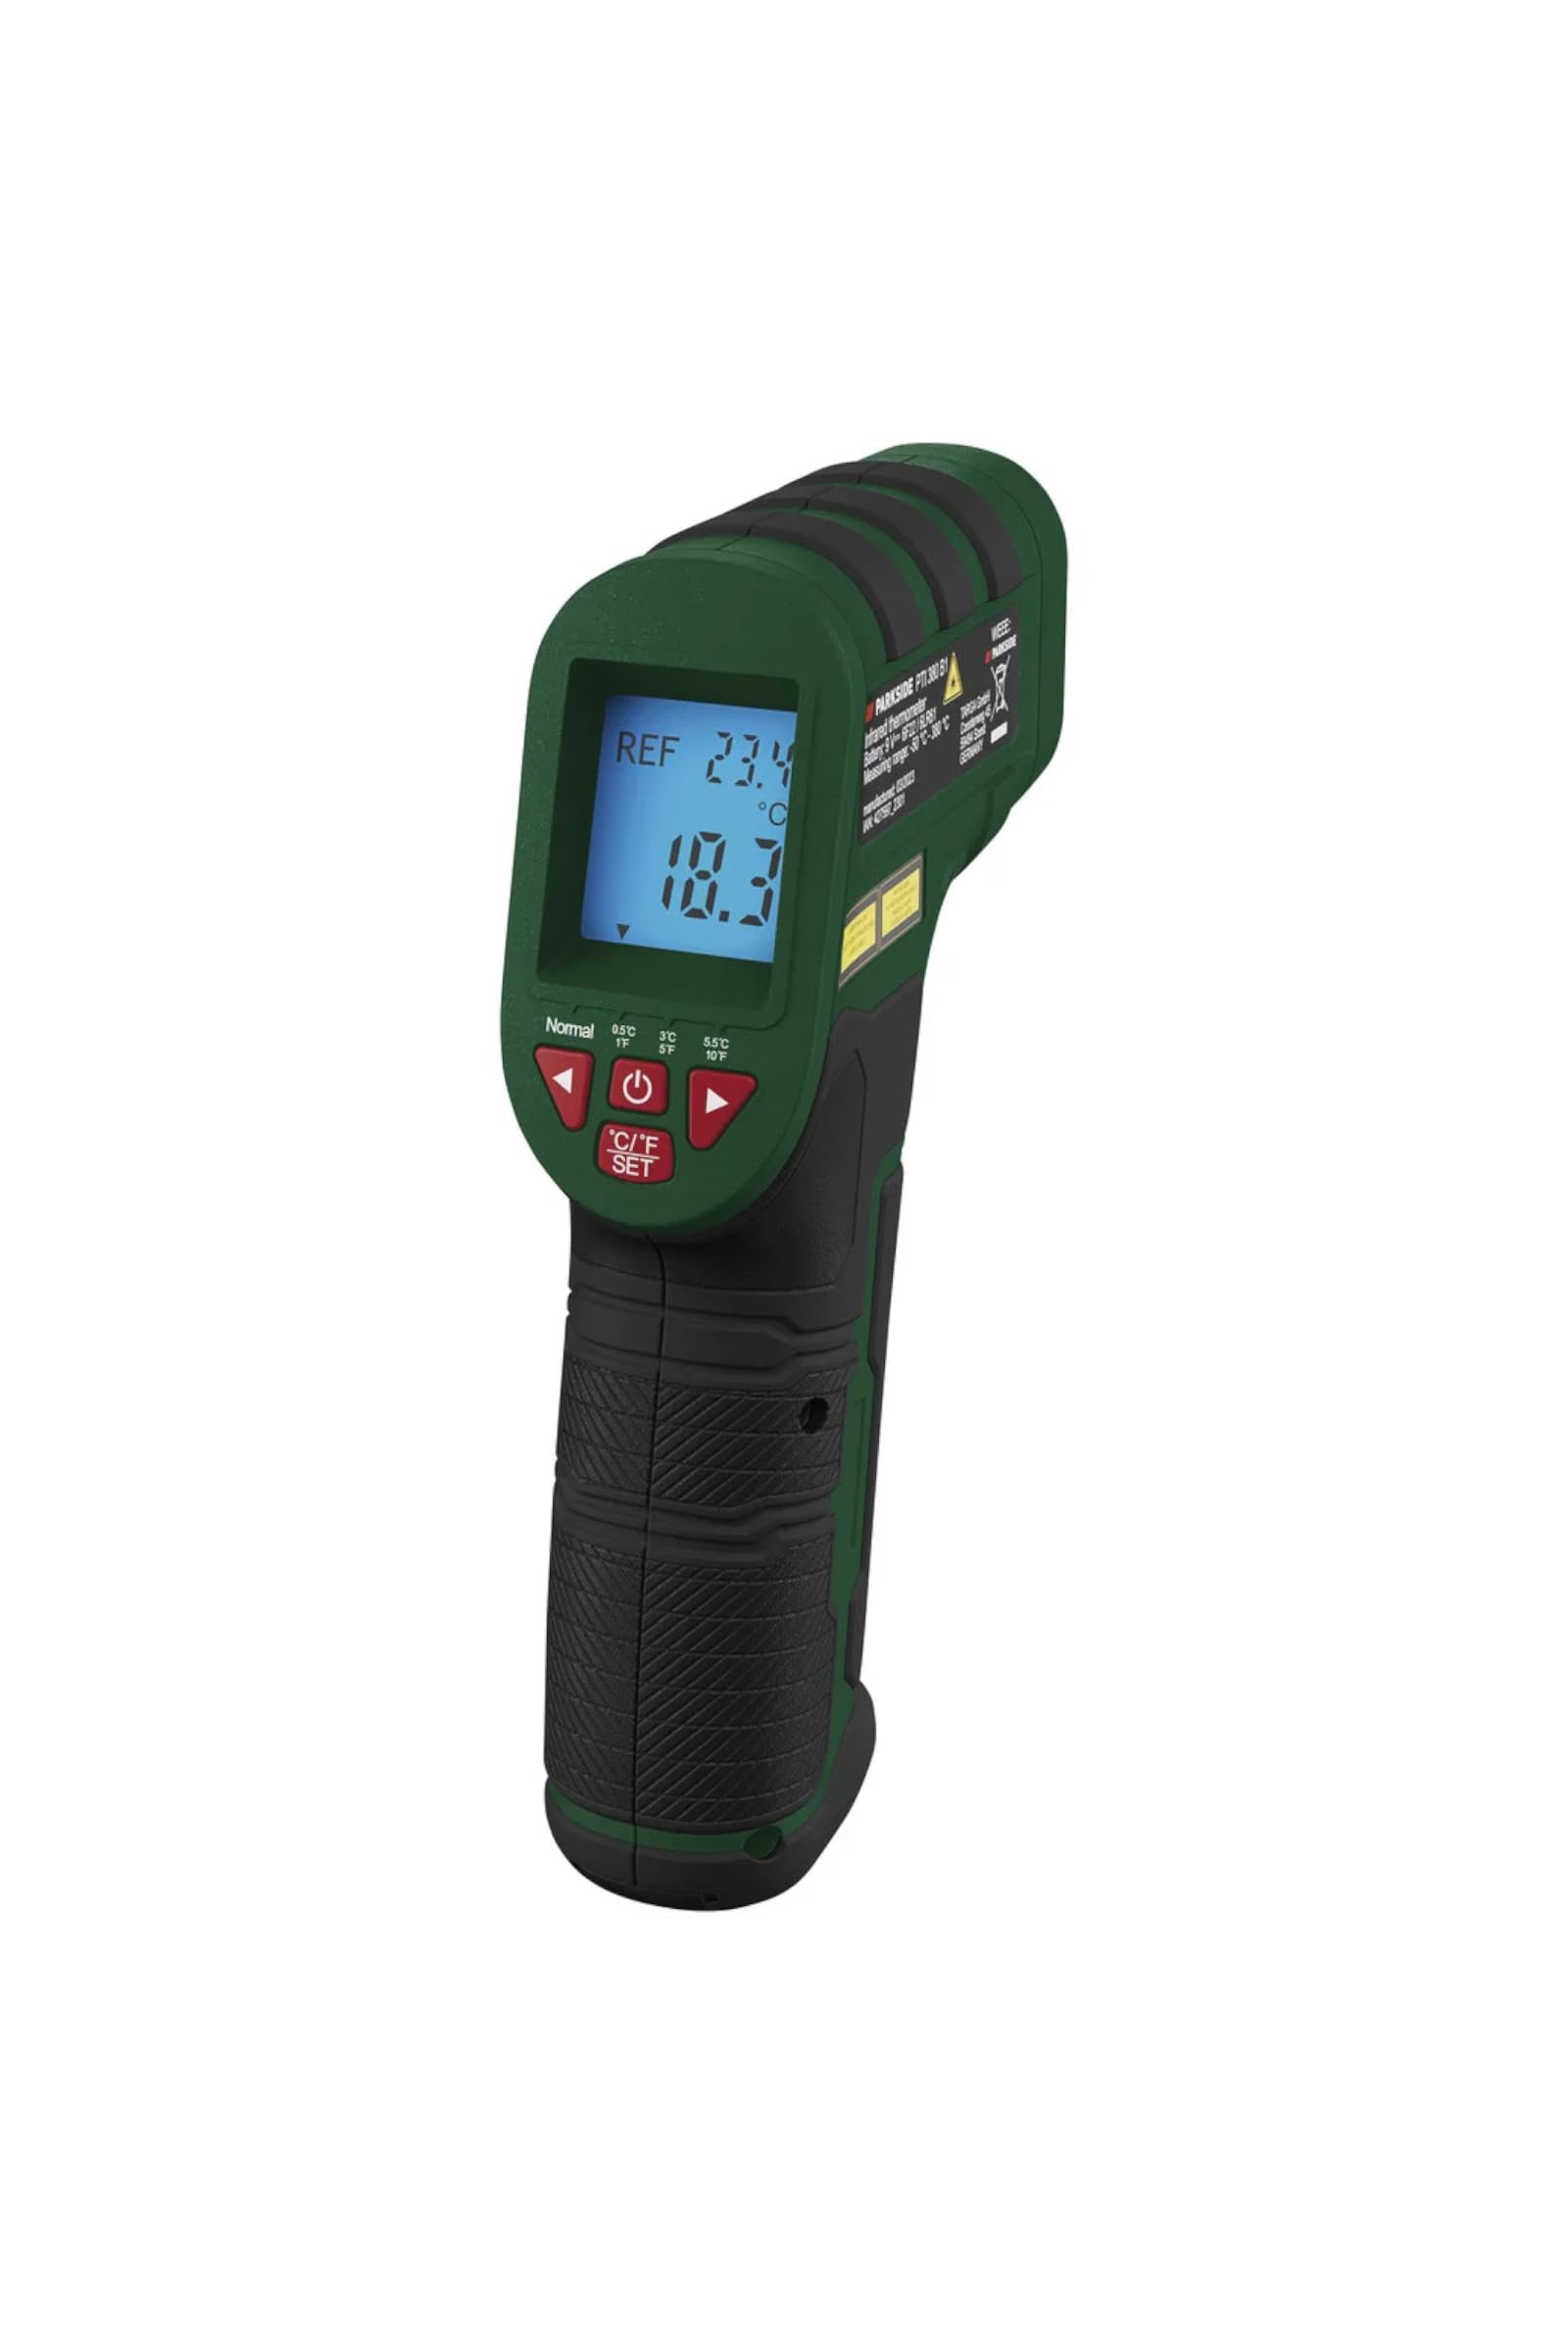
Figuur 1: Algehele view of the Parkside PTI 380 B1 Infrared Thermometer.

Figuur 2: Kant view of the thermometer, highlighting the trigger and control buttons.

Figuur 3: Voorkant view, showing the infrared sensor and the 8-point laser aperture.
Komponente:
- Infrarooi sensor
- 8-punt laser
- LCD-kleurskerm
- Meting sneller
- Mode Selection Buttons
- Unit Selection Button (°C/°F)
- Batterykompartement (in die handvatsel geleë)
4. Opstelling
4.1 Battery installasie
- Vind die batteryklepdeksel op die handvatsel van die toestel.
- Maak die deksel oop.
- Insert the included battery, ensuring correct polarity (+/-).
- Maak die batterykompartement se deksel stewig toe.
The device includes a battery change indicator on the display to alert you when the battery level is low.
5. Bedryfsinstruksies
5.1 Aan-/afskakel
Press the measurement trigger to power on the device. The device will automatically shut off after approximately 60 seconds of inactivity to conserve battery life.
5.2 Kies van meeteenhede
Druk die °C/°F SET knoppie om tussen Celsius (°C) en Fahrenheit (°F) temperatuureenhede te wissel.
5.3 Meetmodusse
The device offers two operating modes: Maklike meting en Verwysingsmeting.
5.3.1 Easy Measurement
In this mode, simply point the thermometer at the surface you wish to measure and press the trigger. The current surface temperature will be displayed.
5.3.2 Reference Measurement
This mode is ideal for comparing a measured temperature against a set reference value, useful for detecting thermal bridges or potential mold areas. You can select reference levels of ± 0.5 °C, ± 3 °C, or ± 5.5 °C.
- Set your desired reference temperature.
- Point the thermometer at the surface.
- The display will show a color and emit an audible signal based on the difference between the measured value and the reference value:
- Blou: The measured temperature is colder than the reference value.
- Rooi: The measured temperature is warmer than the reference value.
- Groen: The measured temperature is approximately the reference value.

Figuur 4: Vertoon bvamples showing blue (colder), red (warmer), and green (approximate) indications relative to a reference temperature.
5.4 Neem 'n meting
- Aim the 8-point laser at the center of the area you wish to measure. The laser points define the measurement spot.
- Press and hold the measurement trigger.
- Die temperatuurlesing sal op die skerm verskyn.
- Release the trigger to hold the last measurement.

Figure 5: Using the thermometer to measure the surface temperature of a stove top.

Figuur 6: Toepassing bvample: measuring temperature around a fireplace to detect heat loss.
6. Onderhoud
6.1 Skoonmaak
Wipe the device with a soft, dry cloth. Do not use abrasive cleaners or solvents. Ensure the infrared sensor lens and laser aperture are kept clean for accurate readings.
6.2 Batteryvervanging
When the battery indicator appears on the display, replace the battery as described in the "Battery Installation" section (4.1). Always use the correct type of battery.
6.3 Berging
Store the device in a cool, dry place, away from direct sunlight and extreme temperatures, when not in use for extended periods.
7. Probleemoplossing
- Toestel skakel nie aan nie: Kontroleer of die battery korrek geïnstalleer is en voldoende lading het. Vervang die battery indien nodig.
- Onakkurate lesings: Ensure the sensor lens is clean and free from obstructions. Make sure the measurement distance is appropriate for the target size.
- Laser nie sigbaar nie: Check if the laser function is enabled (if applicable) and ensure the battery has sufficient charge.
As probleme voortduur, kontak kliëntediens.
8. Spesifikasies
| Kenmerk | Spesifikasie |
|---|---|
| Bedryfsmodusse | Easy Measurement / Reference Measurement |
| Meetreeks | -50 ° C tot +380 ° C (-58 ° F tot +716 ° F) |
| Measurement Deviation (> 0 °C) | ± 1.5 °C |
| Measurement Deviation (< 0 °C) | ± 3 °C |
| Kiesbare Verwysingsvlakke | ± 0.5 °C / ± 3 °C / ± 5.5 °C |
| Meeteenhede | °C en °F |
| Outomatiese afskakeling | Ongeveer. 60 sekondes |
| Materiaal | Plastiek |
| Afmetings (L x B x H) | Ongeveer 17.6 x 11 x 4.2 cm (6.9 x 4.3 x 1.7 duim) |
| Gewig | Ongeveer. 260 g (0.57 lbs) |
| Vervaardiger | OWIM GmbH & Co. KG |
| Ingesluit komponente | Measuring device, Battery |
9. Waarborg en Ondersteuning
Vir waarborginligting en kliëntediens, verwys asseblief na die dokumentasie wat saam met u aankoop verskaf is of kontak die kleinhandelaar. Bewaar u bewys van aankoop vir enige waarborgeise.
Vervaardiger: OWIM GmbH & Co. KG


