1. Introduction
The GEPRC TAKER H743 BT 32Bit 50A stack is a high-performance system designed for FPV racing and freestyle drones. It integrates an advanced flight controller and a powerful 4-in-1 Electronic Speed Controller (ESC) into a compact unit. This manual provides essential information for the proper setup, operation, and maintenance of your TAKER H743 BT stack.

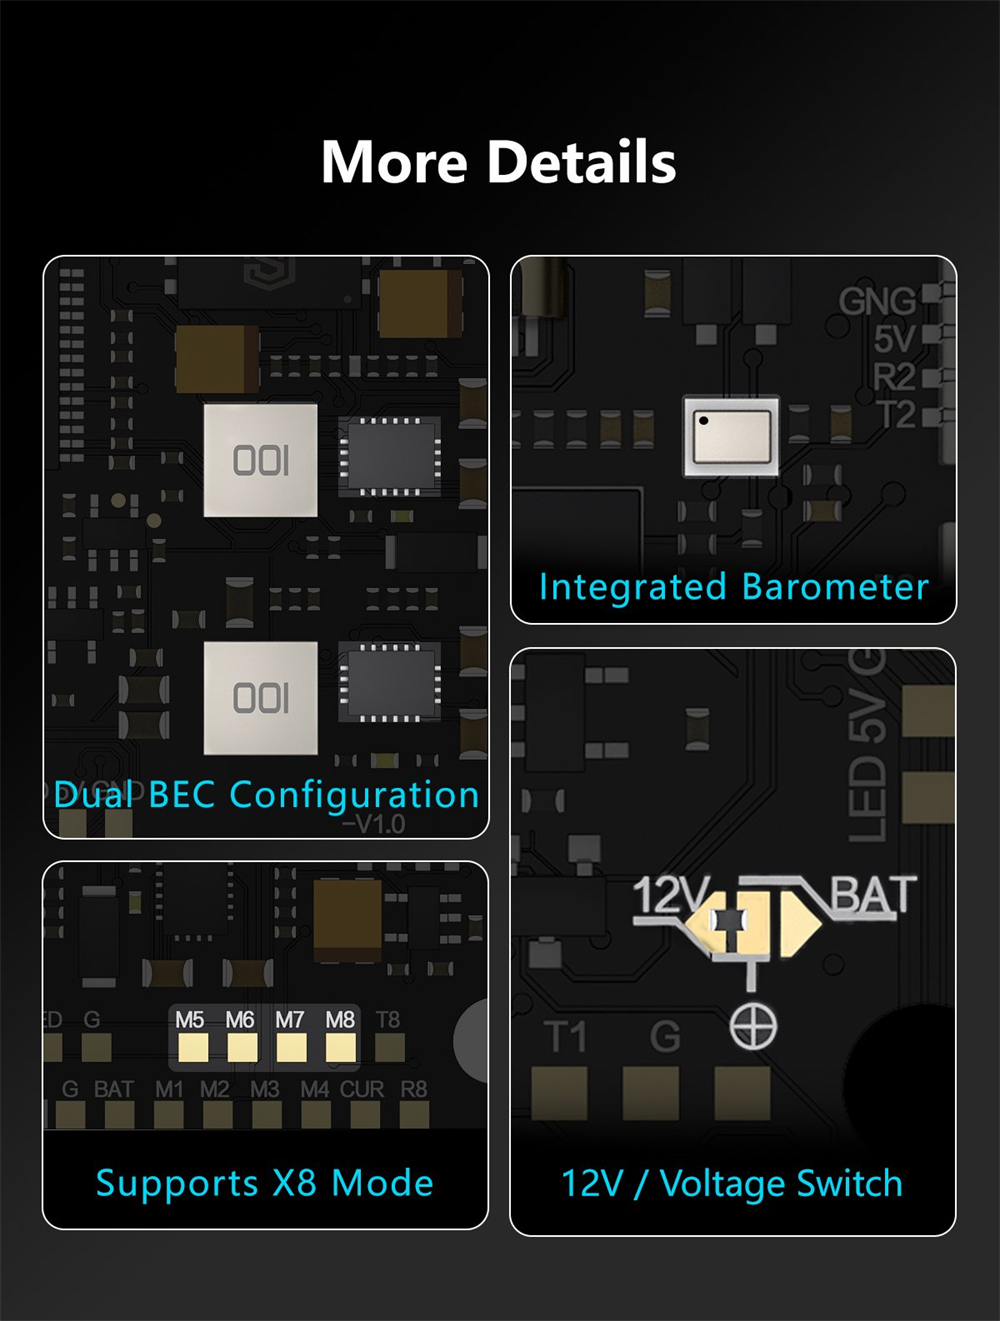
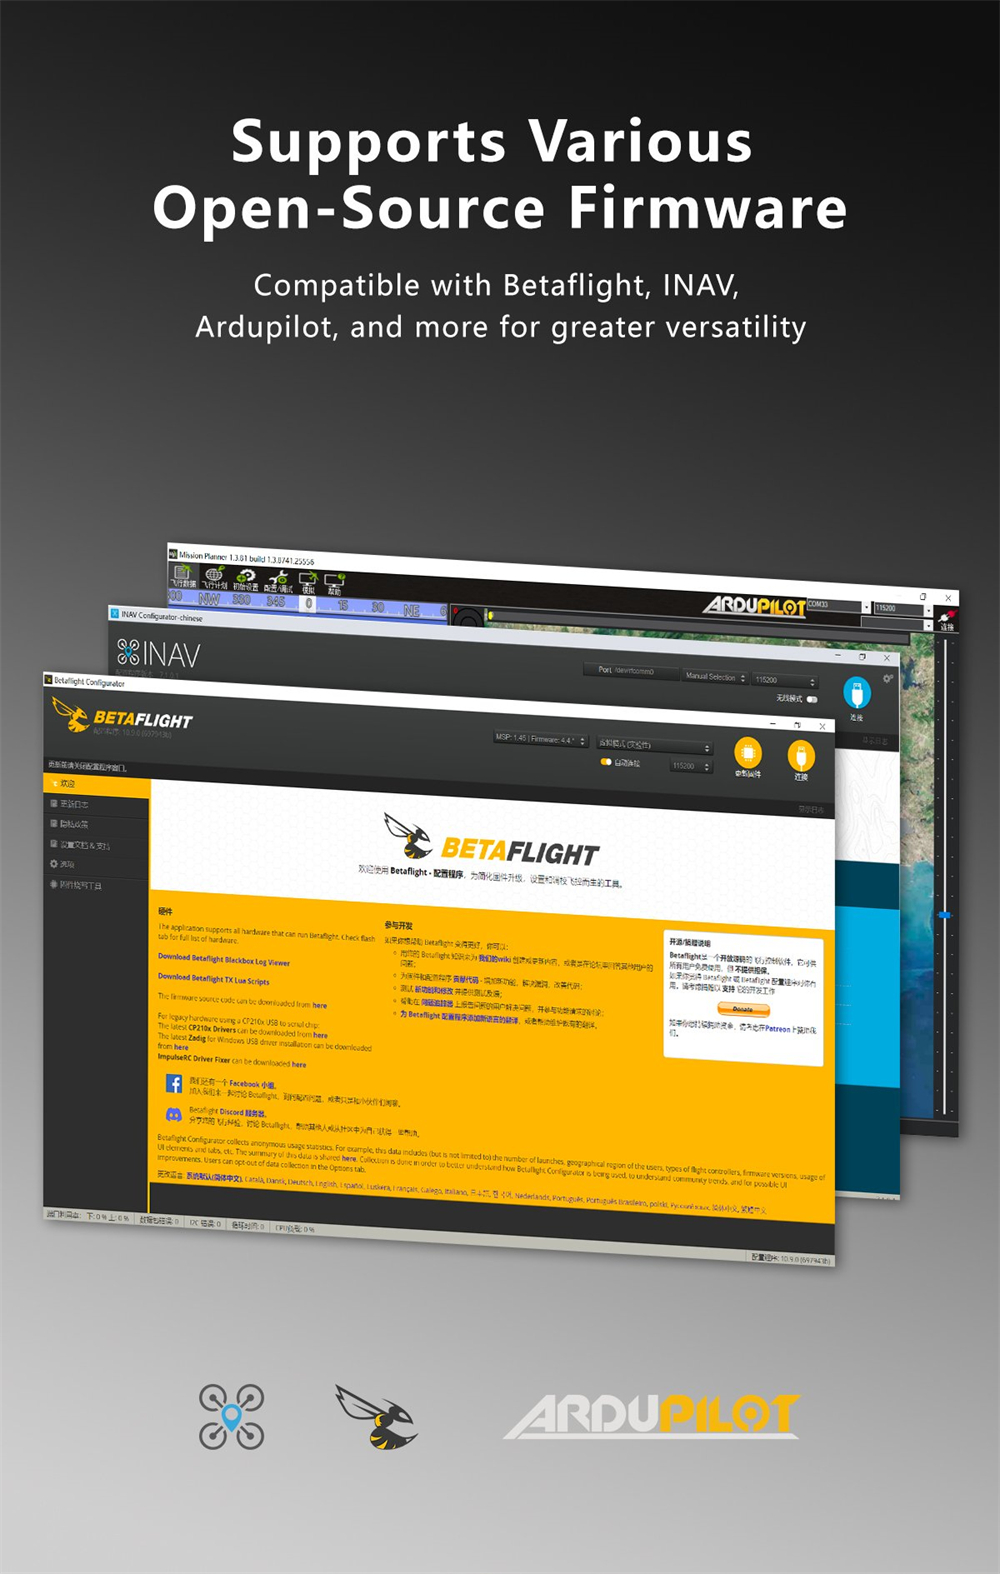
The flight controller features a high-performance STM32H743VIH6 chip with a Cortex-M7 core running at up to 480MHz, ensuring rapid processing. It incorporates a dual gyroscope setup (MPU6000 and ICM42688-P) for precise flight control and includes integrated Bluetooth for convenient wireless parameter adjustments. A built-in 512MB black box allows for extensive flight data logging. The stack supports eight motor output ports and is compatible with X8 models. It is designed for flexibility, supporting open-source firmware like Betaflight, INAV, and Ardupilot. The dual independent 5V@3A and 12V@2.5A BECs provide stable power, and it offers seven UART ports and an integrated barometer for comprehensive functionality.
2. Features
- High-performance STM32H743 main controller with Cortex-M7 core (480MHz).
- Equipped with MPU6000 and ICM42688-P dual gyroscopes for enhanced stability.
- 512MB high-capacity black box storage for flight data.
- Integrated Bluetooth for wireless parameter tuning via smartphone apps (e.g., Speedybee).
- Upgraded Type-C USB interface for reliable connection.
- Plug-and-play design for simplified installation, reducing soldering needs.
- Integrated barometer for accurate altitude holding.
- Features 7 UART ports for extensive peripheral connectivity.
- Independent dual BEC outputs: 5V@3A and 12V@2.5A.
- GEP-BL32 50A 96K 4IN1 32Bit ESC for smooth and powerful flight.
- Supports various open-source firmware: Betaflight, INAV, Ardupilot.
- Pre-installed with BL32 test firmware (AM32 also supported, requires customer flashing).
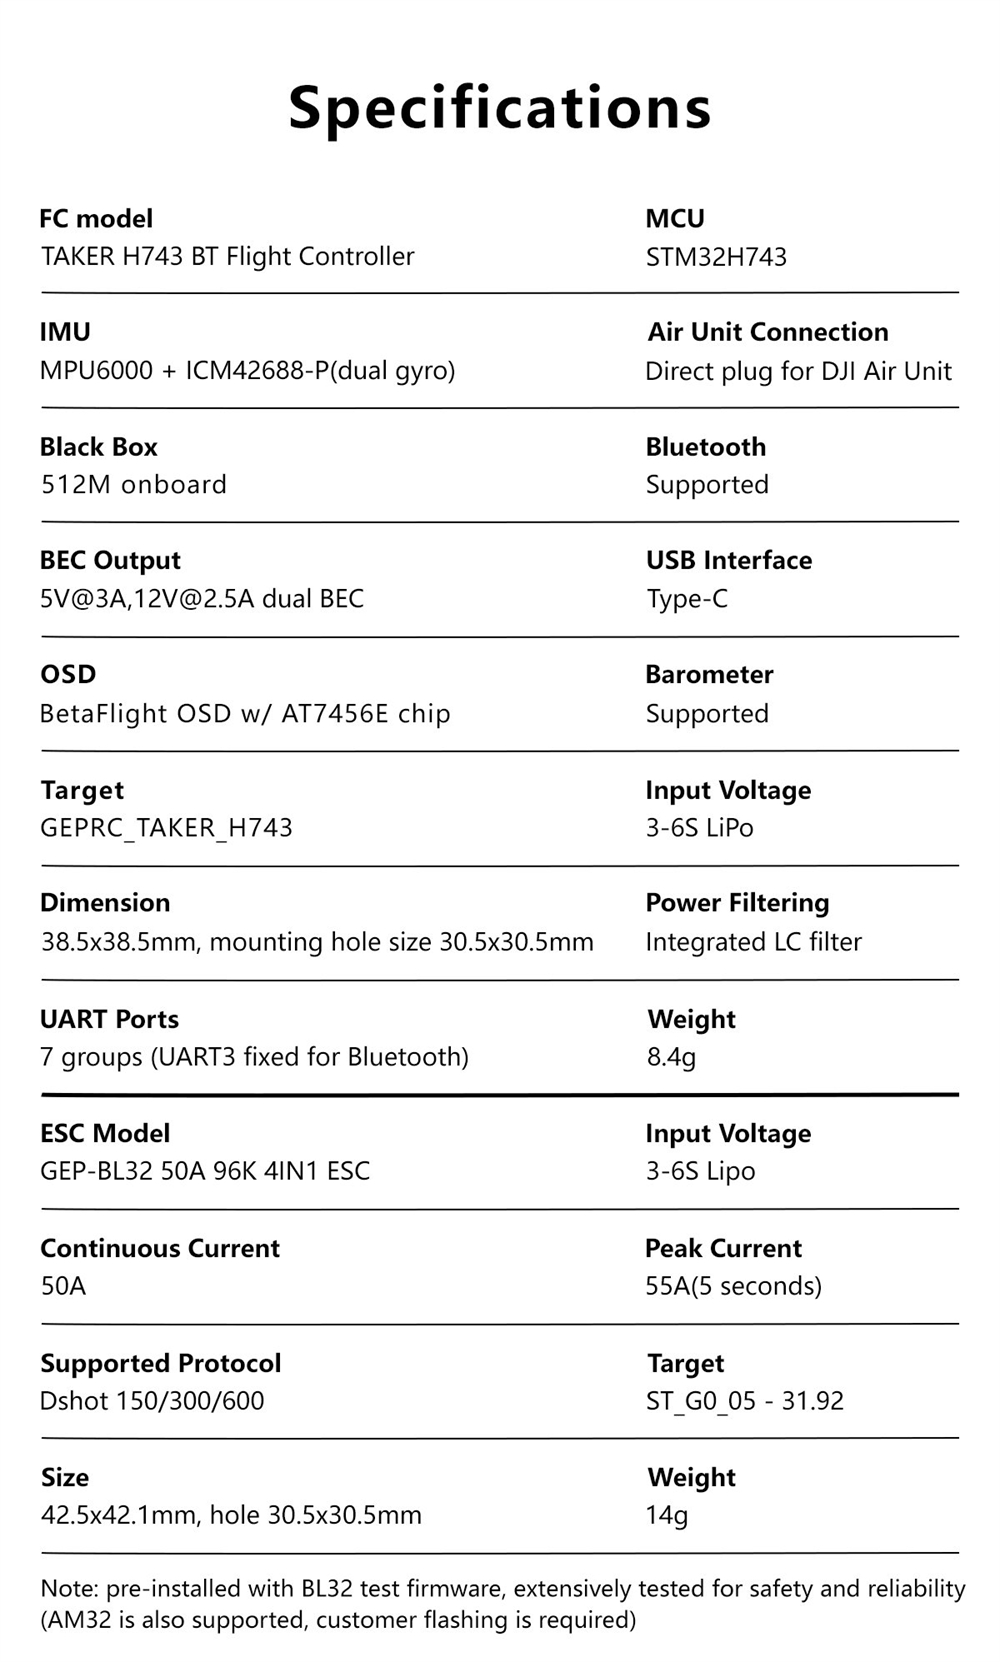
3. Specifications
| Item | Parameter |
|---|---|
| TAKER H743 BT Flight Controller |
|
| GEP-BL32 50A 96K 4IN1 ESC |
|

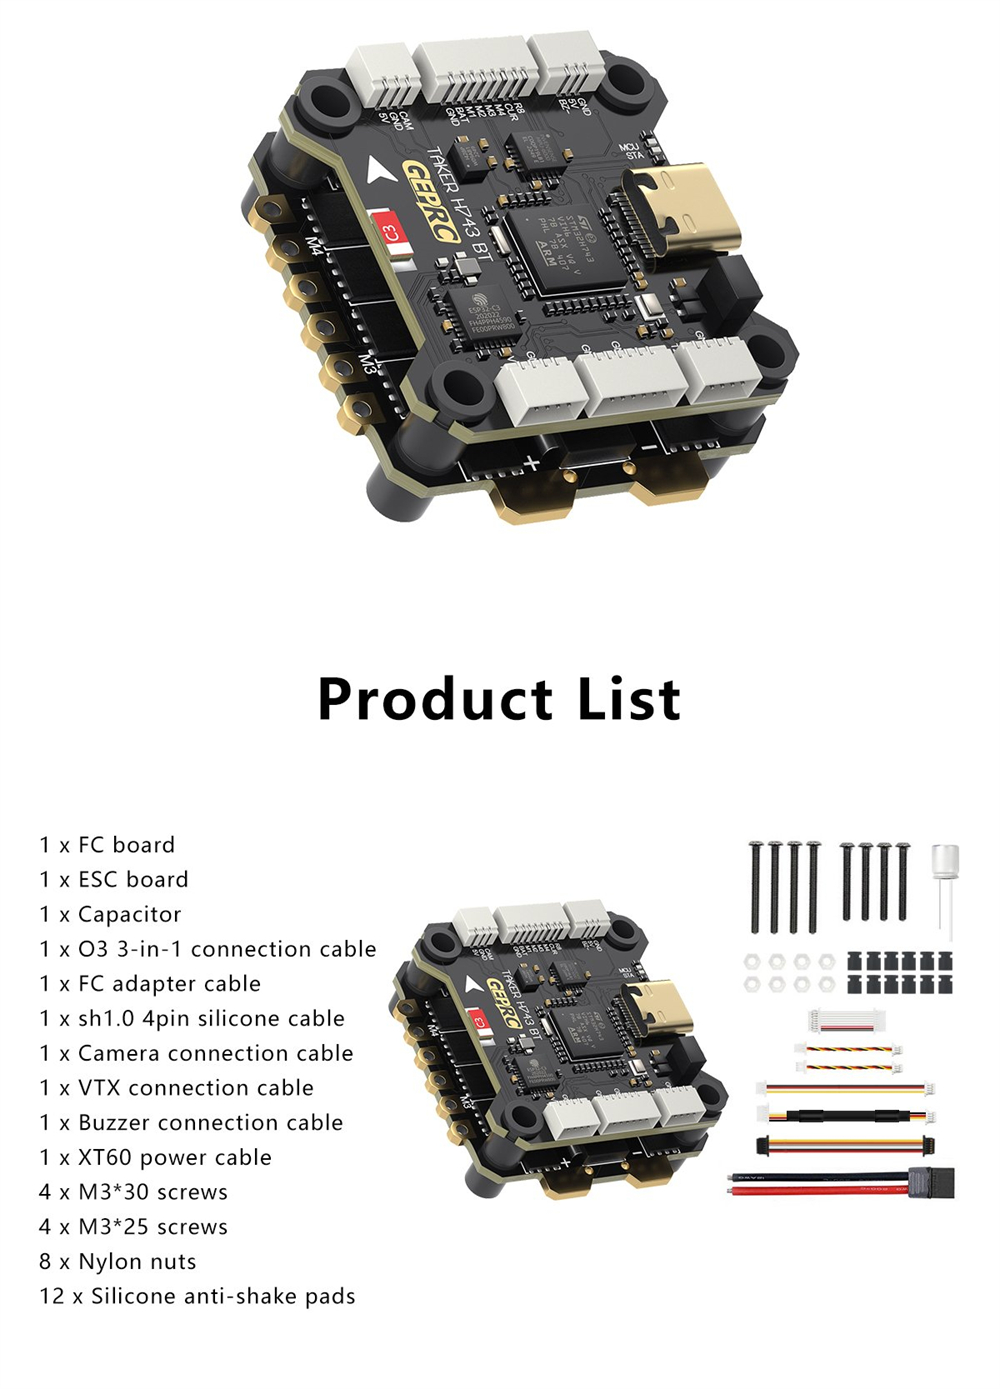
4. Product List (Package Contents)
The following items are included in your GEPRC TAKER H743 BT 32Bit 50A Stack package:
- 1 x FC board
- 1 x ESC board
- 1 x Capacitor
- 1 x DJI O3 3-in-1 connection cable
- 1 x FC adapter cable
- 1 x sh1.0 4pin silicone cable
- 1 x Camera connection cable
- 1 x VTX connection cable
- 1 x Buzzer connection cable
- 1 x XT60 power cable
- 4 x M3*30 screws
- 4 x M3*25 screws
- 8 x Nylon nuts
- 12 x Silicone anti-shake pads

5. Setup and Installation
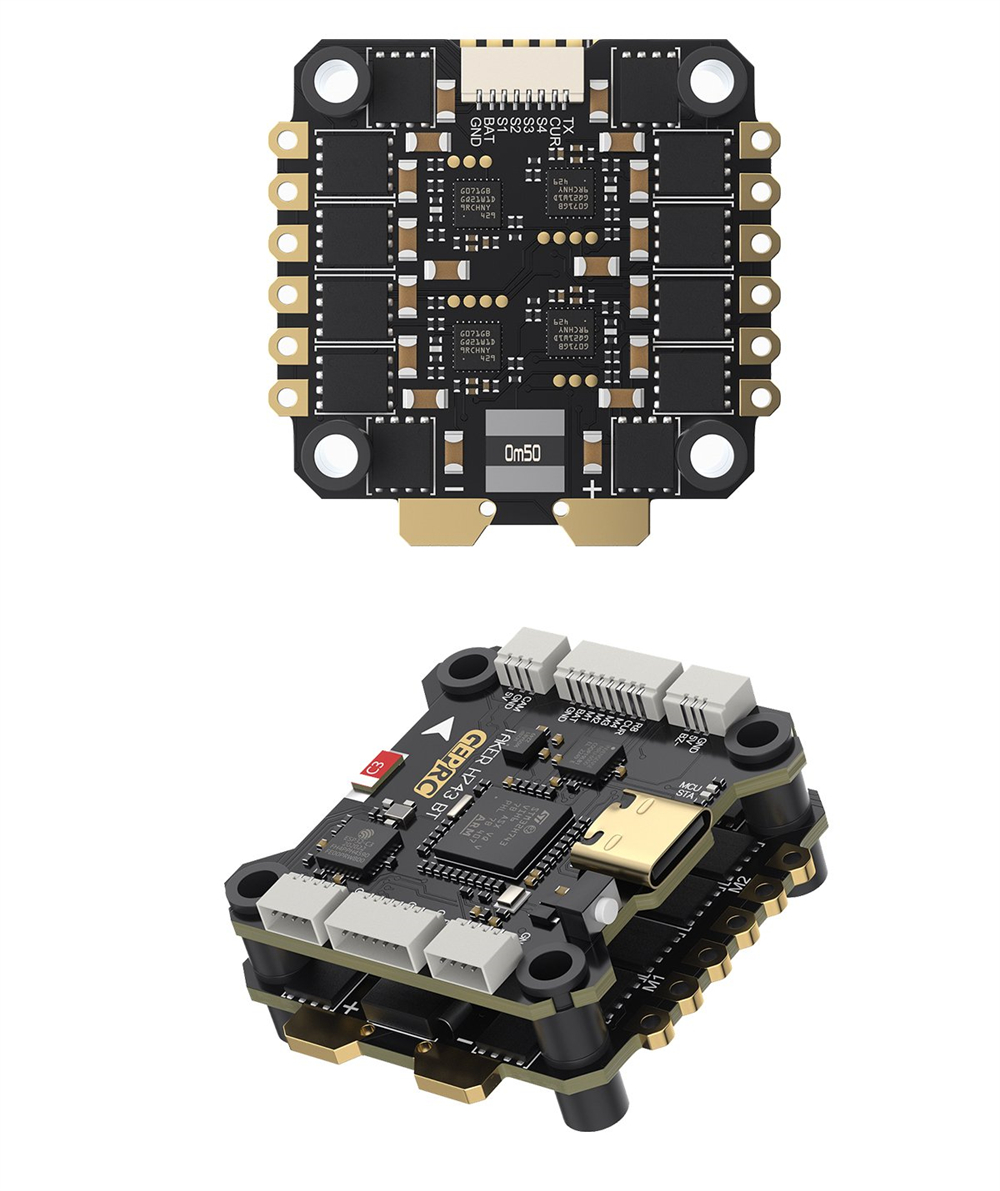
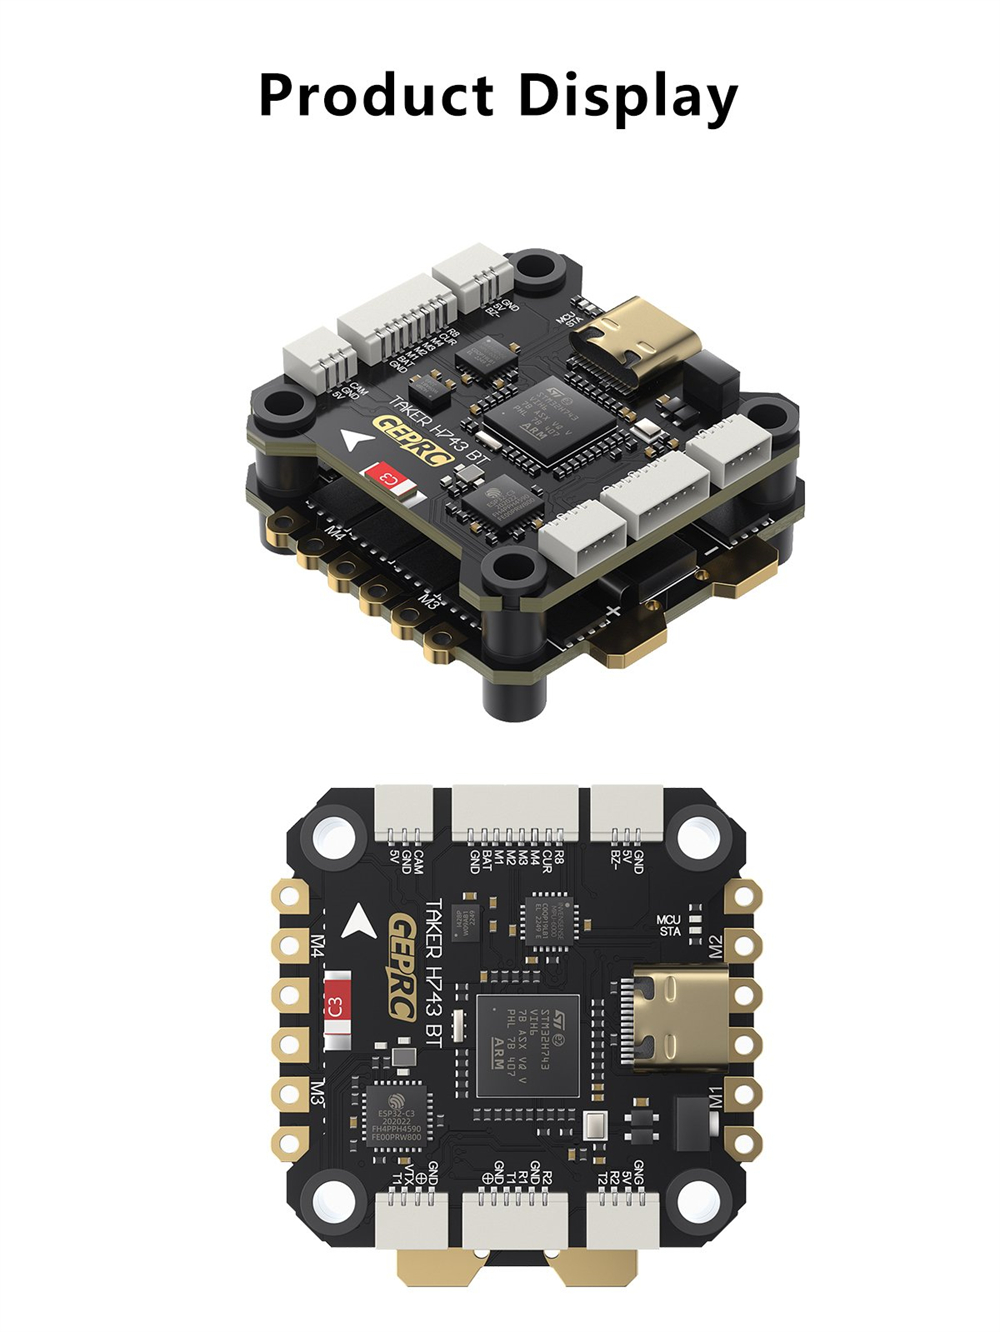
5.1 Component Overview
Familiarize yourself with the Flight Controller (FC) and Electronic Speed Controller (ESC) boards before installation.


5.2 Stacking the Boards
The FC and ESC are designed to be stacked. Use the provided nylon nuts and silicone anti-shake pads to securely mount the boards. Ensure correct orientation as indicated by markings on the boards.
5.3 Wiring Connections
The TAKER H743 BT stack offers plug-and-play convenience for many peripherals. Utilize the dedicated connectors for DJI Air Unit, camera, VTX, and buzzer. Refer to the connection diagram for proper wiring.
- Power Connection: Connect your LiPo battery (3-6S) to the XT60 power cable, then to the ESC.
- Motor Connections: Solder your motors to the designated motor pads (M1-M8) on the ESC. The stack supports up to 8 motors (X8 mode).
- Air Unit: Use the dedicated direct plug for DJI Air Unit.
- Camera/VTX: Use the provided connection cables for your camera and video transmitter.
- Buzzer: Connect the buzzer using the provided cable.
- UART Ports: The FC has 7 UART ports for various peripherals. UART3 is fixed for Bluetooth.
- BEC Outputs: The dual BEC provides 5V@3A and 12V@2.5A for powering peripherals.
5.4 Firmware Flashing (Optional)
The FC comes pre-installed with BL32 test firmware. If you wish to use AM32 firmware, customer flashing is required. Always back up your current configuration before flashing new firmware.
6. Operating Instructions
6.1 Software Configuration
The TAKER H743 BT Flight Controller is compatible with popular open-source flight control software such as Betaflight, INAV, and Ardupilot. Connect the FC to your computer via the Type-C USB port to access the configurator software.
- Initial Setup: Follow the specific setup guides for your chosen firmware (Betaflight, INAV, or Ardupilot) to calibrate sensors, configure motor outputs, and set up your radio.
- OSD: The BetaFlight OSD with AT7456E chip allows for on-screen display of flight data. Configure OSD elements within the Betaflight configurator.
- Black Box: The 512MB onboard black box records flight data. This data can be downloaded and analyzed using the respective configurator software for tuning and troubleshooting.
6.2 Wireless Parameter Tuning
The integrated Bluetooth module allows for convenient wireless parameter adjustments using a compatible smartphone app (e.g., Speedybee). This eliminates the need to connect to a computer for minor adjustments in the field.
6.3 Flight Control
The dual gyroscope system (MPU6000 + ICM42688-P) provides precise and stable flight control, suitable for both racing and freestyle flying. Ensure proper calibration of the gyroscopes during initial setup.
7. Maintenance
- Regular Inspection: Periodically check all solder joints and connectors for signs of wear, corrosion, or damage.
- Cleaning: Keep the boards free from dust, dirt, and moisture. Use compressed air or a soft brush for cleaning. Avoid using liquids directly on the electronics.
- Firmware Updates: Check for official firmware updates from GEPRC or the respective flight control software developers (Betaflight, INAV, Ardupilot) to ensure optimal performance and access to new features.
- Environmental Protection: Protect the stack from extreme temperatures, humidity, and physical impact. Consider conformal coating for enhanced moisture protection in wet environments.
8. Troubleshooting
- No Power: Ensure the XT60 power cable is securely connected and your LiPo battery is charged and properly connected to the ESC. Check for any short circuits.
- No Connection to PC: Verify the Type-C USB cable is functional and correctly plugged into both the FC and your computer. Ensure necessary drivers are installed. Try a different USB port or cable.
- Motors Not Spinning: Check motor connections to the ESC. Verify motor direction and ESC calibration in your flight control software. Ensure the ESC firmware is compatible and correctly flashed.
- Unstable Flight: Re-calibrate accelerometers and gyroscopes in your flight control software. Check for loose components or vibrations affecting the FC. Review PID settings.
- Bluetooth Connection Issues: Ensure Bluetooth is enabled on your smartphone and the FC. Restart both devices. Check the specific Bluetooth pairing procedure for your chosen app (e.g., Speedybee).
- Black Box Data Not Recording: Verify that black box logging is enabled in your flight control software settings. Ensure there is sufficient space on the internal 512MB storage.
9. User Tips
- Start with Default PIDs: When first setting up, use the default PID settings for your chosen firmware and drone frame. Fine-tune them gradually after initial test flights.
- Secure Wiring: Use zip ties or heat shrink to secure all wiring, preventing interference with propellers or other components, and reducing vibration.
- Conformal Coating: For outdoor flying, especially in humid or potentially wet conditions, consider applying a conformal coating to the FC and ESC to protect against moisture and corrosion.
- Regular Data Review: Utilize the black box data to analyze flight performance and identify potential issues or areas for tuning improvements.
- Bluetooth Convenience: Take advantage of the Bluetooth tuning feature for quick adjustments at the flying field without needing a laptop.
10. Warranty and Support
For warranty claims, technical support, or further assistance, please contact the manufacturer or your point of purchase. Keep your proof of purchase for warranty validation.


