1. Product Overview
The TOOLIOM TL-FP-5P TIG Welding Foot Pedal is designed to provide precise amperage control for compatible 5-pin TIG welding machines. It features a durable construction, high sensitivity, and a non-slip design for stable operation during welding tasks.


2. Setup Instructions
- Inspect the Pedal: Before connecting, visually inspect the foot pedal and its 16-ft cable for any signs of damage. Ensure the 5-pin connector is clean and free of debris.
- Connect to Welder: Locate the 5-pin control receptacle on your TIG welding machine. Align the 5-pin connector of the foot pedal cable with the receptacle and firmly insert it. Twist the locking ring to secure the connection.
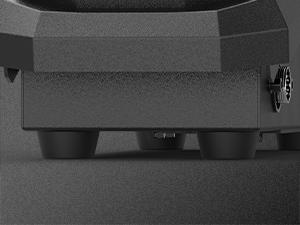
- Position the Pedal: Place the foot pedal on a stable, flat surface in a comfortable position for welding. The non-slip bottom feet will help prevent movement during operation.


3. Operating Instructions
The foot pedal allows for variable amperage control during the welding process, providing greater precision and flexibility.
- Initial Setup on Welder: Ensure your TIG welding machine is set to foot pedal control mode (if applicable) and the maximum desired amperage is set on the welder's control panel.
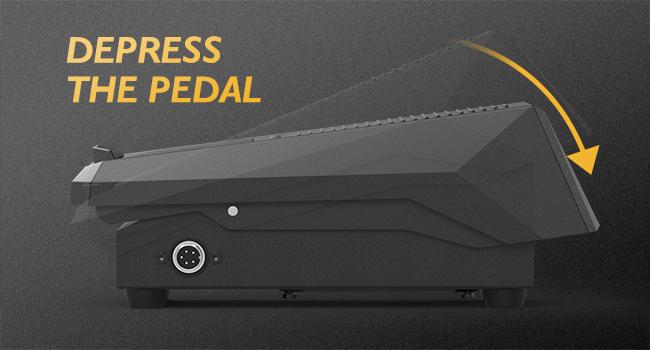
- Depress the Pedal: To initiate the arc and increase the welding current, gradually depress the foot pedal. The current will increase proportionally to how far the pedal is pressed, up to the maximum amperage set on your welder.
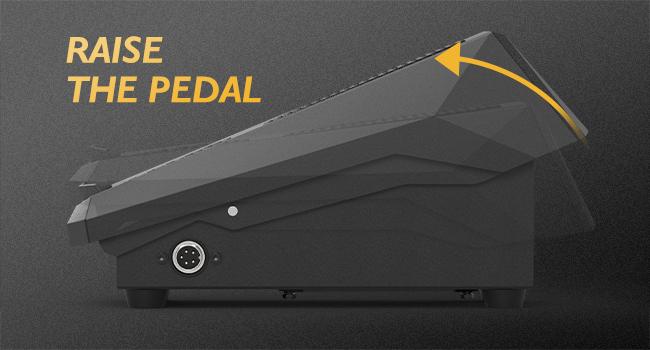
- Raise the Pedal: To decrease the welding current and finish the weld, gradually raise your foot from the pedal. The current will decrease, allowing for a controlled crater fill and arc termination.
4. Maintenance
Proper maintenance ensures the longevity and reliable performance of your foot pedal.
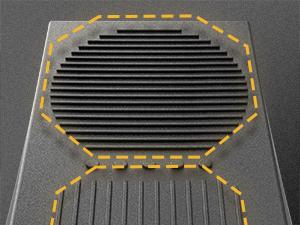
- Cleaning: Regularly clean the pedal surface and the non-slip pad to prevent accumulation of dust, dirt, or welding spatter, which could affect pedal sensitivity or grip. Use a dry cloth or mild cleaner.
- Cable Inspection: Periodically check the 16-ft cable for cuts, abrasions, or kinks. Ensure the connectors are tight and free from corrosion.
- Storage: Store the foot pedal in a clean, dry environment when not in use to protect it from moisture and physical damage.
5. Troubleshooting
If you encounter issues with your foot pedal, refer to the following common troubleshooting steps:
- No Response from Pedal:
- Ensure the 5-pin connector is fully inserted and securely locked into the welding machine.
- Verify that the welding machine is powered on and set to the correct foot pedal control mode.
- Check the cable for any visible damage.
- Inconsistent Amperage Control:
- Clean the pedal surface and ensure no debris is obstructing the pedal's movement.
- Confirm that the maximum amperage setting on your welding machine is appropriate for your task.
- Ensure the pedal is placed on a stable surface and your foot has a consistent contact.
- Pedal Slips During Use:
- Check the anti-slip bottom feet for wear or damage.
- Ensure the floor surface is clean and dry.
If problems persist after these steps, please contact TOOLIOM customer support or your welding machine manufacturer for further assistance.
6. Specifications
| Feature | Specification |
|---|---|
| Model Number | TL-FP-5P |
| Connector Type | 5-Pin |
| Cable Length | 16 ft (approximately 4.88 meters) |
| Dimensions (L x W x H) | 11" x 4.8" x 6.3" (approximately 27.9 cm x 12.2 cm x 16 cm) |
| Weight | 2.58 kg (approximately 5.69 lbs) |
| Origin | Mainland China |

7. User Tips
- Practice Makes Perfect: Amperage control with a foot pedal requires practice. Start with lower amperage settings and gradually increase as you become more comfortable.
- Comfortable Positioning: Ensure your welding setup allows for a comfortable and natural foot position on the pedal to minimize fatigue and maximize control.
- Cleanliness is Key: Keep the welding area and the foot pedal clean. Debris can interfere with pedal operation and lead to inconsistent welds.
8. Warranty and Support
For warranty information, technical support, or any inquiries regarding your TOOLIOM TIG Welding Foot Pedal, please contact the TOOLIOM Store directly. You can find their contact information and store details on their official storefront:
Please provide your model number (TL-FP-5P) and any relevant purchase details when seeking support.