
Introduction
The LeadJoy Saber Plus is a high-performance symmetrical wireless game controller designed for competitive gaming. It features advanced TMR Hall joysticks, dual-mode triggers, a rapid 1000Hz polling rate, and 6-axis gyro motion sensing for precise and responsive control. With wide compatibility across PC, Nintendo Switch, iOS, and Android platforms, and customizable RGB lighting, the Saber Plus offers an immersive and adaptable gaming experience.
Video: Overview of LeadJoy Saber Plus features and design.
Safety & Warnings
General Warning
ATTENTION: Not suitable for children under 36 months.

Warning: Not suitable for children under 3 years old.
Special Warning for Lithium Battery & Button Battery
WARNING: Keep out of reach of children. In case of ingestion, seek medical attention immediately.

Warning against swallowing coin batteries. Swallowing can lead to severe burns, perforation of soft tissue, and death. Seek medical attention immediately if ingested.
Other Safety Warnings
- WARNING: Please mind potential fire risk and strictly follow the instruction manual for charging and storage. For disposal, please check your local authority's website for more information and dispose of the lithium-ion battery safely in accordance with the applicable legal requirements.
- WARNING: Do not immerse the product in water or any liquid. Keep away from high temperature, fire, and strong impact.
- WARNING: Do not disassemble, repair, or modify the product without permission. Stop using immediately if overheating, smoke, or peculiar smell occurs.
Package Contents
Ensure all items are present and undamaged upon unboxing:
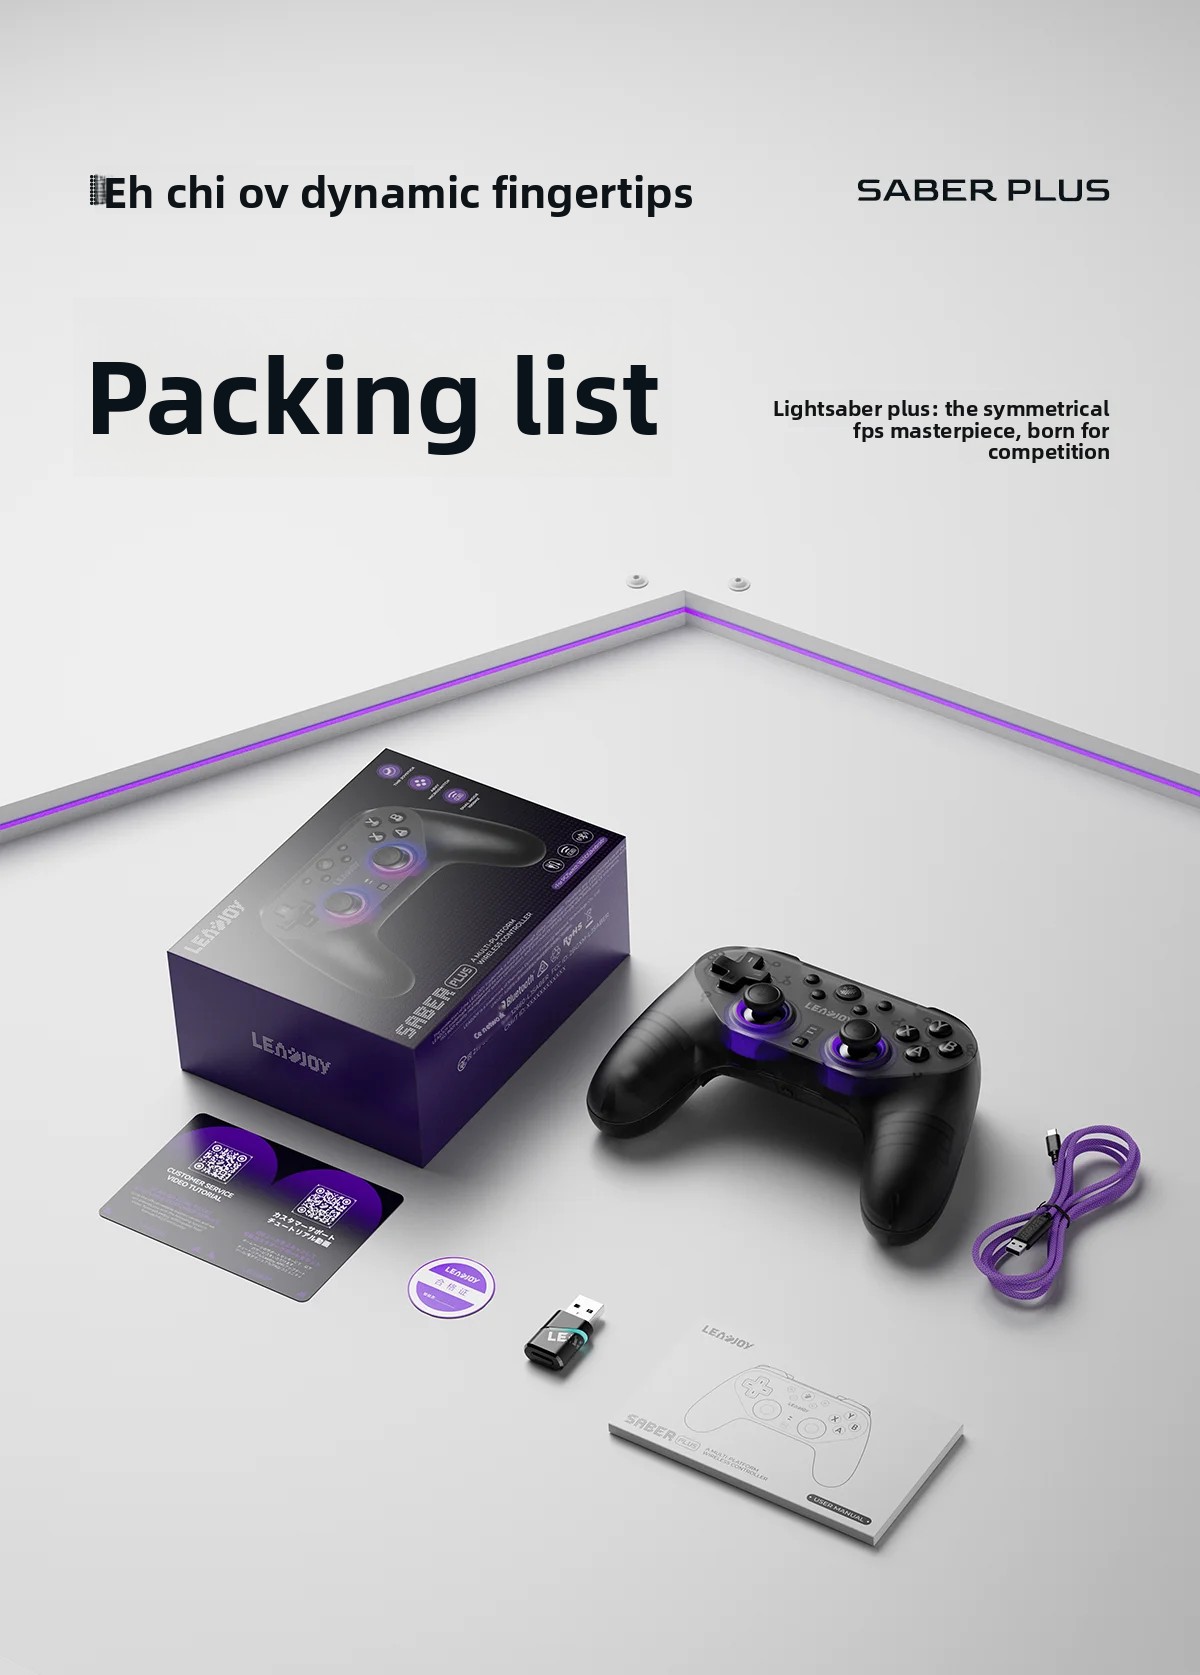
- LeadJoy Saber Plus Controller
- USB Receiver
- USB-C Cable
- User Manual
- Stickers
The complete packing list for the LeadJoy Saber Plus controller.
Specifications
| Feature | Description |
|---|---|
| Brand Name | FLYDIGI |
| Model | Saber Plus |
| Type | Joysticks, Game Controller |
| Interface Type | USB, Bluetooth, 2.4G Wireless |
| Compatible Brand/Model | Mobile Device (PC, Switch, iOS, Android) |
| Joystick Technology | TMR Hall Joysticks (JS13Pro customized model) |
| Trigger Type | Dual-mode (255-level Hall effect linear + micro-motion) |
| Polling Rate | 1000Hz |
| Motion Sensing | 6-Axis Gyro |
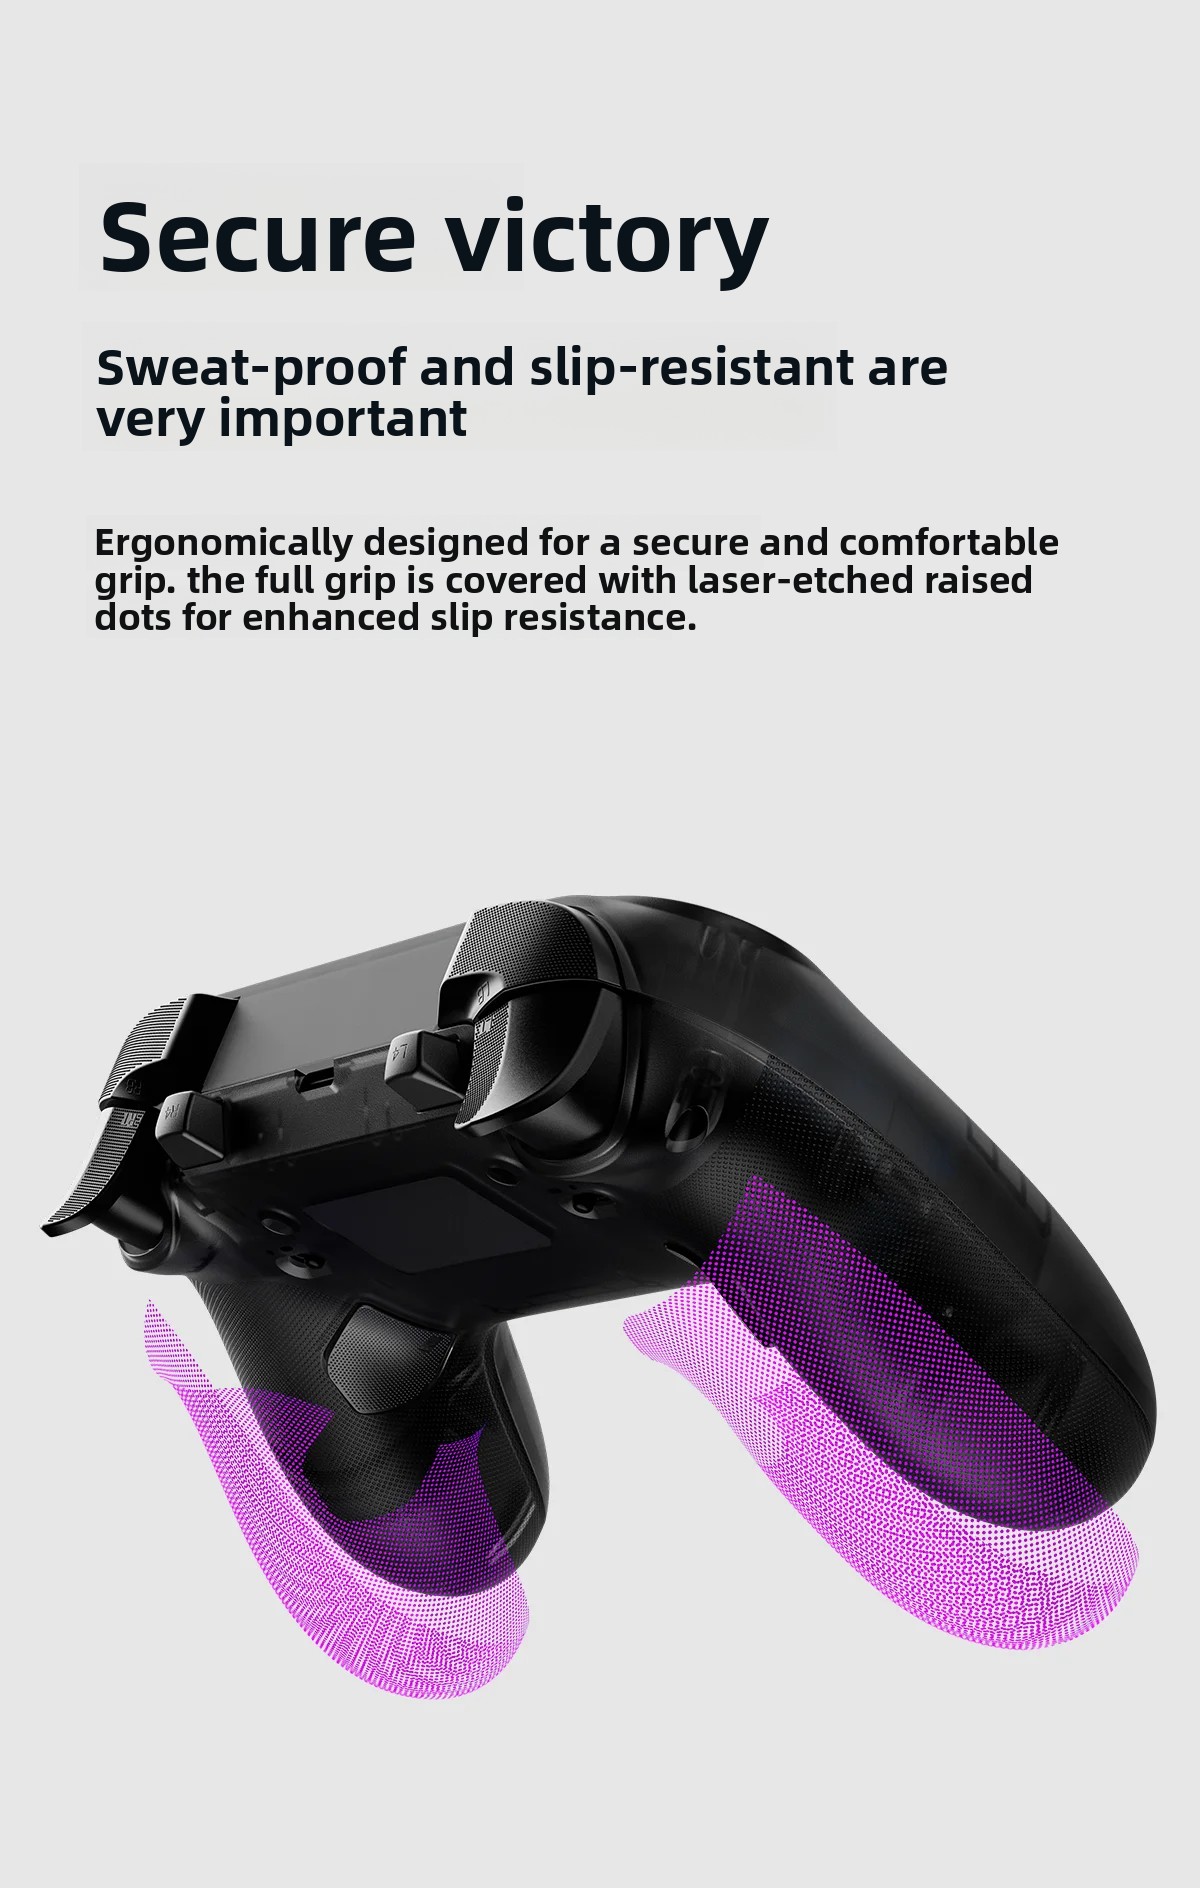
| Buttons | ABXY Micro Switch Buttons, 2 Shoulder Buttons, 4 Back Buttons (programmable) |
| Vibration | Dual asymmetric emergency stop motors with adjustable intensity |
| Battery Capacity | 1000mAh (up to 20 hours playtime) |
| Lighting Effect | Vibe lighting system, 24 RGB fully customizable |
| App Support | PC/Mobile App for real-time parameter adjustment |
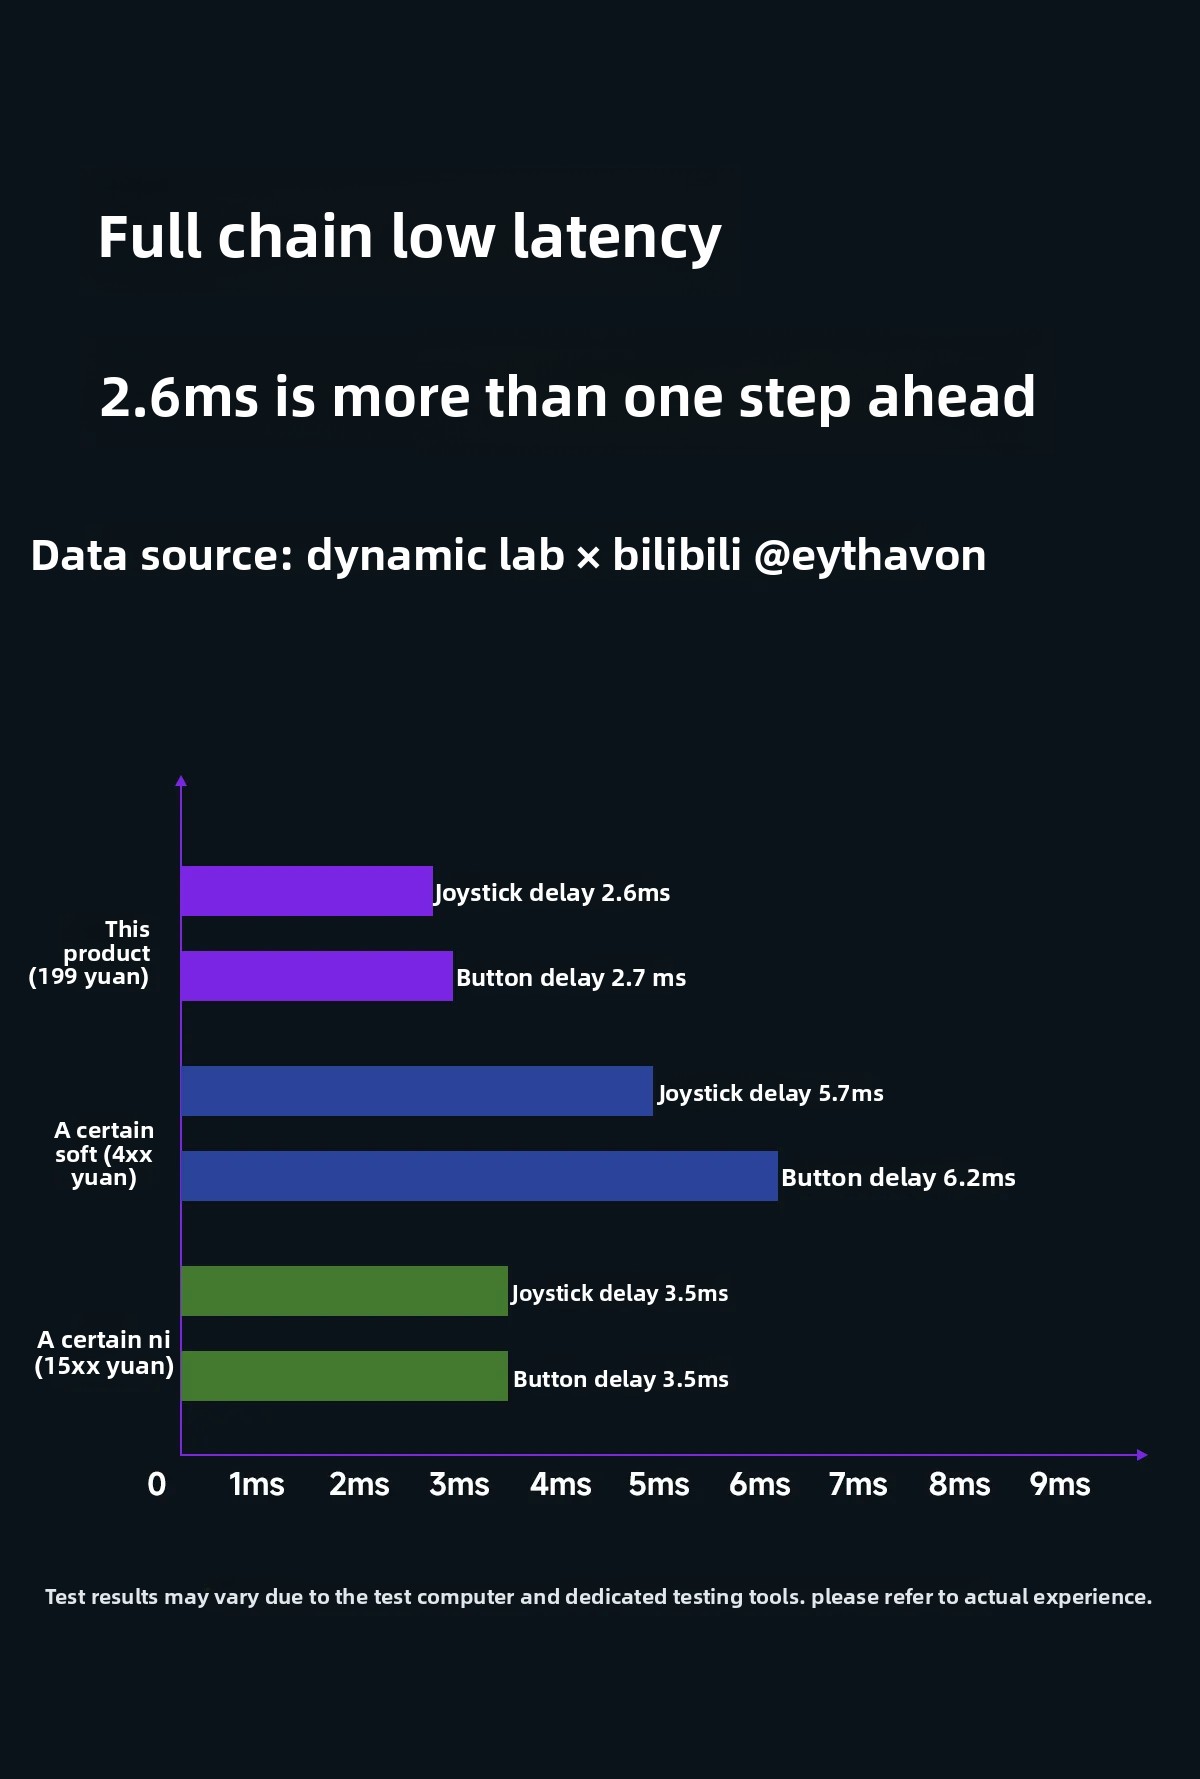
| Latency | Wired Joystick: 2.6ms, Wired Button: 2.7ms, Wireless Joystick: 5.9ms, Wireless Button: 5.5ms |
| Certification | CE |
| Origin | Mainland China |
Detailed comparison of Saber Plus features against an ordinary controller.
Key advantages of the Lightsaber Plus controller compared to ordinary handles.
Setup
Before First Use
- Check the game controller, data cable, power adapter, and other accessories for completeness and damage.
- Charge the built-in battery of the game controller as required to ensure sufficient power.
- Prepare the display device (TV/monitor/tablet) with HDMI/AV/Type-C interface for screen projection (if applicable).
- Read the safety warnings carefully and ensure the use environment is dry, well-ventilated, and free of strong magnetic interference.
Charging Operation
Game Controller Charging
- Connect the controller to the console's USB port with a data cable, or use a dedicated charging dock.
- The charging indicator will be red while charging and turn green when fully charged.
- Full charge time: Approximately 2 hours.
- Do not charge for more than 24 hours continuously to avoid battery damage.
Operation
Power On/Off
- Power On: Long press the power button for 3-5 seconds until the startup screen appears. Release the button and wait for the system to load completely.
- Power Off: Long press the power button for 3 seconds, select [Power Off] on the pop-up menu and confirm. In case of a crash, long press the power button for 8-10 seconds for a forced shutdown.
Sleep Mode
Short press the power button to enter sleep mode. Short press again to wake up (saves power during short breaks).
Screen Projection Connection (TV/Monitor)
- Connect the HDMI/AV cable to the game console's video output port and the other end to the display device's corresponding interface.
- Turn on the display device and switch to the corresponding signal source (HDMI/AV).
- Turn on the game console. The screen content will be automatically projected to the display device (adjust resolution in console settings if needed).
Game Controller Operation
Wired Connection
Connect the controller to the game console's USB/Type-C port with the data cable. The system will automatically recognize and pair it.
Wireless Connection
Turn on the game console and controller. Long press the controller's pairing button until the indicator flashes. The controller will auto-pair with the console (indicator is always on after successful pairing).
Use the direction keys, function buttons, and joysticks on the controller to operate games, select menus, and adjust settings (refer to the controller key marking for specific functions).
Game Operation
- After the console starts up, select the [Game List] on the main interface and press the confirm button to enter.
- Use the controller's direction keys to select the game you want to play, then press the confirm button to start the game.
- In the game, press the [Menu/Back] button to call up the game settings, adjust volume, difficulty, screen brightness, and other parameters.
- To switch games, press the [Home] button to return to the main interface, then select the desired game again.
Basic Settings
On the console main interface, select [System Settings] to enter the setting page. Adjust screen brightness, volume, language, time, resolution, connection mode, and other parameters according to actual needs. Support game file addition/deletion (operate according to the console's built-in prompt).
Advanced Customization
The LeadJoy Saber Plus offers extensive customization options through its PC/mobile application.
- Real-time Parameter Adjustment: Tweak and tune your settings on the fly, whether gaming on PC or console.
- Lighting Effects: Choose from four modes (Chasing the shadow, Gradient, Breathe, Always on, Close) and customize 24 RGB colors for a personalized light and shadow experience.
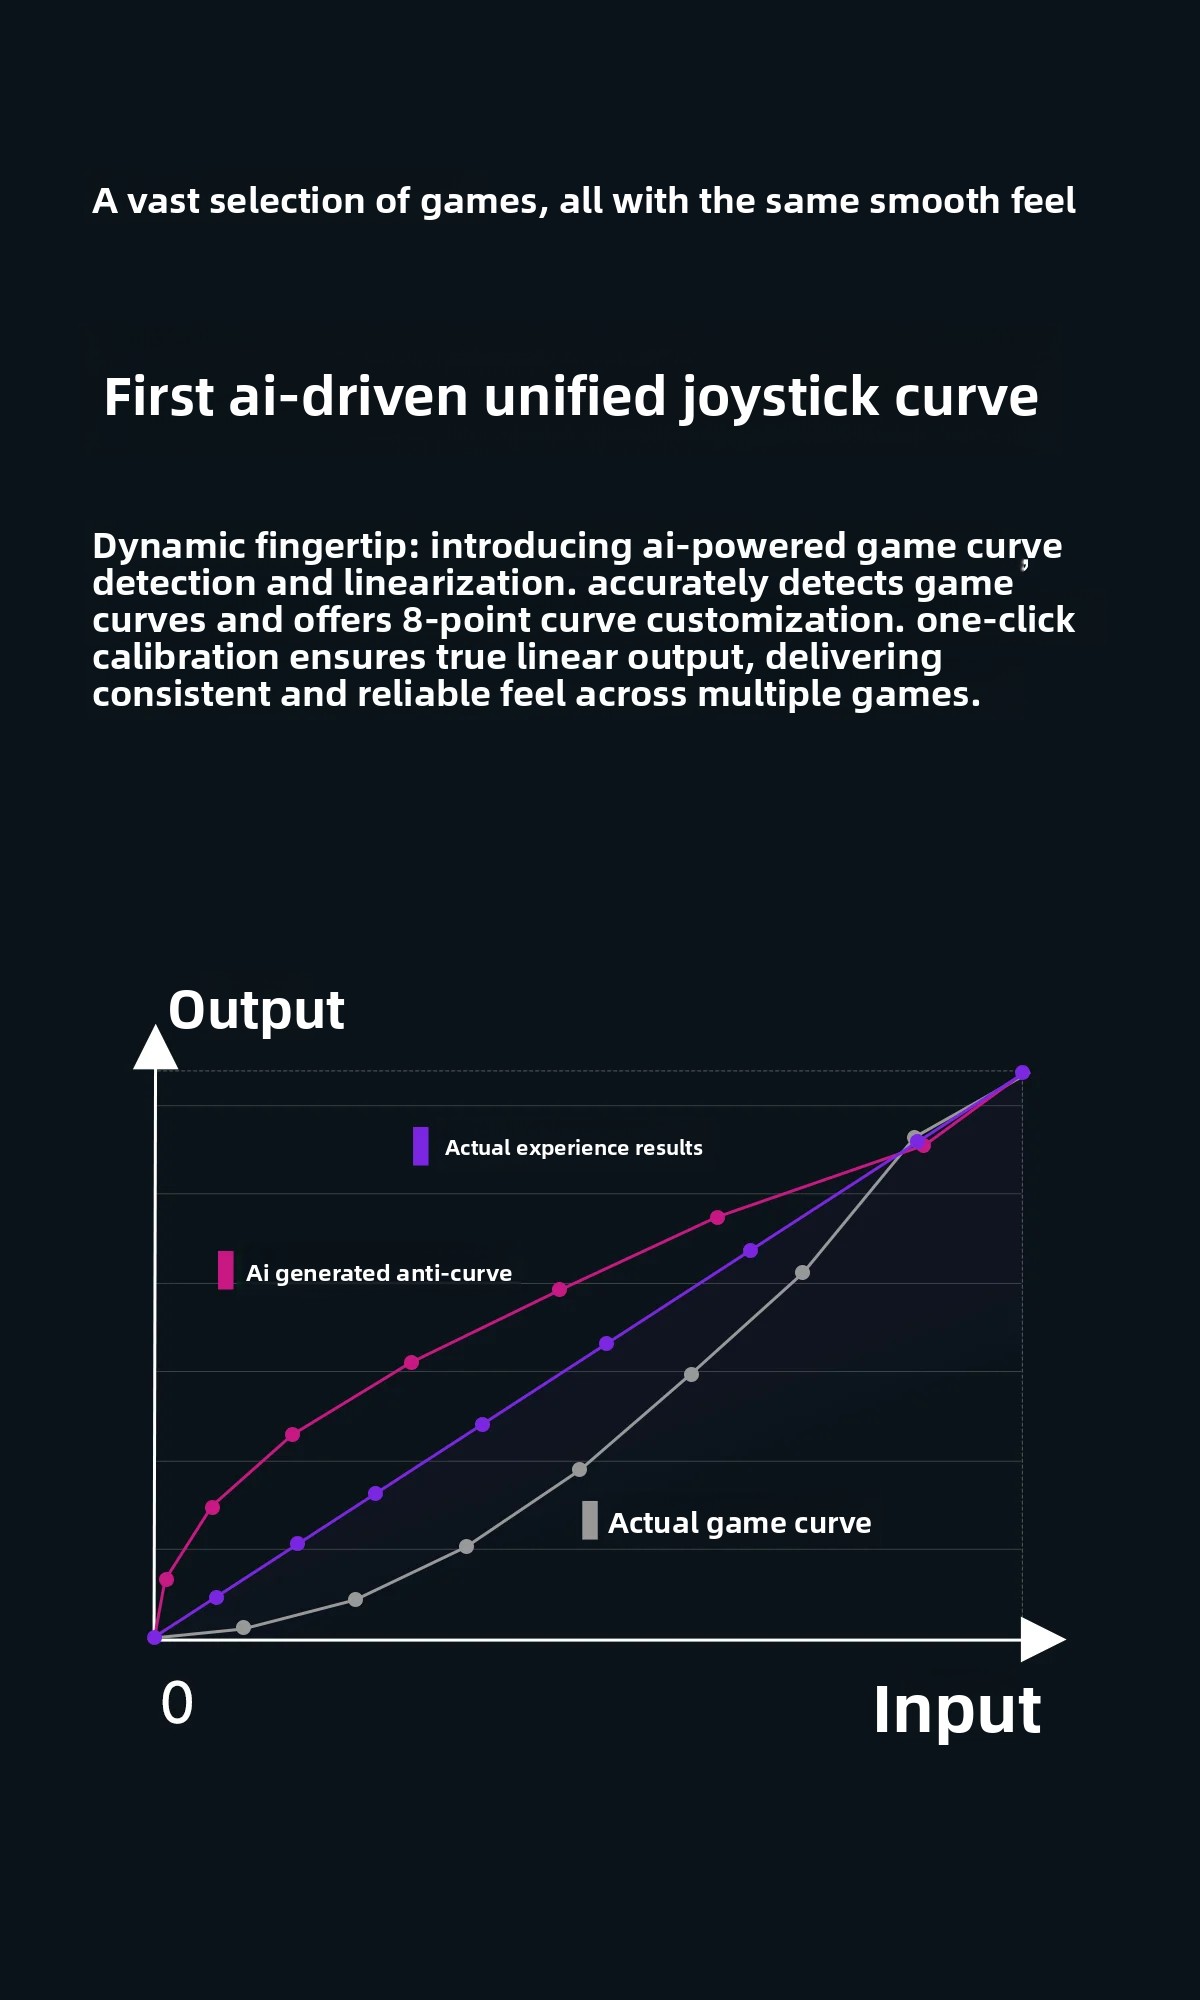
- Joystick Optimization: Fine-tune joystick curves, sensitivity, and dead zones. The AI-driven unified joystick curve ensures a consistent feel across a massive game library.
- Macro Programming: Configure single-key macros with up to 500 steps. All keys can trigger macro values, allowing for complex actions with a single press.
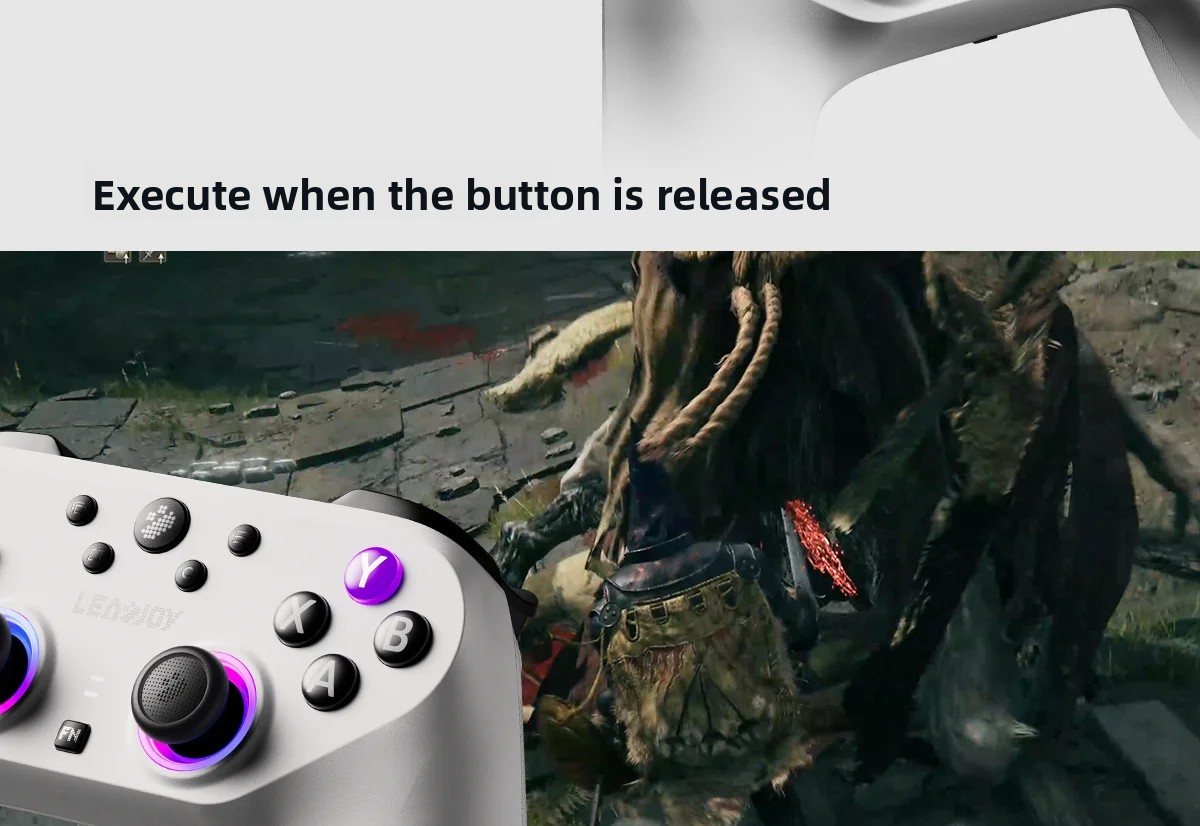
- Key Mapping: Individually configure each key press and release as a single key, key combination, or macro.
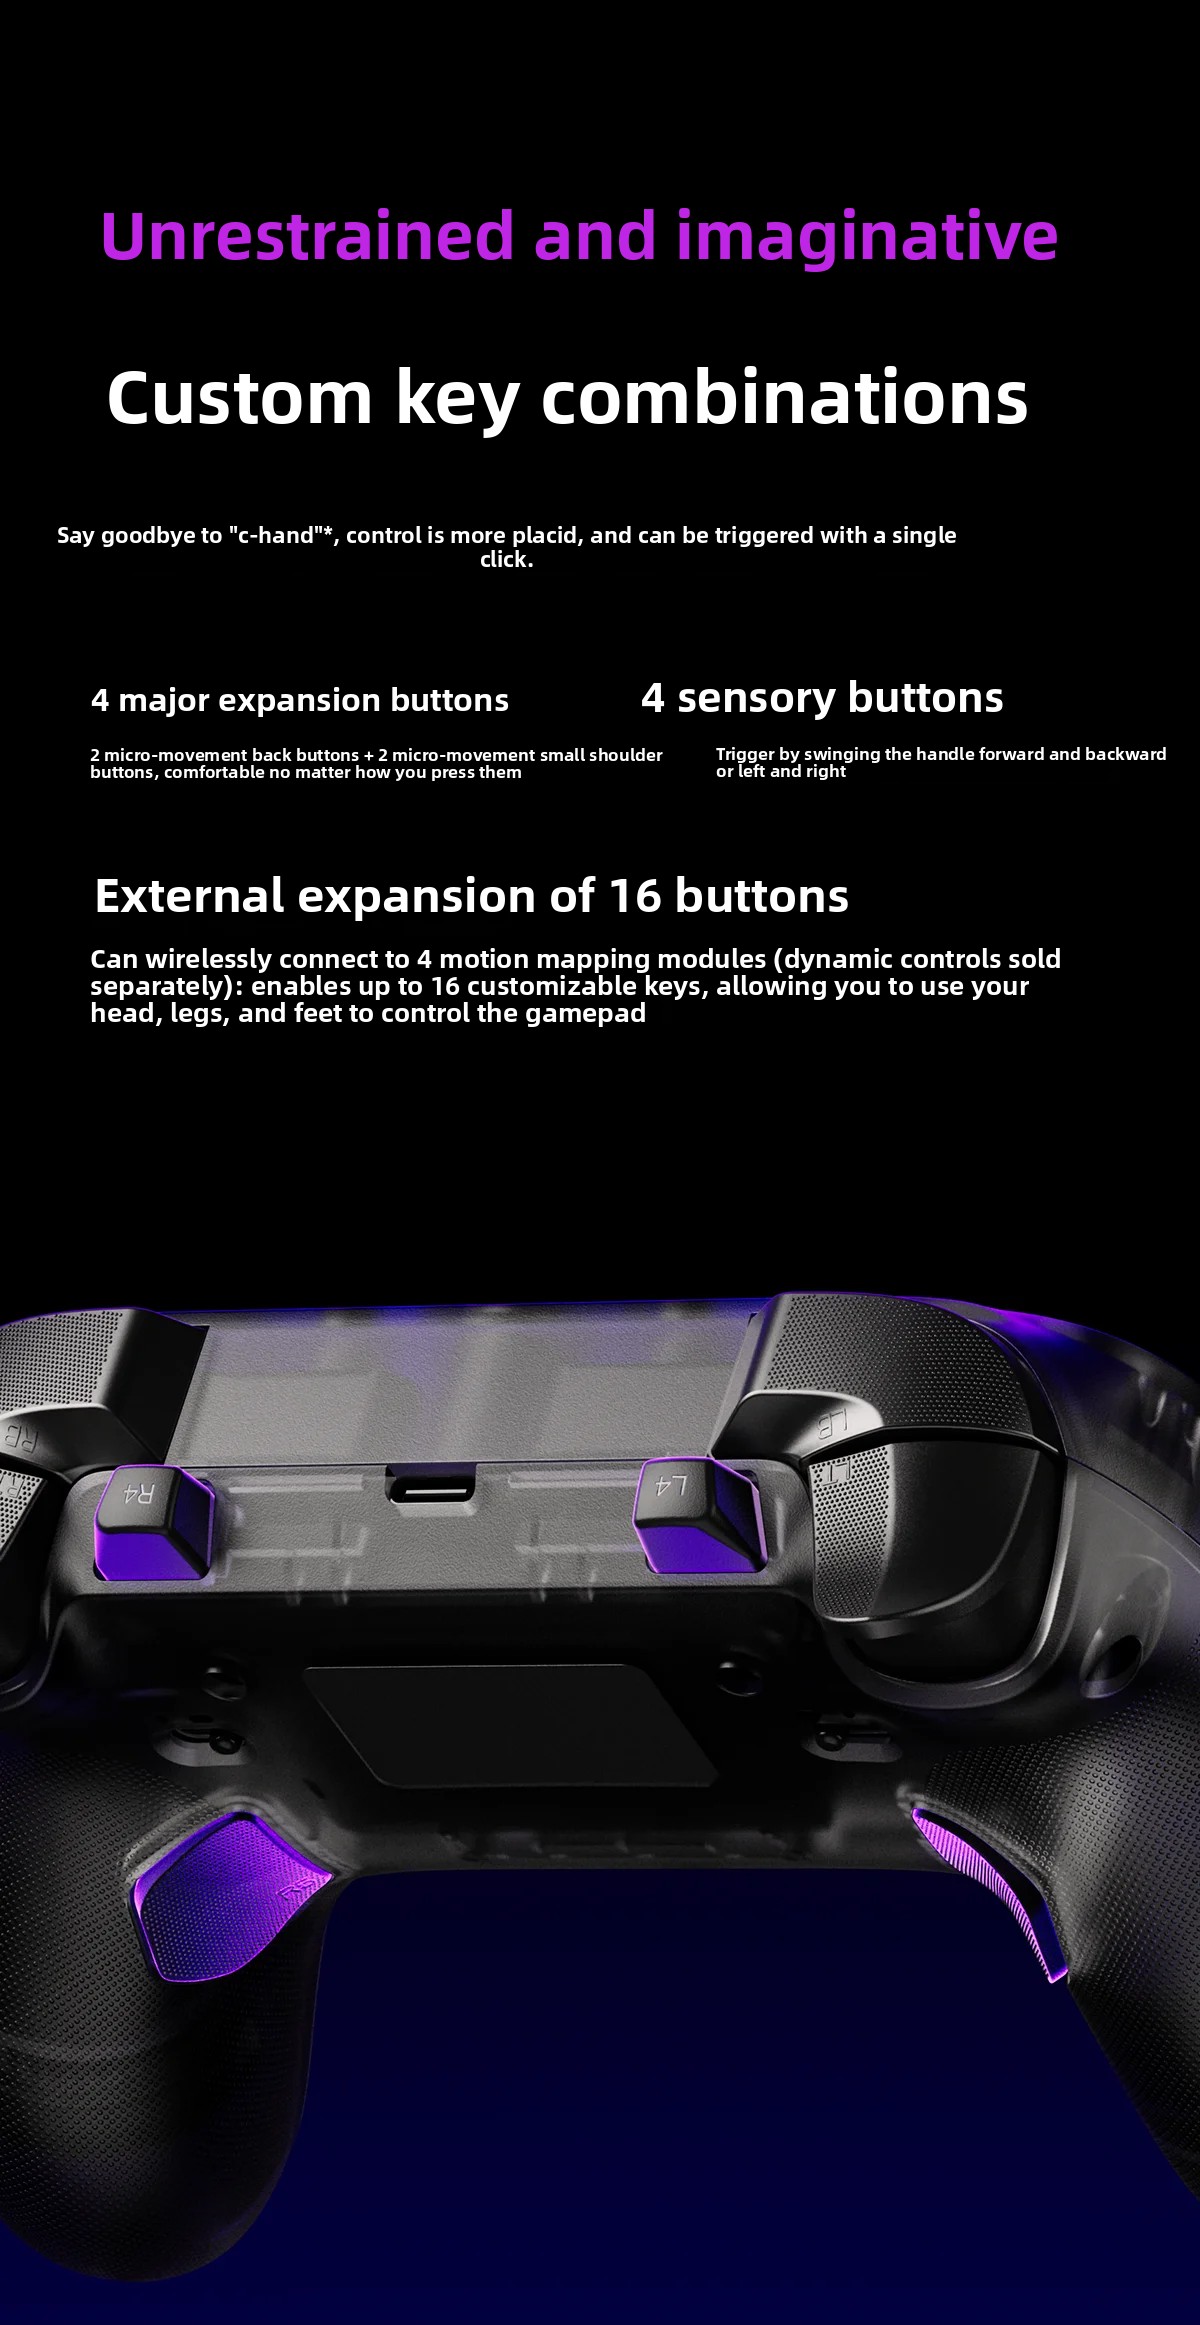
- Dynamic Controls (Optional): The controller supports a 1+4 split control system with external motion mapping modules (sold separately). These can be clamped onto shoelaces for natural foot movement (squat, jump up) or used as haptic feedback buttons, keyboard values, or key combinations.
PC/Mobile App for real-time parameter adjustment of joystick, trigger, vibration, and more.
Customizable lighting effects with various modes and RGB color options.
One dynamic control equals four customizable keys, supporting various input types and external modules.
External motion mapping modules for enhanced somatosensory control (sold separately).
Important Note on Competition Firmware:
For official competitions, please use the dynamic fingertip competition firmware. This competition firmware will disable features not permitted in competitions, such as RC filtering, vibration, macros, and wireless connectivity, unless specifically required for the competition. We do not recommend using this firmware outside of official events.
Maintenance
- Wipe the surface of the controller with a soft dry cloth. Avoid using wet cloth or cleaning agents to prevent liquid from entering the internal circuit.
- Store the controller and its accessories in a dry, cool, dust-free environment. Avoid direct sunlight and high-temperature baking.
- Do not place heavy objects on the controller to prevent shell deformation and internal component damage.
- Dispose of the controller and its batteries in accordance with local environmental protection regulations. Do not discard as household waste.
After Use
Turn off the game controller when not in use for a long time, and disconnect the power adapter. Unplug all connecting cables (HDMI/AV/data cable) and store them with the controller and accessories to avoid cable damage.
User Tips
- Optimize for FPS: Utilize the 6-axis motion sensing for precise FPS aiming without drift. Experiment with the RC filtering feature for improved accuracy.
- Personalize Your Play: Take advantage of the PC/mobile app to fine-tune joystick curves, trigger sensitivity, and button mappings to match your playstyle for different games.
- Custom Lighting: Explore the 24 RGB customizable lighting effects to create a unique aesthetic for your controller.
- Macro Advantage: For non-competitive play, program macros for complex in-game actions to gain an edge.
Troubleshooting
- Controller not powering on: Ensure the battery is sufficiently charged. Connect the controller to a power source using the provided USB-C cable and allow it to charge for at least 15 minutes before attempting to power on again.
- Wireless connection issues: Make sure the controller and console are both powered on. Long press the controller's pairing button until the indicator flashes to re-enter pairing mode. Ensure no strong magnetic interference is present in the environment.
- Input lag or unresponsiveness: For optimal performance, especially in competitive games, consider using a wired connection. Check the controller's settings via the PC/mobile app to ensure joystick and trigger curves are calibrated correctly.
- Overheating or unusual smell: Immediately stop using the controller and disconnect it from any power source. Contact customer support if the issue persists after the device has cooled down.
- Buttons or joysticks not responding: Try connecting the controller via a wired connection to rule out wireless interference. If the issue persists, perform a factory reset through the PC/mobile app if available, or contact customer support.
Warranty & Support
For product support, warranty claims, or technical assistance, please contact the manufacturer or their authorized representative:
- Manufacturer: Chongqing Blue XinqiuNetwork Technology Co., Ltd.
- Manufacturer Email/Website/Telephone: lansexinqiu2@163.com / 19974943636
- EU Authorized Representative: MJCM SARL
- EU Representative Address: 78 avenue des Champs Elysees, Office 326, PARIS, FR
- EU Representative Email: mjcm190928@gmail.com
Please retain your proof of purchase for any warranty-related inquiries.