
1. Introduction
Thank you for choosing the ESSGOO 10.4" IPS Touch Screen Universal Rotatable Single 1 DIN Car Radio. This manual provides essential information for the safe installation, operation, and maintenance of your new car multimedia player. Please read it thoroughly before use and keep it for future reference.

2. Safety Information
WARNING: Failure to follow these safety instructions may result in fire, electric shock, or other injury or damage.
- To prevent injuries and fires, avoid dropping metal objects into the device.
- If you notice smoke or a peculiar smell from the device, immediately turn off the power.
- Avoid dropping the device or subjecting it to strong collisions to prevent damage.
- Do not install the device in direct sunlight, high temperatures, high humidity, or dusty environments.
- Replace fuses only with those of the same specification. Using an incorrect fuse may cause device failure or fire. Always pull out the power wire before replacing a fuse.
- Lower the volume when driving to remain aware of road and traffic conditions.
- Do not allow the device to get wet during car washing to prevent short circuits, fire, or other malfunctions.
- Connect the unit only to a DC 12V power supply with negative grounding.
- Never install the unit where it obstructs safe driving.
- Do not use the video display function in the front while driving, except for the rear view video camera, to comply with regulations and reduce accident risk.
- Do not expose the unit, amplifier, or speakers to moisture or water to prevent electronic sparks or fires.
3. Package Contents
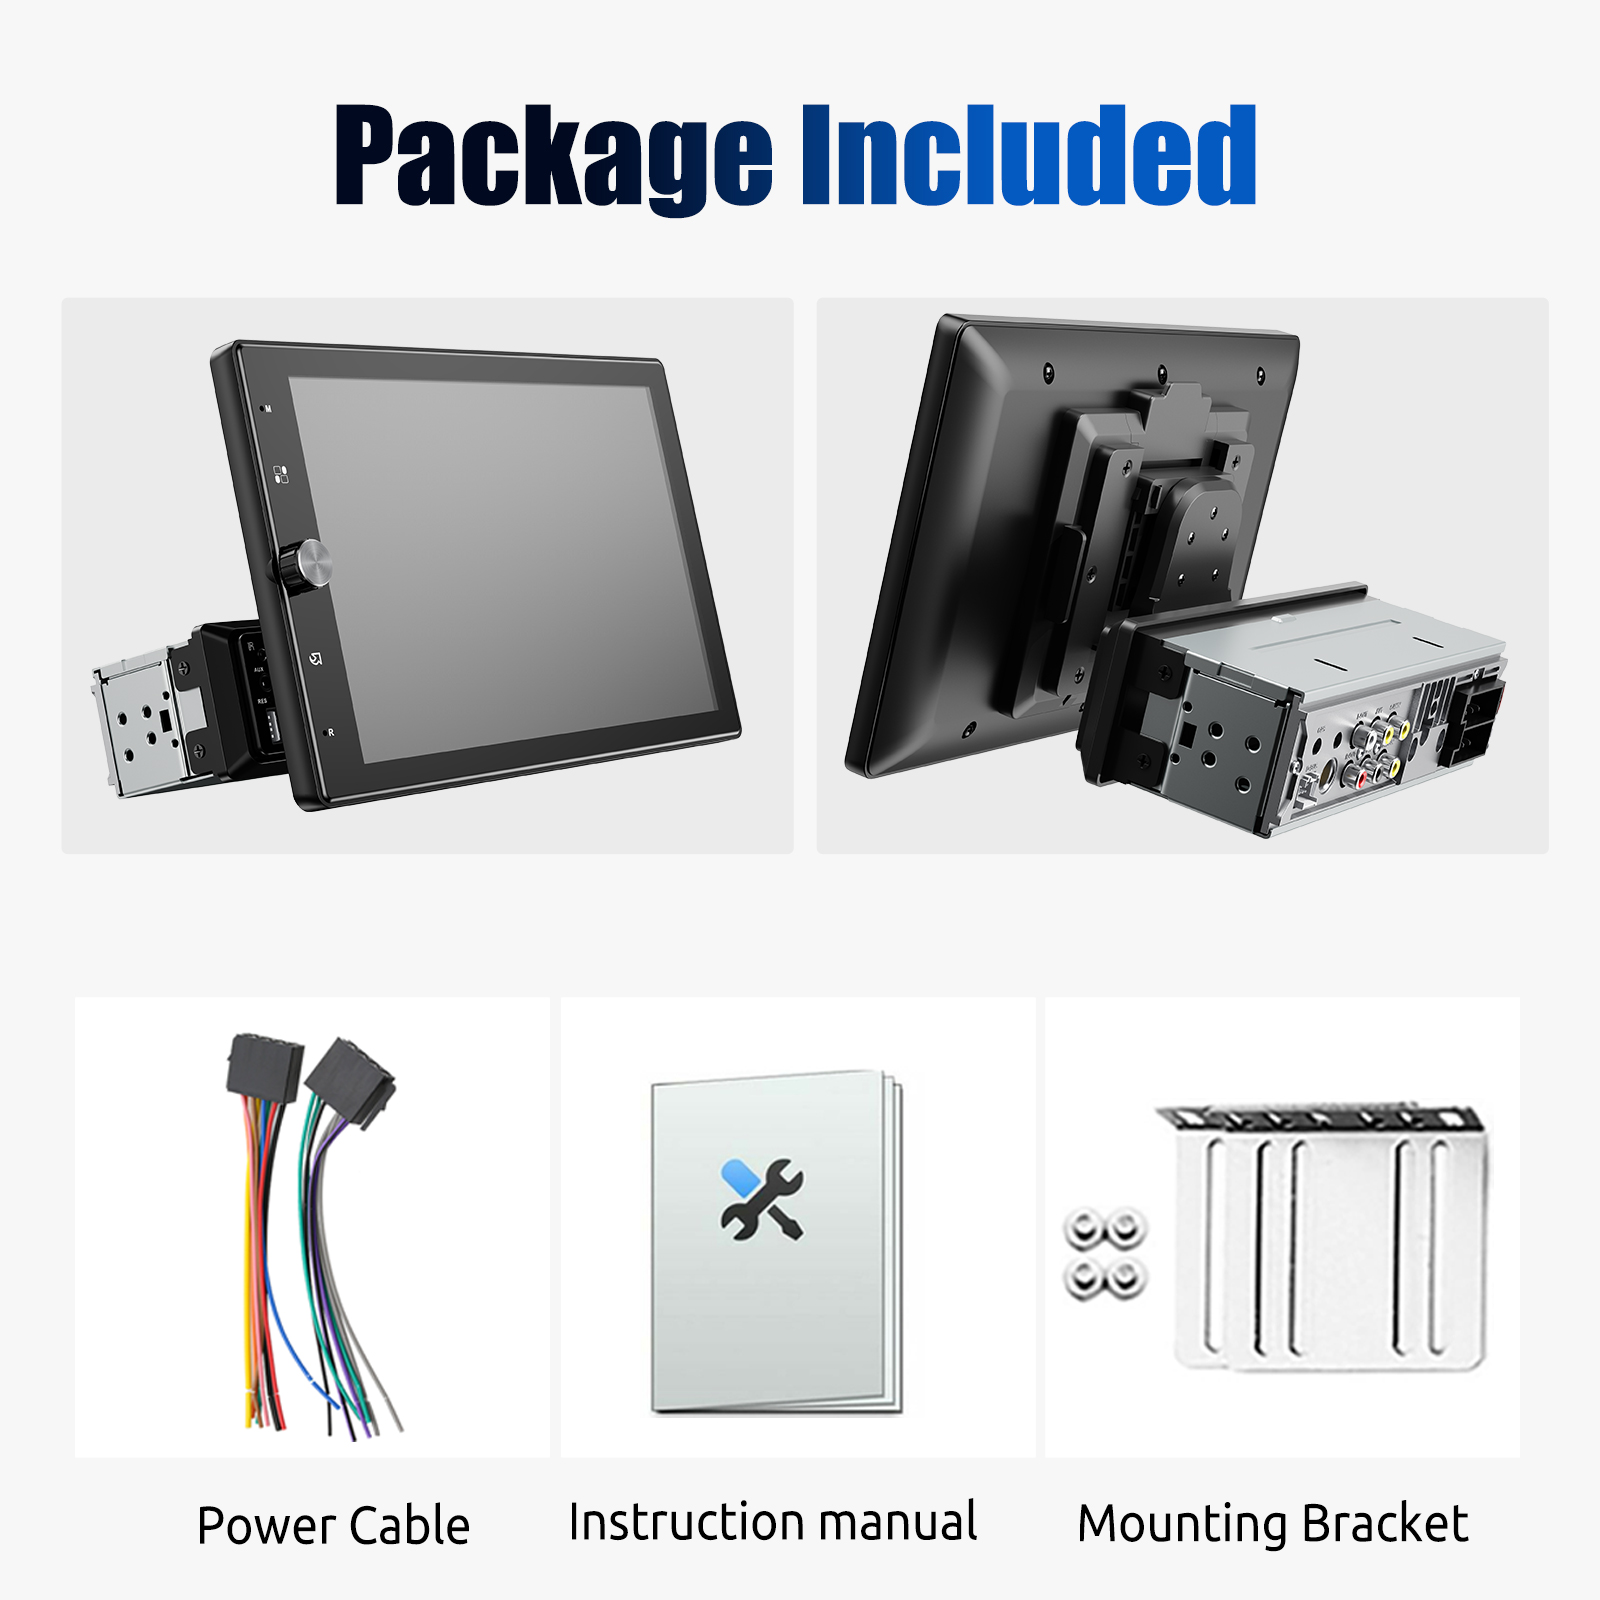
Verify that all items are included in your package:
- 1 x Car Radio Unit
- 1 x Power Cable
- 1 x Mounting Bracket
- 1 x Instruction Manual (this document, also available as PDF)
- 1 x Rear View Camera (optional, depending on purchase variant)
- 1 x Microphone (optional, depending on purchase variant)

4. Installation
4.1 Pre-Installation Notes
- The product is designed for a standard single-DIN mounting space.
- Ensure your vehicle's dashboard dimensions are compatible, typically 178mm (L) x 50mm (H).
- The power cord follows the ISO standard. Verify that the power connector of your original car radio matches the ISO connector. If not, an additional adapter cable may be required (not included).


4.2 Installation Steps
- Position the unit in the proper place in your dashboard.
- Connect the unit according to the wiring diagram provided in section 4.3. Test all functions to ensure they work correctly before finalizing.
- Once tested, wrap all connection lines with insulation tape to ensure complete and secure wiring.
- Bend the hooks of the metal mounting bracket and insert the bracket into the instrument panel, then fix it securely.
- Slide the car radio unit into the metal mounting bracket until it locks into place.
4.3 Wiring Diagram
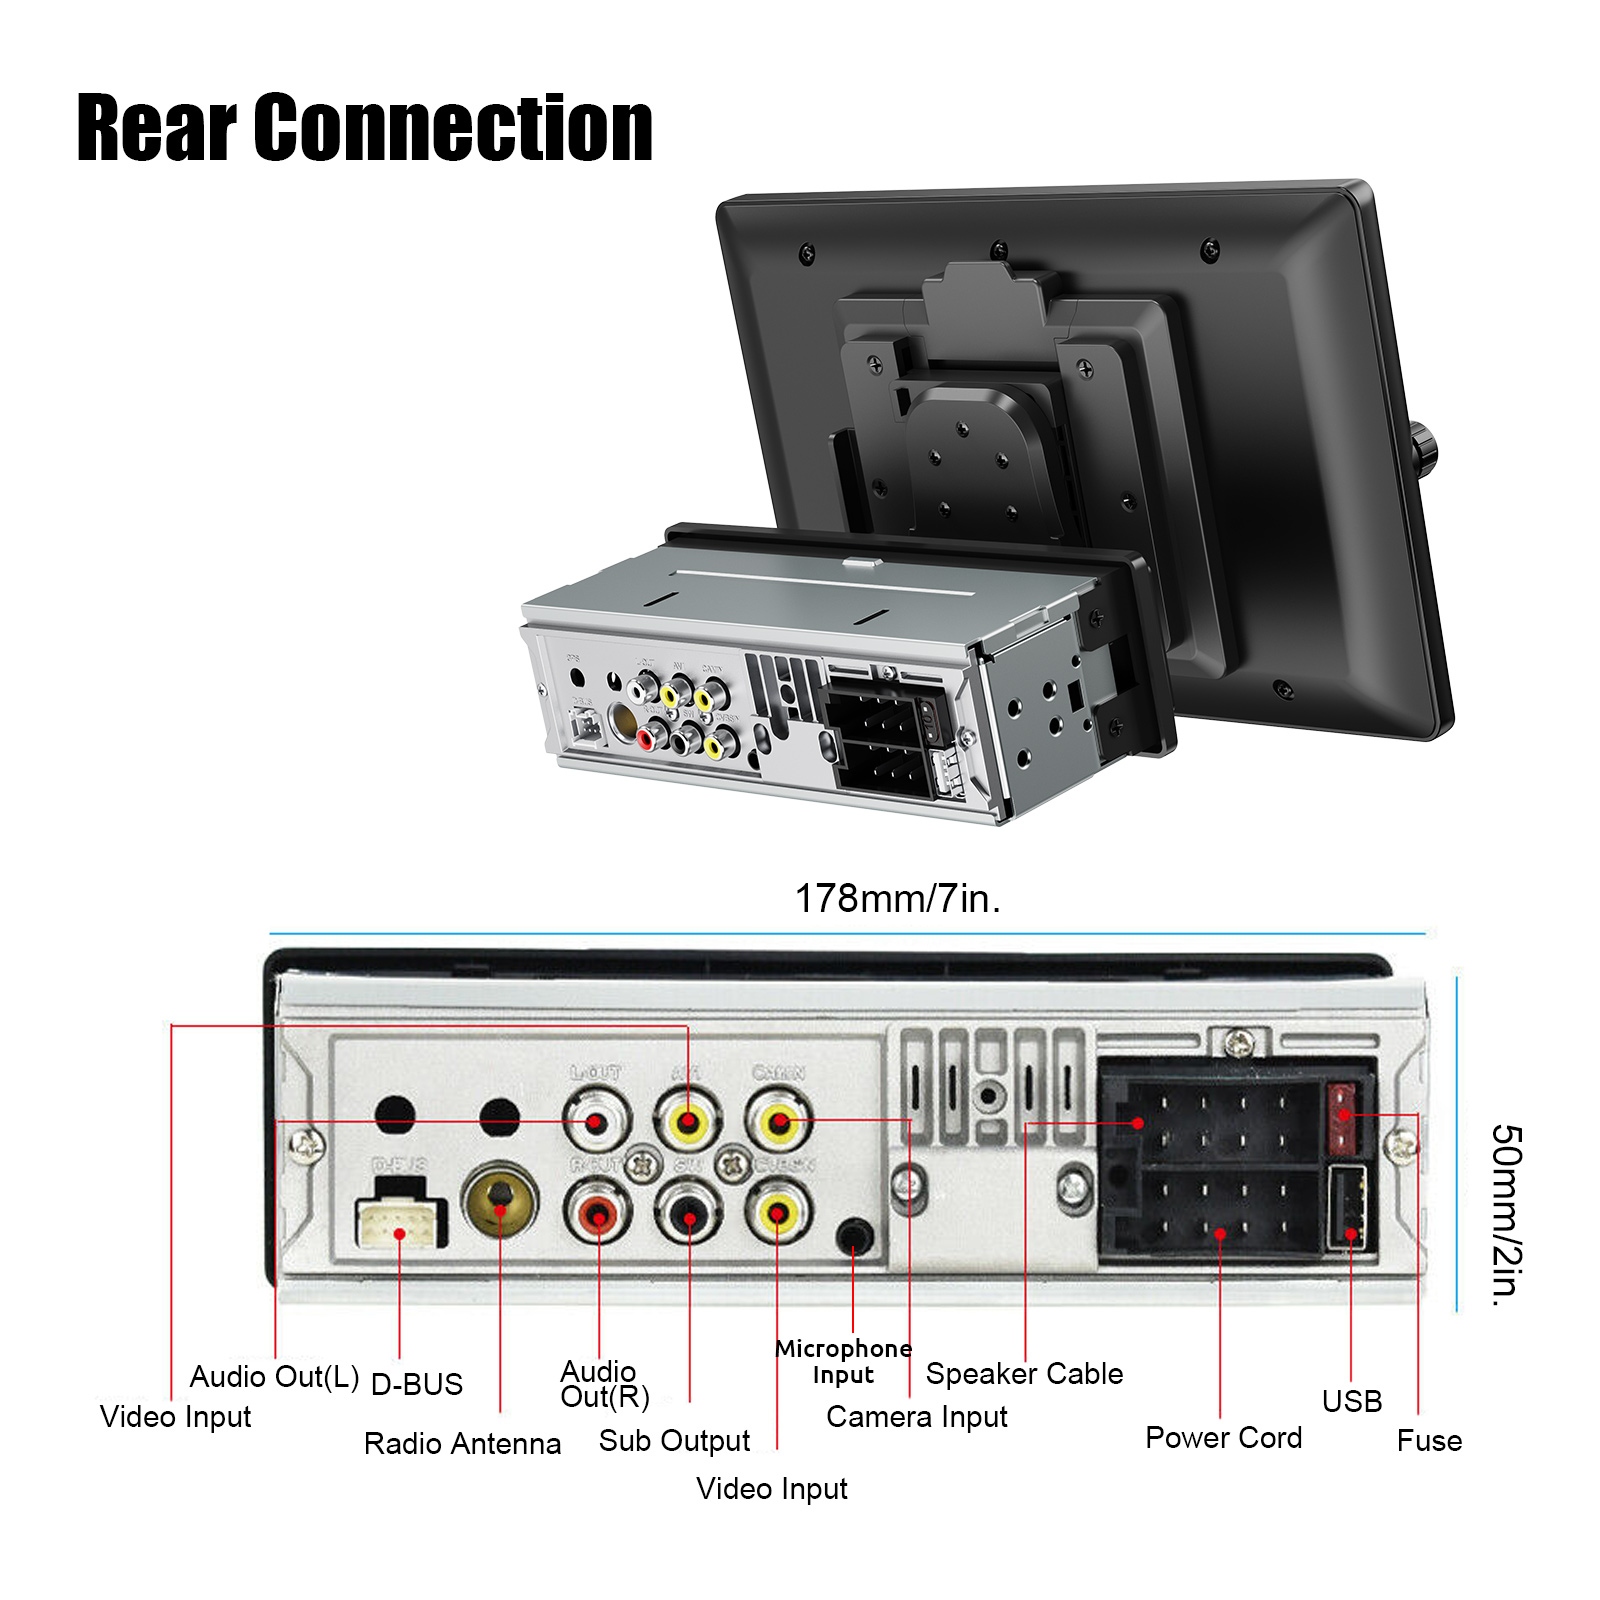
Please check the speaker line carefully before installation. If any grounding or touching occurs, please correct the connection, otherwise the unit may be damaged.
Rear Connection Overview:

5. Product Features
- Display: 10.4-inch HD IPS capacitive touch screen, 1024x600 resolution, 178° viewing angle. Manually rotatable 90° (anticlockwise).
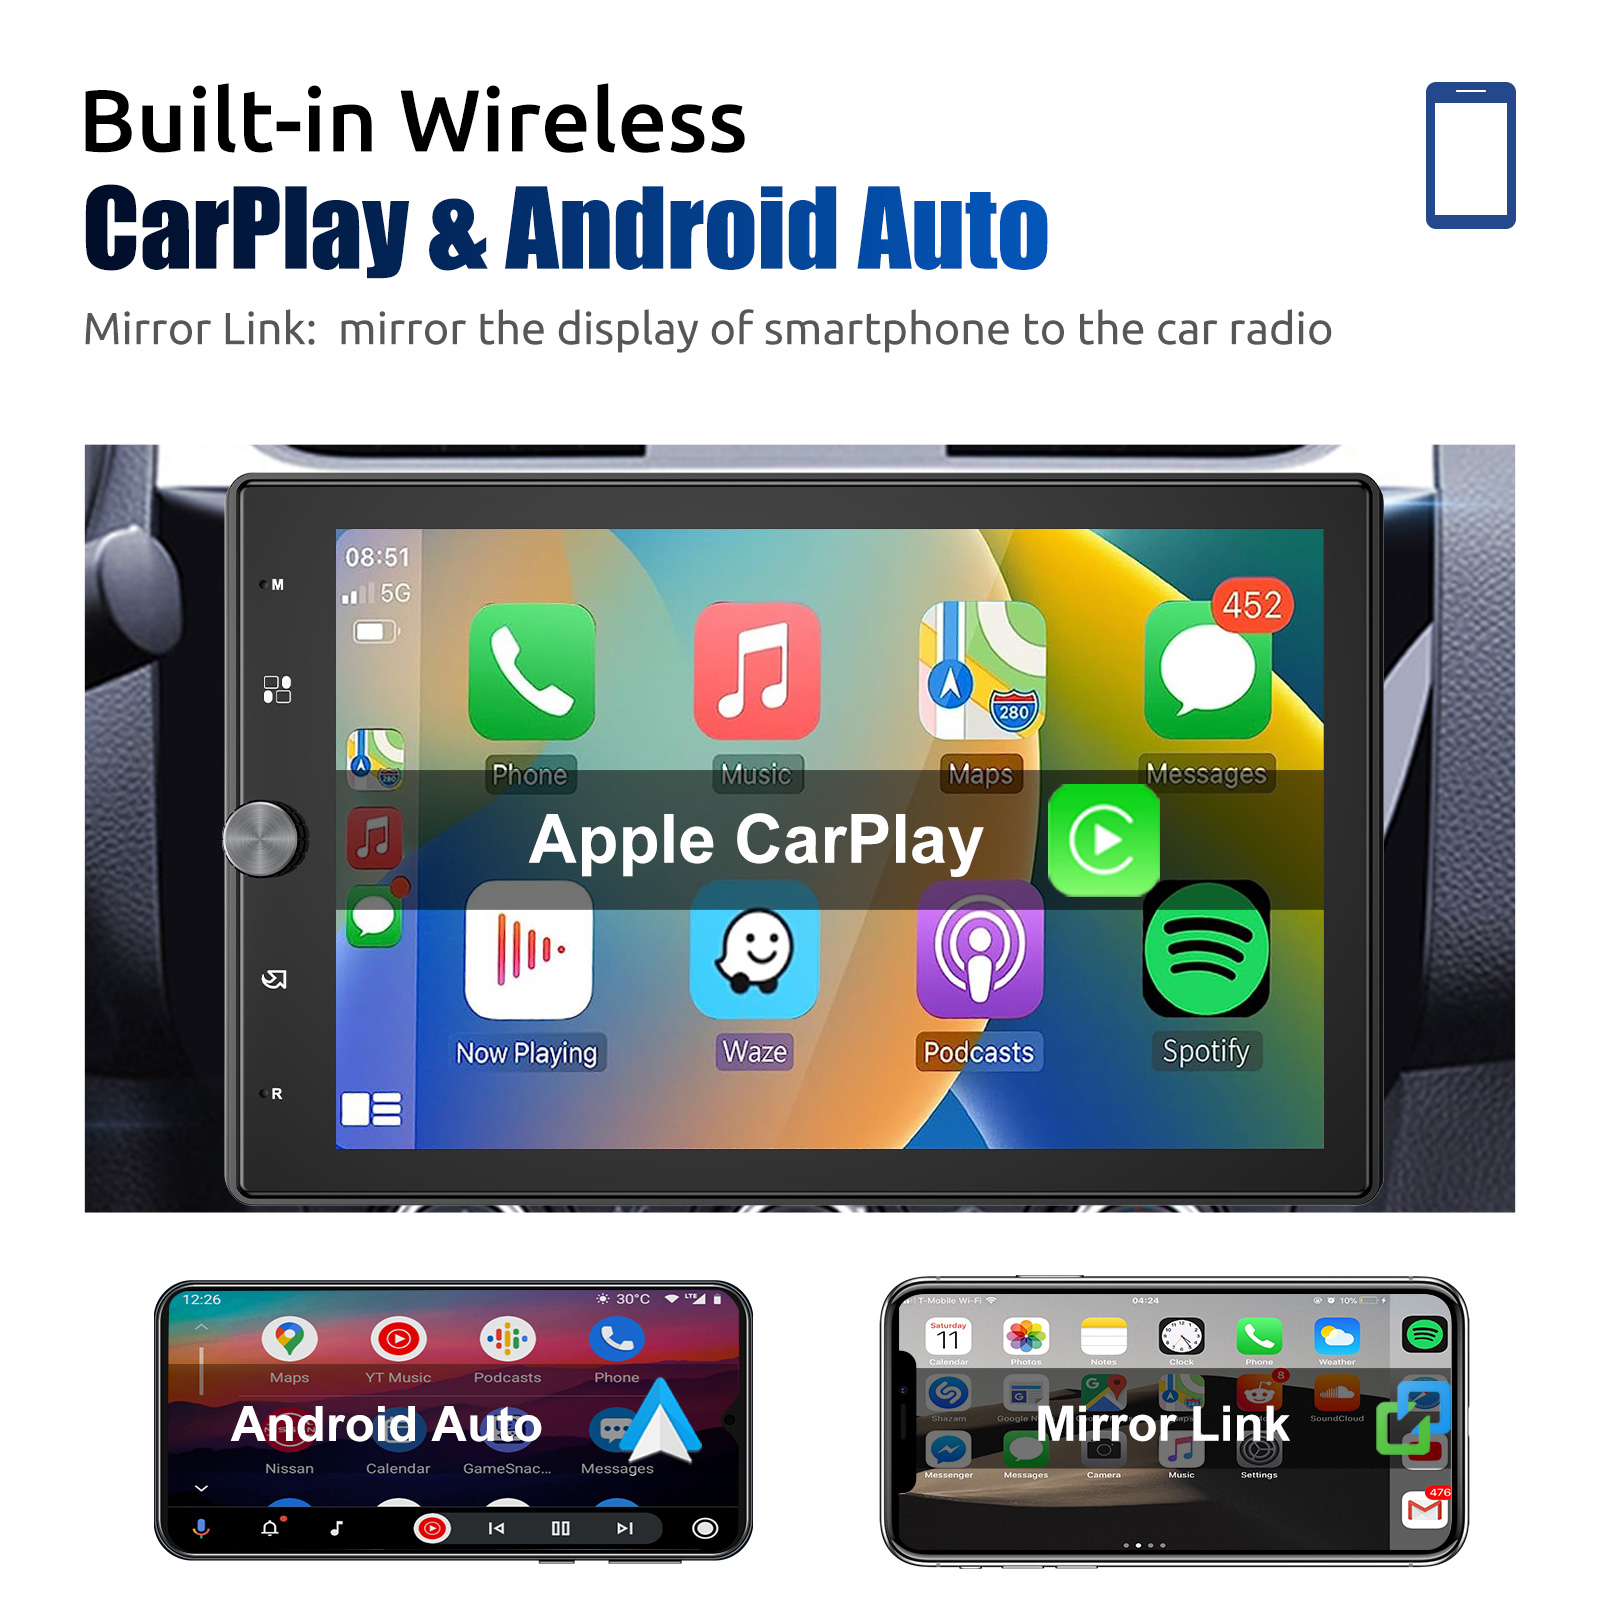
- Connectivity: Wireless Apple CarPlay & Android Auto, Mirror Link (iOS & Android), Bluetooth 4.2 (hands-free calls, music playback, automatic phone book loading).
- Audio: FM Radio (87.5MHz~108.00MHz), MOSFET amplifier with 4 x 45 Watts max power output, Bass & Treble control, L&R channel stabilizer.
- Inputs: USB port, TF card slot, AUX-in (3.5mm plug), Rear Camera Input, USB DVR Input, External Microphone Input.
- Media Support:
- Audio formats: MP3/WMA/WAV/MKV/FLAC/OGG/APE.
- Video formats: RM/RMVB/DVD(VOB)/VCD(DAT)/MP1/MP2/DIVX/XVID/MP4/H263/H264/FLV/3GP/SWF/AVI/ASF/MJPEG (supports 1080P video format).
- Additional Functions: Steering Wheel Control (SWC) support, Power-off with auto-memory store function (radio/TF/USB mode), Clock Function, Mute Function, Video input Function (displayed at the same time), USB Charging.

6. Basic Operation
6.1 Front Panel Controls
6.2 Remote Control Description (Optional)
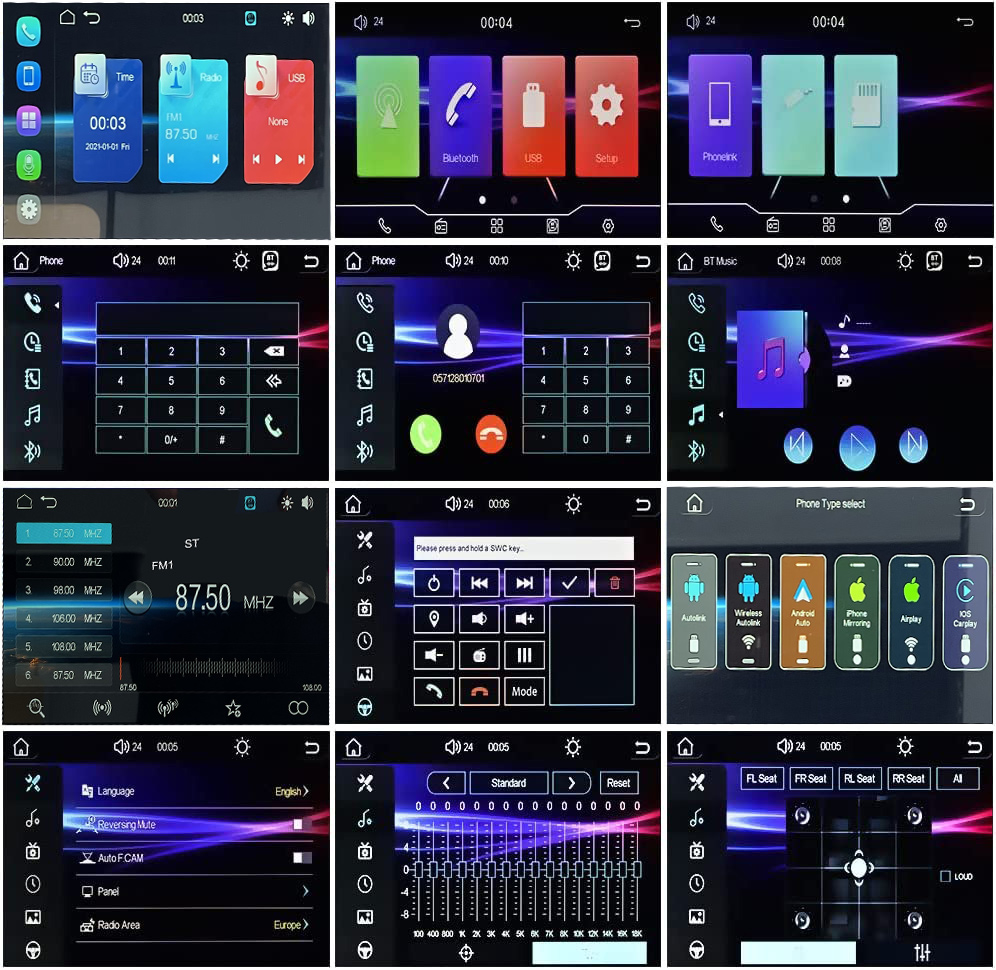
6.3 Steering Wheel Control Learning
To configure steering wheel controls:
- Access the 'Wheel' setting in the Basic Setup menu.
- Long press the desired button on your steering wheel.
- Short press the corresponding UI function on the car radio screen.
- Press 'ENTER' to save the setting.
- To reset all steering wheel controls, press the 'Default' key.
6.4 Main User Interface (UI)
The main UI provides access to various functions such as Radio, PhoneLink, Bluetooth, Setup, BT Music, Wallpaper, Tachograph, AV IN, USB, and SD.
You can adjust various settings through the UI, including brightness, contrast, saturation, and equalizer presets (Jazz, Classic, Rock, Pop, Soft, User).
7. Connectivity and Multimedia
7.1 Wireless CarPlay & Android Auto
Immerse yourself in a seamless and user-friendly infotainment experience. Connect your iPhone to Apple CarPlay or your Android smartphone to Android Auto to securely access calls, texts, navigation, music, and more. Operate intuitively via the touchscreen or voice control.

Connection Steps: Connect the car radio's Bluetooth to your phone, then select CarPlay or Android Auto on the unit and follow the on-screen prompts.
7.2 Mirror Link
The Mirror Link function allows you to mirror your smartphone screen (iOS and Android) to the car radio. Connect your mobile phone to the unit with a USB cable. When prompted, ensure USB debugging is enabled on Android phones (Android 4.0-9.0 supported). This allows you to display apps like Google Maps, Spotify, or YouTube on the larger car screen.
Important: Do not playback video or use your mobile phone for distracting activities while driving.
7.3 Bluetooth Handsfree & Music Playback
Built-in Bluetooth 4.2 supports hands-free calls, Bluetooth music playback, and automatic phone book loading. To pair, use the BT function on the unit, search for the device on your phone, and enter the password '0000' if prompted.

7.4 FM Radio
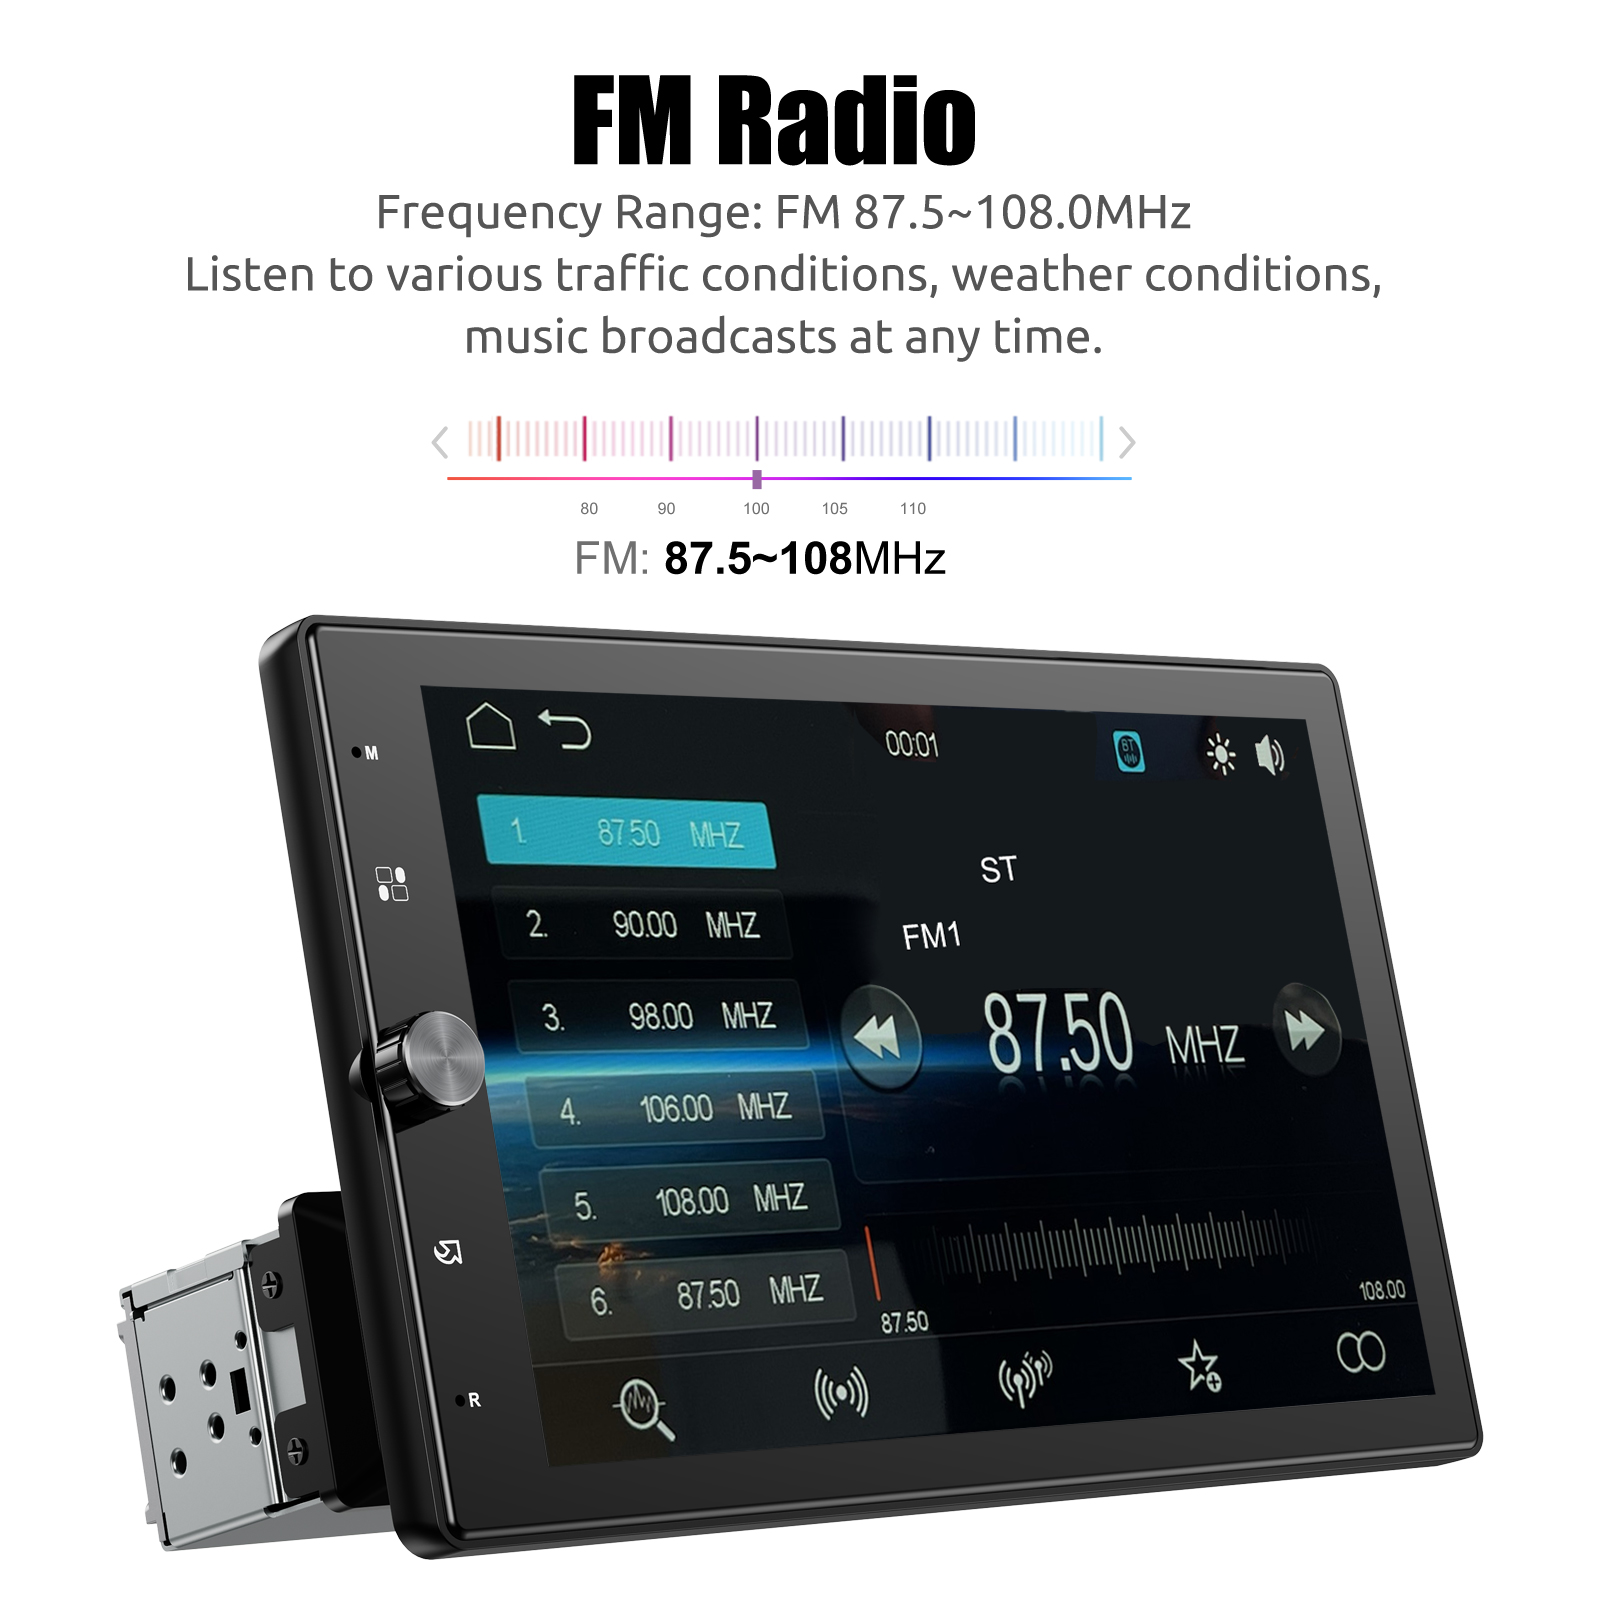
The multimedia radio supports FM frequencies from 87.5MHz to 108.0MHz. You can listen to real-time road conditions, news broadcasts, and weather forecasts. The unit also features power-off auto-memory for radio stations.

7.5 Multiple Input Ways (USB, TF, AUX)
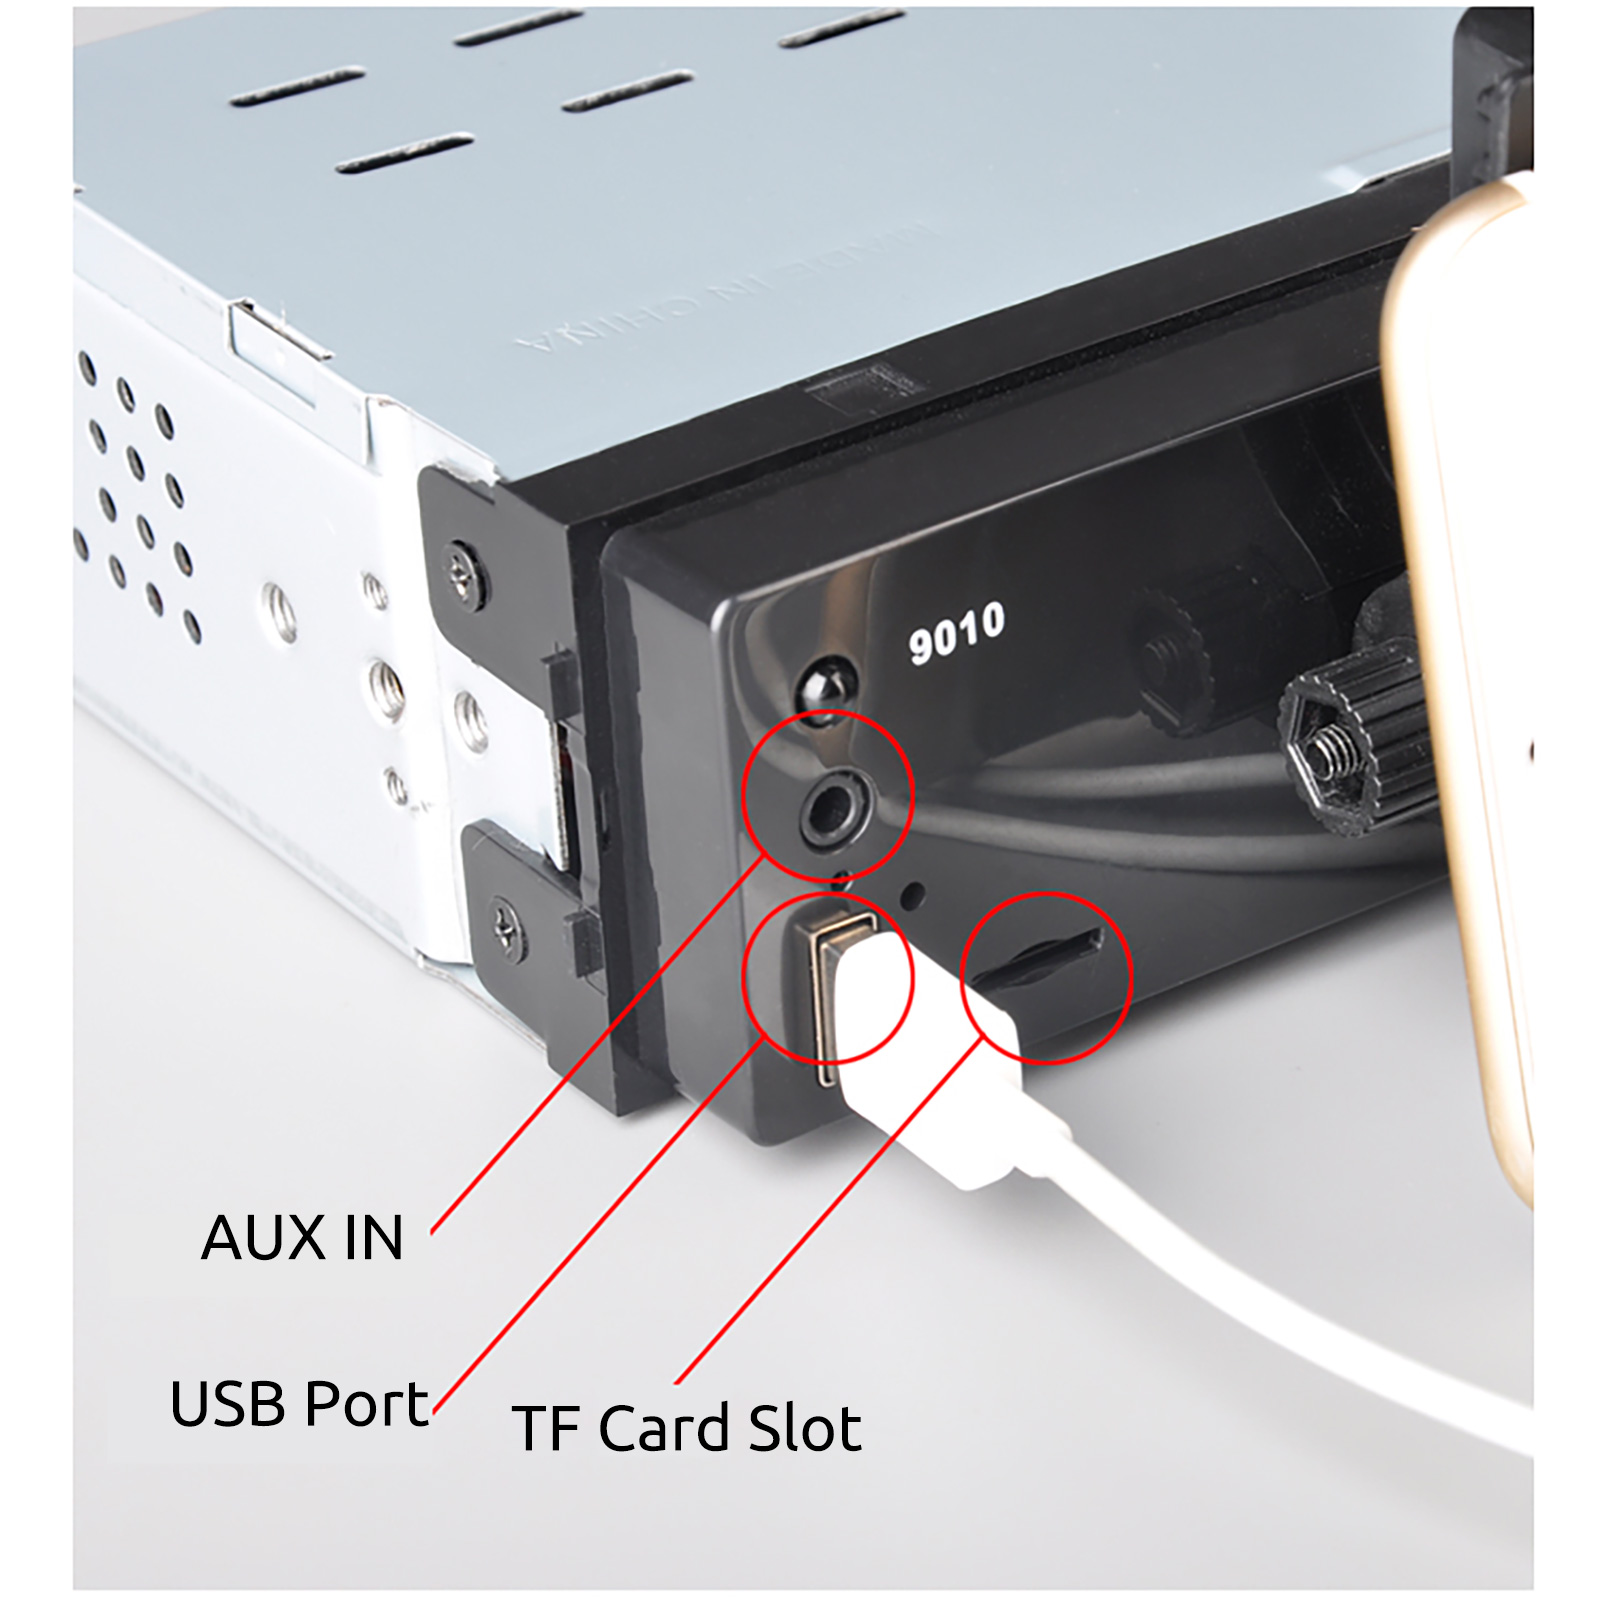
The 1 DIN car stereo supports vast USB/SD storage equipment. You can download songs and videos to play directly. The AUX audio input (3.5mm plug) allows external audio sources like navigation devices, MP3 players, or mobile phones to be connected, outputting sound through the car's speakers. USB interfaces also support charging for most mobile phones.

7.6 Rear View Camera Input
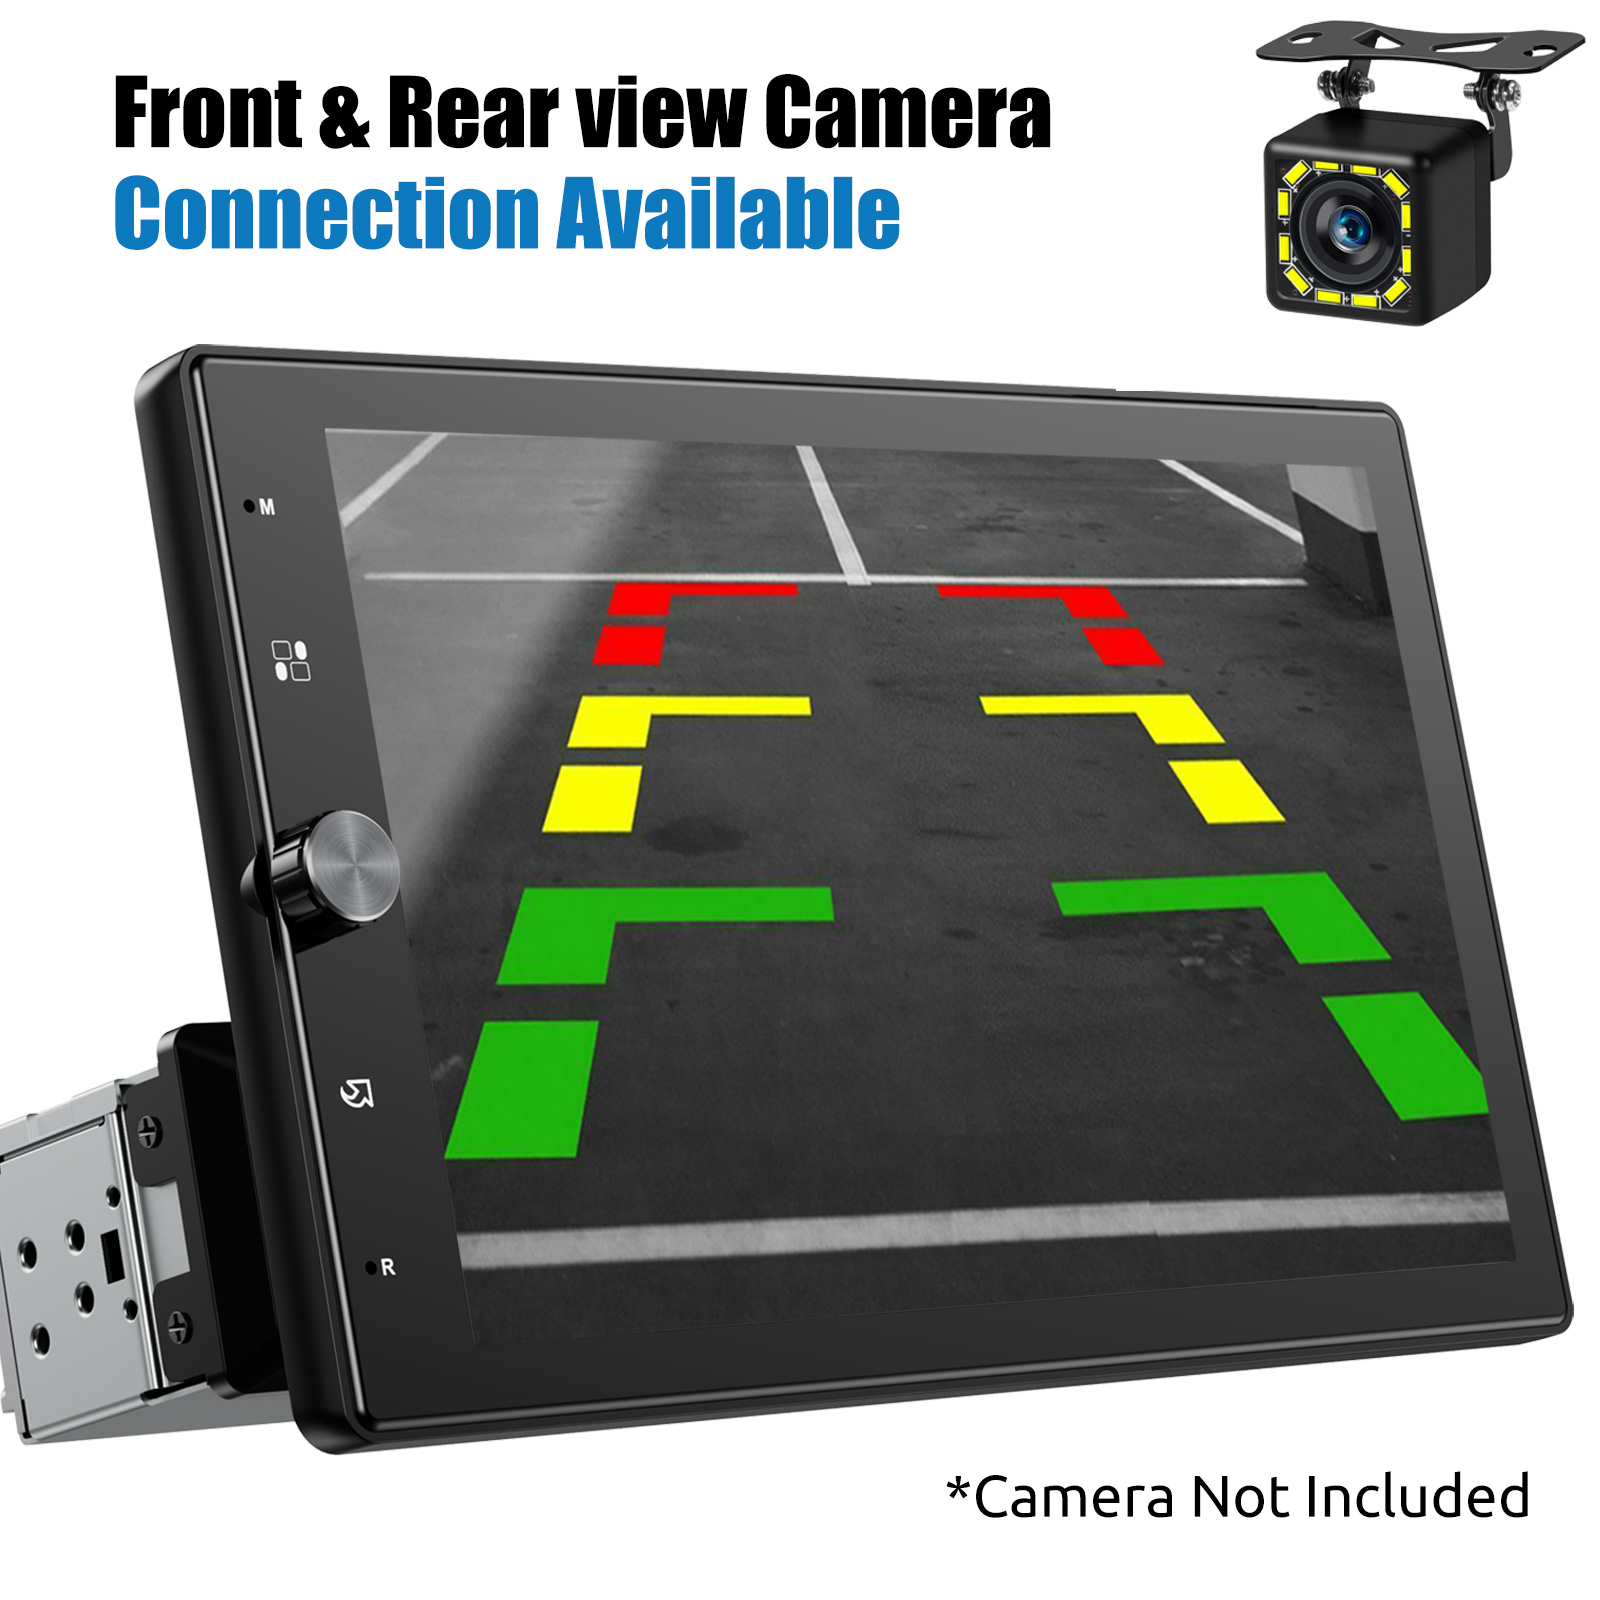
After connecting a rear view camera (not included), the radio will automatically display the reversing image as soon as you engage reverse gear, making daily reversing safer.

8. Specifications
| Feature | Specification |
|---|---|
| System | WINCE (non-Android) |
| Screen Size | 10.4 inches |
| Screen Resolution | 1024x600 IPS capacitive touch screen |
| Viewing Angle | 178° |
| Rotating Angle | Manually Rotate 90° (anticlockwise) |
| Working Voltage | 12V |
| Bluetooth Version | 4.2 |
| Output Power | 4 x 45 Watts (MOSFET amplifier) |
| Play Modes | U disk / AUX / Bluetooth |
| Radio Frequency Range | FM 87.5 - 108.0 MHz |
| Audio Formats | MP3/WMA/APE/FLAC/WAV/OGG |
| Video Formats | RM/RMVB/DVD/(VOB)/VCD(DAT)/MP1/MP2/DIVX/MP4/H263/H264/FLV/3GP/SWF/AVI/ASF/MIPEG (1080P support) |
| OSD Languages | English, Portuguese, Spanish, Russian, German, Italian, Persian, French, Japanese, Turkish, Czech, Chinese (Simplified), Chinese (Traditional), Polish, Yiddish |
| Signal-to-Noise Ratio (SNR) | 65dB |
| Frequency Response | 20Hz-20KHz |
| Loudspeaker Impedance | 4Ω-8Ω |
| Tone Control (Bass) | +/-7dB (100Hz) |
| Tone Control (Treble) | +/-7dB (100Hz) |
| FM Sensitivity | 25dB |
| FM Selectivity | 60dB |
| FM Separation | 35dB |
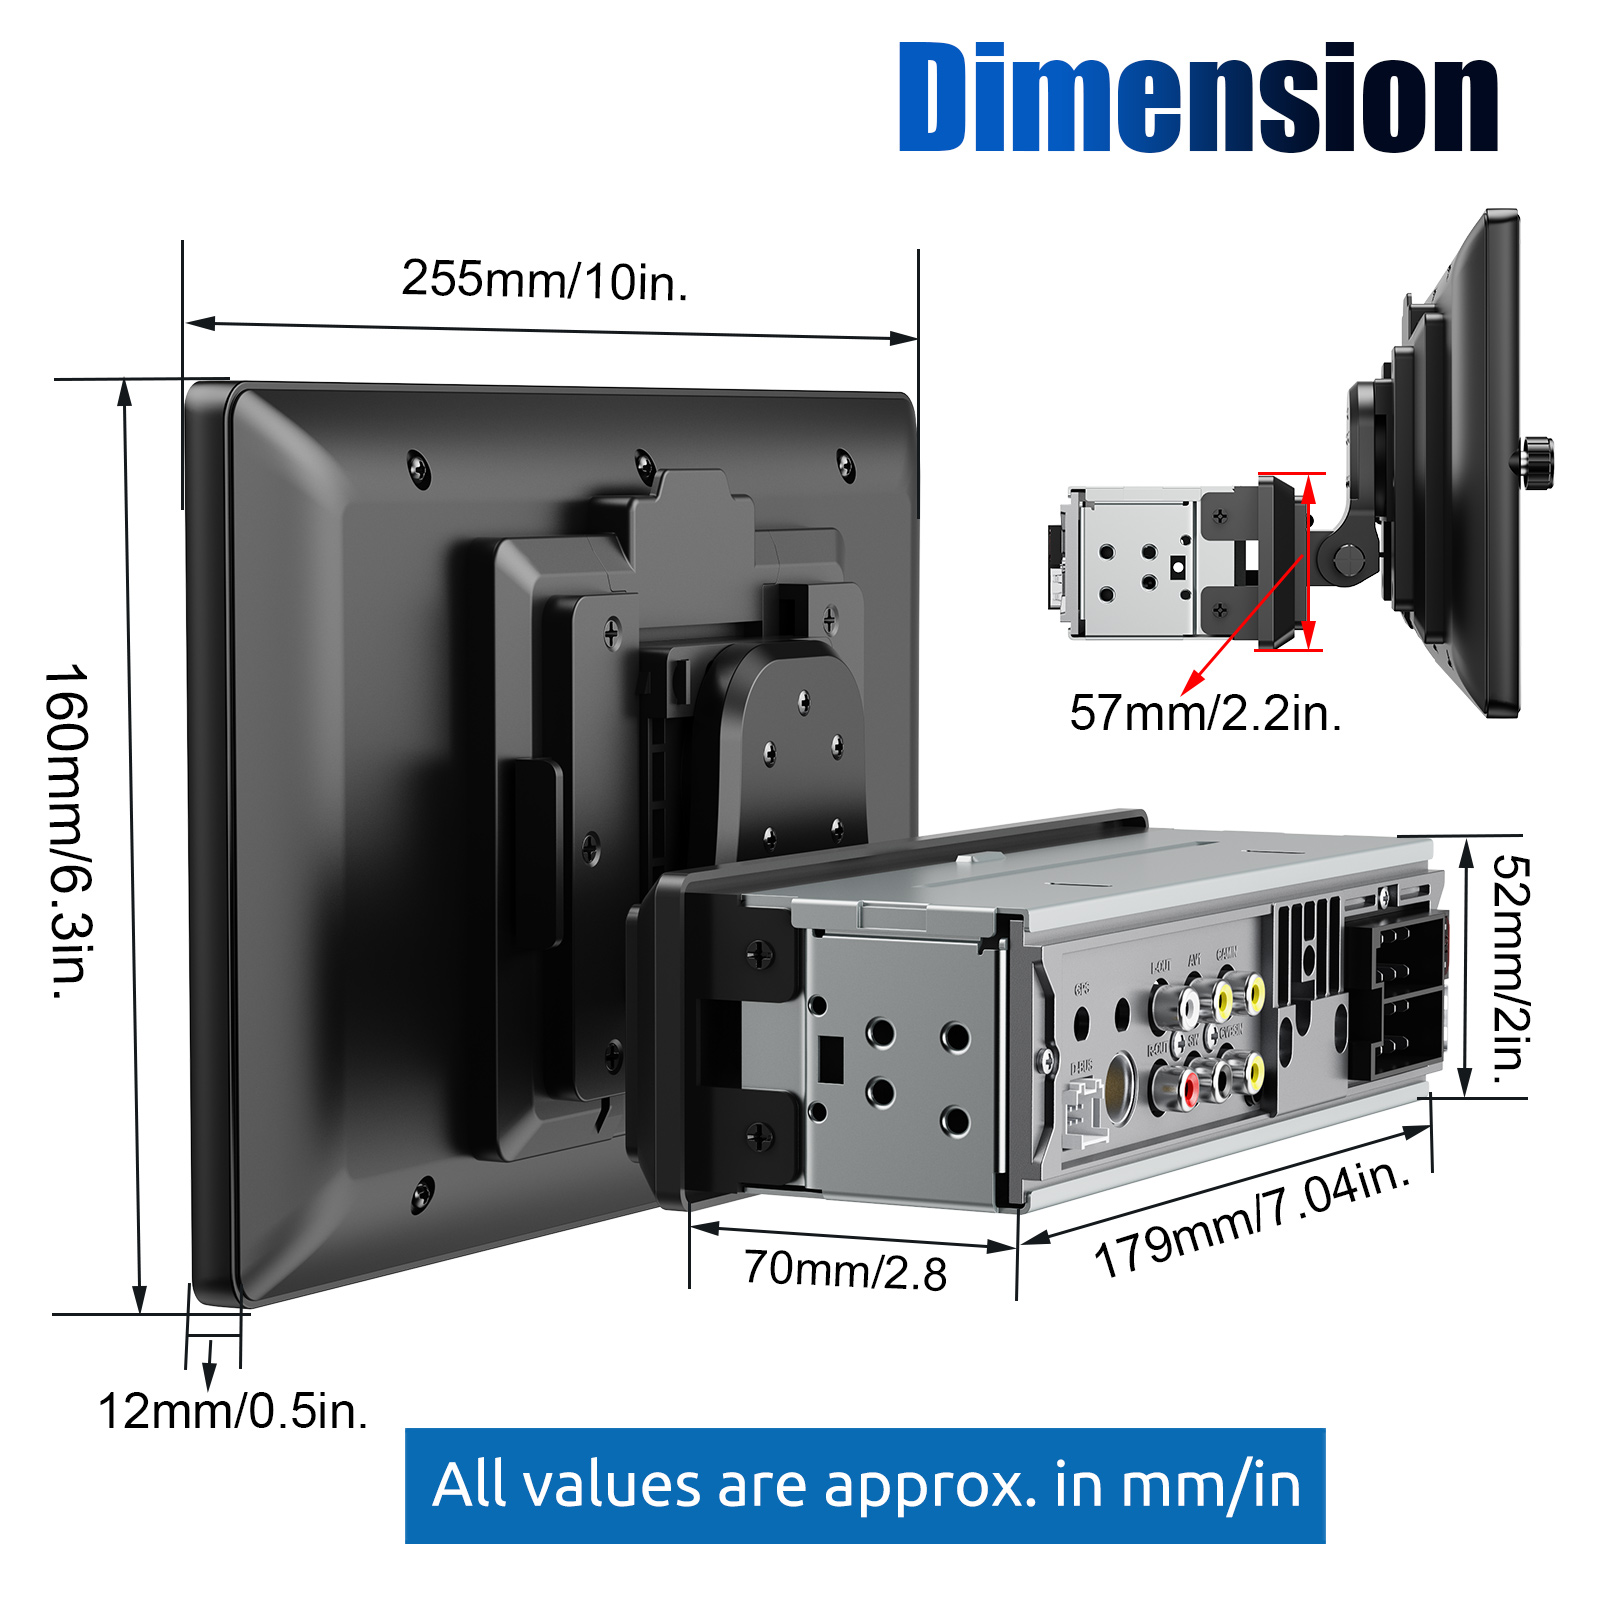
| Item Size | 255mm x 160mm x 85mm (approx. 10in x 6.3in x 3.3in) |
| Installation Size | 179mm x 70mm x 52mm (approx. 7in x 2.8in x 2in) |

9. User Tips
- Compatibility: This unit has been successfully installed in various vehicles, including older models like the Land Rover Discovery 2 (2002). Always verify dashboard dimensions (178x50mm) and ISO connector compatibility before installation.
- Installation: Users report quick installation. Ensure all wiring is correctly connected and insulated to prevent issues.
- Performance: Many users praise the fast mobile connection (CarPlay/Android Auto) and good sound quality.
- Screen Care: While the screen offers great visuals, some users have reported fragility. Handle the screen with care during installation and daily use to prevent damage.
- Wiring Harness: The product's power cord is ISO standard. If your vehicle's original radio connector is not ISO, an additional adapter harness will be needed. Search online using your car's make, model, year, and 'ISO harness' to find the correct adapter.
- Memory: This unit runs on a WINCE system, not Android. Therefore, traditional RAM and ROM specifications as found in Android devices do not apply in the same way.
10. Troubleshooting
- No Power: Check all power connections according to the wiring diagram. Ensure the fuse is intact and of the correct specification. Verify proper grounding.
- No Sound: Check speaker cable connections. Ensure volume is not muted or set too low. Verify audio output settings.
- Screen Issues (e.g., unresponsive, frozen): Try pressing the 'RES' (Reset) button on the front panel with a sharp, non-metallic object.
- Bluetooth Connection Problems: Ensure Bluetooth is enabled on both the car radio and your mobile device. Verify the pairing password (default is '0000').
- MirrorLink Not Working: For Android phones, ensure 'USB debugging' is enabled in your phone's developer options. Confirm any prompts on both the phone and car radio.
- Rear View Camera Not Displaying: Check the camera input connection. Ensure the camera is powered correctly. Verify the reversing signal connection.
11. Maintenance
- Cleaning the Screen: Use a soft, dry, lint-free cloth to clean the touchscreen. Avoid using harsh chemicals, abrasive cleaners, or solvents, as these can damage the screen surface.
- General Cleaning: Keep the unit's exterior clean by wiping it with a soft, damp cloth. Ensure no liquids enter the unit.
- Ventilation: Ensure the ventilation openings on the unit are not blocked to prevent overheating.
- Fuse Replacement: If a fuse blows, replace it only with a fuse of the same type and rating. Consult a professional if unsure.
12. Warranty and Support
For specific warranty details, please refer to the terms provided by your seller at the time of purchase. If you encounter any issues not covered in this manual, please contact the seller's customer support for assistance.
A PDF version of this user manual is available for download. You can find it by searching for 'F133 Operation Manual' or by visiting the product page and looking for 'Item guides & documents'.