1. Introduction
The Realm MIG-250 is a professional 2-in-1 multi-function welding machine designed for versatility and portability. This compact inverter welder is suitable for heavy-duty welding tasks in various environments, including construction sites, workshops, farms, or home garages. It delivers strong, stable, and precise arcs for clean, durable welds across a range of materials such as aluminum, stainless steel, iron, carbon steel, and alloy steel.
This manual provides essential information for the safe and effective operation, maintenance, and troubleshooting of your MIG-250 welding machine. Please read it thoroughly before use.

2. Safety Information
Always prioritize safety when operating welding equipment. Failure to follow safety precautions can result in serious injury or death.
General Safety Precautions:
- Personal Protective Equipment (PPE): Always wear a welding helmet with appropriate shade, flame-resistant clothing, welding gloves, and safety shoes. The included welding mask provides basic protection, but additional PPE is recommended.
- Ventilation: Ensure adequate ventilation to remove welding fumes, which can be hazardous to your health.
- Electrical Safety: Connect the machine to a properly grounded power supply. Do not operate in wet conditions. Inspect cables and connections for damage before each use.
- Fire Hazards: Keep flammable materials away from the welding area. Have a fire extinguisher readily available.
- Arc Rays: Welding arcs produce intense visible and invisible (UV and IR) rays that can burn eyes and skin. Protect yourself and bystanders.
- Hot Metal: Welded materials and equipment remain hot for a significant period after welding. Handle with care to prevent burns.
Machine Safety Features:
The MIG-250 is equipped with multiple safety protections to ensure reliable operation:
- Over-current Protection: Automatically shuts down the machine if the output current exceeds safe limits.
- Over-temperature Protection: Activates if the internal temperature becomes too high, preventing damage to components.
- Overload Protection: Safeguards the machine from excessive electrical load.
- IP21S Protection: Provides protection against solid objects larger than 12.5mm and vertically falling water drops.

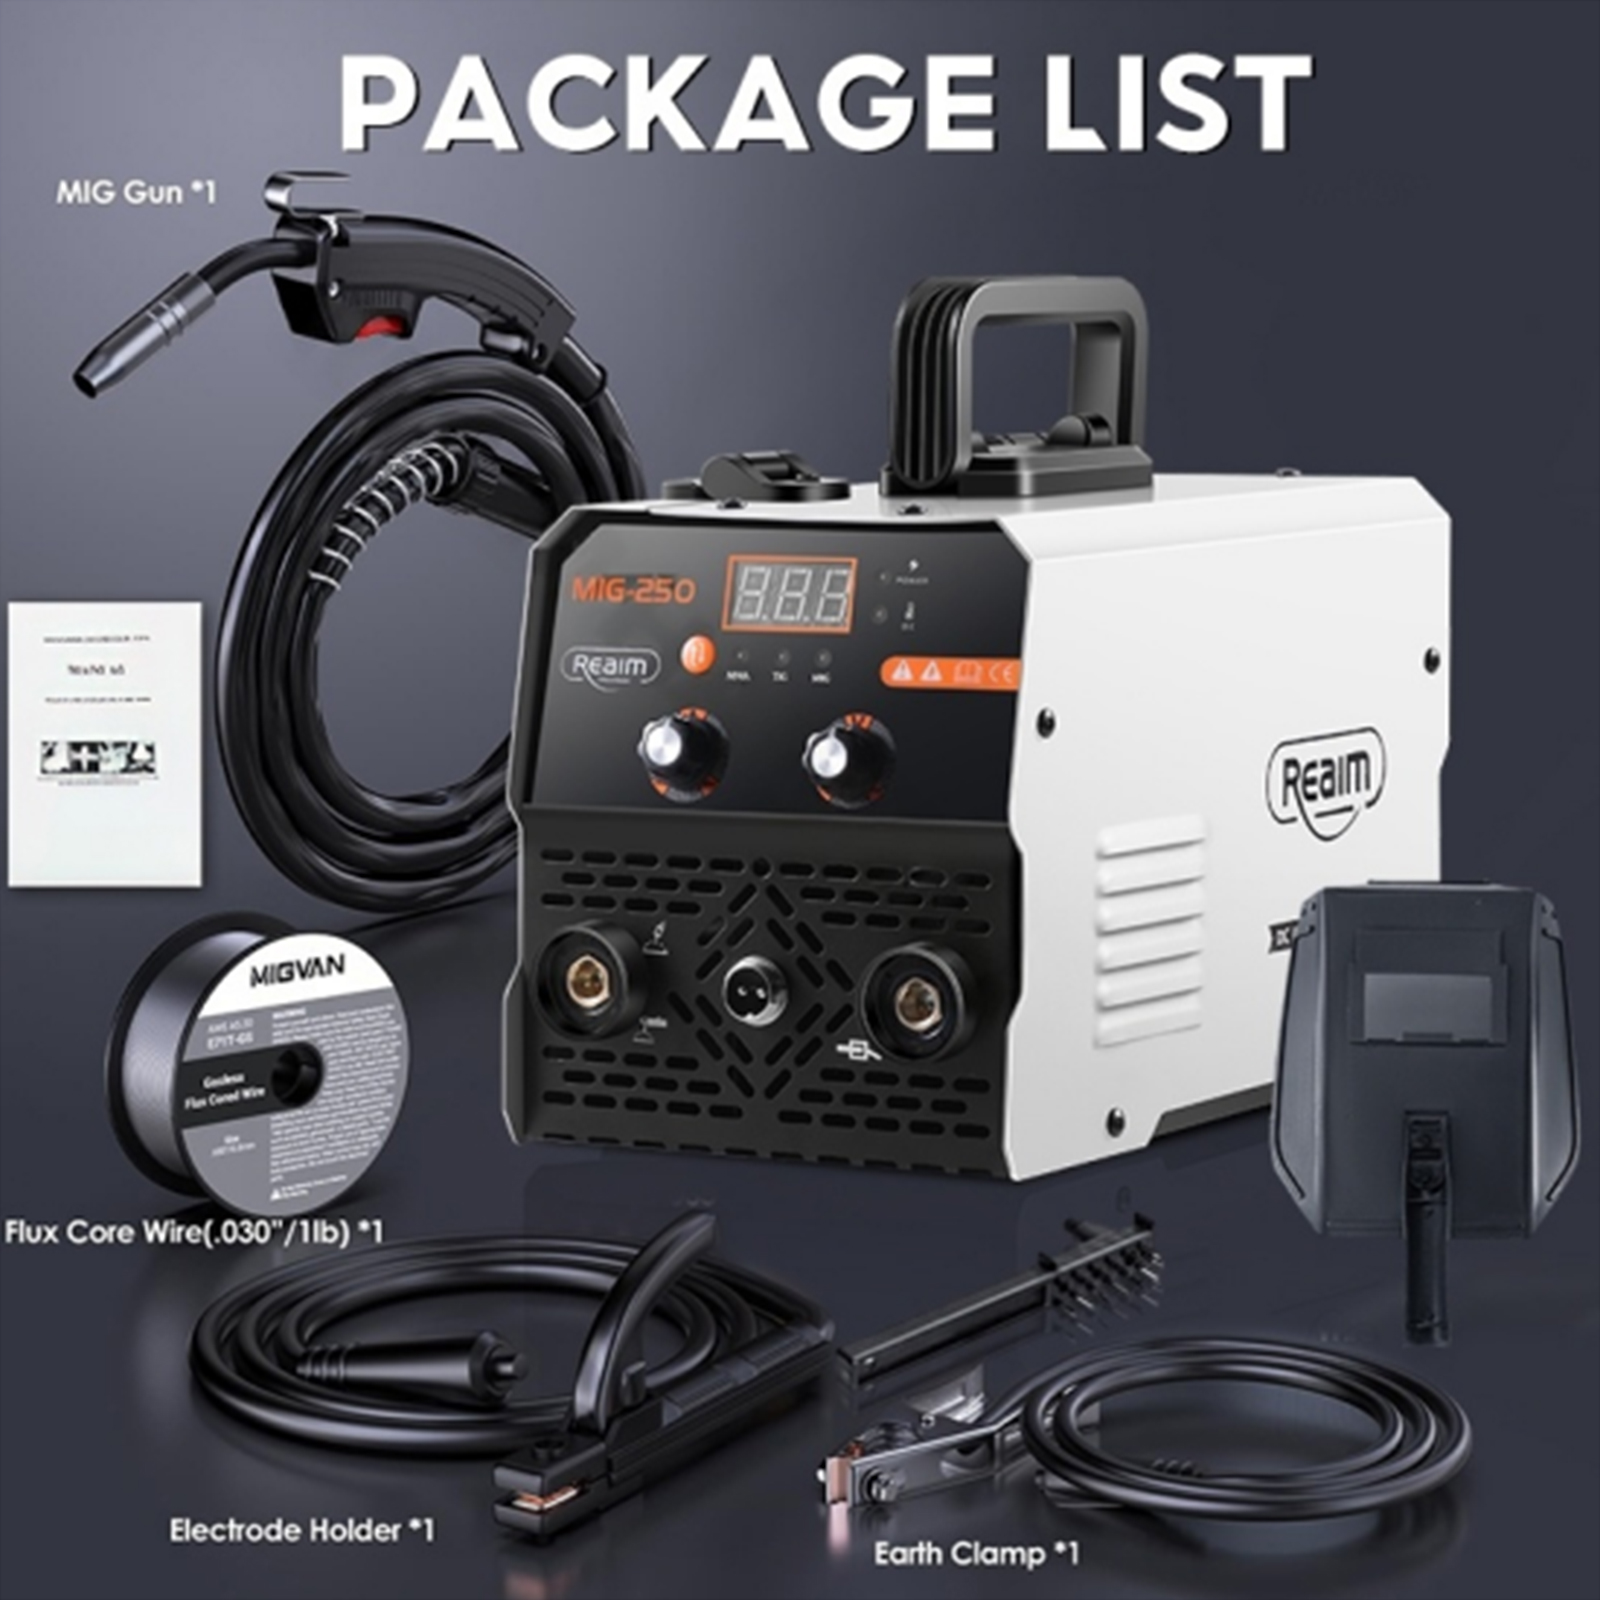
3. Package Contents
Carefully unpack your Realm MIG-250 welding machine and verify that all items listed below are present and undamaged:
- 1 x Realm MIG-250 2-in-1 Welding Machine (MIG/MMA)
- 1 x MIG-14AK Torch (with 450g welding wire pre-loaded)
- 1 x 200A Electrode Holder
- 1 x 200A Ground Clamp
- 1 x Welding Mask (Protective Face Shield)
- 1 x Slag Brush
- 1 x Wire Guide Tube
- 1 x User Manual (English instructions)
4. Product Overview and Features
The Realm MIG-250 is a multi-process inverter welder featuring advanced IGBT technology for efficient and stable welding performance. Its compact design and intuitive controls make it suitable for both beginners and experienced welders.
Key Features:
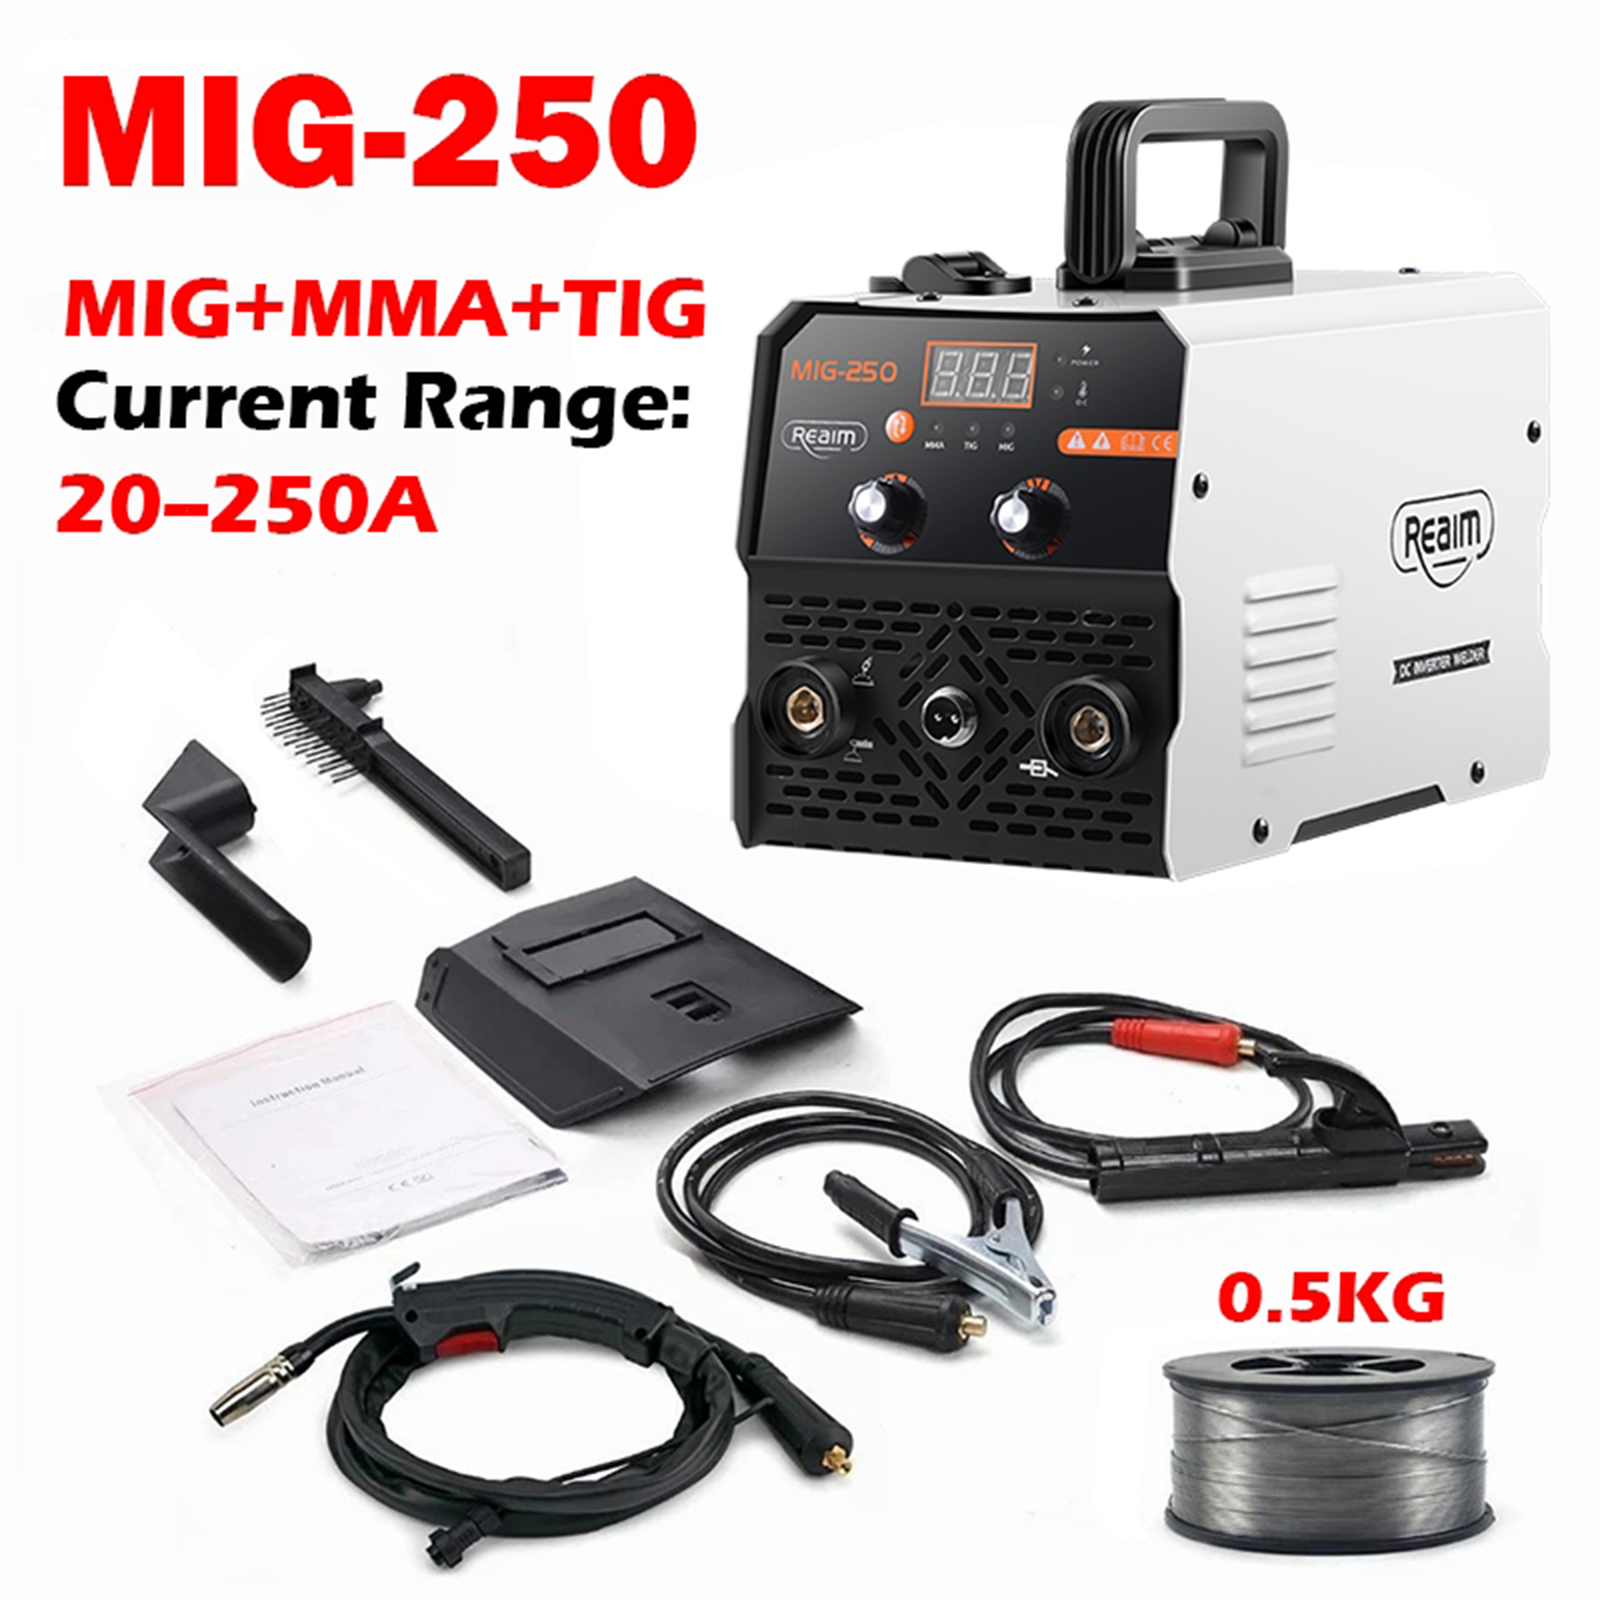
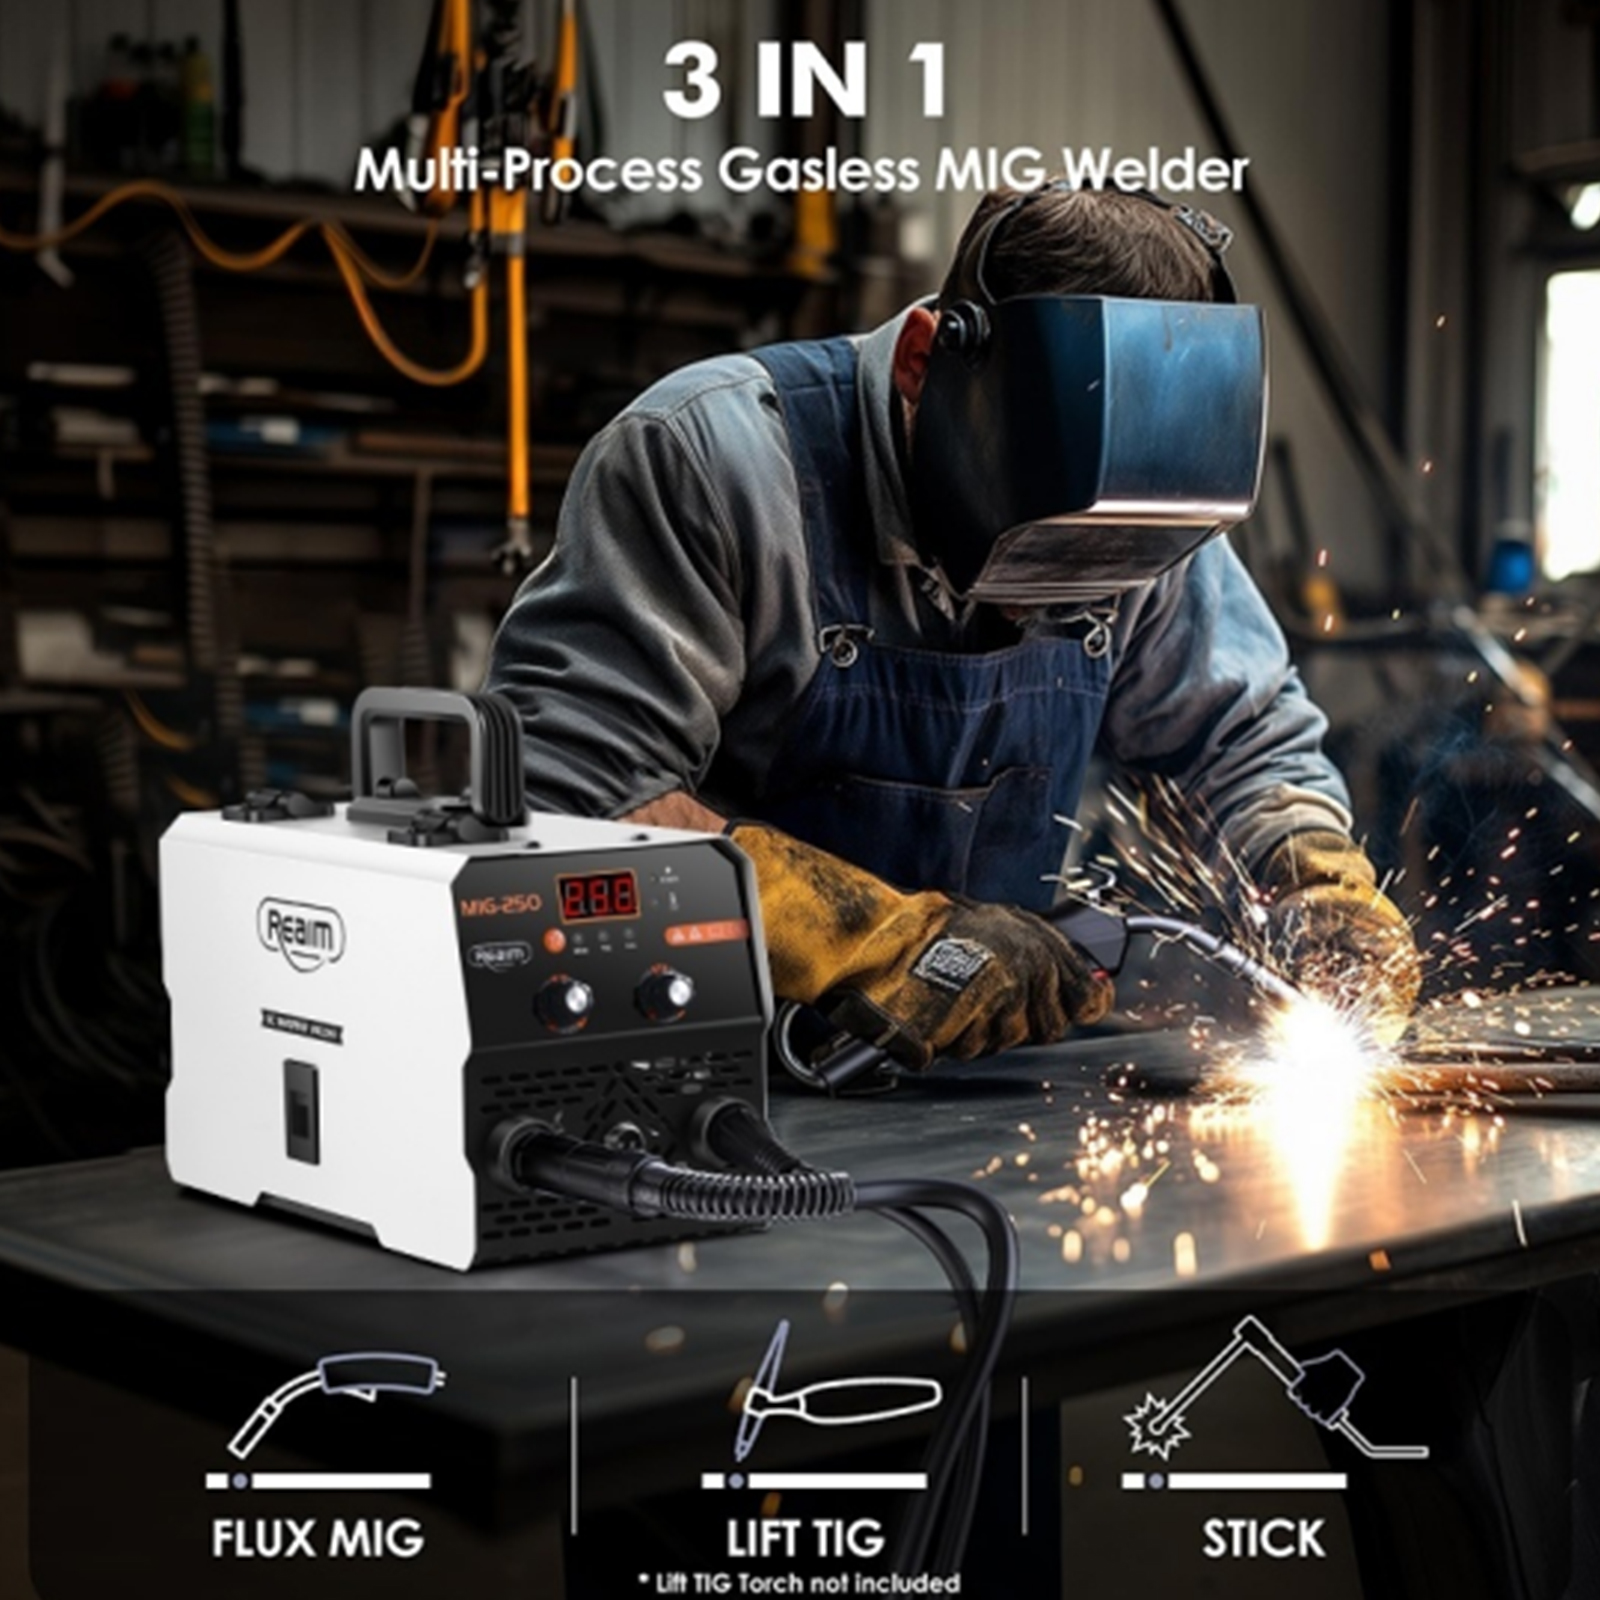
- 2-in-1 Dual Functionality: Supports Gasless Flux Core MIG welding, MMA (Stick) welding, and Lift TIG welding (TIG torch not included).
- High Output Current: Adjustable from 40A to 250A, capable of handling 2.5–4.0mm electrodes for MMA and 0.8–1.0mm MIG wire.
- Digital Display & Adjustable Settings: A large LED display provides real-time current readout. Manual adjustment knobs allow precise control over current and wire feed speed.
- IGBT Inverter Technology: Ensures higher frequency operation, reduced energy loss, and improved efficiency, leading to smooth arc ignition and minimal spatter.
- Efficient Cooling System: Equipped with a large blade fan for excellent heat dissipation, ensuring continuous use and long-term reliability.
- Universal Material Compatibility: Capable of welding aluminum, stainless steel, carbon steel, iron, and alloy steel.
- Compact & Portable: Weighing only 3.5kg (7.7 lbs) with dimensions of 29 x 15 x 18 cm, it is ideal for on-site and mobile work.
- Power Input: Operates on 220V AC, 50/60Hz, compatible with standard power supplies.


5. Setup Instructions
5.1 Power Connection
- Ensure the welding machine's power switch (located at the rear) is in the 'OFF' position.
- Connect the power cord to a grounded 220V AC, 50/60Hz power outlet. Ensure the outlet can handle the machine's maximum load power of 3.9 kVA.
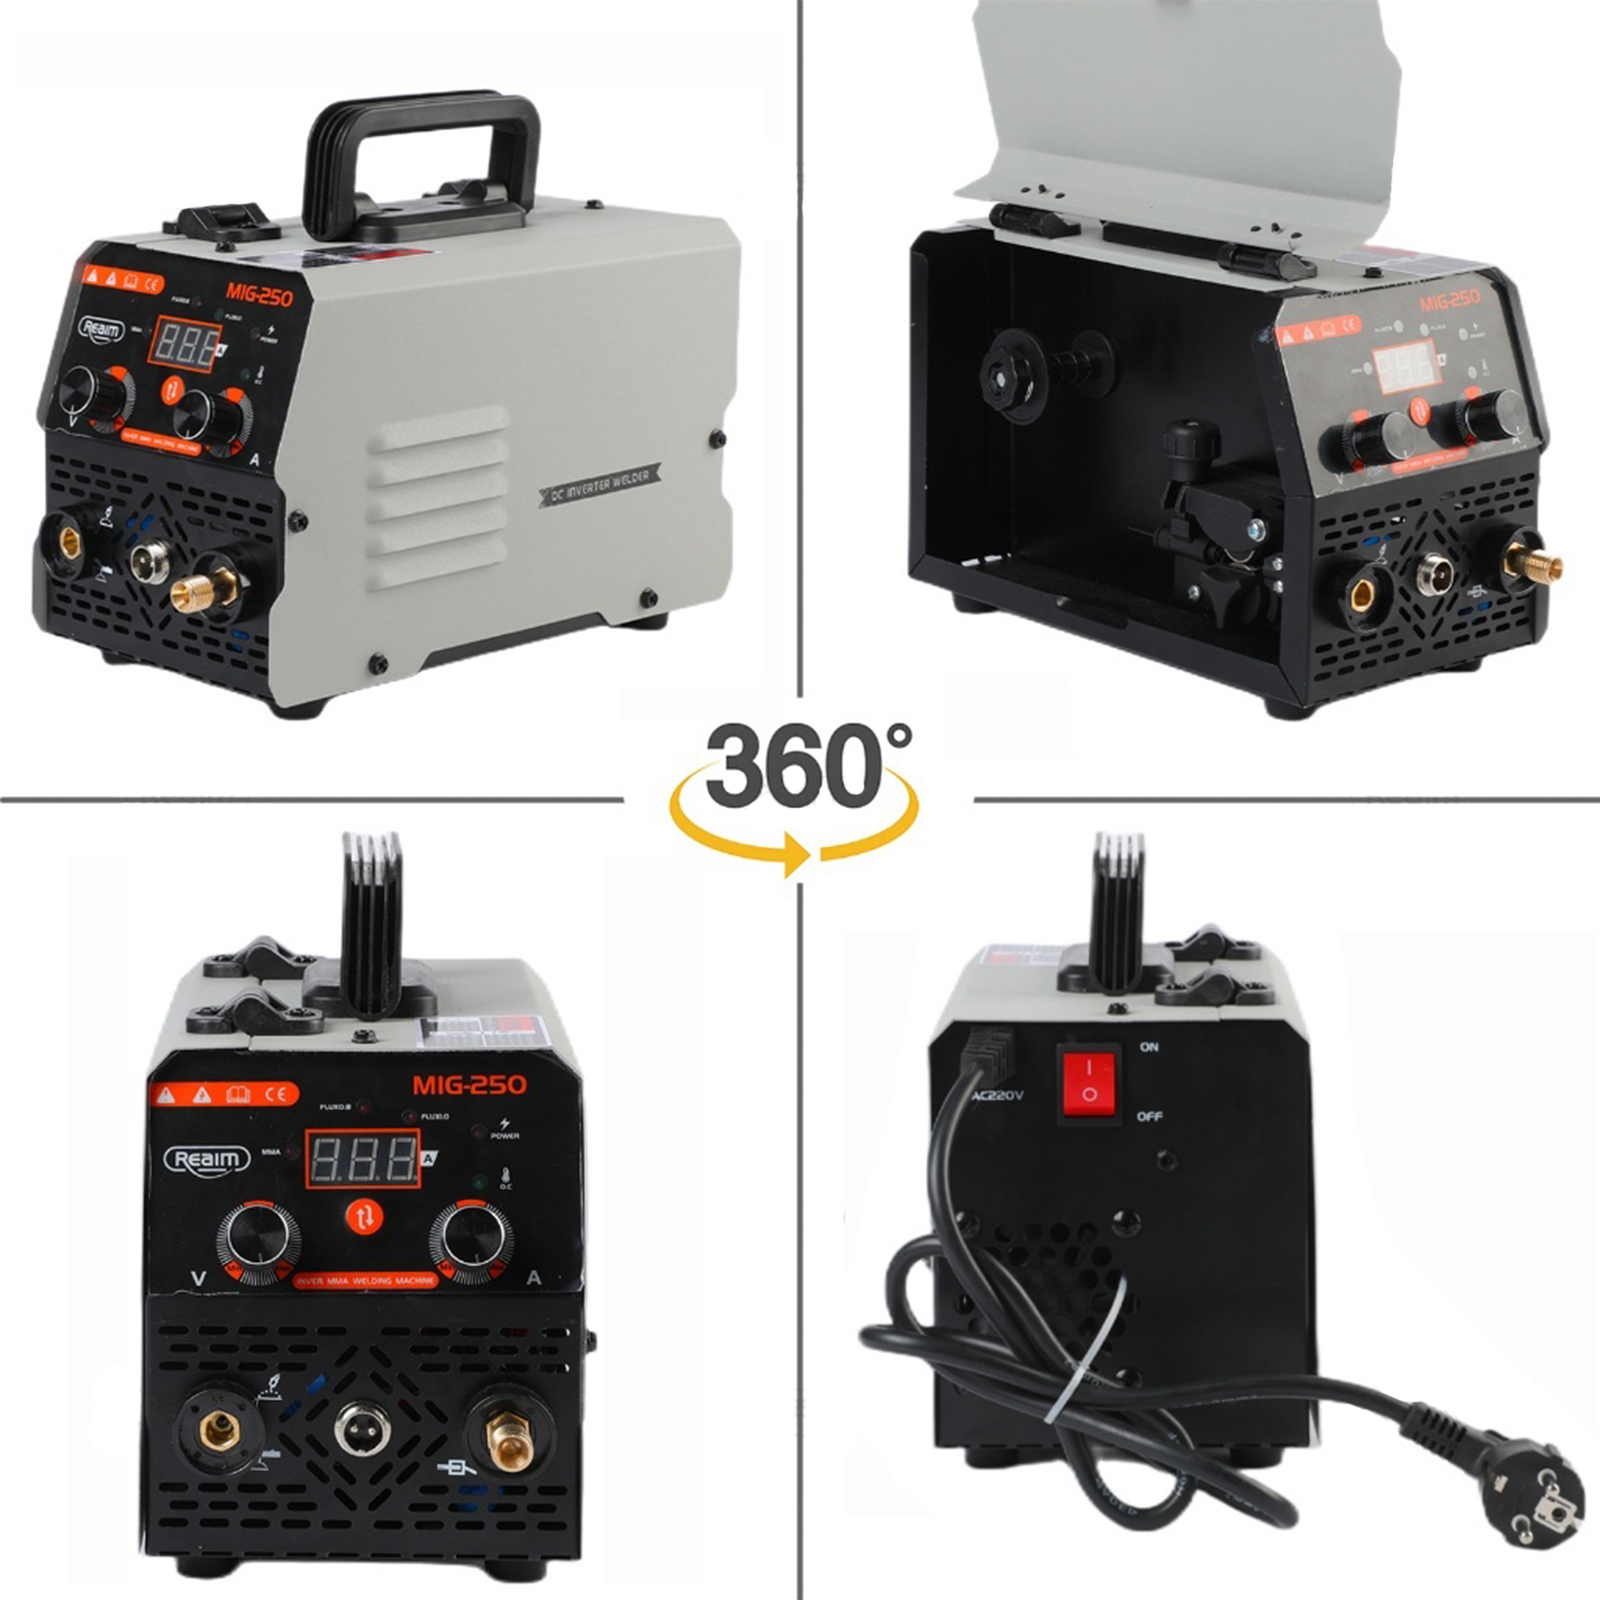
5.2 Ground Clamp Connection
- Connect the 200A Ground Clamp cable to the negative (-) terminal on the front panel of the welding machine.
- Securely attach the ground clamp to the workpiece or a clean, bare metal portion of the welding table. A good ground connection is crucial for stable arc and safe operation.
5.3 MIG Welding Setup (Gasless Flux Core)
- Open the wire feeder compartment cover.
- Install the flux core wire spool (1lb/2lbs, 0.8-1.0mm diameter) onto the spindle.
- Thread the wire through the wire guide tube and into the drive roller mechanism. Ensure the wire is seated correctly in the groove corresponding to its diameter.
- Close the drive roller tension arm and adjust the tension appropriately (not too tight to crush the wire, not too loose to slip).
- Connect the MIG-14AK Torch to the positive (+) terminal on the front panel.
- Feed the wire through the MIG torch liner by pressing the MIG gun switch (with power on and in MIG mode) until it emerges from the contact tip. Trim any excess wire.
5.4 MMA Welding Setup (Stick)
- Connect the 200A Electrode Holder cable to the positive (+) terminal on the front panel.
- Insert the desired electrode (2.5–4.0mm diameter) into the electrode holder.
5.5 TIG Welding Setup (Lift TIG)
- (Note: TIG torch is not included and must be purchased separately.)
- Connect the TIG torch to the appropriate terminal (usually negative for DC TIG) and the gas line (if using shielded gas, though the machine is primarily gasless for MIG).
- Connect the ground clamp to the workpiece.
6. Operating Instructions
6.1 Powering On and Mode Selection
- Ensure all connections are secure and you are wearing appropriate PPE.
- Flip the power switch at the rear of the machine to the 'ON' position. The LED display will illuminate.
- Use the mode selection buttons on the front panel to choose between MMA, TIG, or MIG welding. The selected mode will be indicated on the digital display.
6.2 Adjusting Welding Parameters
- Current Adjustment: Use the large knob on the front panel to adjust the output current from 40A to 250A. The digital display will show the current setting.
- Wire Feed Speed (MIG Mode): In MIG mode, the voltage adjustment knob fine-tunes the wire feed speed. Adjust this in conjunction with the current for optimal arc stability and weld penetration.
6.3 Welding Process (General Guidelines)
- Prepare Workpiece: Ensure the workpiece is clean, dry, and free of rust, paint, or oil.
- Positioning: Position yourself comfortably and safely, ensuring a clear view of the weld puddle.
- Arc Ignition:
- MMA (Stick): Strike the electrode against the workpiece to initiate the arc, then maintain a consistent arc length.
- MIG (Flux Core): Position the MIG gun nozzle close to the workpiece (about 1/2 inch or 12mm) and press the trigger to start the wire feed and arc.
- Lift TIG: Gently touch the tungsten electrode to the workpiece and then lift it slightly to initiate the arc.
- Welding: Maintain a steady hand, consistent travel speed, and appropriate arc length/stick-out for the chosen process and material.
- Post-Weld: Allow the weld to cool naturally. Use the slag brush to remove slag if necessary (for MMA and Flux Core MIG).
7. Maintenance
Regular maintenance ensures the longevity and optimal performance of your welding machine.
- Cleaning: Regularly clean the exterior of the machine with a dry cloth. Use the included slag brush to remove spatter from the MIG gun nozzle and contact tip.
- Cooling System: Ensure the cooling fan vents are clear of dust and debris to prevent overheating. Periodically use compressed air to blow out internal dust if accessible and safe to do so (ensure machine is unplugged).
- Cable Inspection: Inspect all welding cables, electrode holder, ground clamp, and MIG torch for cuts, cracks, or loose connections before each use. Replace damaged components immediately.
- Wire Feeder: Keep the wire feeder mechanism clean. Check drive rollers and wire liner for wear and replace if necessary to ensure smooth wire feeding.
- Storage: Store the welding machine in a clean, dry environment, away from moisture and extreme temperatures. Its compact size (Figure 9) makes storage convenient.

8. Troubleshooting
This section addresses common issues you might encounter. For problems not listed here, please contact customer support.
| Problem | Possible Cause | Solution |
|---|---|---|
| Machine does not power on | No power supply; Power switch off; Faulty power cord/outlet | Check power connection and outlet; Ensure power switch is ON; Inspect power cord for damage. |
| No arc or weak arc | Poor ground connection; Incorrect current setting; Damaged electrode/wire; Incorrect mode selected | Ensure ground clamp is on clean metal; Adjust current; Replace electrode/wire; Verify correct welding mode. |
| Wire feeding issues (MIG) | Incorrect wire tension; Kinked wire liner; Wrong drive roller size; Spool tangled | Adjust drive roller tension; Inspect and clear wire liner; Ensure correct drive roller for wire size; Untangle wire spool. |
| Machine shuts down during operation | Overheat/Overload protection activated; Insufficient ventilation | Allow machine to cool down; Ensure cooling vents are clear; Reduce duty cycle or current if continuously tripping. |
| Poor weld quality (excessive spatter, porosity) | Incorrect settings (current/wire speed); Improper technique (arc length, travel speed); Contaminated workpiece | Adjust current and wire speed; Refine welding technique; Clean workpiece thoroughly. |
9. Specifications
Detailed technical specifications for the Realm MIG-250 welding machine:
| Feature | Specification |
|---|---|
| Input Voltage | 220V AC |
| Frequency | 50/60Hz |
| Max Load Power | 3.9 kVA |
| Output Voltage | 60V |
| Output Current | 40–250A (adjustable) |
| Motor Type | DC Inverter (IGBT) |
| Insulation Class | F |
| Protection Level | IP21S |
| MIG Wire Diameter | 0.8–1.0mm (Flux Core) |
| MMA Electrode Diameter | 2.5–4.0mm |
| Net Weight | 3.5 kg (7.7 lbs) |
| Gross Weight | 5.8 kg (12.8 lbs) |
| Unit Size (L x W x H) | 29 x 15 x 18 cm (11.4 x 5.9 x 7.1 inches) |
10. User Tips
- Beginner-Friendly: The digital display and easy controls are designed to simplify setup and operation, making this welder suitable for those new to welding.
- Energy Efficiency: Leverage the advanced IGBT technology to reduce power consumption by up to 30% compared to older models, saving on operational costs.
- All-Position Welding: This machine allows for all-position welding, providing flexibility to weld vertically, overhead, or in tight spaces without restrictions.
- Material Versatility: Experiment with different materials like aluminum, stainless steel, and carbon steel to fully utilize the machine's universal compatibility.
- Practice Makes Perfect: If you are new to welding, practice on scrap pieces of metal to get a feel for the machine's settings and your technique before working on critical projects.
11. Warranty and Support
For information regarding warranty coverage, technical support, or service, please refer to the documentation provided at the time of purchase or contact the seller directly. Keep your purchase receipt as proof of purchase.