
1. Introduction
1.1 About This Manual
This manual describes the assembly, installation, operation, and troubleshooting of the Sumry HGX 4KW Hybrid Inverter. Please read this manual carefully before installation and operation, and keep it for future reference.
This manual provides safety and installation guidelines, as well as information on tools and wiring.
1.2 Features
- Off-grid solar inverter
- No battery function available (can power loads directly from PV array without battery connected)
- Under Battery Mode, AC voltage can be adjusted to 100VAC, 110VAC, and 120VAC.
- Utility power, battery, and PV power complement each other
- Pure sine wave solar inverter
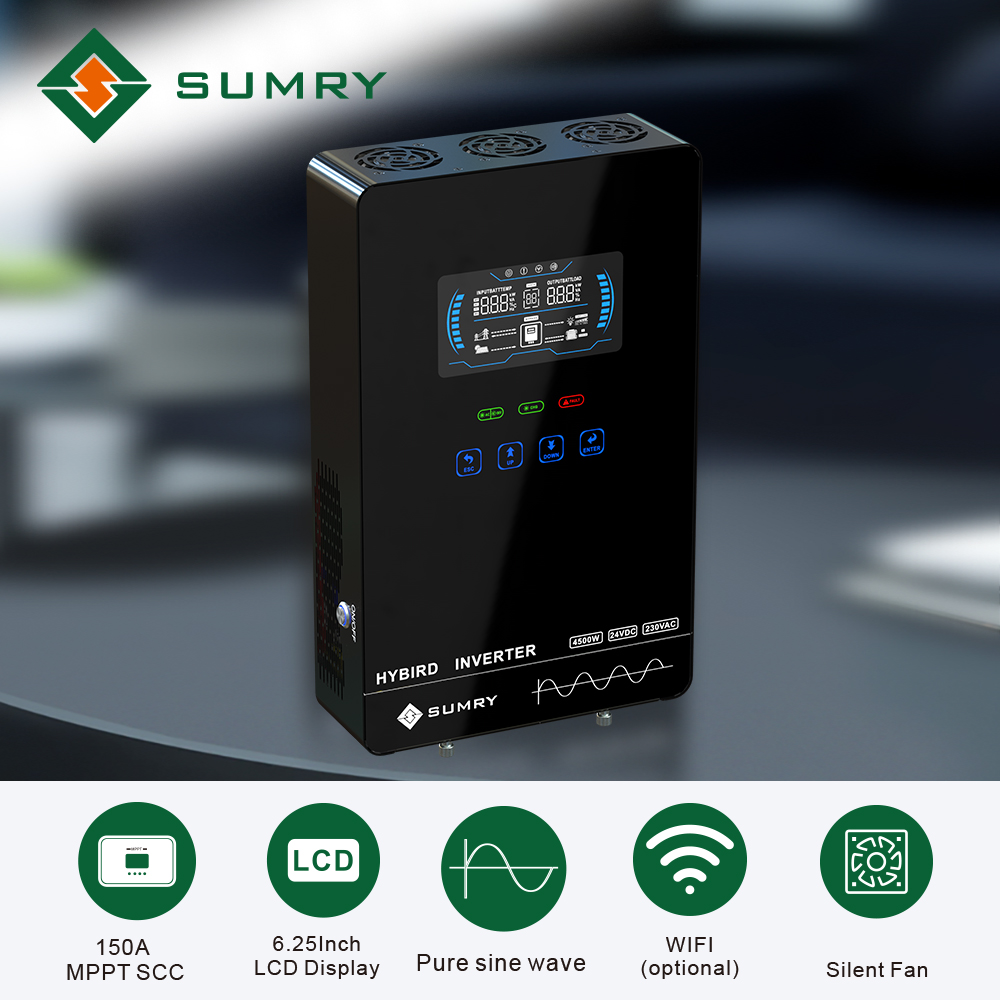
- Unique glass top cover design with 6.25-inch LCD display and touchable buttons
- Built-in 140A MPPT (Max PV 5600W) solar charger
- High PV input range from 55V-450Vdc
- Smart battery charger design for optimized battery performance
- Configurable AC/Battery input priority via LCD setting
- Auto restart while PV is recovering
- Over-load, over-temperature, and output short circuit protection
- Cold restart function
- Built-in lithium battery automatic activation
- Communication with RS232/RS485
- WiFi monitoring function (optional)
- Anti-dust kit for harsh environment (optional)
- Restore default settings with one click
1.3 Basic System Architecture
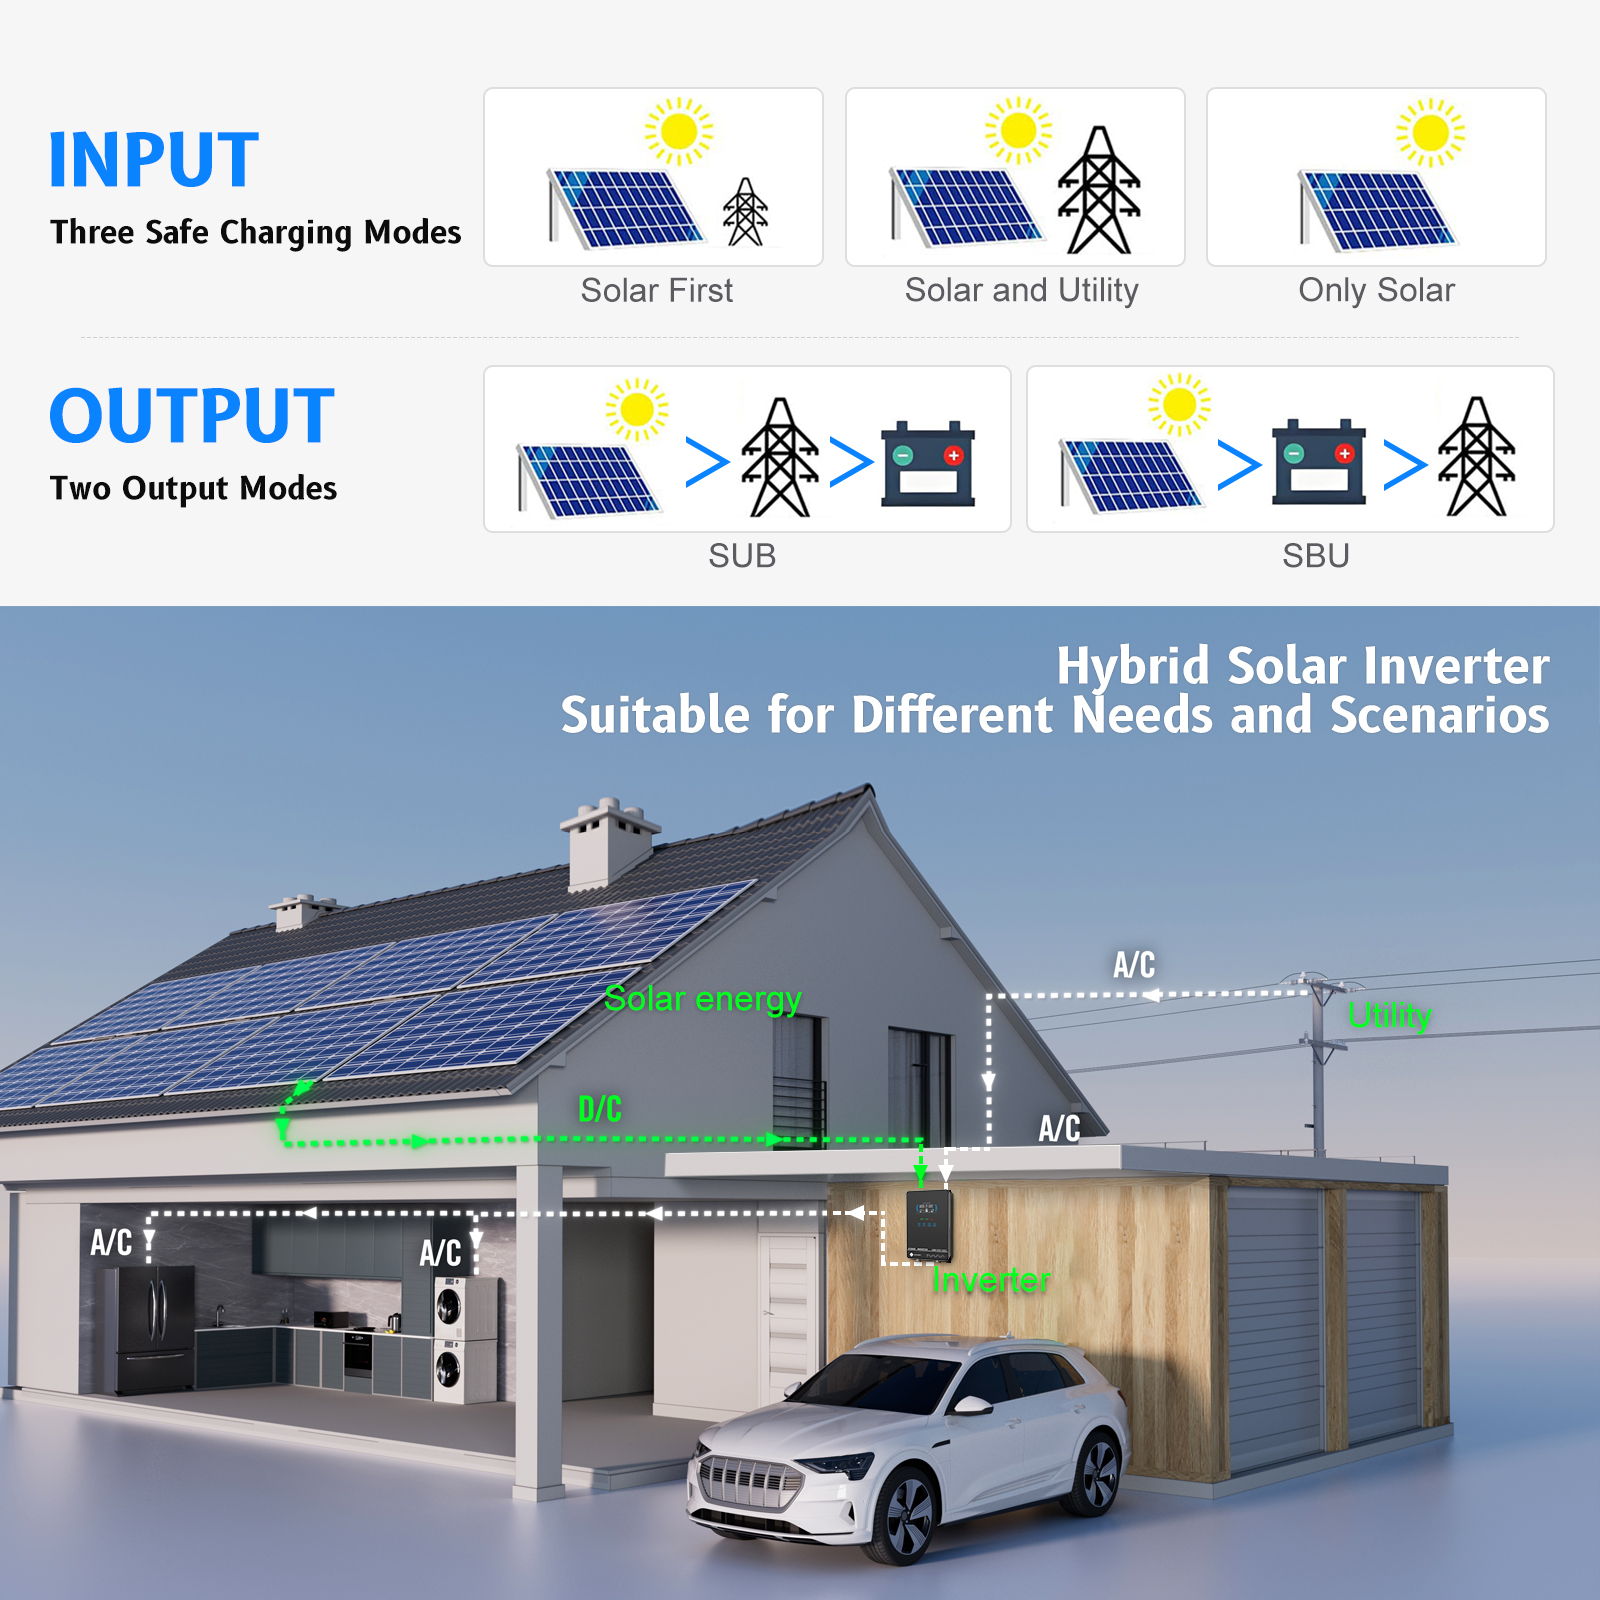
The following illustration shows a basic application for this inverter/charger. A complete running system includes:
- Generator or Utility power source.
- PV modules (optional).
- Battery packs (optional).
This inverter can power various appliances in home or office environments, including motor-type appliances such as tube lights, fans, refrigerators, and air conditioners.


1.4 Product Overview


The inverter features a 6.25-inch LCD display, status indicators, function touch buttons, a power on/off switch, and various input/output ports including PV input, AC input, AC output, battery input, and an RS485/RS232 communication port.
2. Safety Instructions
⚠ WARNING: This chapter contains important safety and operating instructions. Read and keep this manual for future reference.
- Before using the unit, read all instructions and cautionary markings on the unit, the batteries, and all appropriate sections of this manual.
- CAUTION – To reduce risk of injury, charge only deep-cycle lead-acid type rechargeable batteries. Other types of batteries may burst, causing personal injury and damage.
- Do not disassemble the unit. Take it to a qualified service center when service or repair is required. Incorrect re-assembly may result in a risk of electric shock or fire.
- To reduce risk of electric shock, disconnect all wirings before attempting any maintenance or cleaning. Turning off the unit will not reduce this risk.
- CAUTION – Only qualified personnel can install this device with battery.
- NEVER charge a frozen battery.
- For optimum operation of this inverter/charger, please follow required specifications to select appropriate cable size. It's very important to correctly operate this inverter/charger.
- Be very cautious when working with metal tools on or around batteries. A potential risk exists to drop a tool to spark or short circuit batteries or other electrical parts and could cause an explosion.
- Please strictly follow installation procedure when you want to disconnect AC or DC terminals. Please refer to the INSTALLATION section of this manual for details.
- GROUNDING INSTRUCTIONS - This inverter/charger should be connected to a permanent grounded wiring system. Be sure to comply with local requirements and regulations to install this inverter.
- NEVER cause AC output and DC input short-circuited. Do NOT connect to the mains when DC input short circuits.
- Warning!! Only qualified service persons are able to service this device. If errors still persist after following troubleshooting table, please send this inverter/charger back to local dealer or service center for maintenance.
3. Installation
3.1 Unpacking and Inspection
Before installation, please inspect the unit. Be sure that nothing inside the package is damaged. You should have received the following items:
- The unit x 1
- User manual x 1
3.2 Preparation
Before connecting all wirings, please take off the bottom cover by removing two screws.
3.3 Mounting the Unit
Consider the following points before selecting where to install:
- Do not mount the inverter on flammable construction materials.
- Mount on a solid surface.
- Install this inverter at eye level in order to allow the LCD display to be read at all times.
- The ambient temperature should be between 0°C and 55°C to ensure optimal operation.
- The recommended installation position is to be adhered to the wall vertically.
- Be sure to keep other objects and surfaces as shown in the diagram to guarantee sufficient heat dissipation and to have enough space for removing wires.
⚠ SUITABLE FOR MOUNTING ON CONCRETE OR OTHER NON-COMBUSTIBLE SURFACE ONLY.
Install the unit by screwing two screws into the wall.
3.4 Battery Connection
⚠ CAUTION: For safety operation and regulation compliance, it's requested to install a separate DC over-current protector or disconnect device between battery and inverter. It may not be requested to have a disconnect device in some applications, however, it's still requested to have over-current protection installed. Please refer to the typical amperage in the table below for required fuse or breaker size.
⚠ WARNING! All wiring must be performed by qualified personnel.
⚠ WARNING! It's very important for system safety and efficient operation to use appropriate cable for battery connection. To reduce risk of injury, please use the proper recommended cable and terminal size as below.
Recommended Battery Cable and Terminal Size:
| Model | Typical Amperage | Battery Capacity | Wire Size | Cable mm² | Ring Terminal Dimensions D (mm) | Ring Terminal Dimensions L (mm) | Ring Terminal Dimensions M (mm) | Torque Value |
|---|---|---|---|---|---|---|---|---|
| 3.0KW 24V | 110A | 100AH | 1*4AWG | 22 | 8 | 44 | 18.2 | 2~3 Nm |
| 200AH | 8 | 44 | 18.2 | |||||
| 4.0KW 24V | 150A | 200AH | 1*2AWG | 35 | 8 | 44 | 18.2 | 2~3 Nm |
Follow these steps to implement battery connection:
- Assemble battery ring terminal based on recommended battery cable and terminal size.
- Connect all battery packs as units require.
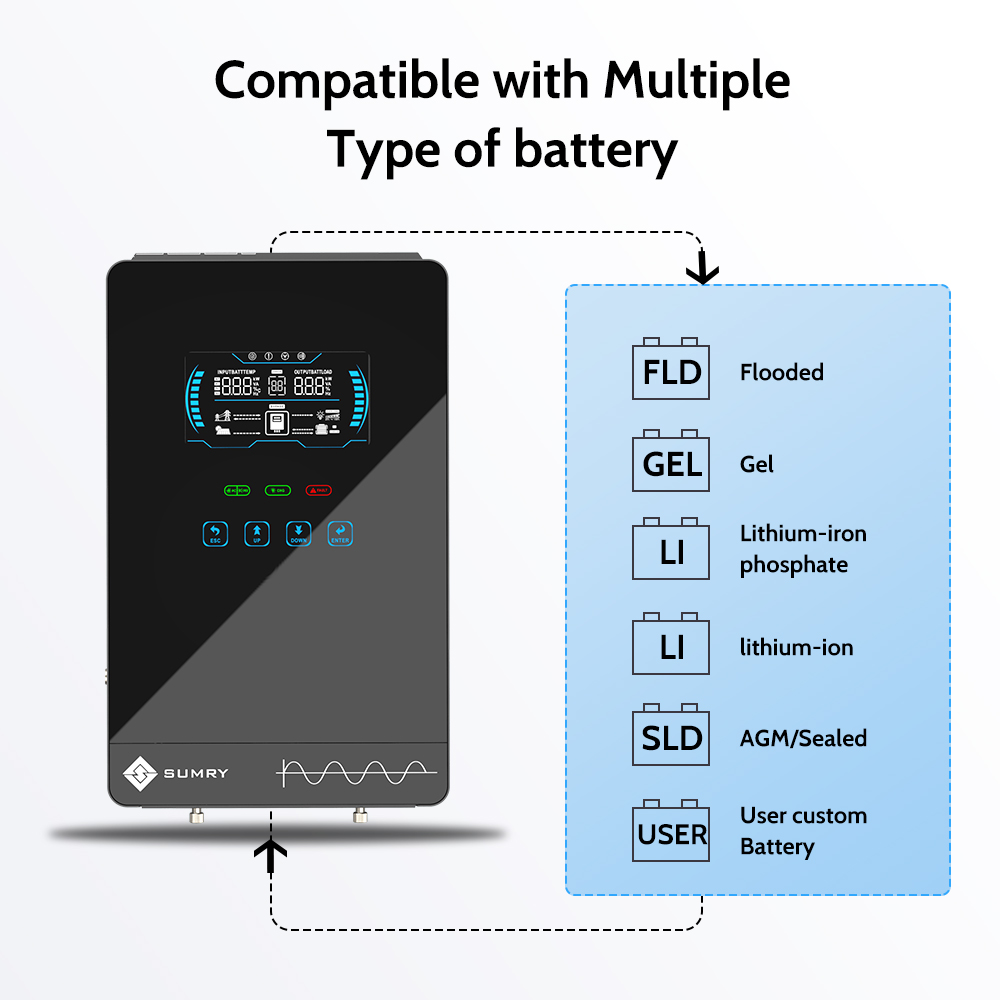
NOTE: Please only use sealed lead-acid battery or sealed GEL/AGM lead-acid battery or lithium battery.
- Insert the ring terminal of the battery cable flatly into the battery connector of the inverter and make sure the bolts are tightened with a torque of 2-3 Nm. Ensure polarity at both the battery and the inverter/charger is correctly connected and ring terminals are tightly screwed to the battery terminals.
⚠ WARNING: Shock Hazard! Installation must be performed with care due to high battery voltage in series.
⚠ CAUTION!! Do not place anything between the flat part of the inverter terminal and the ring terminal. Otherwise, overheating may occur.
⚠ CAUTION!! Do not apply anti-oxidant substance on the terminals before terminals are connected tightly.
⚠ CAUTION!! Before making the final DC connection or closing DC breaker/disconnector, be sure positive (+) must be connected to positive (+) and negative (-) must be connected to negative (-).
3.5 AC Input/Output Connection
⚠ CAUTION!! Before connecting to AC input power source, please install a separate AC breaker between the inverter and the AC input power source. This will ensure the inverter can be securely disconnected during maintenance and fully protected from overcurrent of AC input. The recommended spec of AC breaker is 32A for 3.0KW and 40A for 4.0KW.
⚠ CAUTION!! There are two terminal blocks with “INPUT” and “OUTPUT” markings. Please do NOT mis-connect input and output connectors.
⚠ WARNING! All wiring must be performed by qualified personnel.
⚠ WARNING! It's very important for system safety and efficient operation to use appropriate cable for AC input connection. To reduce risk of injury, please use the proper recommended cable size as below.
Suggested Cable Requirement for AC Wires:
| Model | Gauge | Torque Value |
|---|---|---|
| 3.0KW | 10 AWG | 1.2~1.6 Nm |
| 4.0KW | 8 AWG | 1.4~1.6Nm |
Follow these steps to implement AC input/output connection:
- Before making AC input/output connection, be sure to open DC protector or disconnector first.
- Remove insulation sleeve 10mm for six conductors. Shorten phase L and neutral conductor N by 3mm.
- Insert AC input wires according to polarities indicated on the terminal block and tighten the terminal screws.
- Then, insert AC output wires according to polarities indicated on the terminal block and tighten terminal screws. Be sure to connect the PE protective conductor (Ground) first.
- Ground (green/yellow)
- L – LINE (brown or black)
- N – Neutral (blue or white)
- Make sure the wires are securely connected.
⚠ WARNING: Be sure that AC power source is disconnected before attempting to hardwire it to the unit.
⚠ CAUTION: Important! Be sure to connect AC wires with correct polarity. If L and N wires are connected reversely, it may cause utility short-circuited when these inverters are operated in parallel.
⚠ CAUTION: Appliances such as air conditioners require at least 2-3 minutes to restart to balance refrigerant gas. If a power shortage occurs and recovers quickly, it can damage connected appliances. Check if your air conditioner has a time-delay function before installation. Otherwise, the inverter/charger may trigger an overload fault and cut off output, potentially causing internal damage to the air conditioner.
3.6 PV Connection
⚠ CAUTION: Before connecting to PV modules, please install separately a DC circuit breaker between the inverter and PV modules.
⚠ WARNING! All wiring must be performed by qualified personnel.
⚠ WARNING! It's very important for system safety and efficient operation to use appropriate cable for PV module connection. To reduce risk of injury, please use the proper recommended cable size as below.
Suggested Cable Requirement for PV Wires:
| Model | Wire Size | Cable (mm²) | Torque Value (max) |
|---|---|---|---|
| 3.0KW/4.0KW | 1 x 12AWG | 4 | 1.2 Nm |
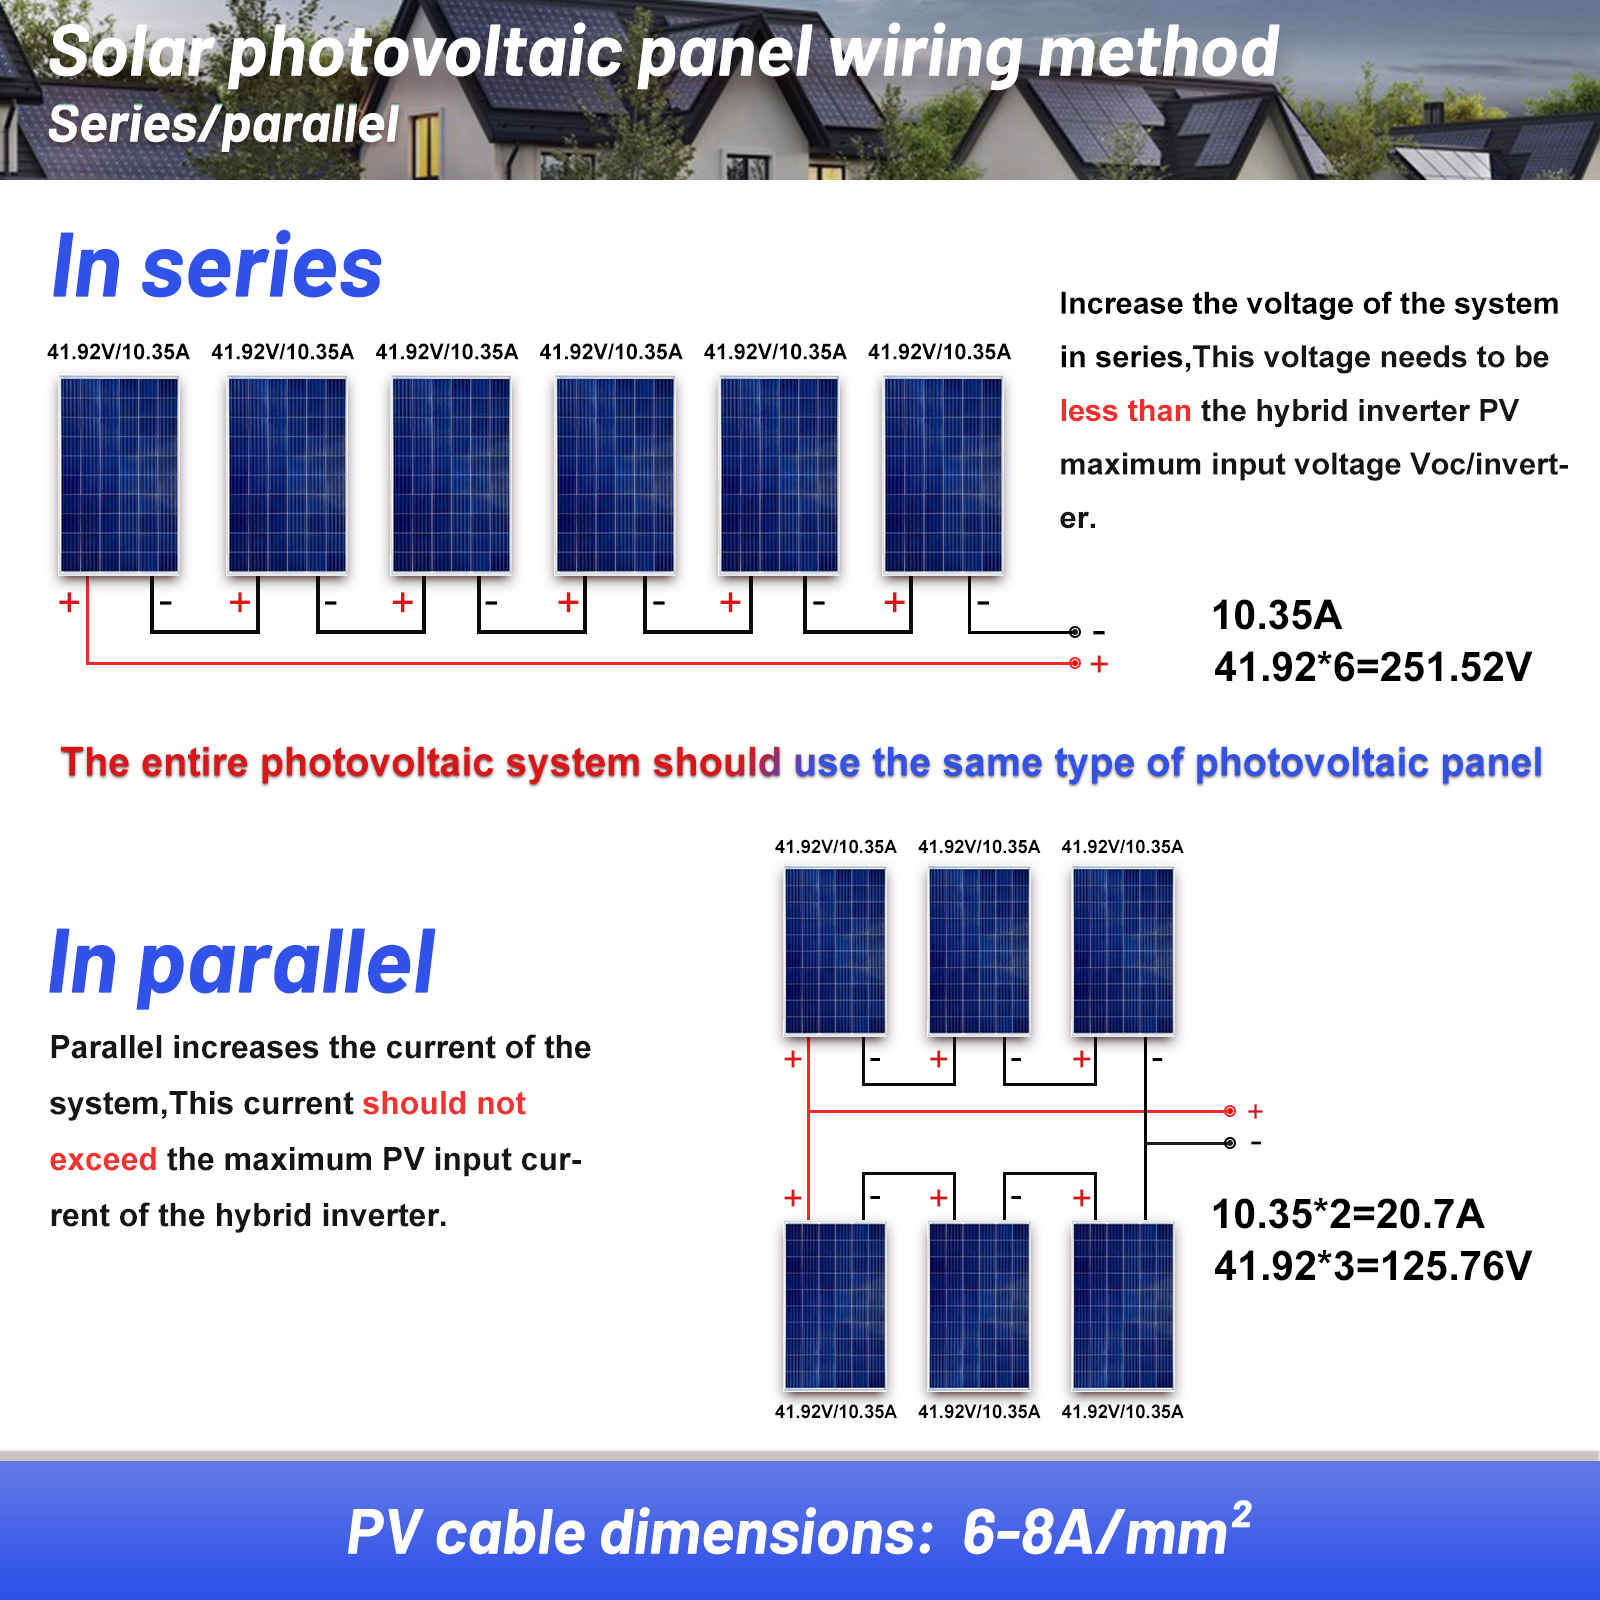
PV Module Selection:
When selecting proper PV modules, please be sure to consider the following parameters:
- Open circuit Voltage (Voc) of PV modules must not exceed the max. PV array open circuit voltage of the inverter.
- Open circuit Voltage (Voc) of PV modules should be higher than the min. PV Array MPPT Voltage range.
| INVERTER MODEL | 3.0KW | 4.0KW |
|---|---|---|
| Max. PV Array Open Circuit Voltage | 350Vdc | |
| PV Array MPPT Voltage Range | 55Vdc~350Vdc | |
Follow these steps to implement PV module connection:
- Remove insulation sleeve 10 mm for positive and negative conductors.
- Check correct polarity of connection cable from PV modules and PV input connectors. Then, connect the positive pole (+) of the connection cable to the positive pole (+) of the PV input connector. Connect the negative pole (-) of the connection cable to the negative pole (-) of the PV input connector.
- Make sure the wires are securely connected.
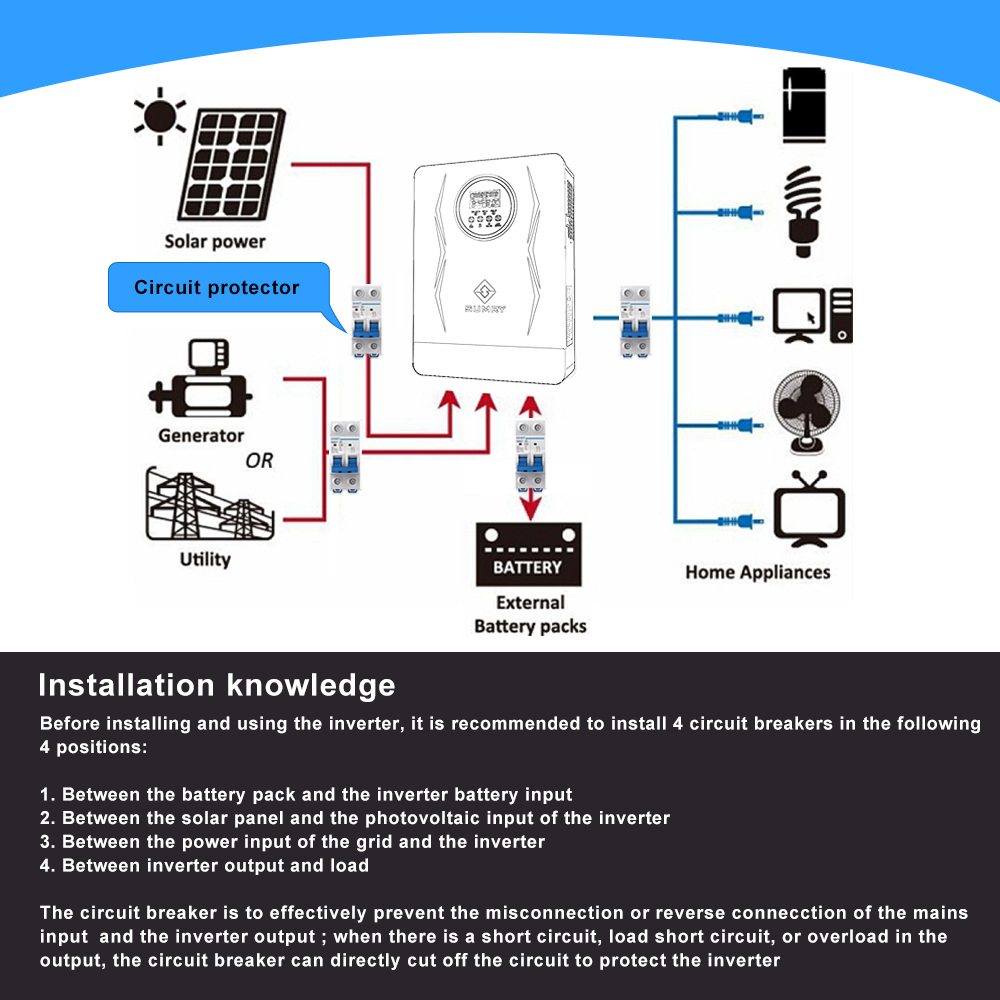
Installation Knowledge:
Before installing and using the inverter, it is recommended to install 4 circuit breakers in the following 4 positions:
- Between the battery pack and the inverter battery input.
- Between the solar panel and the photovoltaic input of the inverter.
- Between the power input of the grid and the inverter.
- Between inverter output and load.
The circuit breaker is to effectively prevent misconnection or reverse connection of the mains input and the inverter output. When there is a short circuit, load short circuit, or overload in the output, the circuit breaker can directly cut off the circuit to protect the inverter.
Circuit Breaker Specification:
For the Sumry HGX 4000W inverter, you need to install:
- A 2P200A specification circuit breaker between the battery and the inverter.
- A 2P20A specification circuit breaker between the photovoltaic input and the inverter.
- A 2P63A specification circuit breaker between the utility input and the inverter.
- A 2P40A specification circuit breaker on the output of the inverter.
3.7 Final Assembly
After connecting all wirings, please put the bottom cover back by screwing two screws.
4. Operation
4.1 Power ON/OFF
Once the unit has been properly installed and the batteries are connected, simply press the On/Off switch (located on the bottom of the case) to turn on the unit.
4.2 Operation and Display Panel
The operation and display panel is on the front panel of the inverter. It includes three indicators, four function keys, and an LCD display, indicating the operating status and input/output power information.
LED Indicator Messages:
| LED Indicator | Color | Status | Messages |
|---|---|---|---|
| AC-INV | Green | Solid On | Output is powered by utility in Line mode. |
| Flashing | Output is powered by battery or PV in battery mode. | ||
| CHG | Green | Solid On | Battery is fully charged. |
| Flashing | Battery is charging. | ||
| FAULT | Red | Solid On | Fault occurs in the inverter. |
| Flashing | Warning condition occurs in the inverter. |
Function Keys:
| Function Key | Description |
|---|---|
| ESC | To exit setting mode |
| UP | To go to previous selection |
| DOWN | To go to next selection |
| ENTER | To confirm the selection in setting mode or enter setting mode |
4.3 LCD Display Icons
The LCD display provides various information about the inverter's status and performance. Icons indicate input source, configuration, fault information, output information, and battery status.
Detailed descriptions of LCD display icons and their meanings can be found in the full PDF manual, available for download: User Manual (PDF).
4.4 LCD Setting
After pressing and holding the ENTER button for 3 seconds, the unit will enter setting mode. Use the “UP” or “DOWN” button to select setting programs, then press “ENTER” to confirm or “ESC” to exit.
Key settings include output source priority, maximum charging current, battery type, auto-restart functions, output voltage, and output frequency. Refer to the full manual for a complete list of settings and their options.
4.5 Lithium Battery Connection and Settings
If the inverter is matched with lithium batteries, only those with compatible BMS communication protocols are allowed. Follow these steps:
- Assemble battery ring terminal based on recommended battery cable and terminal specifications.
- Insert the ring terminal of battery cable flatly into the battery connector of the inverter and make sure the bolts are tightened with a torque of 2-3Nm. Ensure polarity is correct and terminals are tightly screwed.
- Connect the RJ45 connector to the COMM port on the inverter.
- Connect the other end of the RJ45 plug to the battery communication port (RS485). Ensure RS485-A and RS485-B connections are correct.
Note: If choosing a lithium battery, make sure to connect the BMS communication cable between the battery and the inverter. You need to choose battery type as “Lib-485” mode in Program 5.
When the battery type is set to "Lib-485", settings for programs 12, 13, and 29 are adjusted. The default charging current is 0.5C. If communication fails, the inverter will cut off output.
Long press the “ESC” button for 3 seconds to enter the lithium battery page, which displays total battery voltage, remaining capacity, charging/discharge current, battery capacity, BMS board temperature, and single cell voltages/temperatures.
Note: When communication fails (LCD display code 51), the inverter will cut off output. If the communication protocol does not match, you can select “LIB” mode.
4.6 Operating Mode Description
The inverter supports various operating modes, including Standby/Power Saving Mode, Line Mode, and Battery Mode, each with specific charging and output behaviors.
- Standby Mode: Inverter is not turned on, but can charge battery without AC output.
- Power Saving Mode: Output is off when connected load is very low or not detected.
- Line Mode: Unit provides output power from the mains and can charge the battery.
- Battery Mode: Unit provides output power from battery and PV power.
For detailed descriptions of each mode and their charging/output logic, refer to the full PDF manual.
5. Maintenance
5.1 Battery Equalization
The equalization function helps reverse negative chemical effects like stratification and remove sulfate crystals that build up on battery plates, which can reduce battery capacity. It's recommended to equalize batteries periodically.
To apply equalization:
- Enable battery equalization function in monitoring LCD setting program 33.
- Set equalization interval in program 37, or activate equalization immediately in program 39.
The controller enters the Equalize stage when the set interval is reached or immediately activated. It supplies power to charge the battery until it reaches the equalization voltage, then maintains this voltage. If the battery voltage doesn't reach the target within the timeout, the controller will stop equalization and return to float stage.
6. Troubleshooting
6.1 Fault Reference Code
The inverter's LCD display will show specific fault codes if an error occurs. These codes help identify the nature of the problem, whether it's an internal circuit error or an external issue like over-temperature or short circuit.
| Fault Code | Fault Event | Icon on |
|---|---|---|
| 01 | Fan is locked when inverter is off. | ⚠ |
| 02 | Over temperature | ⚠ |
| 03 | Battery voltage is too high | ⚠ |
| 04 | Battery voltage is too low | ⚠ |
| 05 | Output short circuited or over temperature is detected by internal converter components. | ⚠ |
| 06 | Output voltage is too high. | ⚠ |
| 07 | Overload time out | ⚠ |
| 08 | Bus voltage is too high | ⚠ |
| 09 | Bus soft start failed | ⚠ |
| 11 | Main relay failed | ⚠ |
| 51 | Over current or surge | ⚠ |
| 52 | Bus voltage is too low | ⚠ |
| 53 | Inverter soft start failed | ⚠ |
| 55 | Over DC voltage in AC output | ⚠ |
| 56 | Battery connection is open | ⚠ |
| 57 | Current sensor failed | ⚠ |
| 58 | Output voltage is too low | ⚠ |
6.2 Warning Indicator
Warning codes indicate conditions that require attention but are not critical faults. These are often accompanied by audible alarms and flashing icons.
| Warning Code | Warning Event | Audible Alarm | Icon Flashing |
|---|---|---|---|
| 01 | Fan is locked when inverter is on. | Beep twice every second | ⚠ |
| 03 | Battery is over-charged | Beep twice every second | ⚠ |
| 04 | Low battery | Beep twice every second | ⚠ |
| 07 | Overload | Beep twice every second | ⚠ |
| 10 | Output power derating | Beep twice every second | ⚠ |
| 12 | Solar charger stops due to low battery. | ⚠ | |
| 13 | Solar charger stops due to high PV voltage. | ⚠ | |
| 14 | Solar charger stops due to overload. | ⚠ | |
| 15 | PV is weak | ⚠ | |
| 61 | When the battery communication is abnormal, stop charging and discharging. | ⚠ |
6.3 Troubleshooting Table
| Problem | LCD/LED/Buzzer | Explanation / Possible Cause | What to do |
|---|---|---|---|
| Unit shuts down automatically during startup process. | LCD/LEDs and buzzer will be active for 3 seconds and then complete off. | The battery voltage is too low (<1.91V/Cell) | 1. Re-charge battery. 2. Replace battery. |
| No response after power on. | No indication. | 1. The battery voltage is far too low. (<1.4V/Cell) 2. Battery polarity is connected reversed. | 1. Check if batteries and the wiring are connected well. 2. Re-charge battery. 3. Replace battery. |
| Input voltage is displayed as 0 on the LCD and green LED is flashing. | Input protector is tripped | Check if AC breaker is tripped and AC wiring is connected well. | |
| Mains exist but the unit works in battery mode. | Green LED is flashing. | Insufficient quality of AC power. (Shore or Generator) | 1. Check if AC wires are too thin and/or too long. 2. Check if generator (if applied) is working well or if input voltage range setting is correct. (UPS Appliance) |
| Green LED is flashing. | Set "Solar First" as the priority of output source. | Change output source priority to Utility first. | |
| When the unit is turned on, internal relay is switched on and off repeatedly. | LCD display and LEDs are flashing | Battery is disconnected. | Check if battery wires are connected well. |
| Buzzer beeps continuously and red LED is on. | Fault code 07 | Overload error. The inverter is overload 110% and time is up. | Reduce the connected load by switching off some equipment. |
| Fault code 05 | Output short circuited. | Check if wiring is connected well and remove abnormal load. | |
| Fault code 02 | Temperature of internal converter component is over 120°C. | Check whether the air flow of the unit is blocked or whether the ambient temperature is too high. | |
| Fault code 03 | Battery is over-charged. | Return to repair center. | |
| Fault code 01 | The battery voltage is too high. | Check if spec and quantity of batteries are meet requirements. | |
| Fault code 06/58 | Fan fault | Replace the fan. | |
| Fault code 08/09/53/57 | Output abnormal (Inverter voltage below than 190Vac or is higher than 260Vac) | 1. Reduce the connected load. 2. Return to repair center | |
| Fault code 51 | Internal components failed. | Return to repair center. | |
| Fault code 52 | Over current or surge. | Restart the unit, if the error happens again, please return to repair center. | |
| Fault code 55 | Bus voltage is too low. | ||
| Fault code 56 | Output voltage is unbalanced. | If the battery is connected well, please return to repair center. |
7. Specifications
7.1 Line Mode Specifications
| INVERTER MODEL | 3.0KW/24V | 4.0KW/24V |
|---|---|---|
| Input Voltage Waveform | Sinusoidal (utility or generator) | |
| Nominal Input Voltage | 120Vac | |
| Low Loss Voltage | 95Vac±5V(UPS); 65Vac±7V(Appliances) | |
| Low Loss Return Voltage | 100Vac±5V(UPS); 70Vac±5V(Appliances) | |
| High Loss Voltage | 140Vac±5V | |
| High Loss Return Voltage | 135Vac±5V | |
| Max AC Input Voltage | 150Vac | |
| Nominal Input Frequency | 50Hz/60Hz (It can be set in program 09) | |
| Low Loss Frequency | 45±1Hz/55±1Hz | |
| Low Loss Return Frequency | 47±1Hz/57±1Hz | |
| High Loss Frequency | 55±1Hz/65±1Hz | |
| High Loss Return Frequency | 53±1Hz/63±1Hz | |
| Output Short Circuit Protection | Line mode: Circuit Breaker Battery mode: Electronic Circuits | |
| Efficiency (Line Mode) | >95% (Rated R load, battery full charged) | |
| Transfer Time | 10ms typical (UPS); 20ms typical (Appliances) | |
7.2 Inverter Mode Specifications
| INVERTER MODEL | 3.0KW/24V | 4.0KW/24V |
|---|---|---|
| Rated Output Power | 3.0KW | 4.0KW |
| Output Voltage Waveform | Pure Sine Wave | |
| Output Voltage Regulation | 120Vac±5% | |
| Output Frequency | 60Hz or 50Hz | |
| Peak Efficiency | 94% | |
| Overload Protection | 5s@≥150% load; 10s@110%~150% load | |
| Surge Capacity | 2* rated power for 5 seconds | |
| Nominal DC Input Voltage | 24Vdc | |
| Cold Start Voltage | 23.0Vdc | |
| Low DC Warning Voltage | 22.0Vdc | |
| Low DC Warning Return Voltage | 23.0Vdc | |
| Low DC Cut-off Voltage | 21.0Vdc | |
| High DC Recovery Voltage | 29Vdc | |
| High DC Cut-off Voltage | 31Vdc | |
| No Load Power Consumption | <35W | |
7.3 Charge Mode Specifications
Utility Charging Mode:
| INVERTER MODEL | 3.0KW/24V | 4.0KW/24V |
|---|---|---|
| Charging Current (UPS) @ Nominal Input Voltage | 80A | 110A |
| Bulk Charging Voltage (Flooded Battery) | 29.2Vdc | |
| Bulk Charging Voltage (AGM / Gel Battery) | 28.2Vdc | |
| Floating Charging Voltage | 27Vdc | |
| Charging Algorithm | 3-Step | |
Solar Charging Mode:
| INVERTER MODEL | 3.0KW/24V | 4.0KW/24V |
|---|---|---|
| Rated Power | 5600W | |
| PV Charge Current | 100A | 140A |
| Efficiency | 98.0% max. | |
| Max. PV Array Open Circuit Voltage | 350Vdc | |
| PV Array MPPT Voltage Range | 55-350Vdc | |
| Standby Power Consumption | 2W | |
| Battery Voltage Accuracy | +/-0.3% | |
| PV Voltage Accuracy | +/-2V | |
| Charging Algorithm | 3-Step | |
7.4 General Specifications
| INVERTER MODEL | 3.0KW/24V | 4.0KW/24V |
|---|---|---|
| Safety Certification | CE | |
| Operating Temperature Range | 0°C to 55°C | |
| Storage temperature | -15°C~60°C | |
| Dimension (D*W*H), mm | 400*250*89mm | |
| Net Weight, kg | 7.5kg | 8.5kg |
* Product technical specifications are subject to change without notice.
7.5 Approximate Back-up Time Table
| Model | Load (W) | Backup Time @ 24Vdc 100Ah (min) | Backup Time @ 24Vdc 200Ah (min) |
|---|---|---|---|
| 4.0KW | 300 | 449 | 1100 |
| 600 | 222 | 525 | |
| 900 | 124 | 303 | |
| 1200 | 95 | 227 | |
| 1500 | 68 | 164 | |
| 1800 | 56 | 126 | |
| 2100 | 48 | 108 | |
| 2400 | 35 | 94 | |
| 2700 | 31 | 74 | |
| 3200 | 28 | 67 |
Note: Backup time depends on the quality of the battery, age of battery, and type of battery. Specifications of batteries may vary depending on different manufacturers.
8. User Tips
- For optimal performance, ensure all circuit breakers are correctly sized and installed as specified in the manual for battery, PV, AC input, and AC output connections.
- When connecting lithium batteries, always ensure the BMS communication cable is properly connected and the inverter is set to "Lib-485" mode in Program 5 for correct battery management. If communication issues arise, switch to "LIB" mode if your battery supports it.
- If you plan to use the WiFi monitoring function, remember that the inverter has only one communication port. You must choose between WiFi module communication or battery BMS communication, as only one can be active at a time.
- If the inverter is shutting down or not responding, first check battery voltage and all wiring connections, especially for correct polarity and secure terminals.
- If using a generator as an AC input source, ensure its output quality is stable and within the inverter's acceptable input voltage range to prevent issues.
9. Frequently Asked Questions (FAQ)
- Q: Can this equipment be used in parallel, and if so, how many units?
- A: The provided information does not explicitly state parallel capability. Please consult the full user manual (PDF) or contact customer support for details on parallel operation.
- Q: Does it come with a built-in battery?
- A: No, the product description states "No battery function available" and refers to "External Battery packs" and "Compatible With Most Kinds Of 24V Batteries," indicating it does not have a built-in battery.
- Q: How can I get the digital user manual?
- A: A PDF version of the user manual is available. You can access it here: User Manual (PDF).
- Q: Does it work with LiFePO4 batteries?
- A: Yes, the inverter is compatible with LiFePO4 batteries, as well as other types like Lithium, GEL, Lead-acid, and AGM batteries. Ensure proper BMS communication settings are configured (Program 5, "Lib-485" mode).
- Q: Can it function without a battery?
- A: Yes, the inverter supports "No battery function available" mode, meaning it can power loads directly from the PV array without a battery connected.
- Q: Is a WiFi module or WiFi version available? Is there an app to control via WiFi?
- A: Yes, WiFi monitoring function is optional. There is an app ("smartess App") to monitor and control the inverter via WiFi. Note that the inverter has only one communication port, so you must choose between WiFi module communication or battery BMS communication.
- Q: The unit I received doesn't have a ground on the input AC. Can I tie the input and output ground together?
- A: The manual states that the inverter/charger should be connected to a permanent grounded wiring system and to connect the PE protective conductor (Ground) first for AC output. It is crucial to follow local requirements and regulations for grounding. If you are unsure, it is recommended to consult a qualified electrician.
10. Warranty and Support
For warranty information, technical support, or service, please contact your local dealer or the service center. Only qualified service personnel should attempt repairs. If issues persist after following the troubleshooting guide, return the inverter/charger to the service center.