
1. Introduction
Thank you for purchasing the Epson Rilakkuma Label Printer LW-H200RK. This compact and user-friendly label printer allows you to create personalized labels with various fonts, frames, and Rilakkuma characters. This manual provides essential information for setting up, operating, and maintaining your device to ensure optimal performance.

2. Package Contents
Ensure all the following items are included in your package:
- Epson Rilakkuma Label Printer LW-H200RK
- Tape Cartridge (sample)
- AA Alkaline Batteries (6 pieces)
- User Manual (this document)
- AS Warranty Card
3. Setup
3.1. Battery Installation
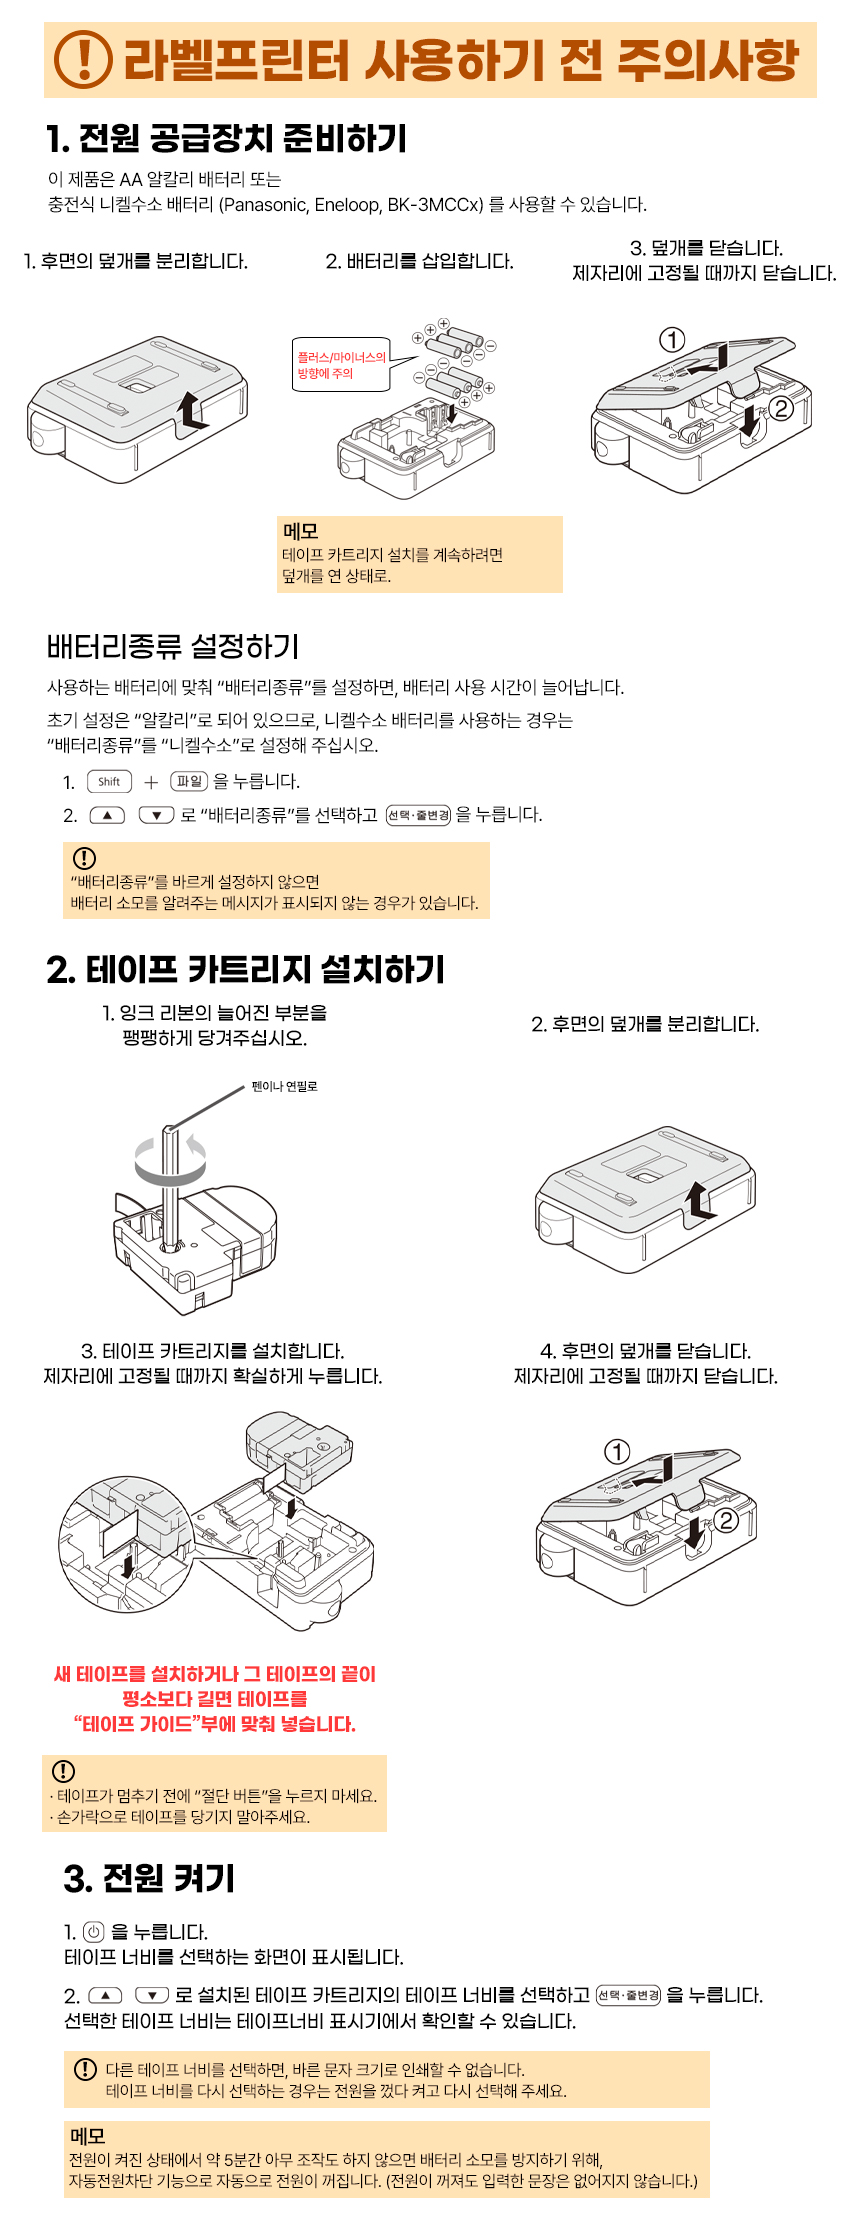
- Ensure the printer is turned off.
- Locate and remove the rear cover of the printer.
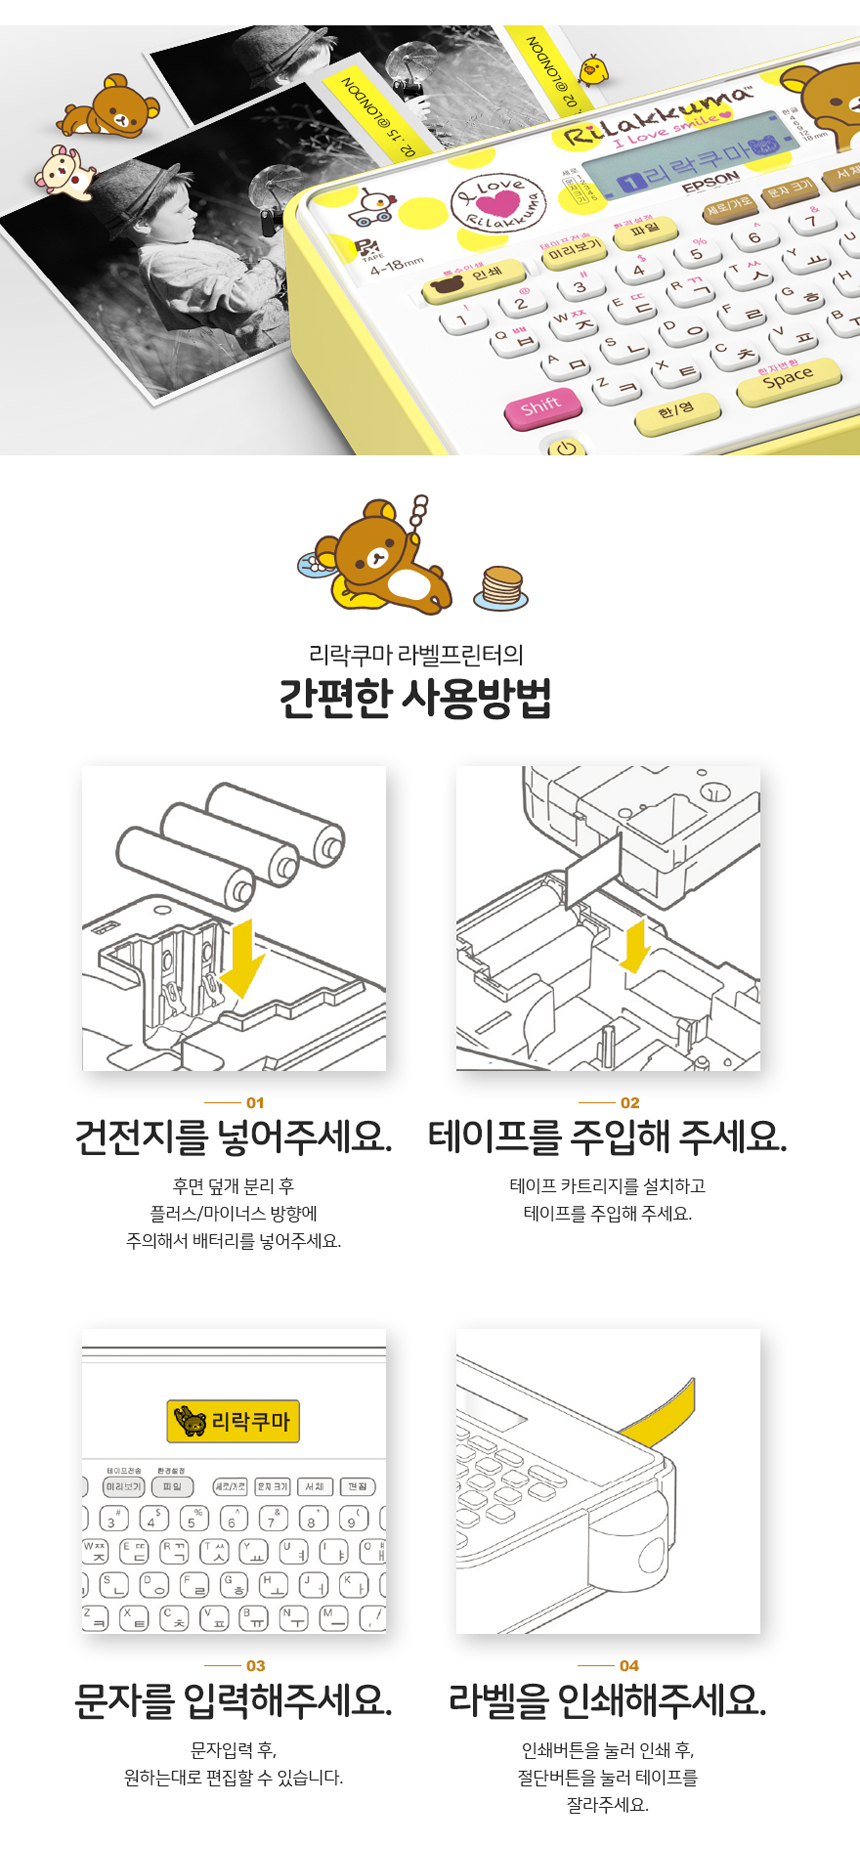
- Insert 6 AA alkaline batteries (e.g., Panasonic, Eneloop, BK-3MCC) into the battery compartment, paying close attention to the positive (+) and negative (-) polarity markings.
- Replace the rear cover until it clicks securely into place.
Note: If using Ni-MH rechargeable batteries, access the printer's settings menu to change the battery type from "Alkaline" (default) to "Ni-MH" for optimized battery life.
3.2. Tape Cartridge Installation
- Open the printer's top cover by gently pulling the raised part.
- Open the tape compartment cover.
- Insert the tape cartridge firmly into the compartment until it clicks into place. Ensure the tape is properly aligned.
- Close the tape compartment cover and then the printer's top cover.
Caution: If the tape appears loose or is not feeding correctly, gently press the tape lever inside the compartment to tighten it before closing the cover.
Warning: Do not press the "Cut" button if a tape cartridge is not installed, as this may damage the internal cutter mechanism.
3.3. Powering On
- Press the power button (Power symbol) to turn on the printer.
- The display will prompt you to select the tape width and type. Use the navigation keys to choose the correct settings for your installed tape cartridge and confirm with the "OK" button.
4. Operation

4.1. Basic Printing Steps
- Input Text: Use the keyboard to type the desired text for your label. The display shows up to 6 characters across 2 lines.
- Adjust Settings (Optional): Before printing, you can adjust various settings such as font, size, style, and print direction.
- Print Label: Press the "Print" button to print your label. The printer will automatically cut the label after printing.
4.2. Key Features and Customization
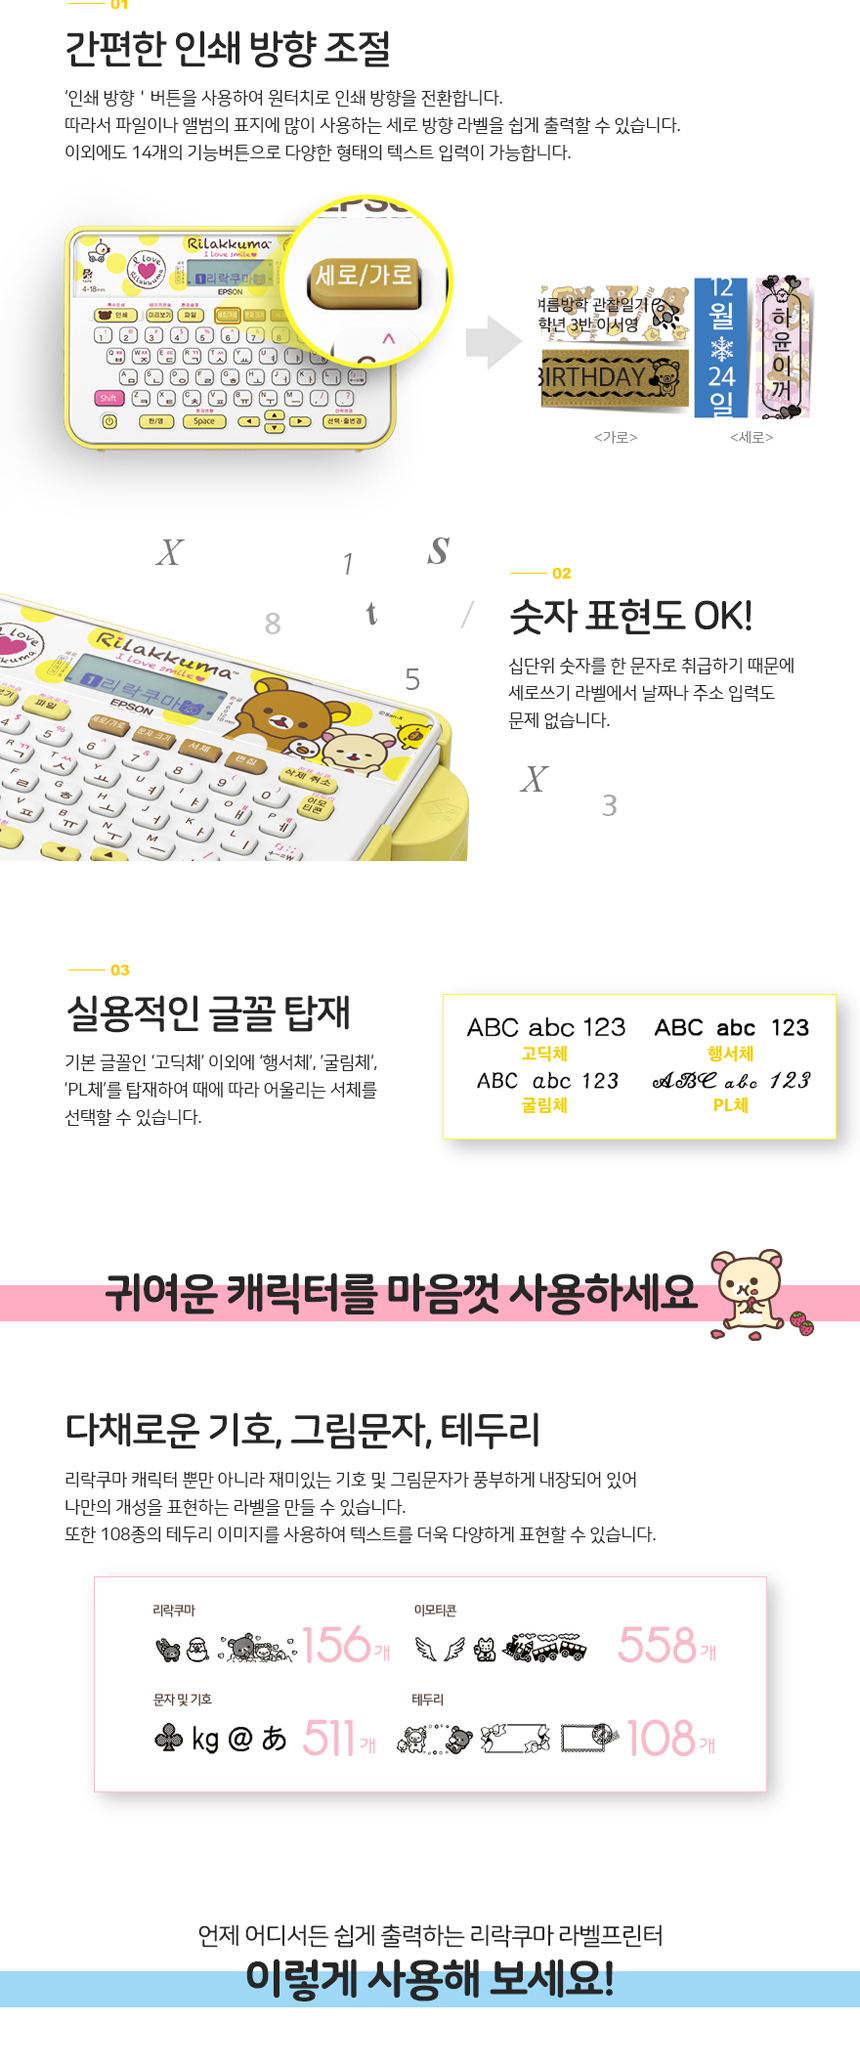
- Print Direction: Easily switch between horizontal and vertical printing modes using the dedicated button.
- Font Selection: Choose from a variety of built-in fonts including Gothic, Round Gothic, Gyosho, and PL to match your style.
- Character and Symbol Input: The printer supports Korean, English, numbers, and a wide range of symbols and special characters.
- Design Elements: Enhance your labels with over 100 types of decorative frames and pictograms, including Rilakkuma-themed designs.
5. Applications
The Epson Rilakkuma Label Printer LW-H200RK is versatile and can be used for various labeling needs:
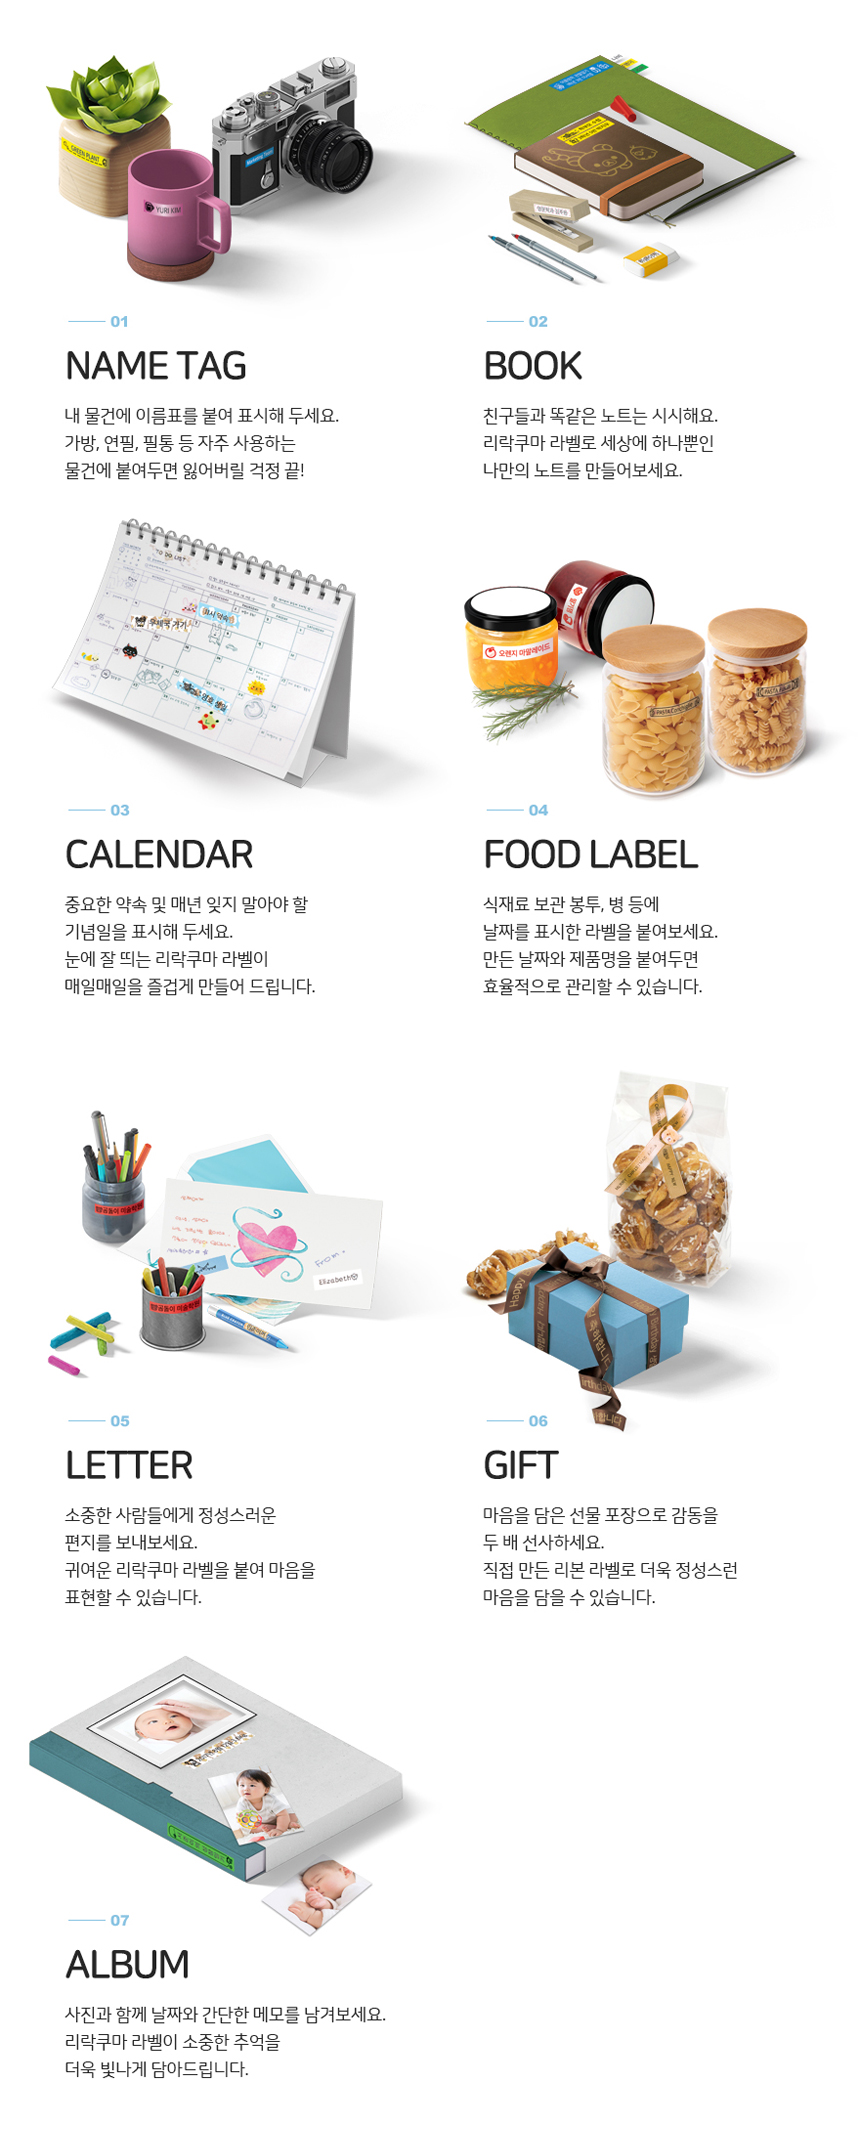
- Name Tags: Create personalized name tags for belongings.
- Book Labels: Organize your books with custom labels.
- Calendar Entries: Mark important dates and events on your calendar.
- Food Labels: Label food containers with contents and dates.
- Letters & Cards: Add a personal touch to letters and cards.
- Gift Tags: Design unique tags for gifts.
- Album Decorations: Decorate photo albums with dates and descriptions.
6. Maintenance
To ensure the longevity and optimal performance of your label printer, follow these maintenance guidelines:
- Cleaning the Printer: Use a soft, dry cloth to wipe the exterior of the printer. Do not use abrasive cleaners or solvents.
- Cleaning the Print Head: If print quality deteriorates, the print head may need cleaning. Refer to the detailed instructions in the included user manual for print head cleaning procedures.
- Tape Cutter Maintenance: Avoid pressing the "Cut" button without a tape cartridge installed to prevent damage to the cutter blade. If the cutter becomes dull or jammed, consult the user manual or contact support.
- Storage: Store the printer in a cool, dry place away from direct sunlight and extreme temperatures when not in use. Remove batteries if storing for extended periods.
7. Troubleshooting
If you encounter issues with your label printer, try the following common troubleshooting steps:
- Printer does not turn on: Check if the batteries are correctly installed with the correct polarity. Ensure the batteries are not depleted and replace them if necessary.
- Poor print quality: Ensure the tape cartridge is correctly installed. Check if the print head is clean (refer to maintenance section). Try a new tape cartridge.
- Tape not feeding: Verify the tape cartridge is properly seated. Gently press the tape lever to ensure the tape is taut.
- Error message on display: Refer to the full user manual for specific error code meanings and solutions.
For more complex issues, please refer to the comprehensive user manual or contact Epson customer support.
8. Specifications

| Feature | Specification |
|---|---|
| Tape Output Width | 4 / 6 / 9 / 12 / 18 mm |
| Max Print Lines | 3 lines |
| Resolution | 64 dots / 180 dpi |
| Print Speed | 6 mm/sec |
| Character Input | Korean 5-row keyboard (ABC/abc) |
| Inputtable Characters | Korean, English, Numbers, Symbols, Special Characters |
| Built-in Fonts | Gothic, Round Gothic, Gyosho, PL |
| Design Frames | 108 types |
| Internal Files | 5 files (approx. 90 characters) |
| Display | LCD 6 characters x 2 lines |
| Supported OS | N/A (Standalone device) |
| Continuous Printing | No |
| Auto Cutting | No |
| Half Cutting | No |
| Power | AA Alkaline Batteries (6) |
| External Dimensions (mm) | 173 x 109 x 58 |
| Weight | 400g (excluding batteries and tape) |
9. User Tips
- Experiment with different font styles and Rilakkuma frames to create unique and appealing labels for various purposes.
- Always ensure the tape cartridge is securely installed to prevent misfeeds and ensure consistent print quality.
- For optimal battery life, especially with rechargeable batteries, remember to set the correct battery type in the printer's settings.
10. Support
For further assistance, detailed warranty information, or to inquire about replacement parts and accessories, please refer to the full user manual included in your package or visit the official Epson support website.