
1. Product Overview
The JONSBO Z20 is a compact and versatile MATX/ATX PC case chassis designed for high-performance hardware in small desktop environments. With a volume of approximately 20 liters, it offers a balance of portability and robust component support.

Figure 1: JONSBO Z20 Mini MATX Chassis highlighting key features.
Key Features:
- Portable and Mobile: Equipped with a detachable carrying handle.
- Efficient Cooling: Features short run-through air ducts and large square mesh for enhanced natural convection.
- Magnetic Dust Filters: Comprehensive coverage with magnetic dust filters on main air inlets and outlets.
- Removable PCI-E Fixing Piece: Optimizes installation experience for longer graphics cards.
- Compact Design: Approximately 20L volume, suitable for various desktop environments.
2. Specifications
| Attribute | Value |
|---|---|
| Product Model | Z20 v1.0 |
| Chassis Material | SPCC steel plate, tempered glass |
| Color | Black/White (Orange, Pink available in special editions) |
| Chassis Dimensions (D/W/H, without protrusions) | 370mm x 186mm x 295mm |
| Chassis Dimensions (D/W/H, with handle/footrest) | 382mm x 198mm x 335mm |
| Motherboard Support | Mini-ITX / Micro-ATX |
| SFX Power Supply Compatible | SFX / SFX-L |
| ATX PS2 PSU Compatible | Limited to 180mm, recommended length ≤140mm (depending on hardware) |
| 2.5-inch Drive Bays | Up to 3 (depending on hardware configuration) |
| 3.5-inch Drive Bays | Up to 1 (depending on hardware configuration) |
| Top Fan Support | 2 x 120mm / 2 x 140mm |
| Rear Fan Support | 1 x 120mm / 1 x 92mm |
| Bottom Fan Support | 2 x 120mm / 2 x 140mm (depending on hardware) |
| Top CPU Water Cooling Radiator | 240mm |
| CPU Air-Cooled Height Limit (Intel) | 164mm |
| CPU Air-Cooled Height Limit (AMD) | 163mm |
| GPU Compatible Size | Limited length 363mm (depending on hardware) |
| Front I/O Interface | USB 3.2 Gen 1 Type-A x1, USB 3.2 Gen 2 Type-C x1, Headphone & Microphone Composite Audio Port x1 |
| Thickness (Integrated bending of top cover/front panel) | 2mm |
| Thickness (Handle/graphics card bracket) | 2mm |
| Thickness (Rear/Bottom Panel) | 1mm |
| Thickness (Main board frame) | 0.8mm |
| Thickness (Glass side panel) | 3mm |
| Thickness (Metal side plate/power supply mounting bracket/power supply side baffle) | 1.2mm |
| Net Weight | 5kg |
| Gross Weight | 6.5kg |
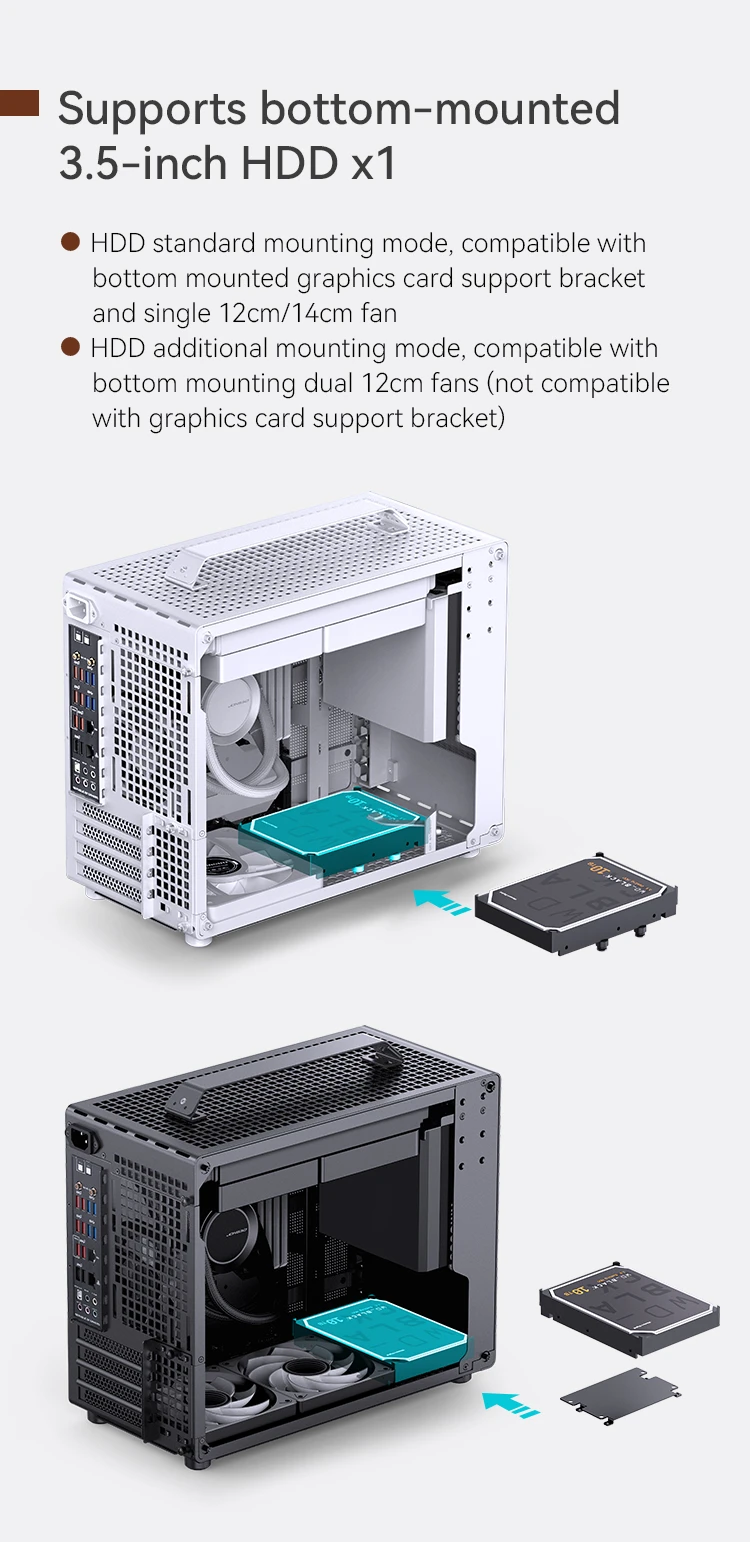
Figure 2: Detailed product parameters.
3. Accessories List
The JONSBO Z20 chassis comes with the following accessories:
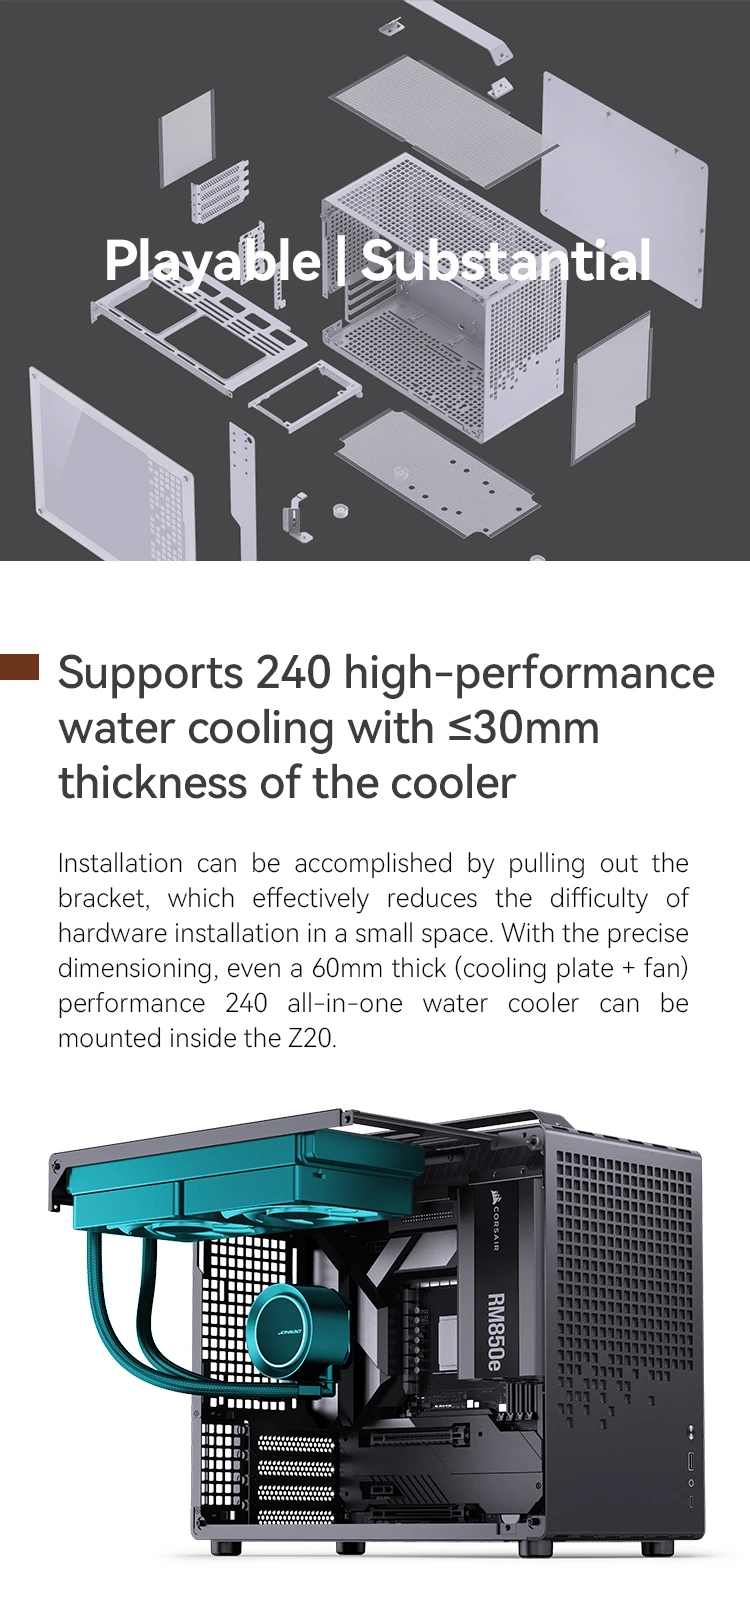
Figure 3: Overview of included accessories.
Screws:
- Motherboard/Power Supply/Graphics Card Support Bracket/SSD Bracket/HDD Bracket Screws (A)
- SSD Screws (B) - x8
- SSD Screws (C) - x5
- HDD Screws (D) - x5
- SSD/HDD Silicone Washers (E) - x5
- HDD Screws (F) - x6
- Hex Socket Handle Screws (G) - x3
Spare Parts:
- Motherboard Post Installation Aid Sleeve (H) - x1
- Motherboard Standoffs (I) - x2
- Glass Side Panel Screws (J) - x1
- PCI-E Slot Cover/Radiator, Fan Bracket Screws (K) - x1
- Cable Ties (L) - x10
Graphics Card Support Bracket Installation Kit:
- Bracket Component (M) - x1
- Bracket Component (N) - x1
- Mouthpiece (O) - x2
Handle Installation Kit:
- Handle Component (P) - x1
- Handle Component (Q) - x2
- Handle (R) - x1
Other Accessories:
- SFX to ATX Power Supply Adapter Bracket (S) - x1
- Dual 2.5-inch SSD Mounting Bracket (T) - x1
- 3.5-inch HDD Mounting Bracket (U) - x1
- Rear Dust Filter (V) - x1
4. Setup & Installation
4.1. Pre-Installation Preparations
-
Remove the Side Panel: Carefully remove the side panel(s) of the chassis. The glass side panel is 3mm thick, handle with care.

Figure 4: JONSBO Z20 with side panel removed.
-
Remove the Internal Baffle: Locate and remove any internal baffles that obstruct component installation.

Figure 5: Internal view showing baffle removal area.
-
Remove the ATX Power Supply Bracket (if applicable): If you plan to use an SFX power supply or need more space, remove the ATX power supply bracket. This bracket can be adjusted to 4 levels of height elevation (P1-P4) for ATX PSUs.
-
Remove the Radiator/Fan Bracket: For easier installation of top-mounted cooling, remove the radiator/fan bracket.
4.2. Motherboard Installation
Install your Mini-ITX or Micro-ATX motherboard into the chassis. Ensure all standoffs are correctly aligned and secured.
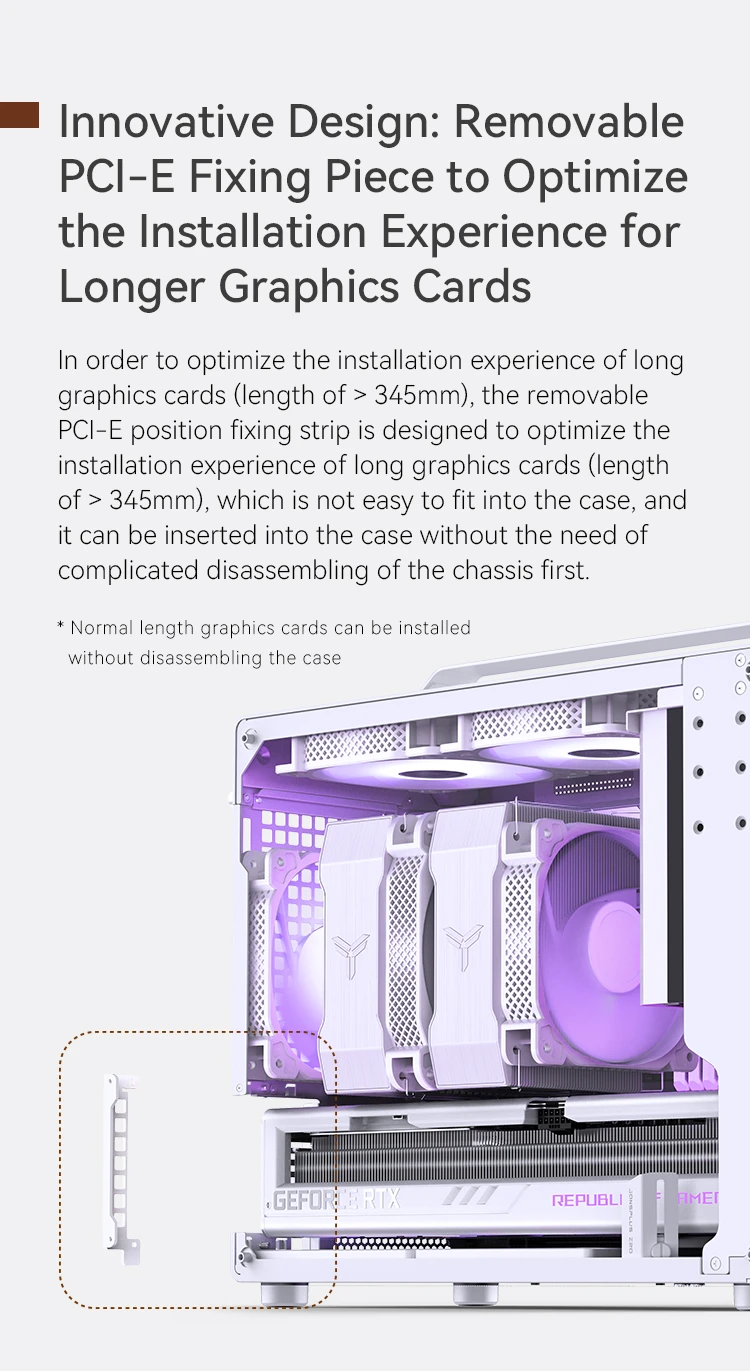
Figure 6: Motherboard installation area.
Connect the front I/O connectors (USB 3.2 Gen 1 Type-A, USB 3.2 Gen 2 Type-C, Headphone & Microphone Composite Audio Port) to your motherboard.
4.3. Power Supply Installation
The JONSBO Z20 supports both ATX PS2 and SFX/SFX-L power supplies. Refer to the compatibility table for recommended lengths based on your hardware configuration.
- ATX Power Supply: Can be installed in vertical mounting mode with 4 levels of height adjustment (P1-P4). Maximum length is 180mm, but ≤140mm is recommended for optimal compatibility.
- SFX/SFX-L Power Supply: Can be installed in side mounting mode or vertical mounting mode using the SFX to ATX adapter bracket (included).
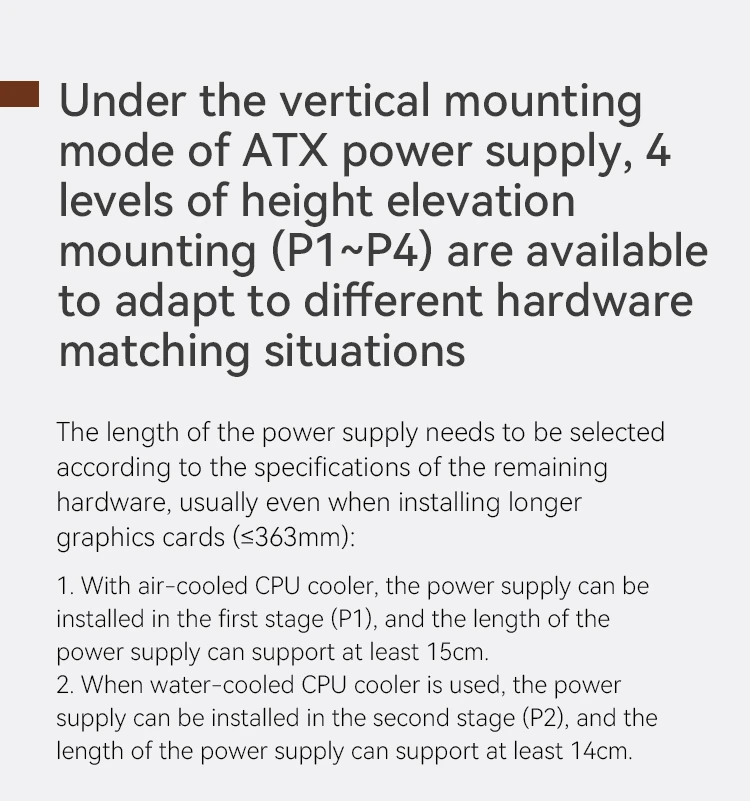
Figure 7: Optional power supply mounting modes.
Tip:
- When installing an ATX PSU in vertical mode with a long graphics card (>280mm), organize power cables in advance.
- If using a water cooling radiator with 30mm thickness in P2 vertical PSU position, only 3 screws are needed to secure the PSU.
4.4. Cooling System Support
The chassis offers flexible cooling options:
- Fans: Supports up to 5 cooling fans. Max 140mm fans on top and bottom. A 120mm fan can be installed at the rear (air-cooled CPU cooler status); if it conflicts with water cooling, a 92mm fan can be used instead.
- Air Coolers: Max CPU cooler height of 164mm (Intel) or 163mm (AMD).
- Water Cooling: Supports 240mm AIO radiators on the top, compatible with 30mm thick coolers (fan not included).

Figure 8: Exploded view of cooling component placement.
4.5. Storage Installation (SSD & HDD)
- 2.5-inch SSD: Up to 3 SSDs can be mounted (2 on the back, 1 on the bottom). They can be mounted on the back side or on the bottom, depending on the rest of the hardware configuration.
- 3.5-inch HDD: Up to 1 HDD can be bottom-mounted. Standard mounting mode is compatible with a graphics card support bracket and a single 12cm/14cm fan. Additional mounting mode is compatible with dual 12cm fans but not with a graphics card support bracket.
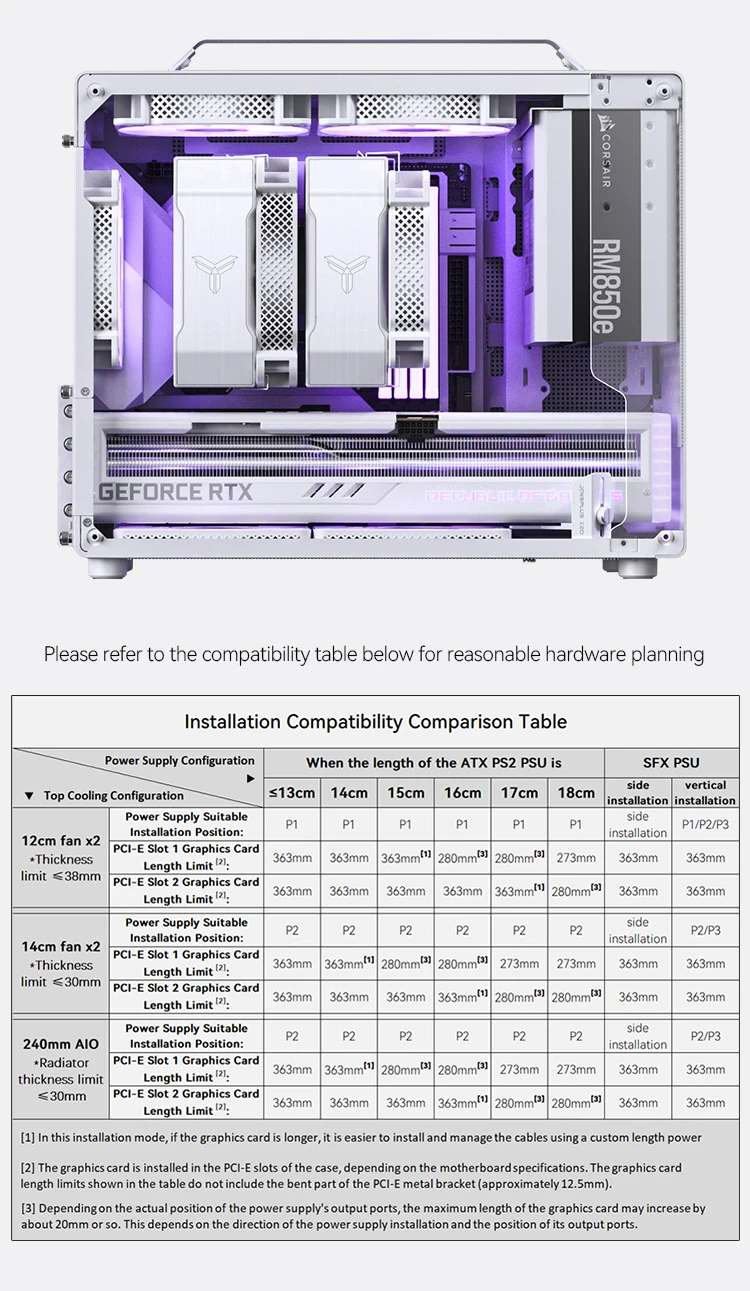
Figure 9: 2.5-inch SSD installation options.
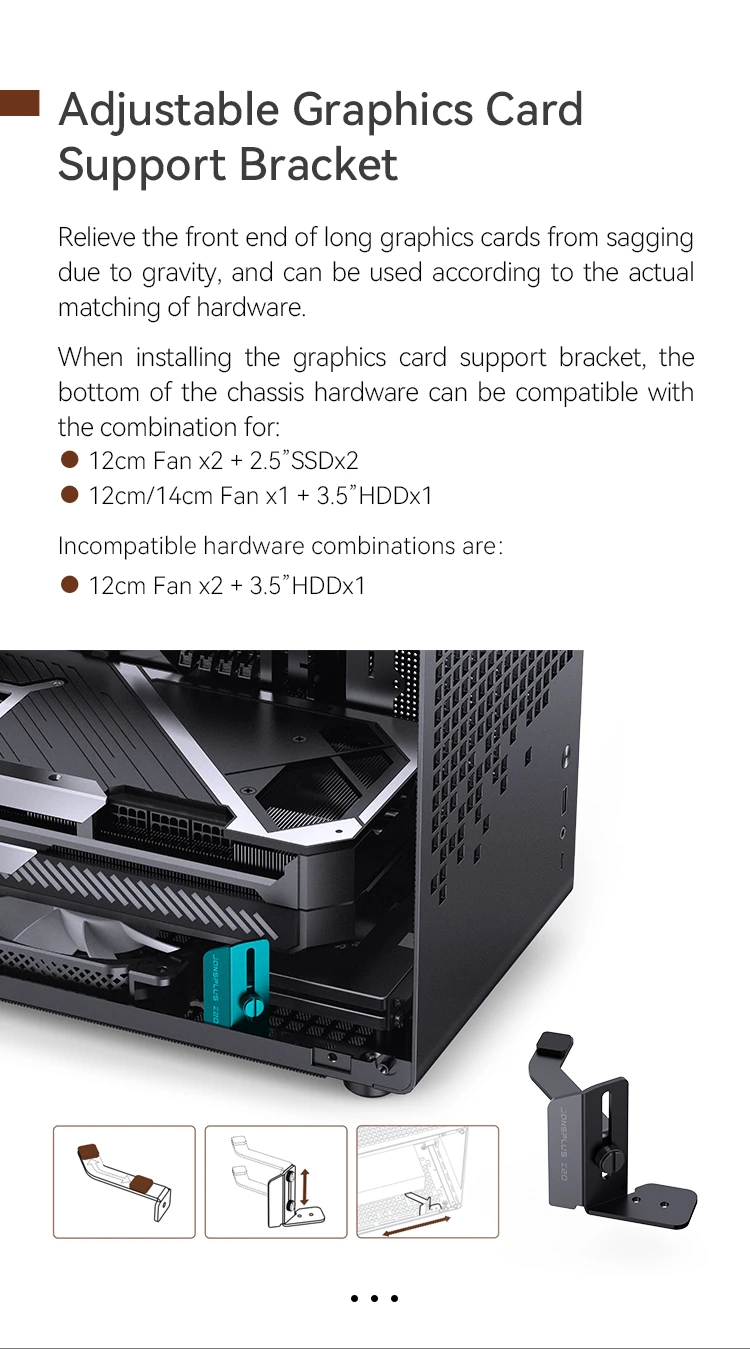
Figure 10: 3.5-inch HDD installation options.
4.6. Graphics Card Installation
The JONSBO Z20 supports high-performance graphics cards up to 363mm in length.
- Standard Installation: Install the graphics card directly into the PCI-E slot.
- Special Mounting Mode for Longer Cards: For graphics cards longer than 345mm, the innovative removable PCI-E fixing piece can be detached to optimize installation without complicated chassis disassembly.
- Adjustable Graphics Card Support Bracket: Relieve sagging of long graphics cards due to gravity. This bracket can be used in various combinations with fans and SSDs/HDDs.
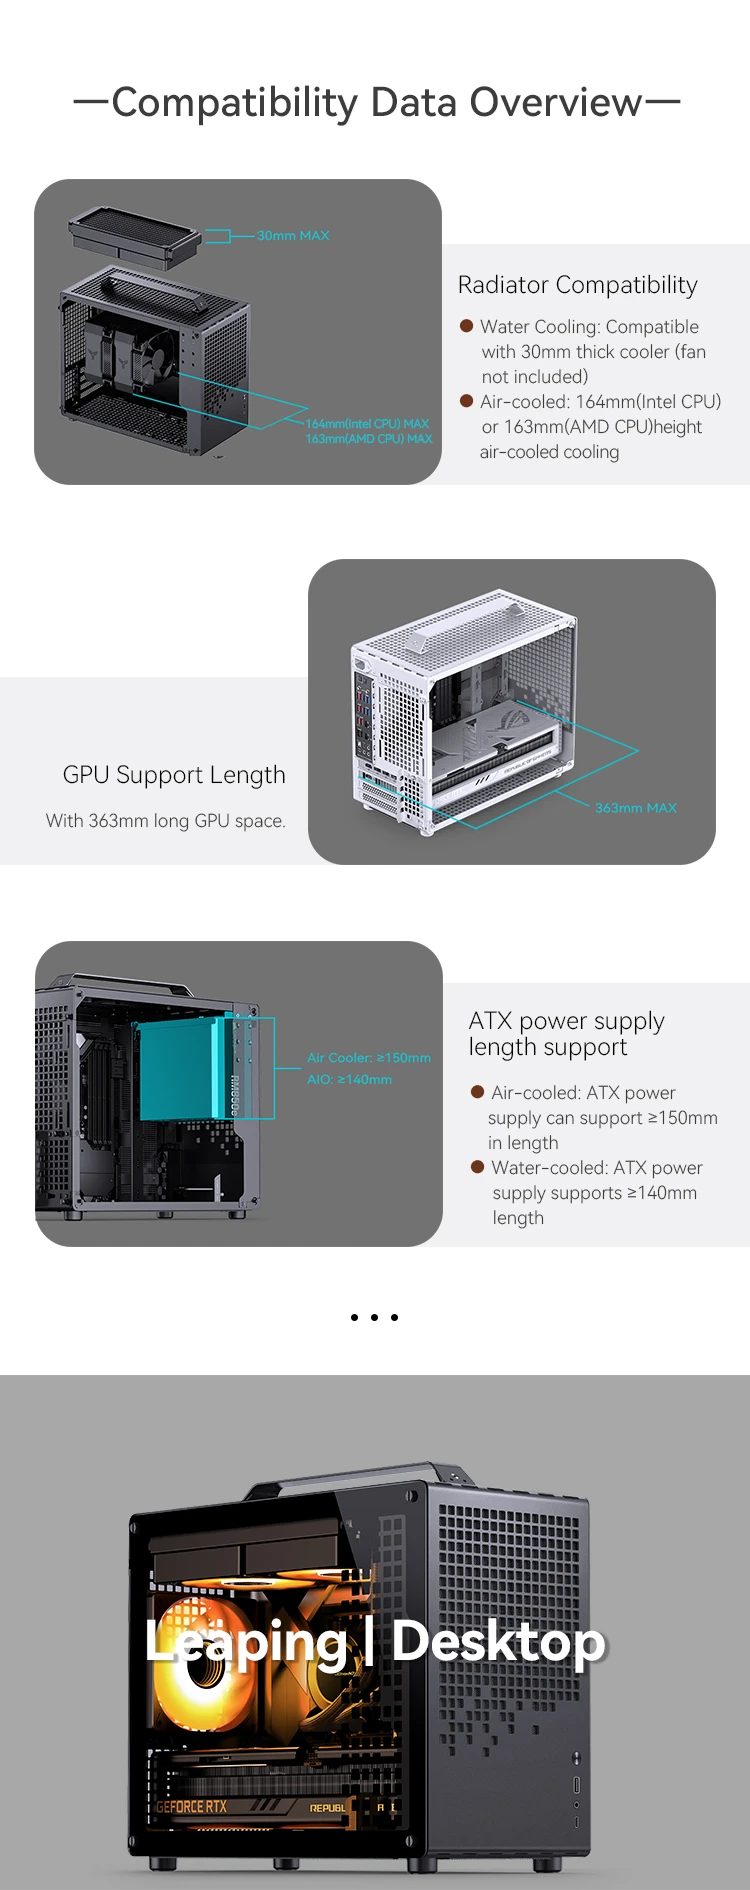
Figure 11: GPU clearance and support for cards up to 363mm.
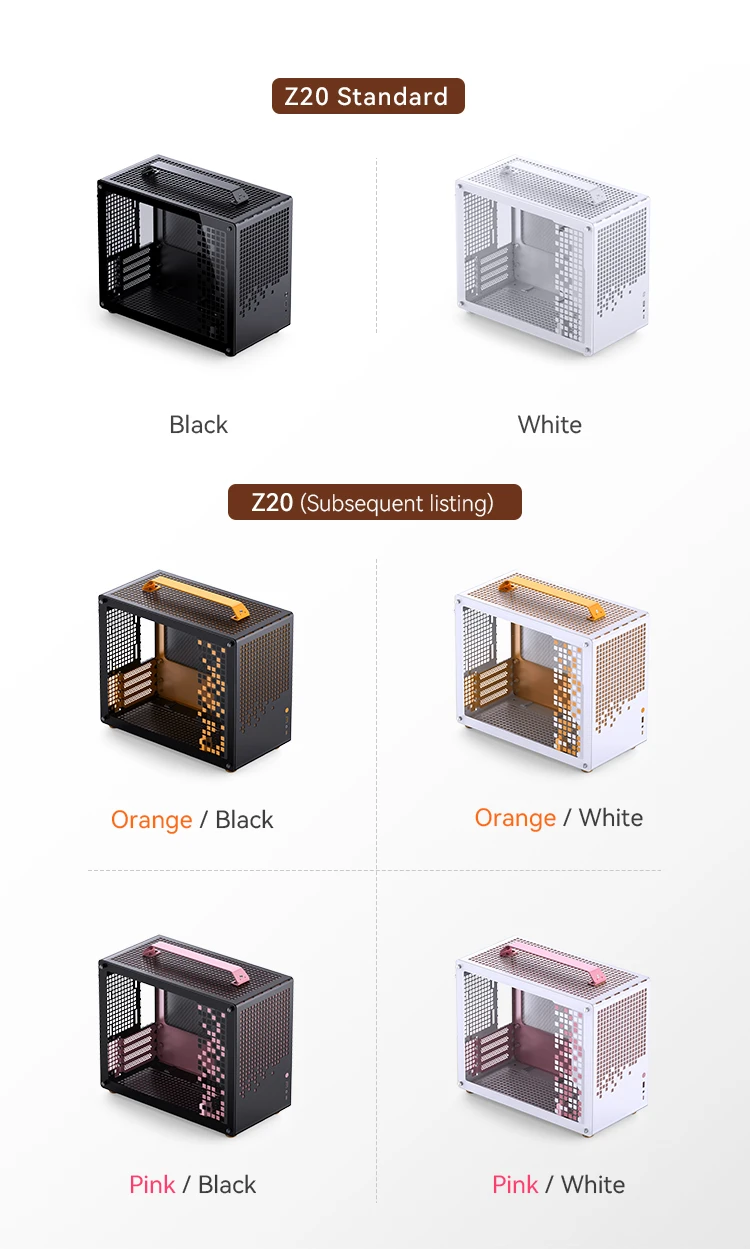
Figure 12: Adjustable graphics card support bracket.
Tip:
- If a long graphics card makes installation difficult, remove the PCI-E slot support bar before placing the graphics card.
- Ensure the graphics card support bracket does not conflict with fan blades to prevent damage.
4.7. Handle Installation
The JONSBO Z20 features a removable handle with 2mm thickness for easy mobility. The handle and case are connected by screwless hooks, ensuring no screw holes affect the appearance after disassembly.
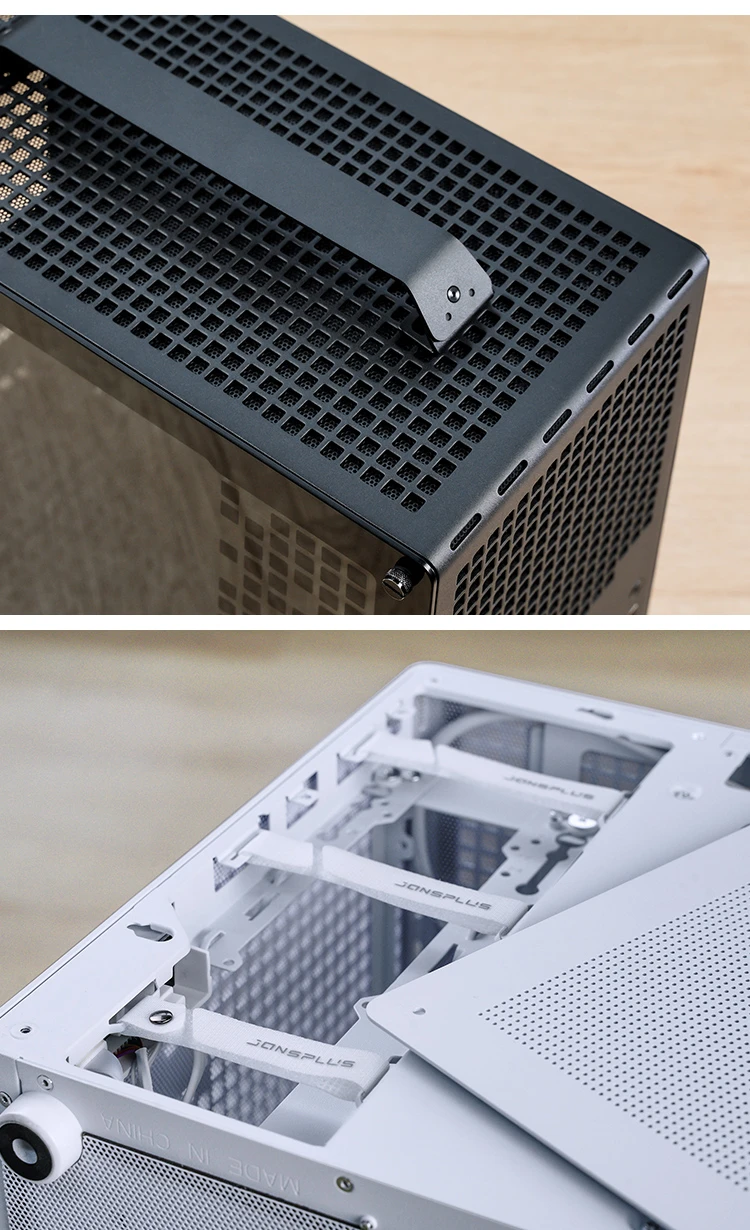
Figure 13: Detachable handle for easy transport.
4.8. Finishing the Installation
After installing all components:
-
Cable Routing: Utilize the dedicated 22mm deep back cable routing channel with 3 Velcro strips to manage and limit extra cables, easing cable routing anxiety.
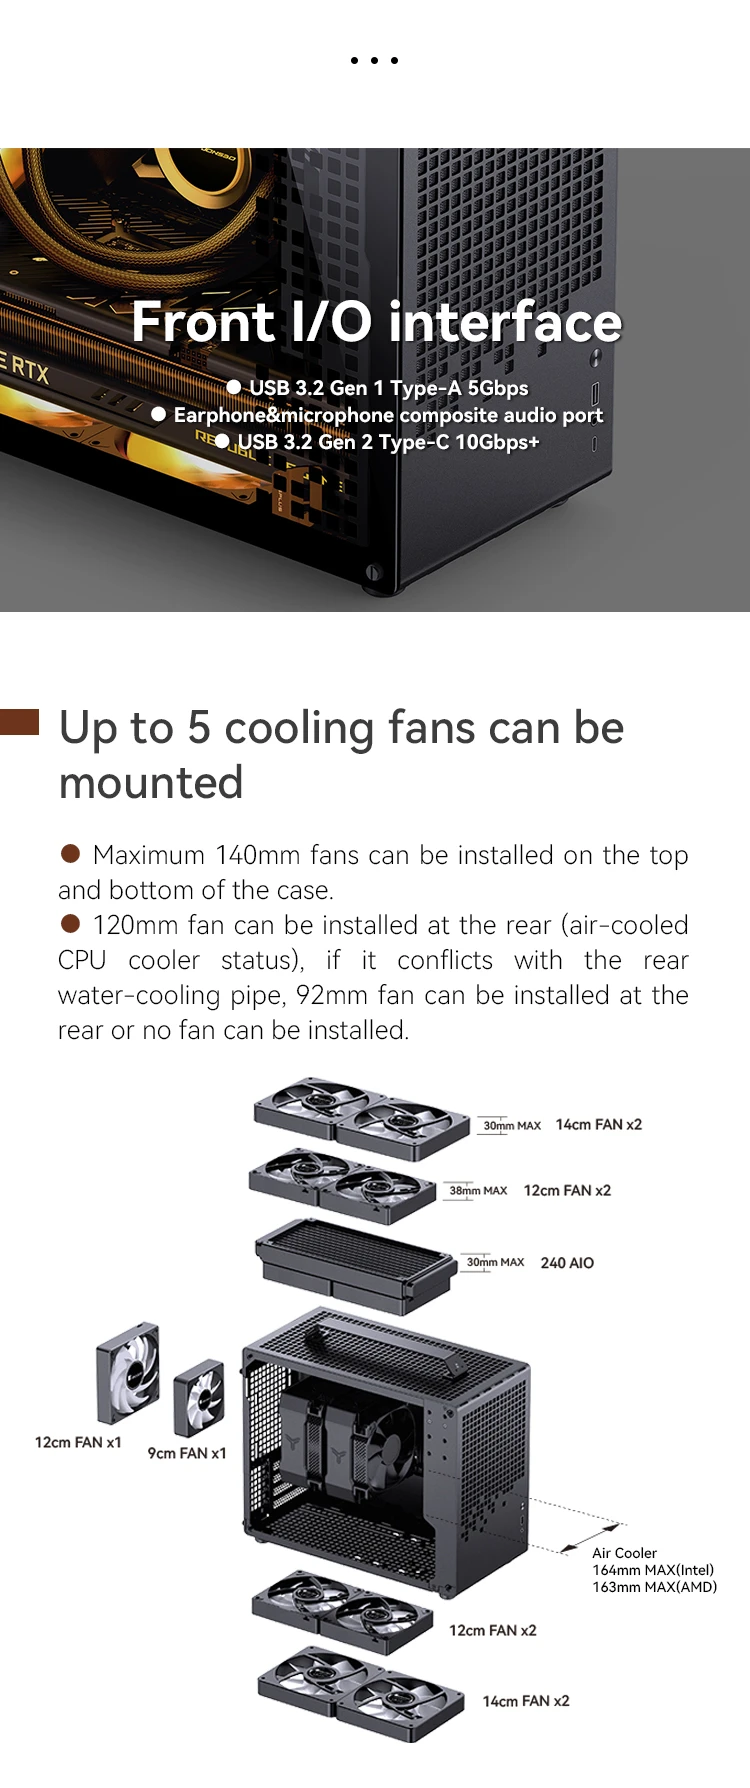
Figure 14: Back cable routing channel with Velcro strips.
The motherboard also comes with 3 Velcro strips underneath to secure and organize front I/O or fan cables.
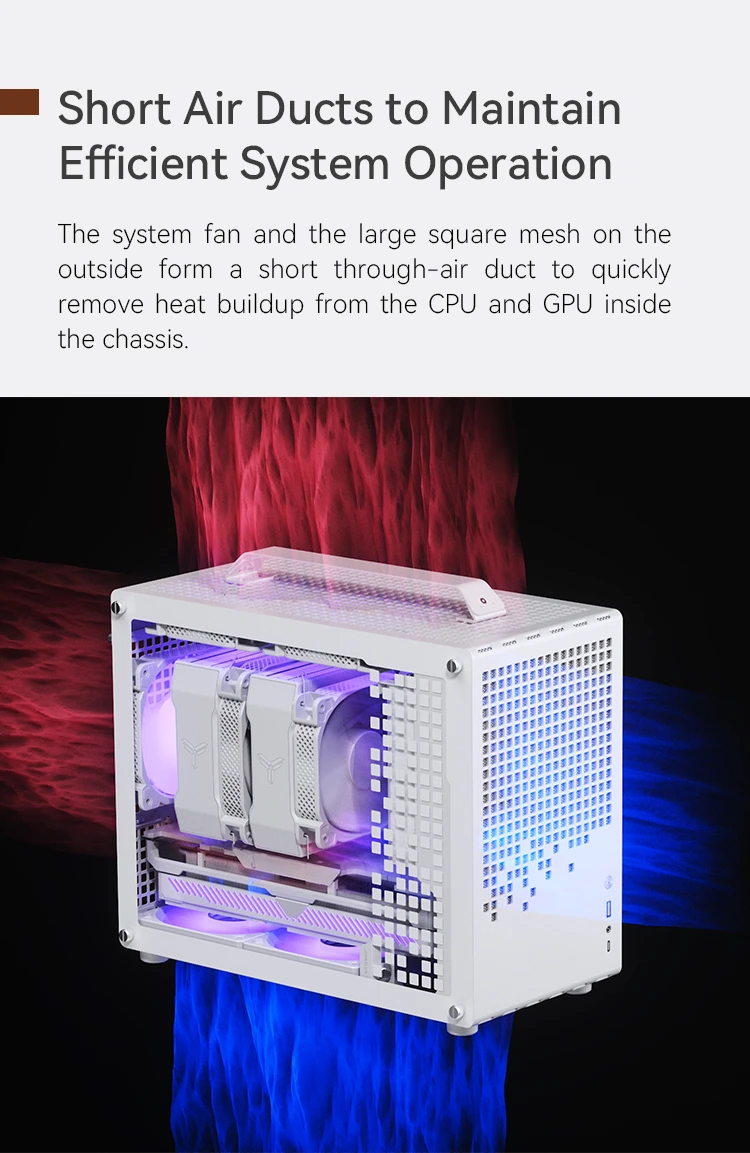
Figure 15: Front I/O cable fixing Velcro strips.
-
Reattach Panels: Securely reattach all side panels and any other removed parts.
5. Operating Instructions
Once all components are installed and secured, connect your peripherals and power cable to the chassis. The JONSBO Z20 is designed for optimal airflow to maintain efficient system operation.
- Placement: Place the chassis on a stable, flat surface, ensuring adequate space around the case for proper ventilation.
- Airflow: The large square mesh on the outside forms short through-air ducts, quickly removing heat buildup from the CPU and GPU inside the chassis.
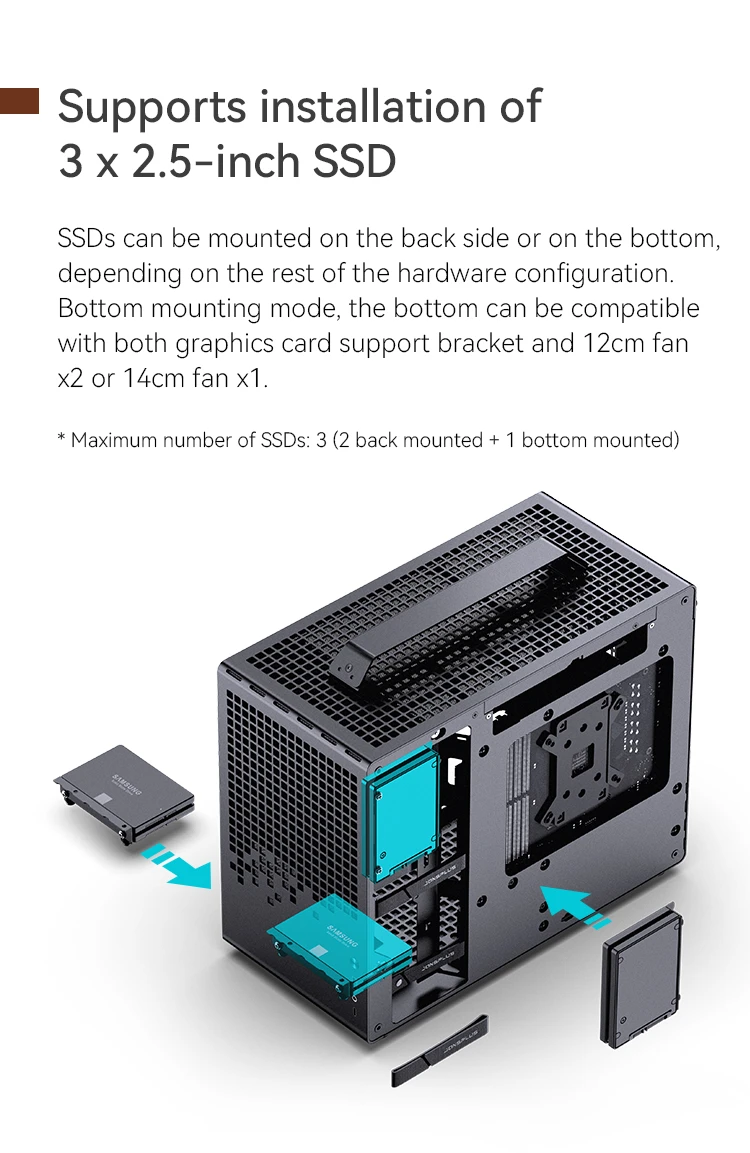
Figure 16: Short air ducts for efficient cooling.
Video 1: JONSBO Z20 Computer Case product showcase, demonstrating features and compatibility.
6. Maintenance
Regular maintenance helps ensure the longevity and optimal performance of your JONSBO Z20 chassis.
- Dust Filter Cleaning: The main air inlet and outlet of the chassis are equipped with magnetic dust filters. Regularly remove and clean these filters to prevent dust buildup and ensure stable operation.
- Rear Dust Filters: Rear dust filters can be used for rear fan intake to bring additional cooling airflow or for rear fanless configurations. Ensure these are also kept clean.
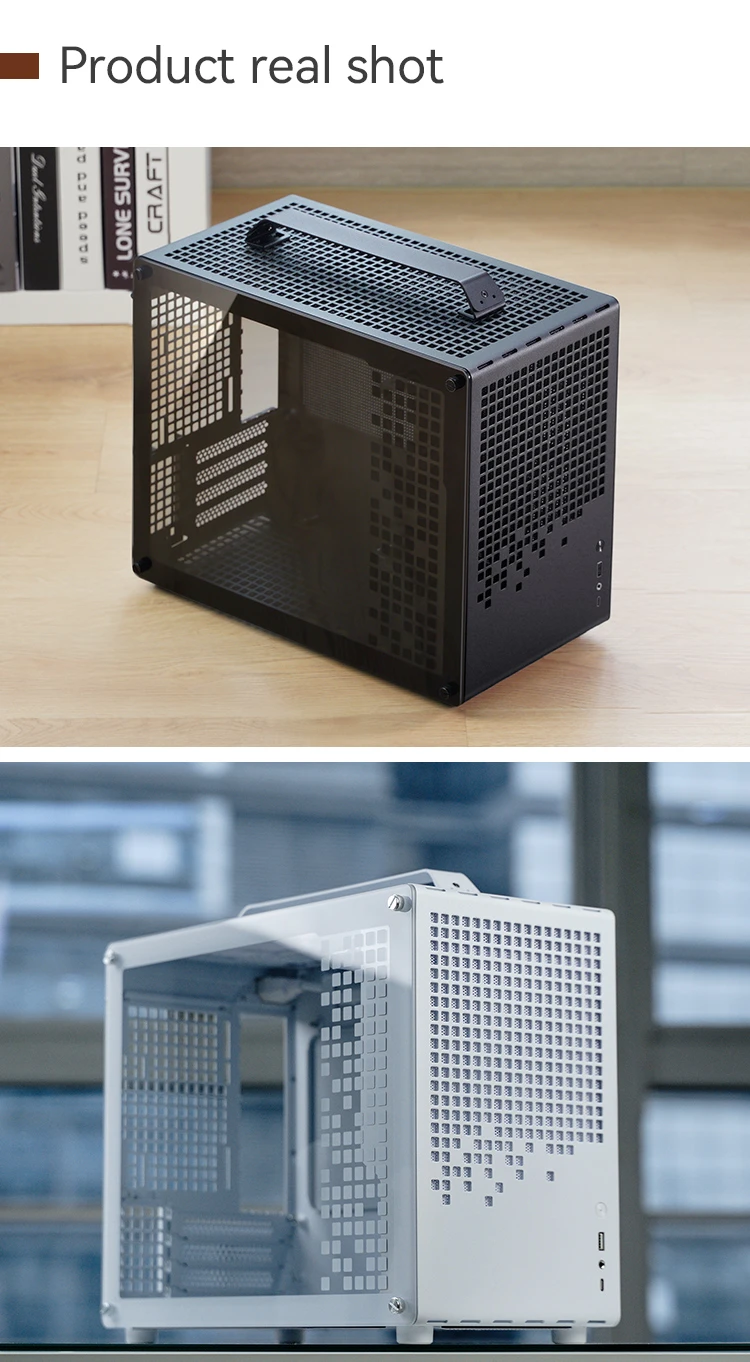
Figure 17: Magnetic dust filters for easy cleaning.
7. Troubleshooting
This section provides guidance for common issues during installation or operation.
- Component Compatibility: Always refer to the specifications and compatibility tables (Figure 2) to ensure your components (GPU, PSU, CPU cooler, radiator) fit within the chassis's limits.
- Long Graphics Cards: If installing a graphics card longer than 345mm, remember to remove the PCI-E slot support bar first for easier installation.
- PSU Length vs. GPU Length: When using an ATX power supply, its length (especially if over 140mm) can impact GPU length compatibility. Consult the compatibility table (Figure 2) for specific configurations.
- SSD/HDD Mounting Conflicts: In some 3.5-inch HDD mounting modes, using dual 12cm fans might conflict with the graphics card support bracket. Plan your storage and cooling setup carefully.
- Overheating: Ensure all fans are correctly installed and functioning. Clean dust filters regularly to maintain optimal airflow. Verify that CPU and GPU coolers are properly seated.
- Loose Connections: Double-check all power cables, data cables, and front I/O connections if components are not functioning as expected.
8. User Tips
- The JONSBO Z20 is well-designed for easy installation and offers good expandability for its compact size.
- Users have noted the high-quality materials and sturdy construction of the case.
- The case is praised for its compact form factor and aesthetically pleasing finish.
- When handling the glass side panel, exercise caution to prevent accidental damage.
9. Warranty & Support
For warranty information, technical support, or service inquiries, please contact JONSPLUS directly.
Manufacturer: Dongguan 1 Sibositong Industrial Co., Ltd.
Address: No.5, Xinglong Luanzhong Village, Qingxi Town, Dongguan, Guangdong Province, 523651, China
Website: www.jonsplus.com
Please retain your proof of purchase for any warranty claims.
A detailed user manual in PDF format is available for download from the manufacturer's website: JONSBO Z20 User Manual (PDF)