
Introduction
Thank you for choosing the PaiPaitek Cat Training Collar. This device is designed to help pet owners manage and correct undesirable behaviors in cats, such as excessive meowing, jumping on counters, or entering forbidden areas. It features both remote-controlled training modes (Beep, Vibration, Static Shock) and an automatic anti-meow function, ensuring a versatile and humane approach to training. Please read this manual thoroughly before use to ensure proper operation and the safety of your pet.
Package Contents
Please check the package to ensure all items are present:
- 1 x Remote Control
- 1 x Receiver
- 1 x Collar Strap (Reflective Nylon)
- 1 x Test Lamp
- 1 x USB Charging Cable
- 1 x Lanyard
- 2 x Contact Points (short and long pairs)
- 2 x Conductive Silicone Caps (for contact points)
- 2 x Anti-Shock Pads
- 1 x User Manual
- 1 x Needle (for resetting, if applicable)
- 1 x Product Box

Product Overview
Familiarize yourself with the components of your PaiPaitek Cat Training Collar:

Remote Control Features:
- Screen: Displays current mode, level, and battery status.
- Level +/- Buttons: Adjusts intensity for Vibration and Static Shock modes (1-100 levels).
- On/Off Button: Powers the remote on or off.
- Vibration Button: Activates vibration correction.
- Static Shock Button: Activates static shock correction.
- Tone Button: Activates an audible beep correction.
- CH Button: Selects the training channel (for multiple receivers).
- Flashlight Button: Turns the built-in flashlight on/off.
- Charging Port: For recharging the remote's battery.
Receiver Features:
- Contact Points: Deliver static shock correction.
- Conductive Silicone Caps: Cover contact points for enhanced comfort and skin protection.
- On/Off Button: Powers the receiver on or off.
- Indicator Light: Shows operational status and battery level.
- Charging Port: For recharging the receiver's battery.
Specifications
| Feature | Detail |
|---|---|
| Model Number | PC 559-1-TIO |
| Material | ABS+PC +Nylon |
| Collar Material | Reflective Nylon |
| Battery Type | Rechargeable Li-on Battery |
| Receiver Weight | Approx. 1 oz (28g) |
| Receiver Dimensions (L x H) | Approx. 1.8 in x 1 in (4.5 cm x 2.5 cm) |
| Application | Cats (5-15 lbs), including deaf cats |
| Training Modes | Beep, Vibration, Static Shock (1-100 levels) |
| Automatic Mode | Automatic Anti-Meow (detects meowing, emits beep/vibration) |
| Control Range | Up to 3300 feet (without fence) |
| Battery Life (Remote) | Up to 90 days |
| Battery Life (Receiver) | Up to 20 days |
| Package Weight | 0.3 kg |
| Package Dimensions | 15 cm x 5 cm x 12 cm |

Setup
1. Charging the Devices
Before first use, fully charge both the remote control and the receiver.
- Connect the USB charging cable to the charging ports on both the remote and the receiver.
- Plug the other end of the USB cable into a compatible USB power source (e.g., laptop, car charger, phone adapter, power bank).
- The indicator lights on both devices will show charging status (refer to device indicators for specific charging signals).
- Once fully charged, disconnect the devices. The remote offers up to 90 days of work time, and the receiver up to 20 days.

2. Attaching the Collar Strap and Contact Points
- Select the appropriate length of contact points (short or long) based on your cat's fur length. For most cats, the shorter points are sufficient.
- Attach the chosen contact points to the receiver.
- For your cat's comfort and skin protection, place the conductive silicone caps over the contact points.
- Thread the reflective nylon collar strap through the receiver.
- Adjust the collar length to ensure a snug but comfortable fit around your cat's neck. You should be able to fit one to two fingers between the collar and your cat's neck. The collar should not be too loose (to prevent movement and ineffective correction) or too tight (to prevent discomfort or skin irritation).
- The collar features a safety buckle for quick release.

Operating Instructions
1. Powering On/Off
- Remote: Press and hold the On/Off button until the screen illuminates/shuts off.
- Receiver: Press and hold the On/Off button on the receiver until the indicator light turns on/off.
2. Remote Training Mode
This mode allows you to manually correct specific undesirable behaviors using the remote control.
- Select Channel: If you have multiple receivers, use the 'CH' button on the remote to select the desired channel corresponding to your cat's collar.
- Choose Correction Type:
- Beep: Press the 'Tone' button for an audible warning.
- Vibration: Press the 'Vibration' button to deliver a vibrational correction.
- Static Shock: Press the 'Static Shock' button to deliver a static correction.
- Adjust Intensity (Vibration/Static Shock): Use the 'Level +' and 'Level -' buttons to set the intensity from 1 to 100. Start with the lowest effective level and increase gradually if needed.
- Correcting Behavior: When your cat exhibits an undesirable behavior (e.g., jumping on furniture, scratching), immediately press the corresponding correction button on the remote. The goal is to interrupt the behavior and associate it with the correction.

3. Automatic Anti-Meow Mode
This mode is designed to automatically deter excessive meowing, particularly useful during nighttime.
- Ensure the receiver is powered on and properly fitted on your cat.
- The collar will detect your cat's meowing.
- Upon detecting meowing, the collar will automatically emit a beep or vibration to distract and discourage the behavior.
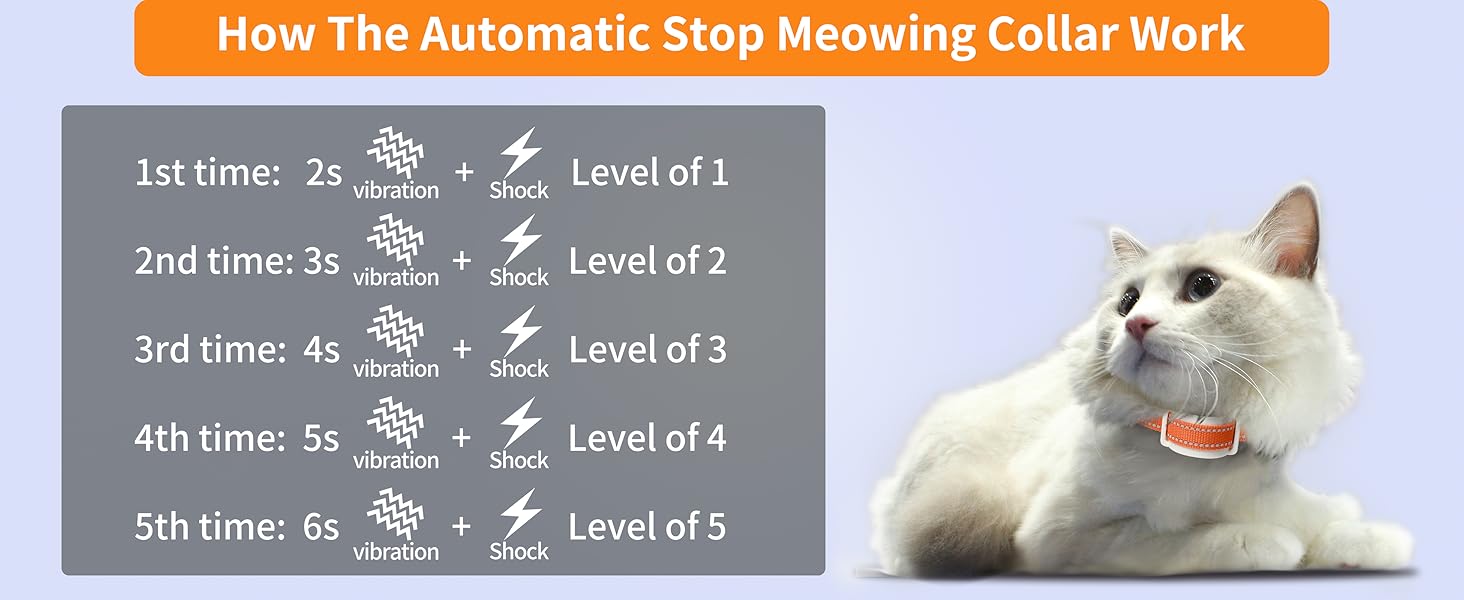
- The system features progressive correction:
- 1st time (2s): Vibration + Level 1 Shock
- 2nd time (3s): Vibration + Level 2 Shock
- 3rd time (4s): Vibration + Level 3 Shock
- 4th time (5s): Vibration + Level 4 Shock
- 5th time (6s): Vibration + Level 5 Shock
- You can select a sound mode based on the length of the meowing:
- Mode 1: Short meowing mode.
- Mode 2: Long meowing mode.


Safety Guidelines
- Proper Fit: Ensure the collar fits snugly but comfortably. It should not be too tight to cause discomfort or too loose to move around and cause friction.
- Duration of Wear: Do not leave the collar on your cat for more than 12 hours per day. Prolonged wear can lead to skin irritation or pressure sores.
- Skin Checks: Regularly inspect your cat's neck area for any signs of redness, irritation, or sores. If any are found, discontinue use immediately and consult a veterinarian.
- Humane Use: This collar is a training aid, not a punishment device. Use corrections sparingly and only when necessary to interrupt unwanted behavior. Always pair corrections with positive reinforcement for desired behaviors.
- Water Resistance: The receiver is generally water-resistant, but avoid submerging it in water for extended periods. Ensure the charging port cover is securely closed.
- Supervision: Always supervise your cat during the initial training phases.
- Age/Weight: This collar is suitable for cats weighing 5-15 lbs. Do not use on kittens or cats outside this weight range without professional guidance.
- Silicone Caps: Always use the conductive silicone caps over the contact points to maximize comfort and minimize skin irritation.
Maintenance
1. Cleaning
- Wipe the remote and receiver with a soft, damp cloth. Do not use harsh chemicals or abrasive cleaners.
- Clean the contact points and the area around them regularly to prevent dirt buildup, which can affect performance and hygiene.
- The nylon collar strap can be hand-washed with mild soap and water. Ensure it is completely dry before reattaching the receiver to prevent moisture damage.
2. Battery Care
- Recharge the devices when the battery indicator shows low power.
- Avoid overcharging or completely draining the battery for extended periods to prolong battery life.
- If storing the device for a long time, charge it to about 50% and store it in a cool, dry place. Recharge every few months to prevent deep discharge.
Troubleshooting
| Problem | Possible Cause | Solution |
|---|---|---|
| Collar not responding to remote. | Low battery on remote or receiver; devices not paired; out of range; incorrect channel selected. | Charge both devices fully. Ensure remote and receiver are powered on and paired. Check that the remote is on the correct channel. Reduce distance between remote and receiver. |
| Automatic Anti-Meow mode not working. | Low battery; collar too loose; meowing not detected; incorrect sound mode selected. | Ensure receiver is charged. Adjust collar for a snug fit. Verify the collar is detecting meows (some cats have very soft meows). Try switching between Mode 1 and Mode 2 for meowing length. |
| Cat not responding to correction. | Correction level too low; poor contact with skin; cat's fur too thick. | Increase the intensity level gradually. Ensure contact points are touching the skin (use longer contact points if necessary). Ensure silicone caps are properly installed. |
| Skin irritation on cat's neck. | Collar too tight; worn for too long; dirty contact points; allergic reaction. | Loosen the collar slightly. Do not leave the collar on for more than 12 hours. Clean contact points regularly. Discontinue use and consult a vet if irritation persists. |
User Tips
- Consistency is Key: For effective training, be consistent with your corrections and positive reinforcement.
- Positive Reinforcement: Always reward desired behaviors with treats, praise, or affection. The collar is a tool to interrupt unwanted actions, not to replace positive training.
- Observe Your Cat: Pay close attention to your cat's reactions to different correction levels. Start low and only increase if necessary.
- Short Training Sessions: Keep training sessions short and positive to prevent your cat from becoming stressed or overwhelmed.
- Environmental Management: While the collar helps, also consider modifying your environment to reduce opportunities for unwanted behaviors (e.g., secure forbidden areas, provide scratching posts).
Warranty and Support
For warranty information, technical support, or any questions regarding your PaiPaitek Cat Training Collar, please refer to the contact information provided with your purchase or visit the official PaiPaitek website. Keep your proof of purchase for warranty claims.