1. Introduction
This manual provides instructions for the installation, operation, and maintenance of the 2.4G Remote Control and Receiver set, designed for children's electric ride-on vehicles. This set includes a remote controller (model HH670Y) and a receiver unit (model HH707K), operating at 12V.

Figure 1: HH670Y Remote Control and HH707K Receiver Unit
2. Safety Information
- Always ensure the electric vehicle is turned off before installing or replacing components.
- Keep the remote control and receiver away from water and excessive moisture.
- Only use the specified voltage (12V) for the receiver unit.
- Ensure proper polarity when connecting wires to avoid damage.
- This product is intended for use with children's electric vehicles only.
3. Package Contents
The package includes the following items:
- 1 x Remote Controller (HH670Y)
- 1 x Receiver Unit (HH707K)
4. Installation and Setup
4.1 Compatibility Check
Before installation, open the control box of your electric ride-on car and visually compare it with the provided receiver unit. If the appearance and connector types of the control box are the same, this part should be compatible with your car.
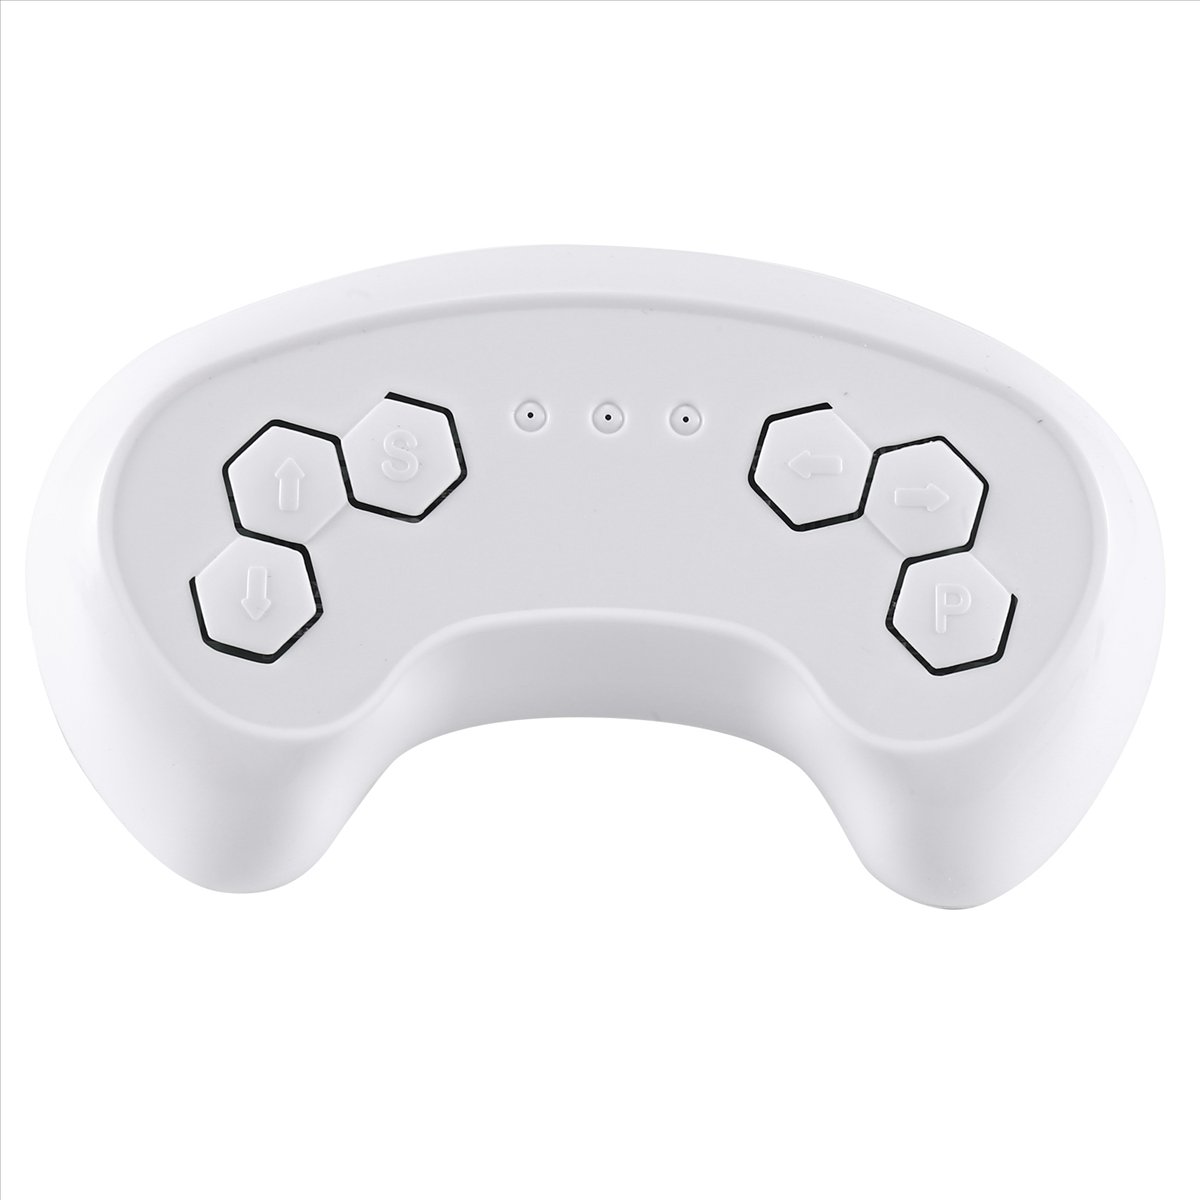
Figure 2: HH707K Receiver Unit (Model HH707K-2.4G, Voltage: DC12V, Max Current: 16A)
4.2 Wiring the Receiver
Connect the receiver unit to your electric vehicle's wiring harness. Ensure that all connections are secure and match the original wiring configuration. Pay close attention to power (positive and negative) and motor connections. The receiver unit has clearly marked ports for connection.

Figure 3: Side view of HH707K Receiver showing connection ports.
4.3 Remote Control Battery Installation
Locate the battery compartment on the back of the remote control. Insert the required batteries (typically AA or AAA, not specified but common for such devices) ensuring correct polarity. Close the battery compartment cover securely.

Figure 4: Back of the HH670Y Remote Control with battery compartment.
5. Operating Instructions
5.1 Pairing the Remote Control with the Receiver
To establish a connection between the remote control and the receiver:
- On the remote control, simultaneously press and hold the forward (up arrow) and reverse (down arrow) buttons. The indicator light on the remote will begin to flash.
- While the remote's light is flashing, turn on the children's electric vehicle.
- The remote control's indicator light should stop flashing, indicating a successful connection.
- Test the remote control functions (forward, reverse, steering) to ensure proper operation.

Figure 5: Front of the HH670Y Remote Control showing control buttons (Forward, Reverse, Left, Right, Speed, Parking).
5.2 Remote Control Functions
- Forward/Reverse Arrows: Control the vehicle's direction of movement.
- Left/Right Arrows: Control the vehicle's steering.
- 'S' Button (Speed): Likely adjusts the speed settings of the vehicle (e.g., low, medium, high).
- 'P' Button (Parking/Brake): May engage a parking brake or emergency stop function.
6. Maintenance
- Keep the remote control and receiver clean and free from dust and debris. Use a soft, dry cloth for cleaning.
- If the remote control will not be used for an extended period, remove the batteries to prevent leakage.
- Regularly check all wiring connections for looseness or damage.
7. Troubleshooting
| Problem | Possible Cause | Solution |
|---|---|---|
| Remote control not responding / Vehicle not moving |
|
|
| Remote control indicator light flashes continuously | Not successfully paired with the vehicle. | Repeat the pairing procedure (Section 5.1). Ensure the vehicle is turned on while pairing. |
| Vehicle moves erratically or intermittently |
|
|
8. Specifications
| Feature | Detail |
|---|---|
| Product Type | 2.4G Remote Control and Receiver Set |
| Remote Control Model | HH670Y |
| Receiver Model | HH707K-2.4G |
| Operating Voltage | DC 12V |
| Max Current (Receiver) | 16A |
| Control Method | 2.4G Wireless |
| Material | Plastic |
| Color | Black (Receiver), White (Remote) |
| Package Dimensions (approx.) | 22 cm (Length) x 10 cm (Width) x 6 cm (Height) |
| Package Weight (approx.) | 0.127 kg |
9. User Tips
- Compatibility is Key: Always visually inspect your existing control box and compare it to the images of this receiver before purchasing to ensure a match.
- Battery Check: If the remote isn't working, the first step is always to check and replace the batteries.
- Pairing Patience: Sometimes it takes a couple of tries to successfully pair the remote. Ensure the vehicle is powered on after you start the pairing sequence on the remote.
10. Warranty and Support
For warranty information, technical support, or replacement parts, please contact the seller or manufacturer directly. Keep your purchase receipt as proof of purchase.


