
1. Introduction
This manual provides detailed instructions for the repair and maintenance of various Lutian pressure washer pump models, including Panther D4, P4, Luba Tiger T4, T5, LT-210, and LT-212. It covers the identification and replacement of common wearing parts such as plungers, water seals, oil seals, check valves, and pressure switches. Proper maintenance and timely replacement of these components are crucial for ensuring the longevity and optimal performance of your pressure washer pump.
2. Component Overview
The following images illustrate the various repair parts available for your Lutian pressure washer pump. Familiarize yourself with each component before proceeding with any repair work.

Figure 2.1: Complete set of Lutian pressure washer pump repair parts.

Figure 2.2: Assortment of various pump repair parts including seals, valves, and switches.

Figure 2.3: Another view of assorted pump repair parts.
Key Components:
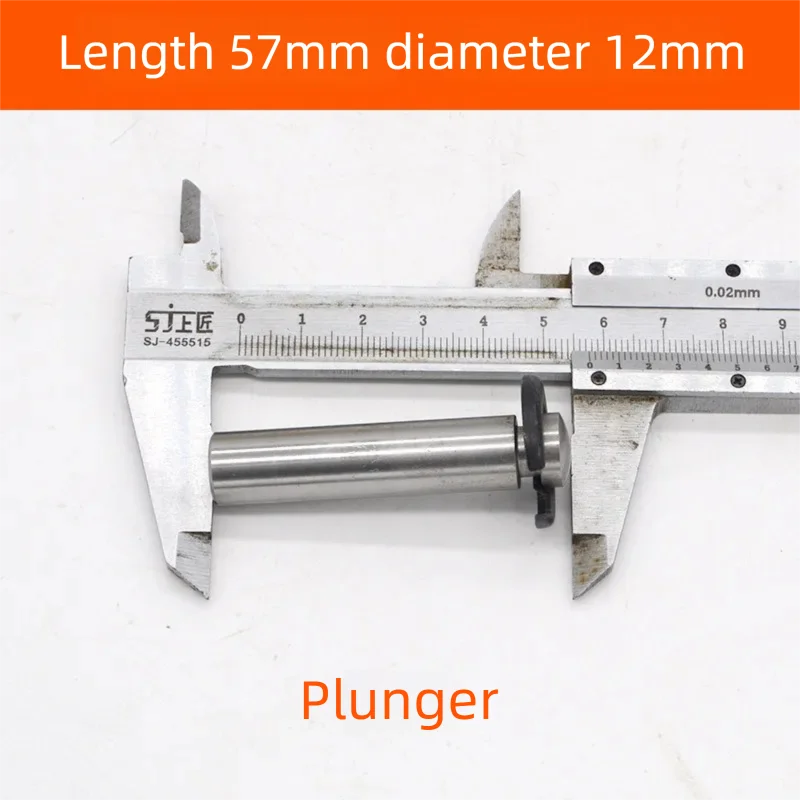
- Plungers: Essential for creating pressure.
- Water Seals: Prevent water leakage.
- Oil Seals: Prevent oil leakage.
- Check Valves: Control water flow direction.
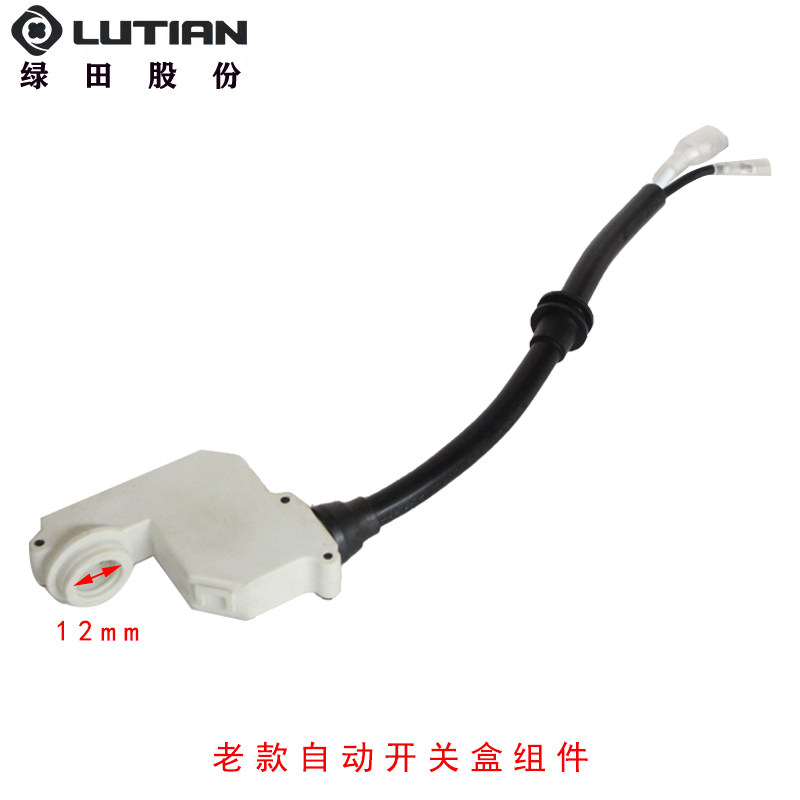
- Pressure Switch: Regulates pump operation based on pressure.
- Springs: Provide necessary tension for valves and plungers.
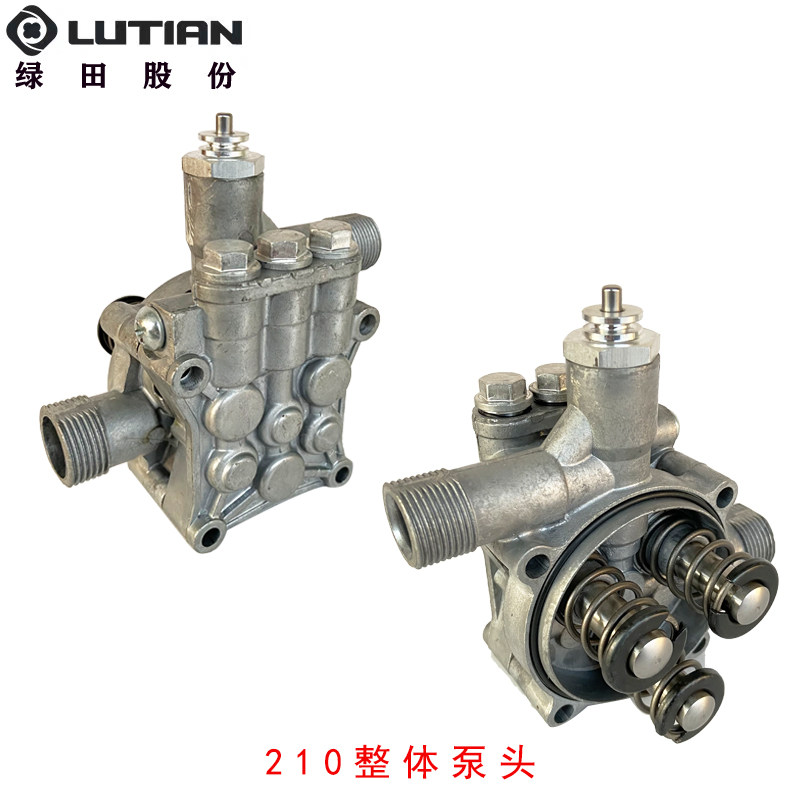
- Pump Body/Casing: The main housing for internal components.
- Pump Cover: Secures the internal components within the pump body.
3. Assembly and Installation
This section details the assembly process for the pump head components. It is recommended to watch the accompanying video for a visual guide.
Video 3.1: Disassembly and reassembly guide for Lutian pressure washer pump parts.
3.1 Pump Cover Assembly
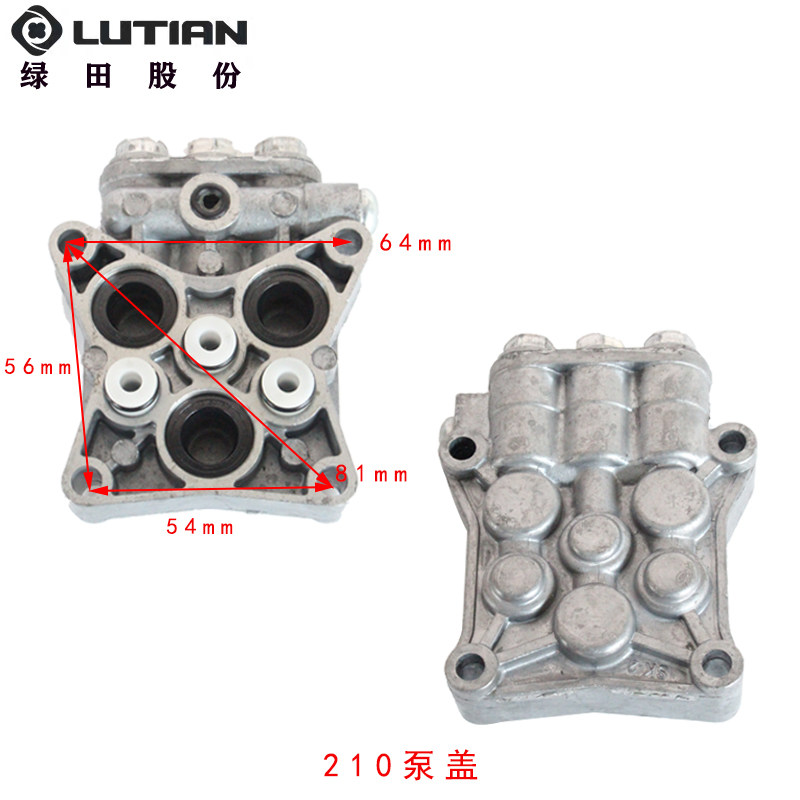
- Install Water Seals: Take the pump cover (Figure 3.1) and install the water seals into the three bottom holes. Ensure the flat side of the seal faces upwards. Do not install them in reverse.
- Install Inlet Valves: Insert the inlet valves into their designated positions. You should hear a click sound when they are properly seated.
- Install Outlet Valves: Install the outlet valves into the three screw holes on the top part of the pump cover. Secure them by screwing on the caps.

Figure 3.1: 210 Pump Cover with dimensions.
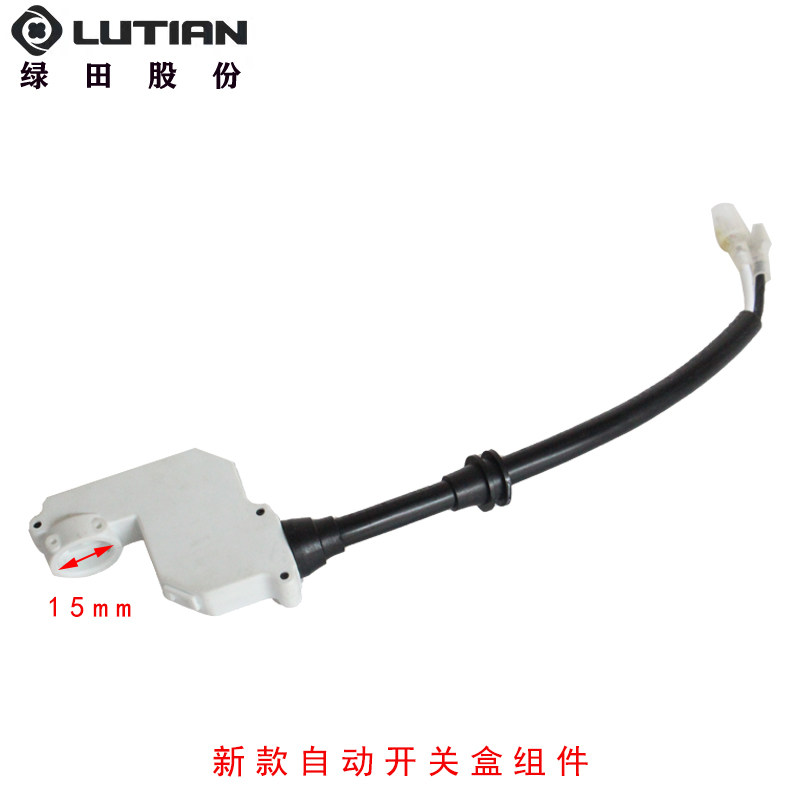
Figure 3.2: 210 Inlet Check Valve (dimensions: 4.5mm, 14.5mm, 12mm).

Figure 3.3: 210 Water Outlet Check Valve (dimensions: 15mm height, 12mm outer diameter, 9mm inner diameter).
3.2 Pump Casing Assembly
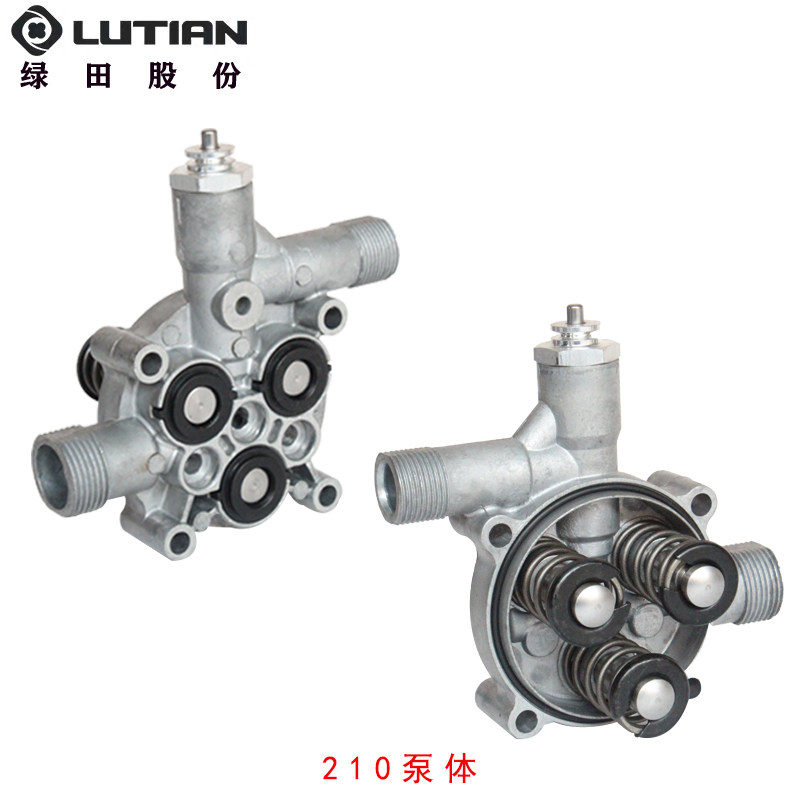
- Install Oil Seals: In the pump casing (Figure 3.4), install the oil seals into the three designated holes. Press the plastic bracket on top of the oil seal to secure it. Repeat for the other three holes.
- Install Plungers and Springs: Insert the plungers and their corresponding springs into the appropriate openings in the casing.
- Install Pressure Sensing Pin: Finally, install the pressure sensing pin into its position on the top of the casing.

Figure 3.4: 210 Pump Body Casing.
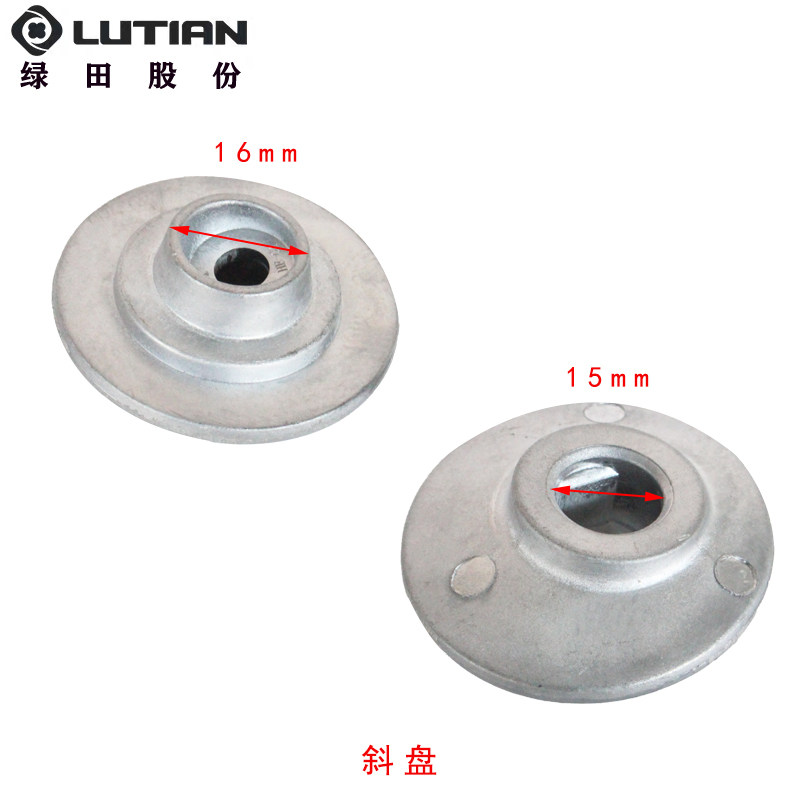
Figure 3.5: Plunger with spring (Height 57mm, diameter 22mm).

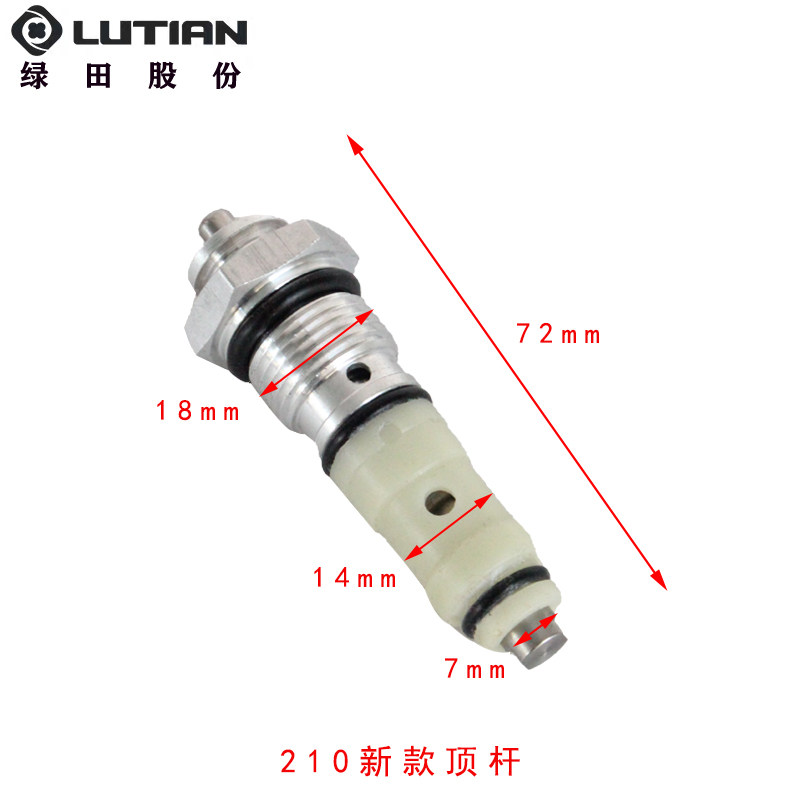
Figure 3.6: Pressure Sensor Pin.
4. Operating Considerations
These components are designed to restore or maintain the functionality of your pressure washer pump. Once properly installed, the pump should operate according to its original specifications. Always ensure all connections are secure and leak-free before operating the pressure washer. Refer to your pressure washer's main instruction manual for specific operating procedures and safety guidelines.
5. Maintenance
Regular inspection and maintenance of your pressure washer pump's internal components can prevent premature failure and ensure consistent performance.
- Inspect Seals: Periodically check water and oil seals for signs of wear, cracking, or leakage. Replace them immediately if any damage is observed.
- Check Valves: Ensure check valves move freely and are not obstructed by debris. Clean or replace if necessary.
- Plungers and Springs: Inspect plungers for scoring or excessive wear. Check springs for corrosion or loss of tension. Replace worn parts to maintain optimal pressure.
- Cleanliness: Keep the pump area clean and free of dirt and debris, which can contaminate seals and valves.
6. Troubleshooting Common Issues
If your pressure washer pump is experiencing issues, replacing specific wearing parts can often resolve the problem.
| Symptom | Possible Cause | Recommended Action |
|---|---|---|
| Water leakage from pump head | Worn or damaged water seals | Replace water seals (Figure 3.1, Figure 3.2) |
| Oil leakage from pump casing | Worn or damaged oil seals | Replace oil seals (Figure 3.4) |
| Low or inconsistent pressure | Worn plungers, weak springs, or faulty check valves | Inspect and replace plungers, springs, or check valves as needed (Figure 3.5, Figure 3.2, Figure 3.3) |
| Pump not building pressure | Faulty pressure switch or clogged check valves | Check pressure switch functionality and clean/replace check valves. |
7. Specifications of Key Components
Below are the dimensions for some of the critical replacement parts:
| Component | Dimensions | Image Reference |
|---|---|---|
| Plunger | Length: 57mm, Diameter: 12mm | Figure 7.1 |
| Plunger with Spring | Height: 57mm, Diameter: 22mm | Figure 7.2 |
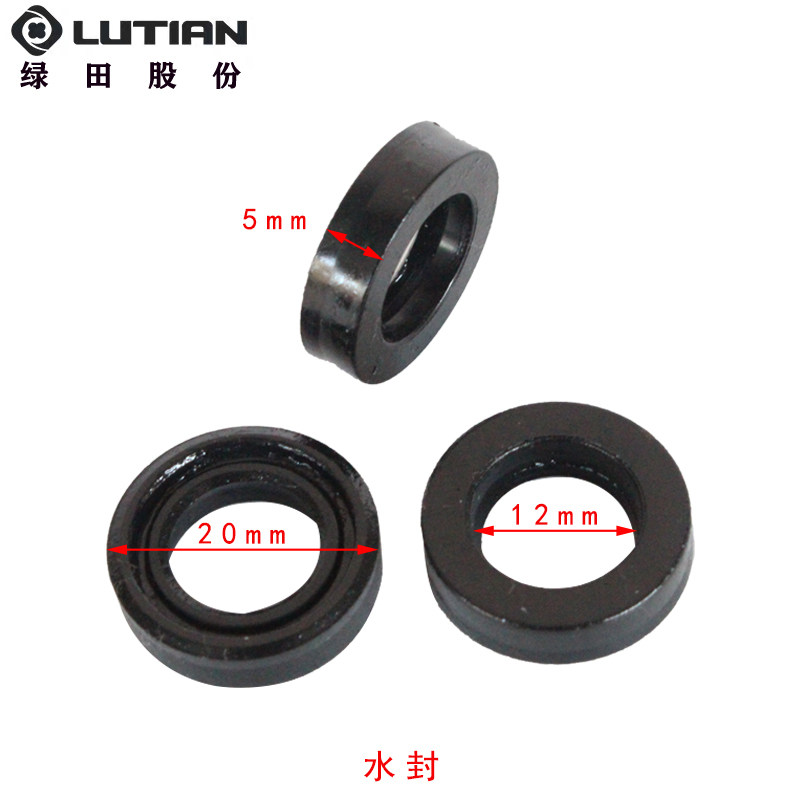
| Water Seal | Inner Diameter: 12mm, Outer Diameter: 20mm, Thickness: 5.3mm | Figure 7.3 |
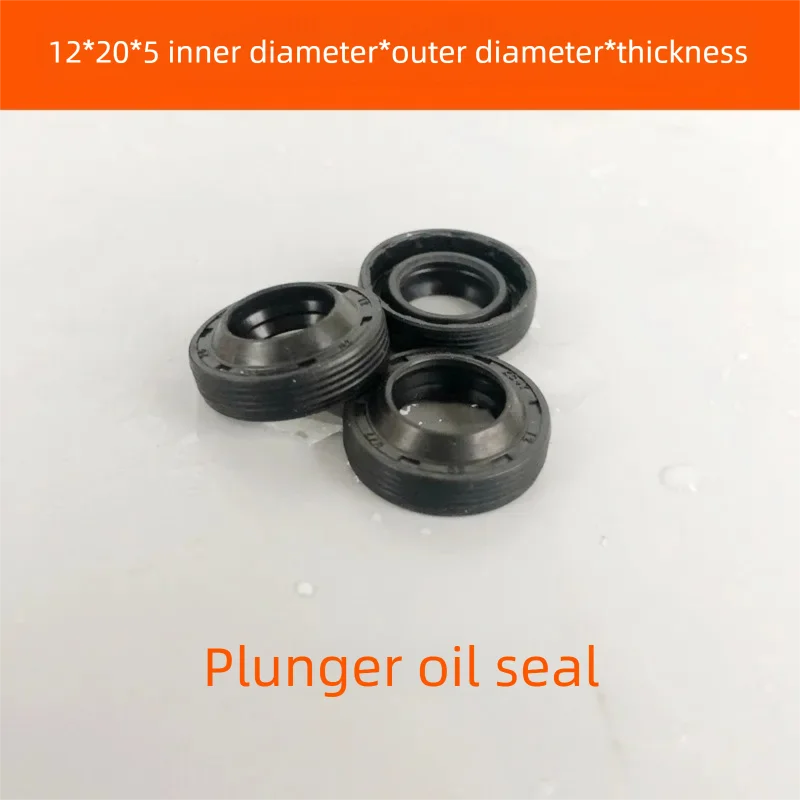
| Plunger Oil Seal | Inner Diameter: 12mm, Outer Diameter: 20mm, Thickness: 5mm | Figure 7.4 |
| Spring | Length: 36mm, Diameter: 22mm | Figure 7.5 |
| 210 Water Outlet Check Valve | Height: 15mm, Outer Diameter: 12mm, Inner Diameter: 9mm | Figure 7.6 |
| 210 Inlet Check Valve | Dimensions: 4.5mm, 14.5mm, 12mm (various parts) | Figure 7.7 |
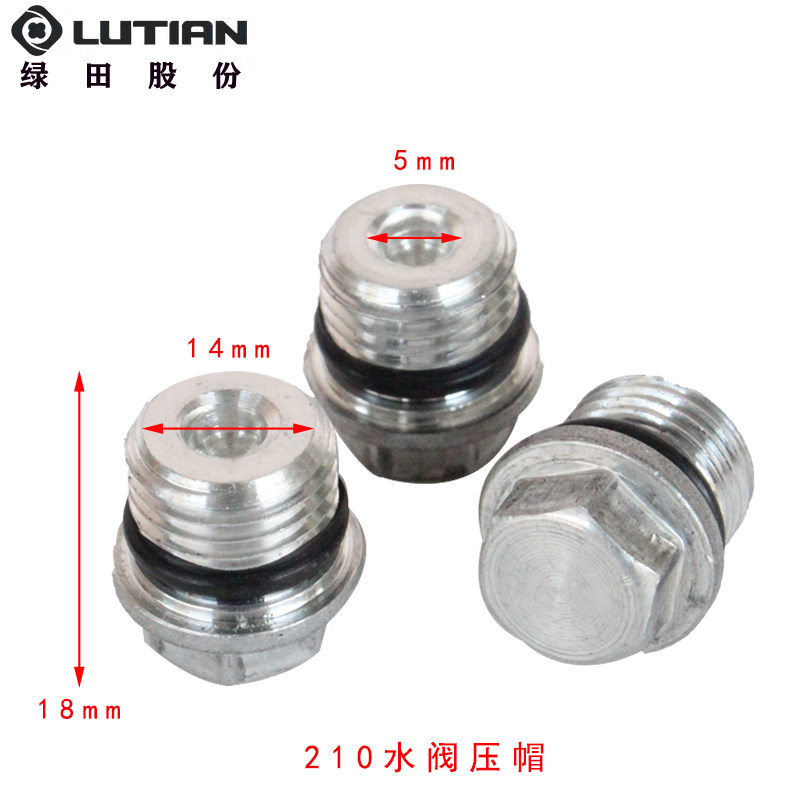
| 210 Water Valve Pressure Cap | Length: 18mm, Diameter: 14mm, Top Diameter: 5mm | Figure 7.8 |
| Water Seal Pressure Sleeve | Dimensions: 27mm, 9mm, 12mm | Figure 7.9 |
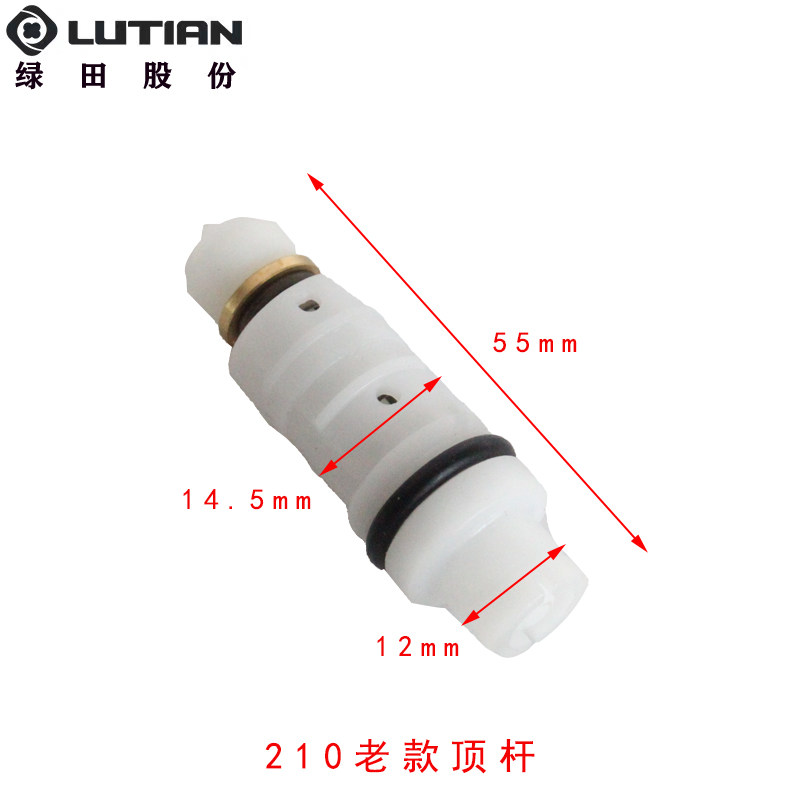
| 210 Old Model Top Rod | Length: 55mm, Diameter: 14.5mm, Inner Diameter: 12mm | Figure 7.10 |
| 210 New Model Top Rod | Length: 72mm, Diameter: 18mm, 14mm, 7mm | Figure 7.11 |
| Swash Plate | Diameters: 16mm, 15mm | Figure 7.12 |
8. User Tips
- Piston Diameter: For models requiring 3 pistons, ensure the replacement pistons have a diameter of 12mm for proper fit and function.
- Seal Orientation: When installing water seals, always ensure the flat side is facing upwards to prevent incorrect assembly and potential leaks.
- Secure Fit: When installing check valves, press firmly until you hear a 'click' sound, indicating they are securely seated.
9. Warranty and Support
For any questions regarding the installation, compatibility, or performance of these replacement parts, please contact the seller directly. Provide your pressure washer model number and details of the specific part you are inquiring about for efficient assistance.