1. Introduction
The VEVOR Magnetic Induction Heater Kit is a flameless heating system designed for efficiently loosening seized metal hardware and components. It utilizes high-frequency magnetic fields to generate induction heat, providing a safe and effective solution for various automotive and mechanical tasks without the risk of open flames.

2. Safety Instructions
Please read and understand all safety warnings and instructions before operating this product. Failure to follow the warnings and instructions may result in electric shock, fire, and/or serious injury.
2.1 General Safety
- Always wear appropriate personal protective equipment (PPE), including safety glasses, gloves, and non-conductive footwear.
- Keep the work area clean and well-lit. Cluttered or dark areas invite accidents.
- Do not operate the induction heater in explosive atmospheres, such as in the presence of flammable liquids, gases, or dust.
- Keep children and bystanders away while operating the induction heater. Distractions can cause you to lose control.
- Avoid touching the heated object immediately after operation, as it will be extremely hot. Allow sufficient time for cooling or use appropriate tools.
2.2 Electrical Safety
- Ensure the power supply voltage matches the voltage specified on the induction heater (110V or 220V).
- Do not expose the induction heater to rain or wet conditions. Water entering the tool will increase the risk of electric shock.
- Do not abuse the cord. Never use the cord for carrying, pulling, or unplugging the power tool. Keep cord away from heat, oil, sharp edges, or moving parts.
- If operating the induction heater in a damp location is unavoidable, use a ground fault circuit interrupter (GFCI) protected supply.
2.3 Induction Heating Specific Safety
- This device generates strong electromagnetic fields. Individuals with pacemakers or other medical implants should consult a physician before use.
- Remove all metallic objects (rings, watches, body piercings, etc.) from your hands and wrists before operating to prevent burns.
- Do not heat sealed containers or objects that may contain flammable liquids or gases, as this can cause explosions.
- Ensure proper ventilation during operation, especially when heating materials that may release fumes.
- Only use coils provided with the kit or approved replacements. Improper coils can cause damage or injury.
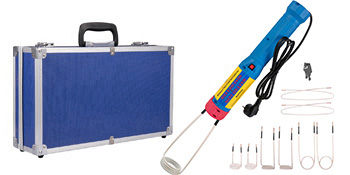
3. Package Contents
The VEVOR Magnetic Induction Heater Kit typically includes the following items:
10 Coils Version

- 1 x Magnetic Induction Heater
- 10 x Coils (various sizes)
- 1 x Storage Case
- 1 x User Manual
8 Coils Version
- 1 x Magnetic Induction Heater
- 8 x Coils (various sizes)
- 1 x Storage Case
- 1 x User Manual
4. Specifications
| Attribute | Value |
|---|---|
| Model | INDUCTION HEATER KIT |
| Material | Metal + Plastic |
| Power | 1000W |
| Voltage | 110V/220V (depending on model) |
| Weight (10 Coils Version) | 7.12 LBS / 3.23 KG |
| Weight (8 Coils Version) | 6.61 LBS / 3 KG |
| Working Temperature | -40°C~60°C |
| Atmospheric Pressure | 86KPa~100KPa |
| High-concerned chemical | None |
| Type | Other |

5. Setup & Assembly
The VEVOR Magnetic Induction Heater Kit is designed for straightforward setup. Follow these steps to prepare your device for operation:
- Unpack Components: Carefully remove all items from the storage case and inspect them for any damage.
- Select Appropriate Coil: Choose a heating coil that best fits the size and shape of the metal object you intend to heat. The kit includes various coil types for different applications.
- Insert Coil: Insert the chosen coil into the front holes of the induction heater.
- Secure Coil: Twist the locking mechanism to secure the coil firmly in place. Ensure the coil is properly seated and cannot easily come loose during operation.
- Connect Power: Plug the induction heater into a suitable power outlet (110V or 220V, depending on your model and region).

6. Operating Instructions
Once the induction heater is set up, follow these steps for safe and effective operation:
- Position the Object: Place the metal object you wish to heat (e.g., a seized bolt, bearing) directly within the center of the installed heating coil. Ensure there is no direct contact between the coil and the object, but the object should be as centered as possible for efficient heating.
- Activate Heating: Press and hold the red power switch on the handle of the induction heater. The LED indicating light will illuminate, and the heating process will begin.
- Monitor Heating: Observe the metal object as it heats. It will typically turn red or orange, indicating sufficient heat for loosening. The heating time will vary depending on the size and type of metal.
- Release Switch: Once the desired temperature is reached, release the red power switch to stop the heating process.
- Remove Object: Carefully remove the heated object using appropriate tools (e.g., wrenches, pliers) while wearing heat-resistant gloves. Allow the object to cool before handling with bare hands.


7. Maintenance
Regular maintenance ensures the longevity and optimal performance of your induction heater.
- Cleaning: After each use, ensure the device is unplugged and cooled down. Wipe the exterior with a clean, dry cloth. Do not use abrasive cleaners or solvents.
- Coil Inspection: Regularly inspect the heating coils for any signs of wear, damage, or insulation breakdown. Replace damaged coils immediately.
- Ventilation: Keep the air vents clear of dust and debris to ensure proper heat dissipation. Blocked vents can lead to overheating.
- Storage: Store the induction heater and its coils in the provided metal case in a dry, cool place, away from direct sunlight and moisture.
- Power Cord: Check the power cord for any cuts, fraying, or damage. Do not use the device if the power cord is damaged.
8. Troubleshooting
If you encounter issues with your induction heater, refer to the following troubleshooting guide:
| Problem | Possible Cause | Solution |
|---|---|---|
| Device does not turn on | No power supply Power switch not pressed Damaged power cord | Check power outlet and connections Ensure red switch is pressed and held Inspect cord for damage; do not use if damaged |
| Object not heating or heating slowly | Incorrect coil size/type Object not ferromagnetic Object not centered in coil Coil damaged | Select appropriate coil for object Ensure object is made of iron or steel Reposition object in the center of the coil Inspect and replace coil if damaged |
| Device overheats and shuts off | Blocked air vents Continuous operation for too long | Clear air vents of debris Allow device to cool down between uses; avoid prolonged continuous operation |
| Sparking or unusual noise | Loose coil connection Damaged coil Foreign metallic object in coil | Ensure coil is securely locked Replace damaged coil Inspect coil area and remove any foreign objects |
9. User Tips
- Material Compatibility: This induction heater works most effectively on ferromagnetic metals like iron and steel. It is generally not suitable for heating non-ferromagnetic metals such as copper or aluminum for tasks like soldering, as these materials do not heat efficiently via induction.
- Targeted Heating: The flameless nature of this tool allows for precise, localized heating. This is particularly useful for loosening seized bolts or bearings without damaging surrounding heat-sensitive components like rubber or plastic.
- Achieving High Temperatures: The device is capable of heating steel to red or even orange temperatures, which is sufficient for breaking down rust and expanding metal parts for easy removal.
- Coil Selection: Always choose a coil that closely matches the size of the part you are heating. A snug fit ensures maximum efficiency and faster heating.
- Cooling Time: While the device has a fan for heat dissipation, allow it to cool down periodically during extended use to prevent overheating and prolong its lifespan.
10. Warranty & Support
For warranty information, technical support, or service inquiries, please refer to the contact information provided by your retailer or visit the official VEVOR website. Keep your purchase receipt as proof of purchase.


