1. Introduction
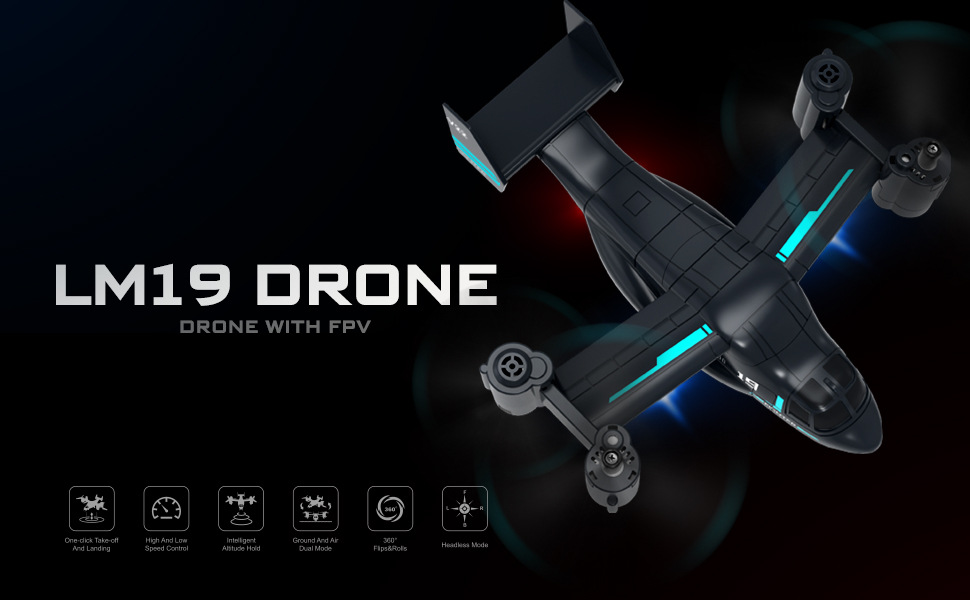
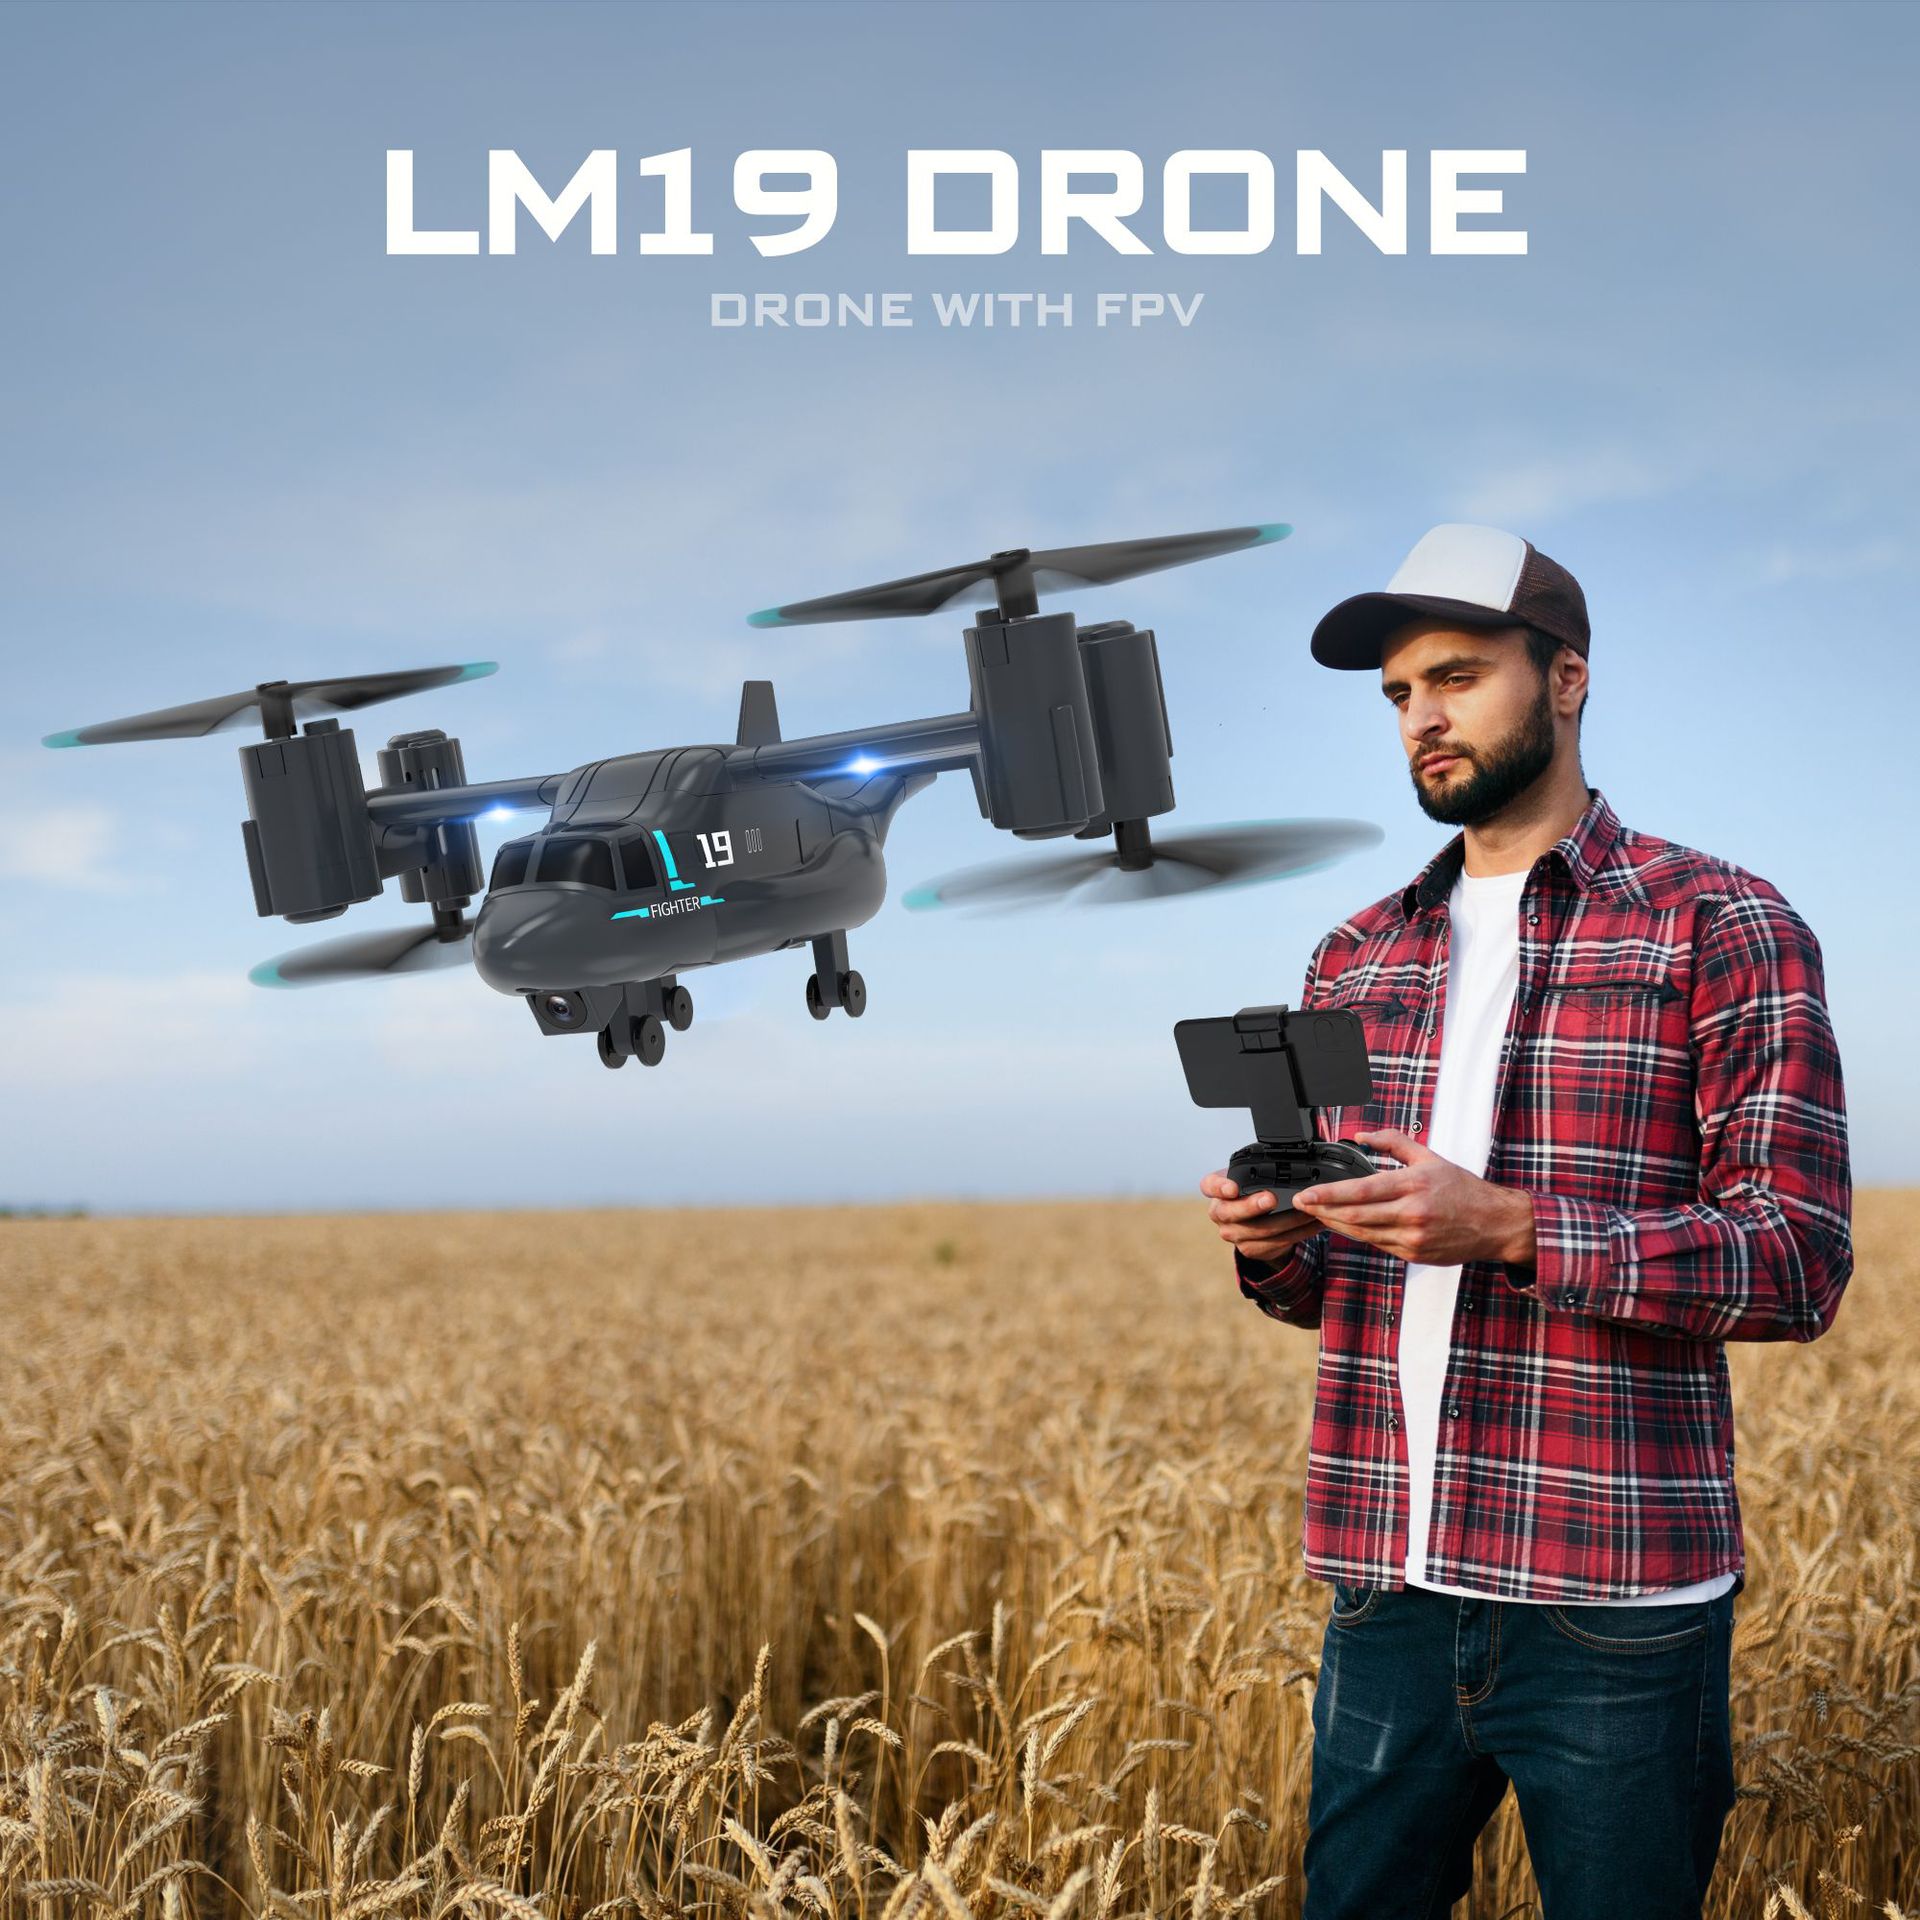
Thank you for purchasing the CONUSEA LM19 Camera Drone. This remote-controlled quadcopter is designed for both aerial flight and ground movement, offering a versatile 2-in-1 experience. It features a 480P WiFi FPV camera (on applicable models), altitude hold, one-key take-off/landing, headless mode, and high/low speed switching. Please read this manual thoroughly before operating the drone to ensure safe and optimal performance.


2. Package Contents
Ensure all items are present in your package:
- LM19 Drone (with or without camera, depending on model)
- Remote Controller
- Body Battery (3.7V 600mAh)
- USB Charging Cable
- Spare Blades x 4 (A*1, B*1, C*1, D*1)
- Screwdriver x 1
- Product Control Manual (this document)
- Optional: Display Stand (included with some versions)
3. Specifications
| Feature | Specification |
|---|---|
| Model Number | LM19 |
| Brand Name | CONUSEA |
| Aircraft Size | 14.5*19.5*6 CM |
| Drone Weight | 71g (Takeoff Weight: 200g) |
| Material | Plastic |
| Power Source | Electric (Lithium Battery) |
| Body Battery | 3.7V 600mAh |
| Charging Time | Approx. 80 minutes |
| Charging Voltage | 3.7V |
| Plugs Type | USB |
| Flight Time | 5~10 minutes (average 8 minutes) |
| Remote Distance | 80 meters |
| Control Channels | 4 channels |
| Controller Mode | MODE2 |
| Controller Battery | 3*AAA (not included) |
| Motor Type | Brush Motor |
| Video Capture Resolution | 480P SD (for camera versions) |
| Picture Transmission Distance | 60-80 meters (for FPV versions) |
| Indoor/Outdoor Use | Indoor-Outdoor |
| Operator Skill Level | Beginner, Intermediate, Expert |
| Features | App-Controlled, Auto Return, FPV Capable, Wi-fi |
| Aircraft Protection | Stuck protection, Low voltage protection |
4. Safety Guidelines
- Recreational Use Only: This drone is intended for recreational purposes.
- Legal Compliance: Always adhere to local laws and regulations regarding drone operation in your country or area. Illegal modification of drones/planes is prohibited.
- Pre-Flight Check: Before each flight, ensure the drone and remote control batteries are fully charged and properly installed. Check propellers for damage.
- Environmental Awareness: Fly in open areas, away from people, animals, buildings, and obstacles. Avoid flying in strong winds or adverse weather conditions.
- Line of Sight: Maintain visual line of sight with the drone at all times.
- Age Recommendation: Recommended for ages 6-12Y and 14+y. Adult supervision is advised for younger operators.
- Emergency Stop: Familiarize yourself with the emergency stop function for immediate shutdown if needed.
5. Setup Instructions
5.1. Battery Installation and Charging
- Remote Controller Batteries: Open the battery compartment on the remote controller and insert 3 AAA batteries (not included), ensuring correct polarity. Close the compartment.
- Drone Body Battery Charging: Connect the drone's 3.7V 600mAh body battery to the USB charging cable. Plug the USB cable into a suitable USB power source (e.g., computer USB port, USB wall adapter). The charging indicator will show the charging status. Charging takes approximately 80 minutes.
- Drone Body Battery Installation: Once fully charged, carefully insert the body battery into the drone's battery compartment, ensuring it is securely connected.
5.2. Propeller Installation (if required)
If propellers are not pre-installed, use the provided screwdriver to attach them according to the A, B, C, D markings on the blades and motor arms. Ensure each blade is on the correct motor for proper flight.
5.3. Pairing the Drone and Remote Controller
- Place the drone on a flat, level surface.
- Turn on the drone's power switch. The indicator lights will flash.
- Turn on the remote controller.
- Push the left joystick (throttle) all the way up, then all the way down. The drone's indicator lights will stop flashing and remain solid, indicating successful pairing.
5.4. FPV App Setup (for camera versions)
- Download the dedicated FPV app (refer to the packaging or a QR code on the drone for the specific app).
- Turn on the drone and connect your smartphone to the drone's Wi-Fi network (usually named 'WiFi_FPV_XXXX').
- Open the FPV app. You should see a live video feed from the drone's camera.
6. Operating Instructions
6.1. Basic Controls
- Left Joystick (Throttle): Up/Down for altitude, Left/Right for rotation (yaw).
- Right Joystick (Direction): Up/Down for forward/backward, Left/Right for side-to-side (strafe).
- Trimming Buttons: Use to fine-tune the drone's stability if it drifts in any direction.
6.2. Flight Modes and Features
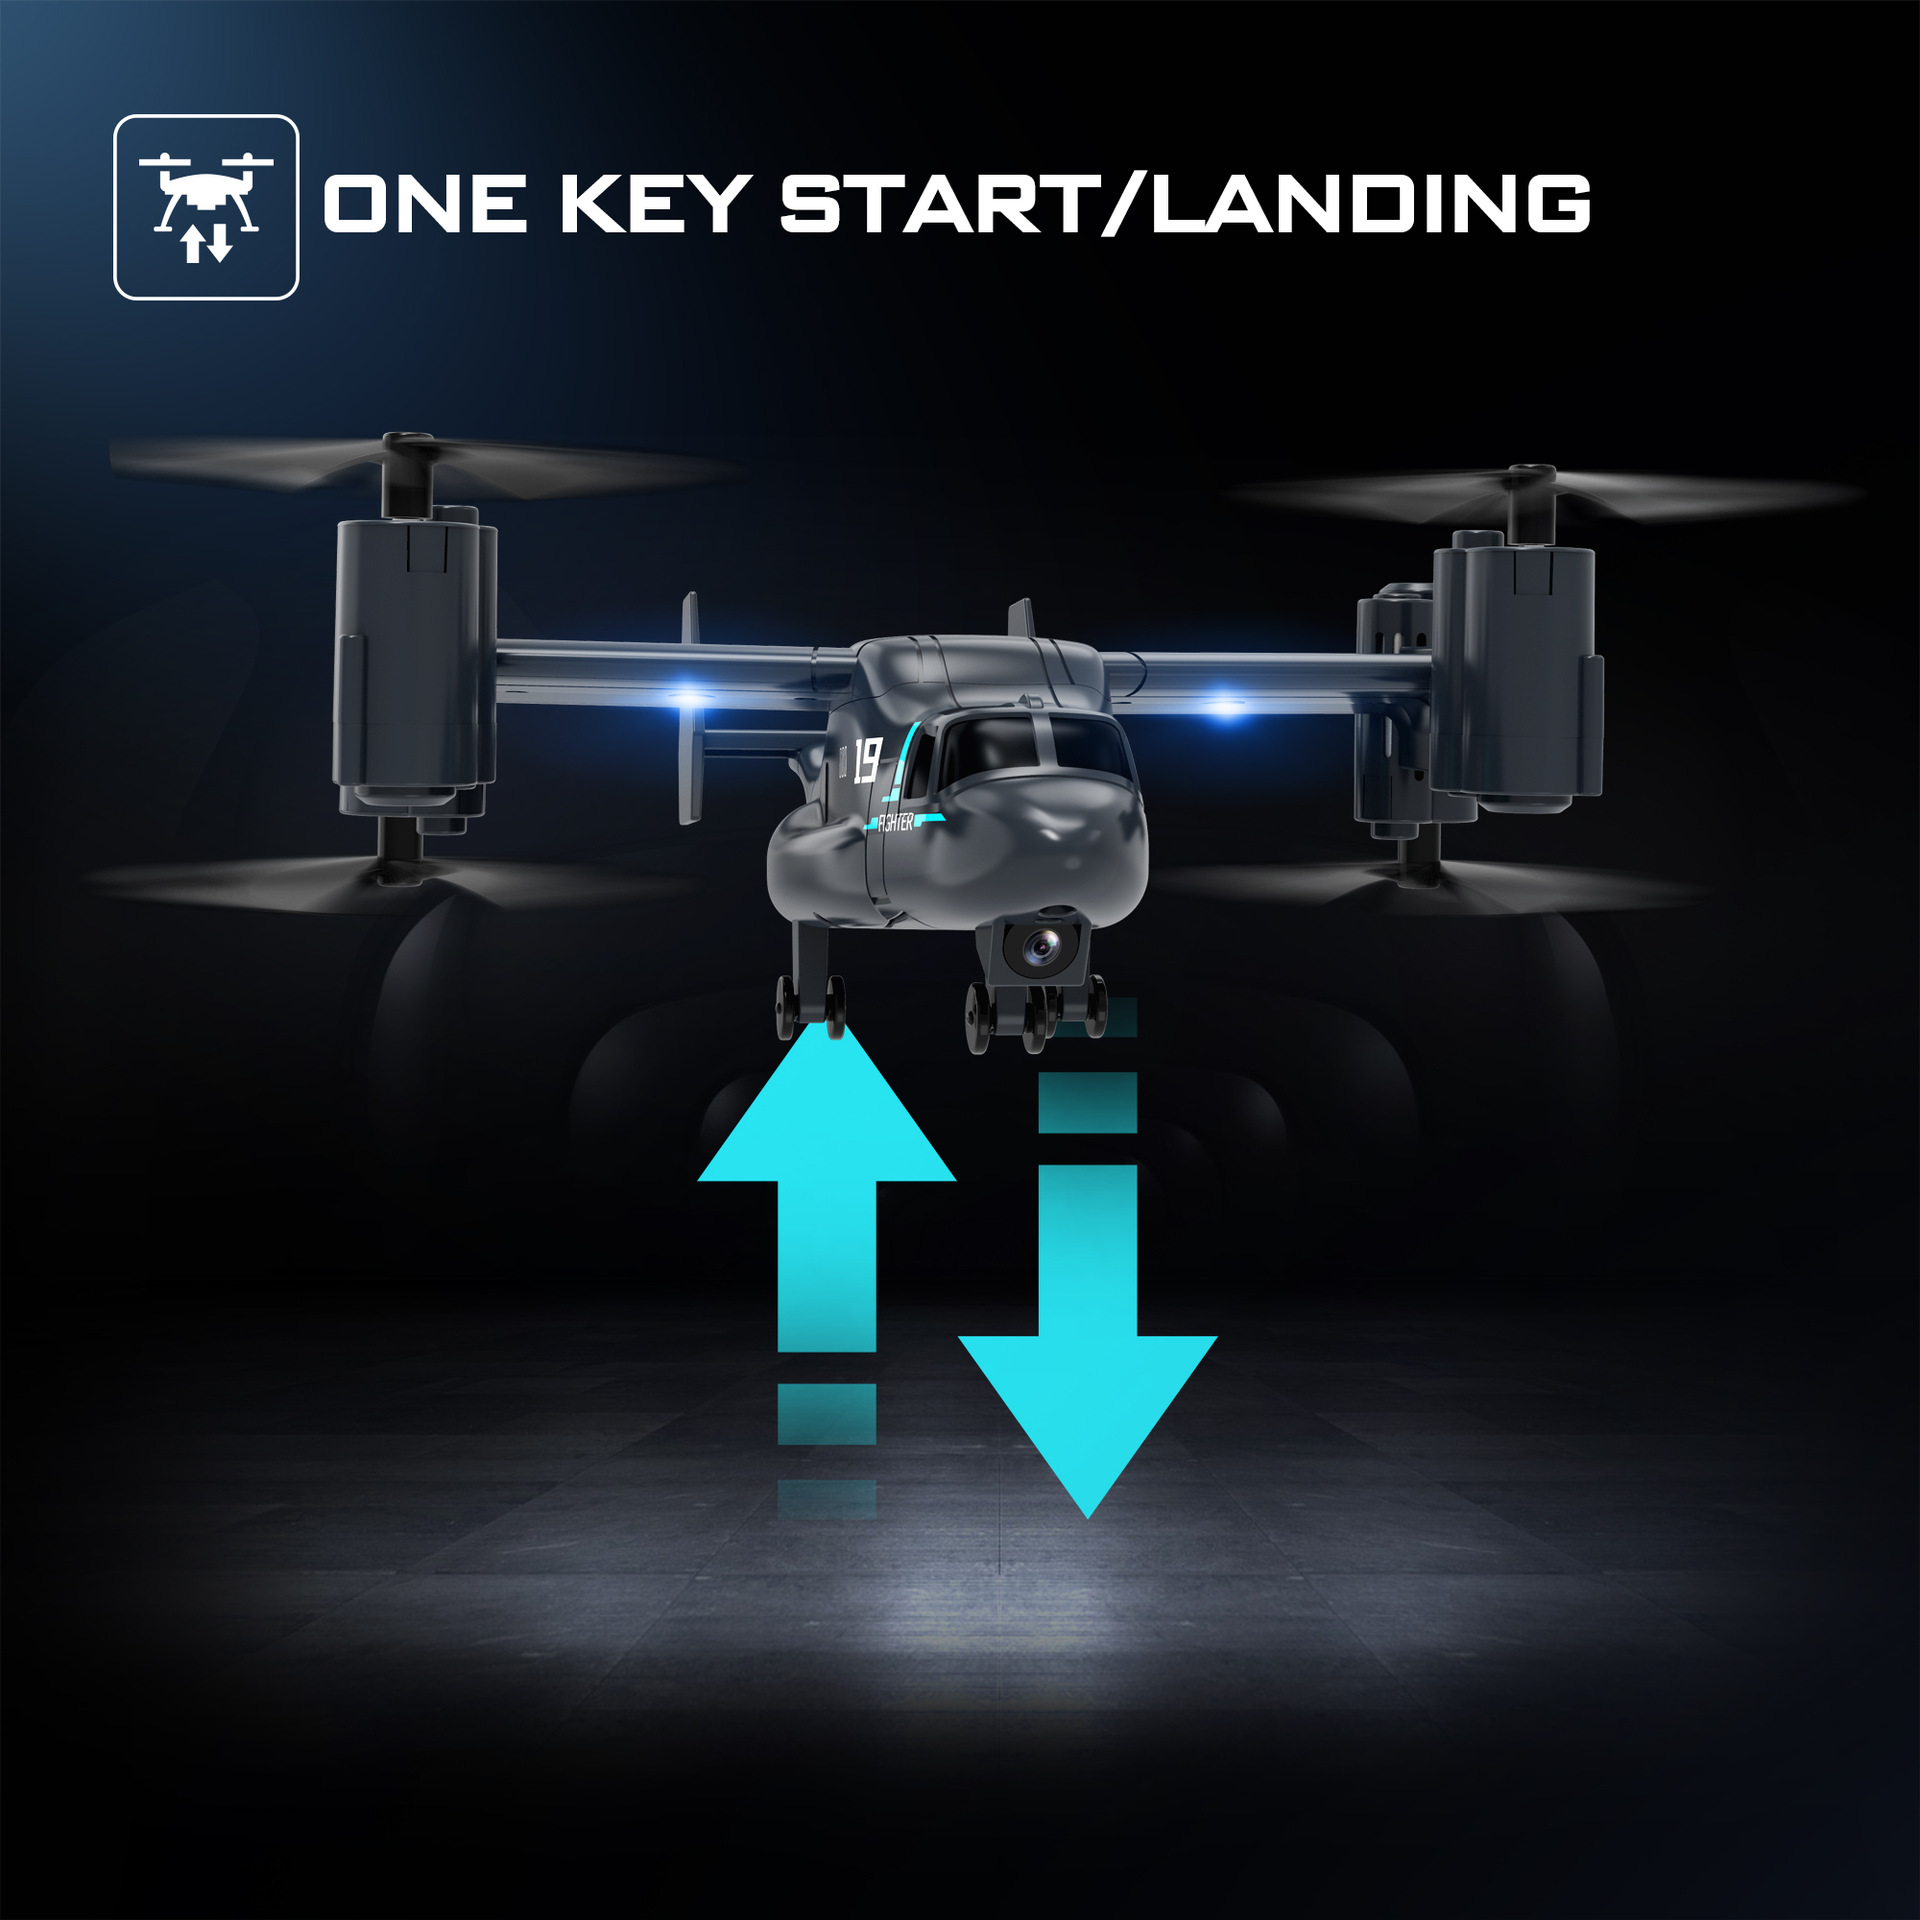
- One Key Take-off/Landing: Press the dedicated button (often indicated by an arrow icon) to automatically take off or land the drone.
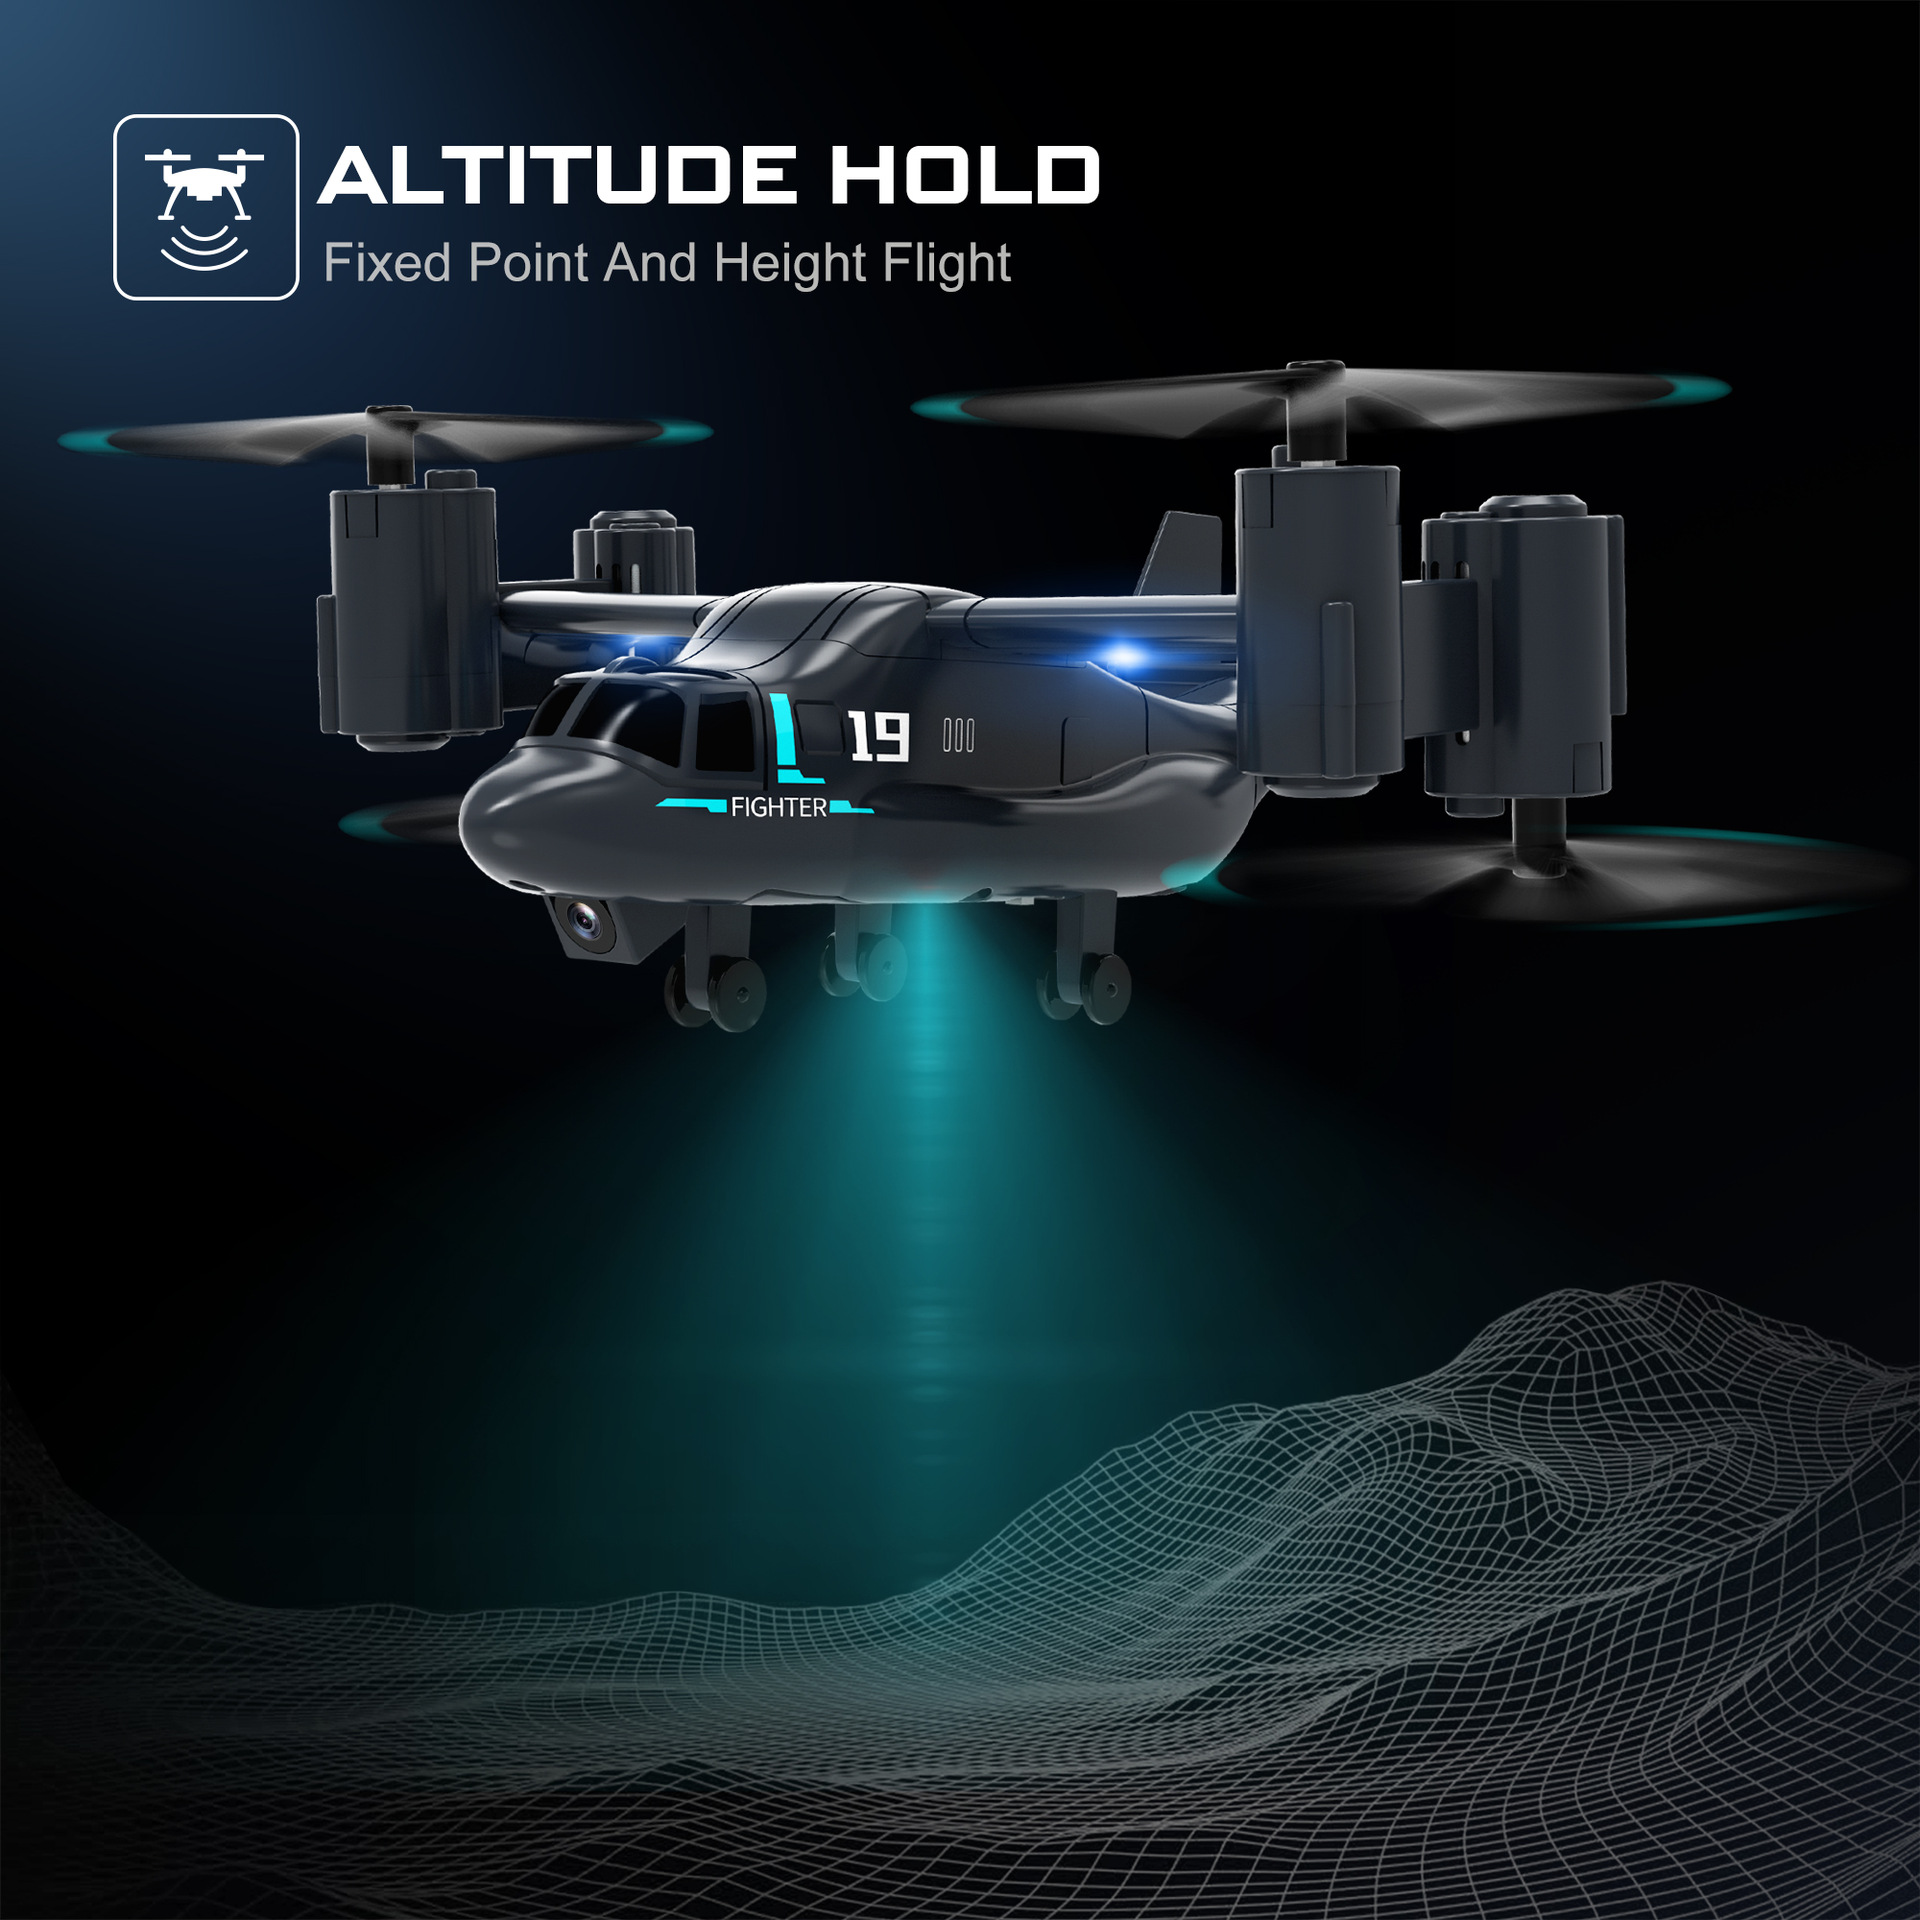
- Altitude Hold: The drone will automatically maintain its current altitude, allowing for easier control of direction.
- Land Mode (2-in-1 Function): In this mode, the drone's propellers adjust to allow it to move forward, backward, and turn on the ground like a vehicle.
- High and Low Speed Switch: Use the speed switch button (second gear) to toggle between different flight speeds, suitable for various skill levels and environments.
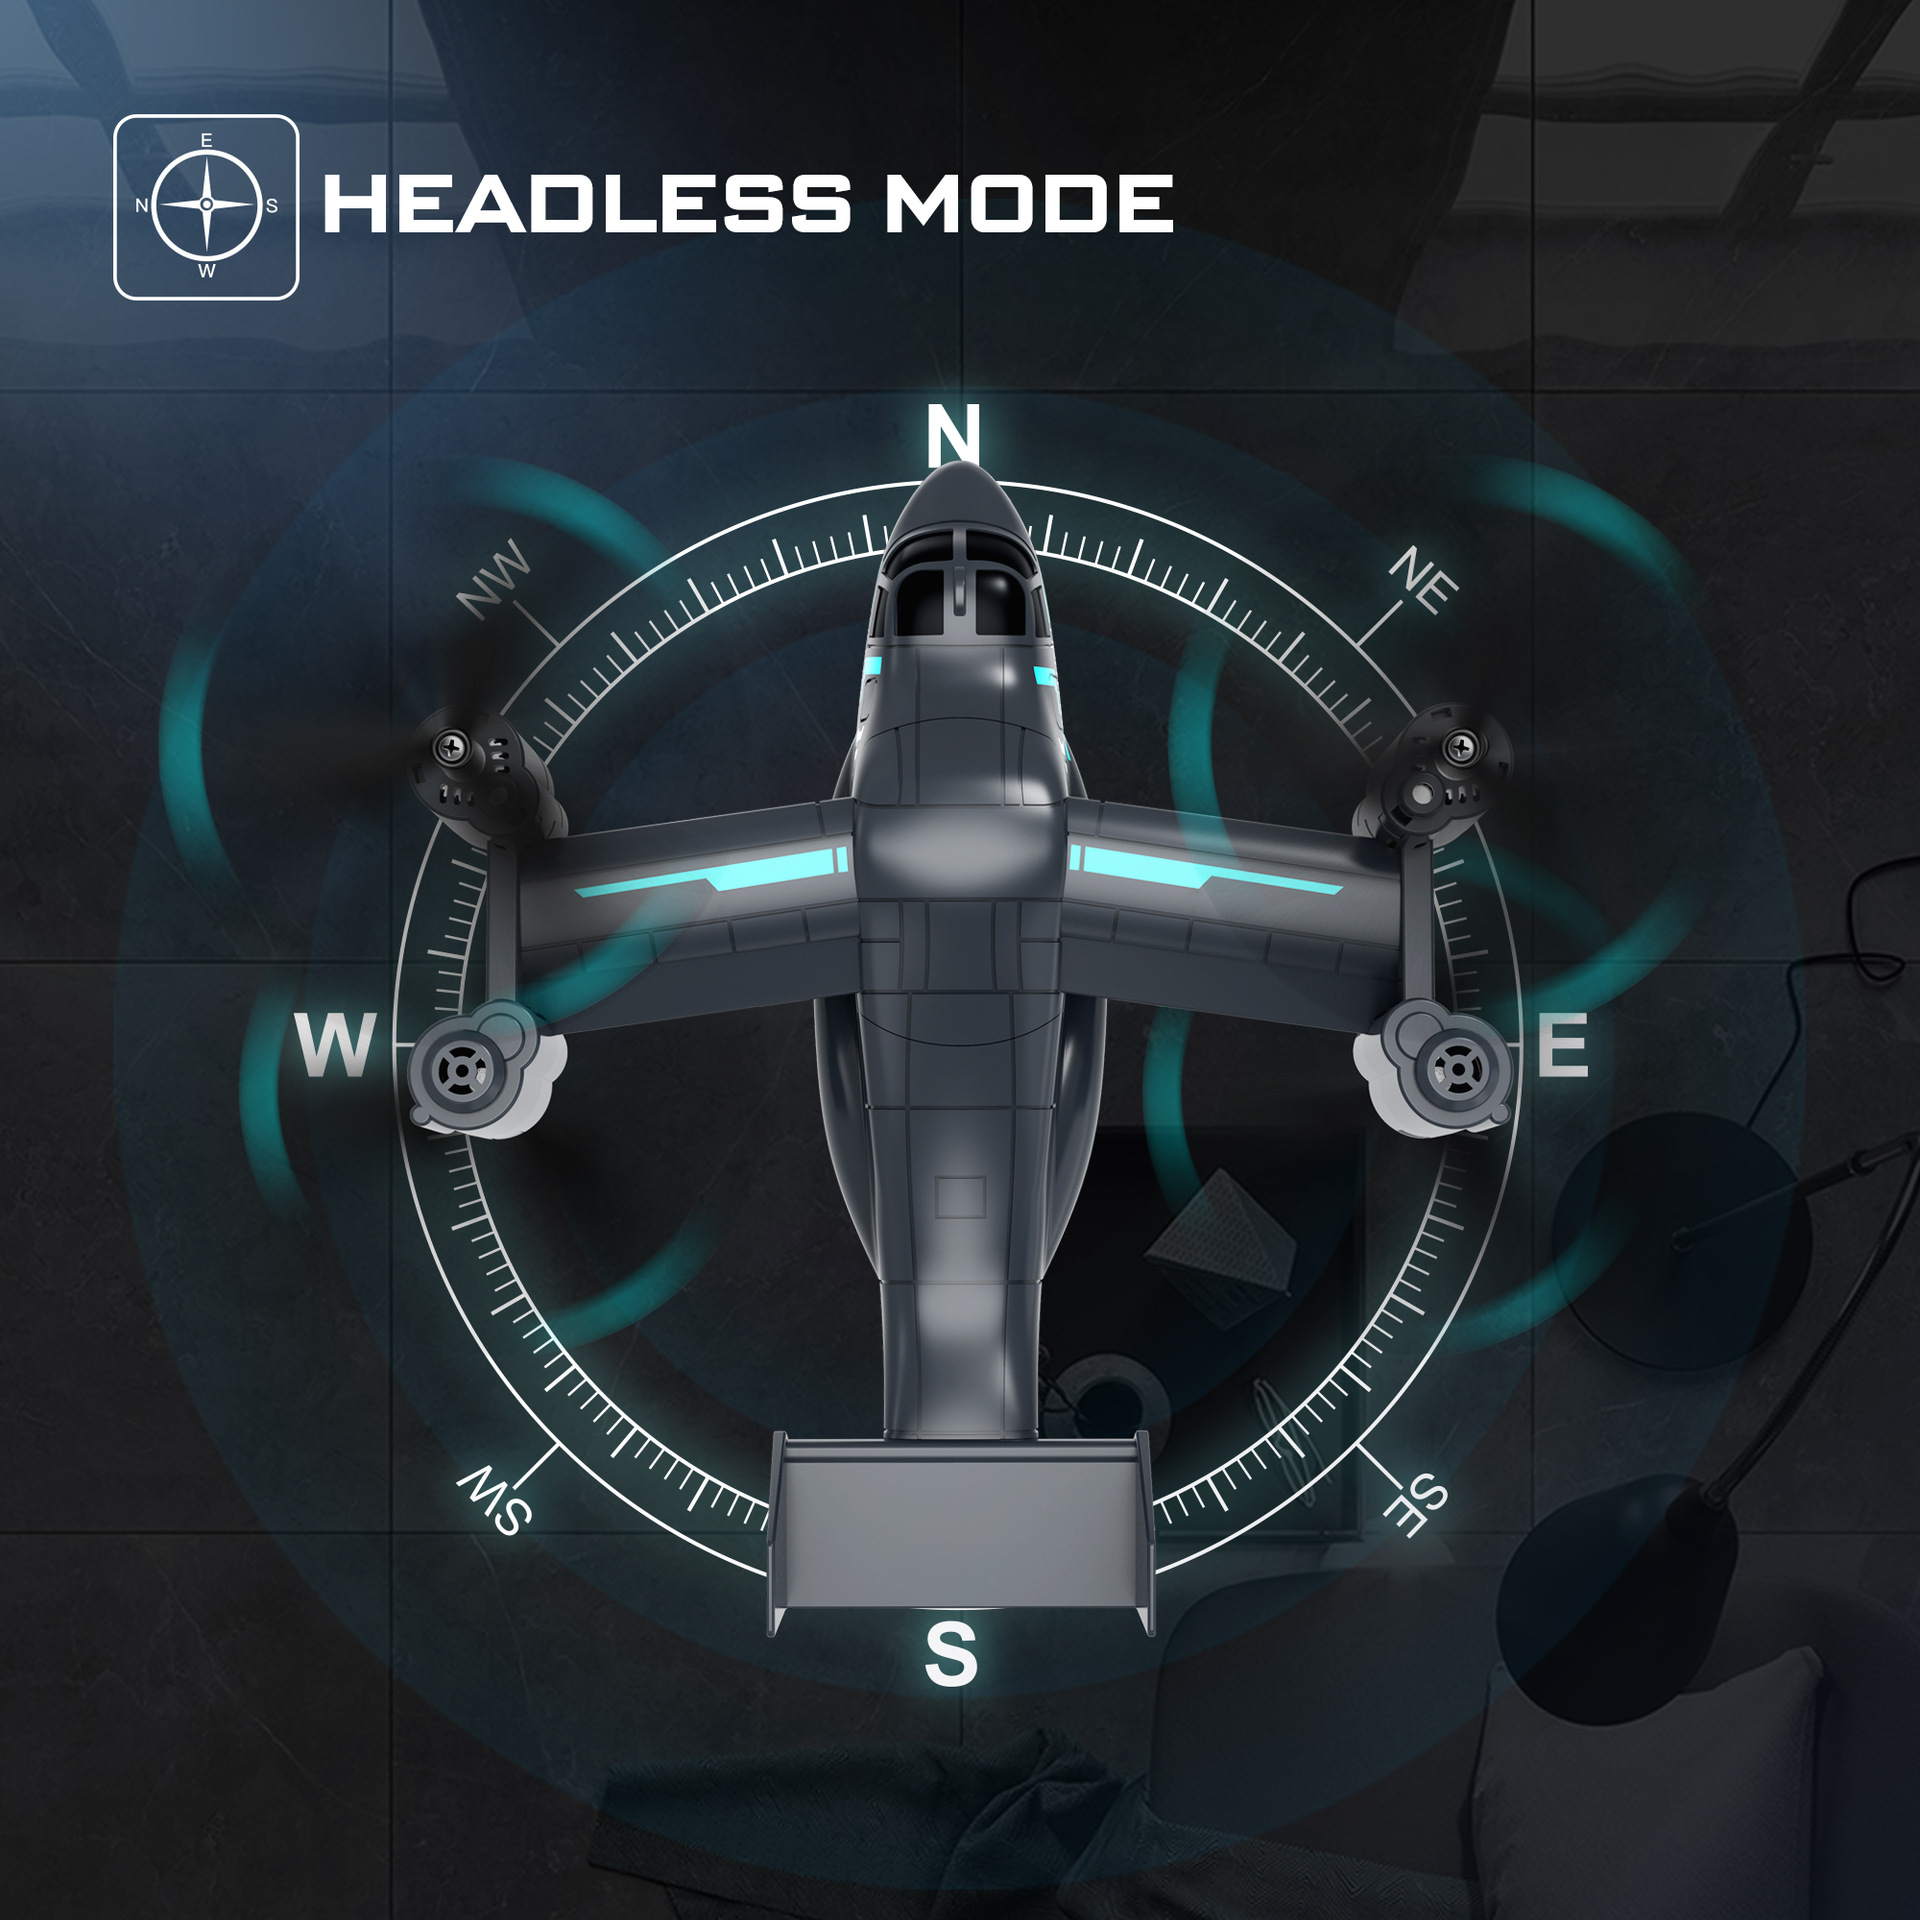
- Headless Mode: In headless mode, the drone's orientation is relative to the pilot, regardless of which way the drone's front is facing. This simplifies control, especially for beginners.
- Roll Function (360° Flips): Press the roll button and move the right joystick in a desired direction to perform a 360-degree flip.
- Emergency Stop: In case of an emergency, press the emergency stop button to immediately cut power to the motors.


6.3. Video Demonstration
7. Maintenance
- Cleaning: Use a soft, dry cloth to clean the drone after use. Avoid water or harsh chemicals.
- Propeller Check: Regularly inspect propellers for any cracks, bends, or damage. Replace damaged propellers immediately using the provided spares and screwdriver.
- Battery Care: Store batteries in a cool, dry place. Do not overcharge or over-discharge. If not used for an extended period, charge the battery to about 50% capacity.
- Storage: When not in use, store the drone and remote controller in a safe place, away from direct sunlight and extreme temperatures.
8. Troubleshooting
- Drone not responding: Ensure both the drone and remote controller are powered on and successfully paired. Check remote controller batteries.
- Drone not taking off/unstable flight: Verify that the body battery is fully charged and correctly installed. Check propellers for damage or incorrect installation. Ensure the drone is on a flat surface during pairing.
- No FPV feed (camera versions): Confirm your smartphone is connected to the drone's Wi-Fi network and the FPV app is open. Ensure the camera is properly connected.
- Short flight time: Ensure the body battery is fully charged. Flight time can be affected by aggressive flying or strong winds.
- Drone drifts: Use the trimming buttons on the remote controller to adjust the drone's stability.
- Emergency Stop: If the drone becomes uncontrollable or is about to hit an obstacle, use the emergency stop function on the remote control.
9. User Tips
- For beginners, start flying in low-speed mode and in an open, obstacle-free environment.
- Practice basic maneuvers like hovering and gentle turns before attempting more advanced tricks like rolls.
- When using FPV, ensure a strong Wi-Fi connection for a smooth video feed.
- Always keep an eye on the drone's battery level to avoid unexpected landings.
10. Statement of Compliance
⚠️ For recreation use only. Illegal modification of drones/planes is prohibited. Please also pay attention to the relevant laws and regulations on the use of drones/planes in your country/area to ensure legal use.
11. Warranty and Support
For any questions, technical support, or warranty inquiries, please contact the seller or manufacturer directly. Keep your purchase receipt as proof of purchase.