1. Introduction
Thank you for purchasing the AIWA BBTC-550 Portable Radio Cassette Player. This versatile device combines classic audio formats with modern connectivity, allowing you to enjoy your music from various sources. Please read this manual carefully before using the unit to ensure proper operation and to maximize your listening experience. Keep this manual for future reference.
Key Features:
- Portable Radio Cassette with CD reader, USB, and Bluetooth 5.0 connection.
- Cassette player and recorder with Auto-Stop function.
- USB port for MP3 music playback.
- AUX IN input (3.5mm) for connecting external audio devices.
- Headphone socket (3.5mm).
- Compatible with CD/CD-R/MP3 discs with 20 programmable memories.
- FM PLL Radio with 40 programmable station presets.
- Digital clock with 24-hour display.
- High-frequency range dynamic speakers with super bass and amplified treble.
- Panoramic LCD screen with soft tonality backlight.
2. Product Overview
The AIWA BBTC-550 is designed for ease of use and portability. Below are images illustrating the device's main components and features.

Figure 2.1: Front view of the AIWA BBTC-550, showing the display, control buttons, and speakers.

Figure 2.2: Top-down view of the AIWA BBTC-550 with the CD compartment lid open.

Figure 2.3: Side view of the AIWA BBTC-550 with the cassette compartment door open and the telescopic antenna extended.

Figure 2.4: Close-up of the side panel showing the 3.5mm headphone jack, 3.5mm AUX IN port, and USB/MP3 port.
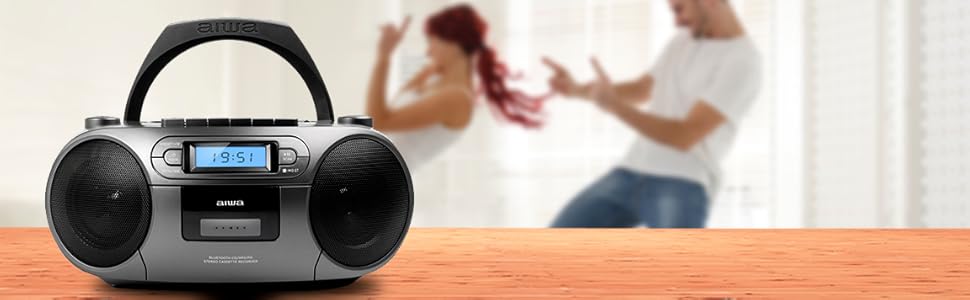
Figure 2.5: Promotional image highlighting the multi-functionality of the AIWA BBTC-550.
3. Setup
3.1 Power Supply
The AIWA BBTC-550 can be powered by either AC mains electricity or batteries for portable use.
- AC Power: Connect the provided AC power cord to the AC IN socket on the unit and then to a standard 230V/50Hz wall outlet.
- Battery Power: For portable use, insert 6 x 1.5V LR14/UM2/C batteries into the battery compartment located on the bottom of the unit. Ensure correct polarity (+/-) when inserting batteries.
3.2 Antenna Adjustment
For optimal FM radio reception, fully extend the telescopic antenna. Adjust its position and angle to achieve the clearest signal.
4. Operating Instructions
4.1 General Controls
- POWER button: Press to turn the unit ON or OFF.
- MODE button: Press to switch between CD, USB, Bluetooth, Radio, and Cassette modes.
- VOLUME knob: Rotate to adjust the sound level.
- LCD Display: Shows current mode, track number, frequency, and time.
4.2 CD Playback
- Press the MODE button to select CD mode.
- Open the CD compartment lid and place a CD (CD/CD-R/MP3 compatible) with the label side facing up. Close the lid securely.
- The unit will read the disc, and the total number of tracks will appear on the display.
- Press the PLAY/PAUSE (►/❚❚) button to start playback.
- Press PLAY/PAUSE (►/❚❚) again to pause, and press once more to resume.
- Press the SKIP (►►| / |◄◄) buttons to skip to the next or previous track.
- Press the STOP (■) button to stop playback.
- Program Play: While in stop mode, press the PROG/TIME button. Use the SKIP buttons to select a track, then press PROG/TIME again to add it to the program list. Repeat for up to 20 tracks. Press PLAY to start programmed playback.
4.3 Cassette Operation
- Press the MODE button to select Cassette mode.
- Open the cassette compartment door and insert a cassette tape. Close the door.
- Playback: Press the PLAY (►) button to start playing the tape.
- Fast Forward/Rewind: Press the FF (►►) or REW (◄◄) buttons. Press STOP (■) to stop winding.
- Stop: Press the STOP (■) button to stop playback or winding. The unit features an Auto-Stop function at the end of the tape.
- Recording: Insert a blank cassette. Select the desired audio source (CD, USB, Bluetooth, Radio, or AUX IN). Press the RECORD (●) button on the cassette deck. The unit will start recording from the selected source. Press STOP (■) to end recording.
4.4 USB Playback
- Press the MODE button to select USB mode.
- Insert a USB flash drive containing MP3 audio files into the USB port.
- The unit will automatically detect and start playing the MP3 files.
- Use the PLAY/PAUSE (►/❚❚) and SKIP (►►| / |◄◄) buttons for control, similar to CD playback.
4.5 Bluetooth Connection
- Press the MODE button to select Bluetooth mode. The display will show 'BT' and start flashing, indicating it's in pairing mode.
- On your Bluetooth-enabled device (smartphone, tablet, etc.), enable Bluetooth and search for available devices.
- Select 'AIWA BBTC-550' from the list of devices.
- Once paired, the unit will emit a confirmation sound, and 'BT' on the display will stop flashing.
- You can now play audio from your connected device through the AIWA BBTC-550. Use your device or the unit's controls for playback.
4.6 FM Radio
- Press the MODE button to select FM Radio mode.
- Extend the telescopic antenna for better reception.
- Auto Scan: Press and hold the SCAN button to automatically scan and save available FM stations. The unit can store up to 40 presets.
- Manual Tuning: Briefly press the SCAN button to manually tune up or down the frequency.
- Select Presets: Use the PRESET (+10) button to cycle through saved stations.
4.7 AUX IN
- Press the MODE button to select AUX IN mode.
- Connect an external audio device (e.g., MP3 player, smartphone) to the 3.5mm AUX IN port using a 3.5mm audio cable (not included).
- Play audio from your external device. The sound will be output through the AIWA BBTC-550 speakers.
- Adjust the volume using the unit's VOLUME knob and/or your external device's volume control.
4.8 Headphone Use
To listen privately, plug 3.5mm stereo headphones into the HEADPHONES socket. The speakers will automatically mute when headphones are connected.
4.9 Setting the Clock
The unit features a digital clock with a 24-hour display.
- In standby mode, press and hold the PROG/TIME button.
- Use the SKIP (►►| / |◄◄) buttons to adjust the hour. Press PROG/TIME to confirm.
- Use the SKIP (►►| / |◄◄) buttons to adjust the minute. Press PROG/TIME to confirm and exit clock setting mode.
5. Specifications
| Feature | Specification |
|---|---|
| Brand Name | AIWA |
| Model Number | BBTC-550 |
| Type | AM / FM Radio Cassette Player |
| Style | Tabletop / Portable |
| Body Material | Plastic |
| Dimensions (WxHxD) | 38 x 38 x 26 cm |
| Weight (Product) | Approx. 2.04 kg |
| Bluetooth | Yes (Version 5.0) |
| WIFI | No |
| Screen | Yes (Panoramic LCD with backlight) |
| CD Compatibility | CD/CD-R/MP3 |
| USB Playback | MP3 files |
| AUX IN | 3.5mm jack |
| Headphone Output | 3.5mm jack |
| Radio Presets | 40 (FM PLL) |
| Power Supply (AC) | 230V/50Hz |
| Power Supply (DC) | 6 x 1.5V LR14/UM2/C batteries |
| Certification | CE, RoHS |
| Origin | China |
| Package Dimensions | 36.7 x 29 x 17.7 cm |
| Package Weight | 2.5 kg |
6. Maintenance
6.1 Cleaning the Unit
- Always disconnect the unit from the power source before cleaning.
- Use a soft, dry cloth to clean the exterior surfaces.
- For stubborn marks, lightly dampen the cloth with water and a mild detergent, then wipe dry immediately.
- Do not use abrasive cleaners, waxes, or solvents as they may damage the finish.
6.2 CD Lens Care
- Never touch the CD lens.
- If the CD lens gets dirty, use a commercially available CD lens cleaner to clean it.
6.3 Cassette Deck Care
- Regularly clean the tape heads, capstan, and pinch roller with a cotton swab lightly moistened with tape head cleaner or isopropyl alcohol.
- Demagnetize the tape heads periodically to prevent sound degradation.
6.4 Battery Replacement
- When the unit's performance diminishes or the display dims, it's time to replace the batteries.
- Open the battery compartment, remove old batteries, and insert new ones, ensuring correct polarity.
- Dispose of old batteries responsibly according to local regulations.
- Remove batteries if the unit will not be used for an extended period to prevent leakage.
7. Troubleshooting
If you encounter any issues with your AIWA BBTC-550, please refer to the following common problems and solutions:
| Problem | Possible Cause | Solution |
|---|---|---|
| No power | AC cord not properly connected; Batteries depleted or incorrectly inserted. | Check AC cord connection; Replace batteries, ensuring correct polarity. |
| No sound | Volume too low; Headphones connected; Incorrect mode selected. | Increase volume; Disconnect headphones; Select the correct mode (CD, USB, BT, Radio, AUX). |
| CD skipping or not playing | CD is dirty or scratched; CD inserted incorrectly; Lens is dirty. | Clean or replace CD; Insert CD with label side up; Clean CD lens. |
| Cassette not playing/recording | Tape heads/capstan dirty; Cassette damaged; Incorrect mode. | Clean tape heads/capstan; Try a different cassette; Ensure Cassette mode is selected. |
| Bluetooth not connecting | Unit not in pairing mode; Bluetooth disabled on external device; Device too far. | Ensure unit is in Bluetooth pairing mode; Enable Bluetooth on your device; Move device closer (within 10m). |
| Poor FM radio reception | Antenna not extended/adjusted; Weak signal area. | Fully extend and adjust the telescopic antenna; Try moving the unit to a different location. |
| USB not recognized | USB drive formatted incorrectly; Files not MP3; USB drive damaged. | Ensure USB is FAT32 format; Check files are MP3; Try a different USB drive. |
8. Warranty and Support
The AIWA BBTC-550 comes with a standard manufacturer's warranty. Please refer to the warranty card included in your product packaging for specific terms and conditions, including the warranty period and coverage details.
Customer Support:
If you experience any problems with your unit that are not covered in the troubleshooting section, or if you require further assistance, please contact your retailer or the AIWA customer support service in your region. Keep your purchase receipt as proof of purchase for warranty claims.
For the latest information and support, you may also visit the official AIWA website.


