

TechSupport Windows 11 Legacy Driver
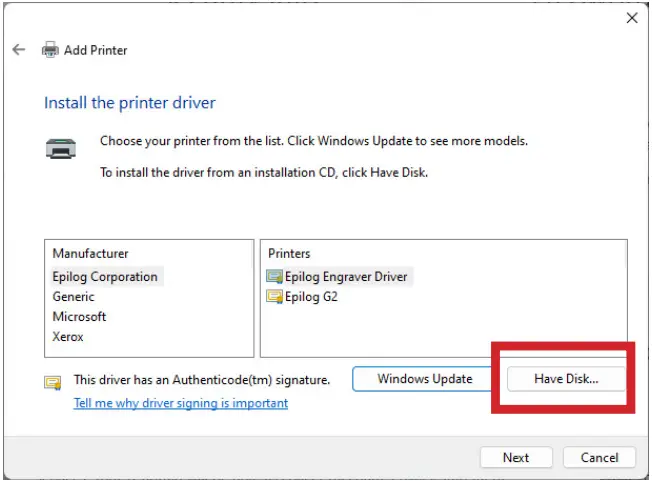
FAQ
- Unable to send a job to the machine?
- Verify that the IP address of the laser matches what was entered during driver install.
- Ensure that the USB connection is not active while using Ethernet.
- Check the Ethernet cable for any issues.
For further technical support, visit https://www.epiloglaser.com/tech-support/technicalsupport/
Before beginning, connect the laser to your computer with an Ethernet cable and turn the machine on.
Ethernet Adapter/Port Setup
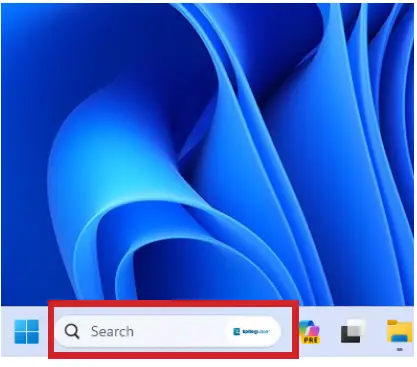
- In the search bar at the bottom of the screen, type Settings.
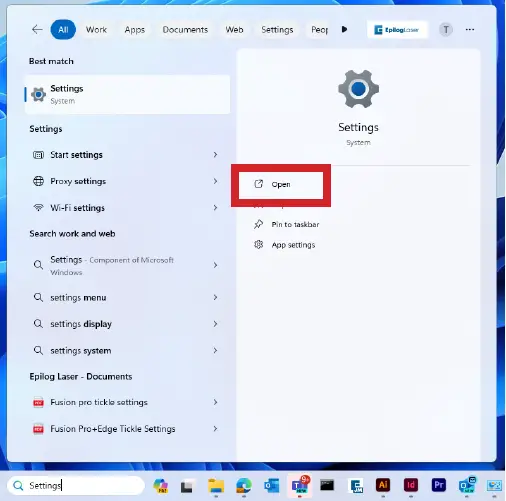
- Click Open.
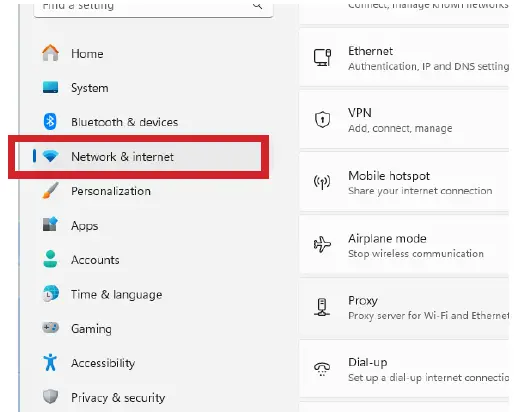
- Click Network and Internet.
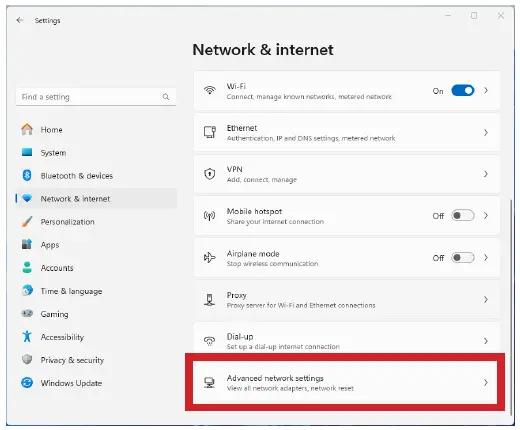
- Click Advanced Network Settings.
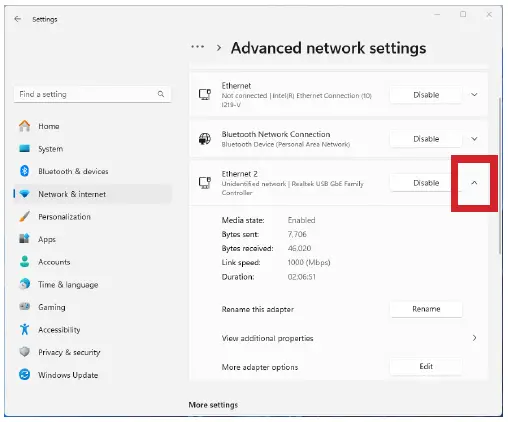
- Select the drop down arrow next to the lasers Ethernet connection. It will often say unidentified network.
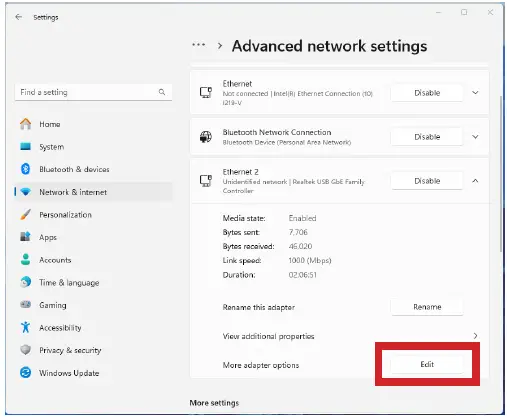
- Next to More adapter settings, click Edit.
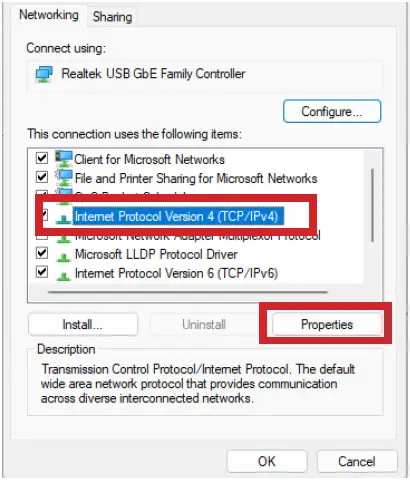
- Select Internet Protocol Version 4 (TCP/IP), then click Properties.
- Select Use the Following IP address. Type 192.168.3.3 into the IP address.
- The last digit of this IP address will be different from the IP address of the laser.

- The last digit of this IP address will be different from the IP address of the laser.
- Click the Subnet Mask field. It will auto-populate with 255.255.255.0.
- Then click OK.
Installing the Driver
This guide is for Ethernet installation of the Mini/Helix, Zing, EXT, and older Fusion/M2 drivers.
- Download the Driver from https://www.epiloglaser.com/tech-support/drivers/
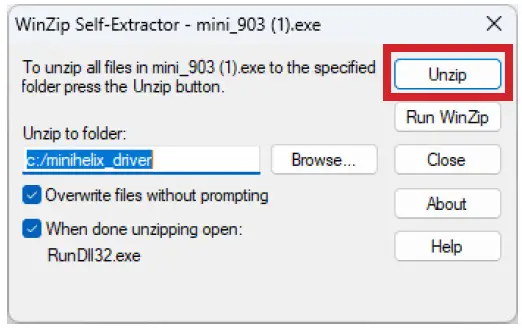
- Open the downloaded file and click unzip.
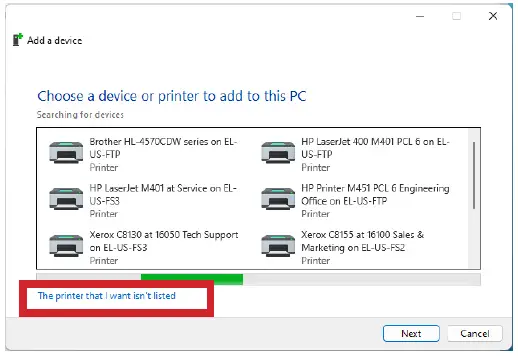
- The Add a Device window will open up. Click The printer that I want isn’t listed.
- To manually launch, open Settings / Bluetooth and Devices / Printers and Scanners / Add a device / The printer I want isn’t listed.
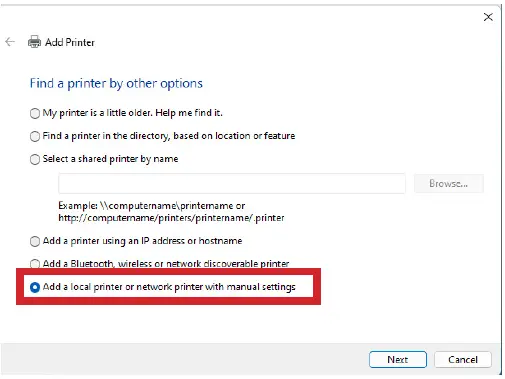
- To manually launch, open Settings / Bluetooth and Devices / Printers and Scanners / Add a device / The printer I want isn’t listed.
- Select Add a local printer or network printer with manual settings.
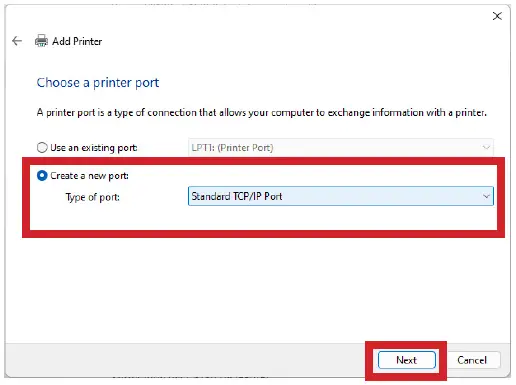
- Select Create a new port. From the drop down menu, select Standard TCP/IP Port. Click Next.

- Deselect Query the printer. Enter the IP address of the laser. The default address is 192.168.3.4. Then click Next.
- If you don’t know the IP address of the laser please refer to the Laser System Manual.
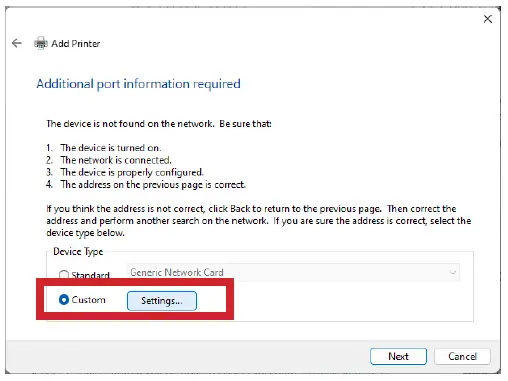
- If you don’t know the IP address of the laser please refer to the Laser System Manual.
- Select Custom and click Settings.
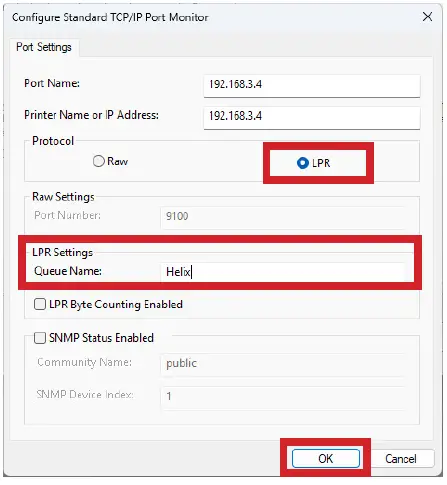
- Select LPR protocol. Enter the machine model in Queue Name. Click OK.
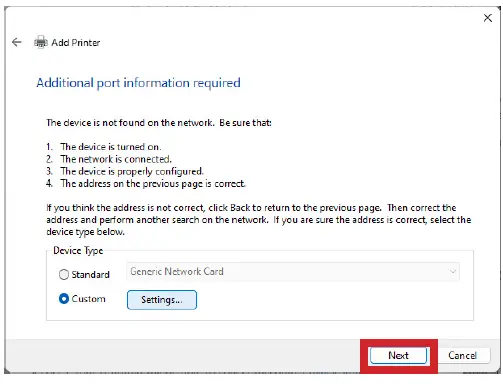
- Click Next.

- Click Have Disk.
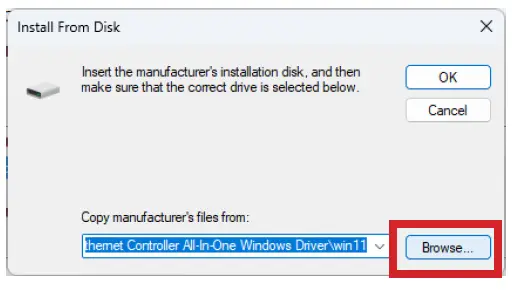
- Click Browse.

- Click This PC, Local Disk (C:), Open.
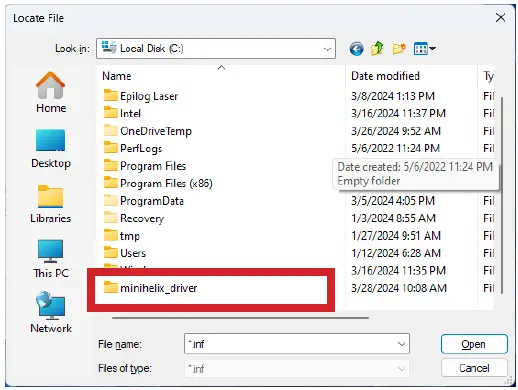
- Open the driver file for your machine.

- Select the .inf file and click Open.
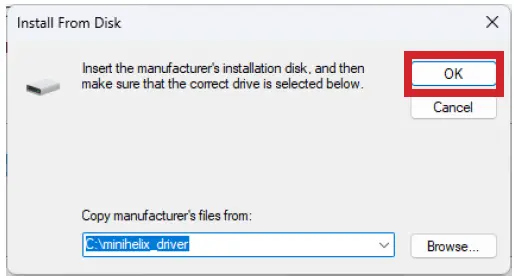
- Click OK.

- Click Next.

- Name the printer or leave the default name and click Next.

- Click Install.

- Leave Do not share this printer selected and click Next.
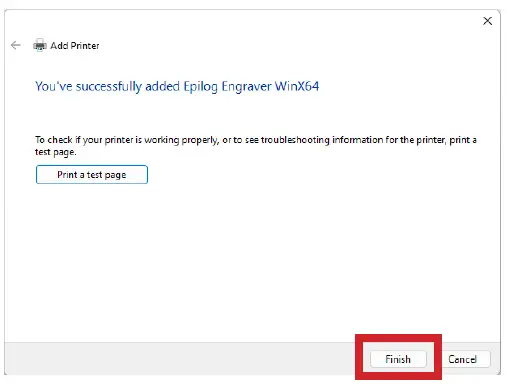
- Click Finish.
You have now completed the Ethernet installation of your Legacy Driver.
Unable to send a job to the machine
- Verify the IP address of the laser matches what was entered during driver install.
- Make sure the USB is NOT connected.
- Test your Ethernet cable.
Further support is available at https://www.epiloglaser.com/tech-support/technicalsupport/
Documents / Resources
 | Windows 11 Legacy Driver |
References
- epiloglaser.com/tech-support/drivers/epiloglaser.com
- epiloglaser.com/tech-support/technical-epiloglaser.com
- User Manualmanual.tools
Published: June 4, 2024
Updated: June 5, 2024