Weiser SmartCode 5 Lever Electronic Lock
Àwòṣe: 9GED14550-005
1. Ifihan
This manual provides comprehensive instructions for the Weiser 9GED14550-005 SmartCode 5 Lever Electronic Lock with Z-Wave technology. This electronic lever lock offers keyless entry, enhanced security, and smart home integration capabilities. Please read this guide thoroughly before installation and operation to ensure proper function and longevity of your lock.
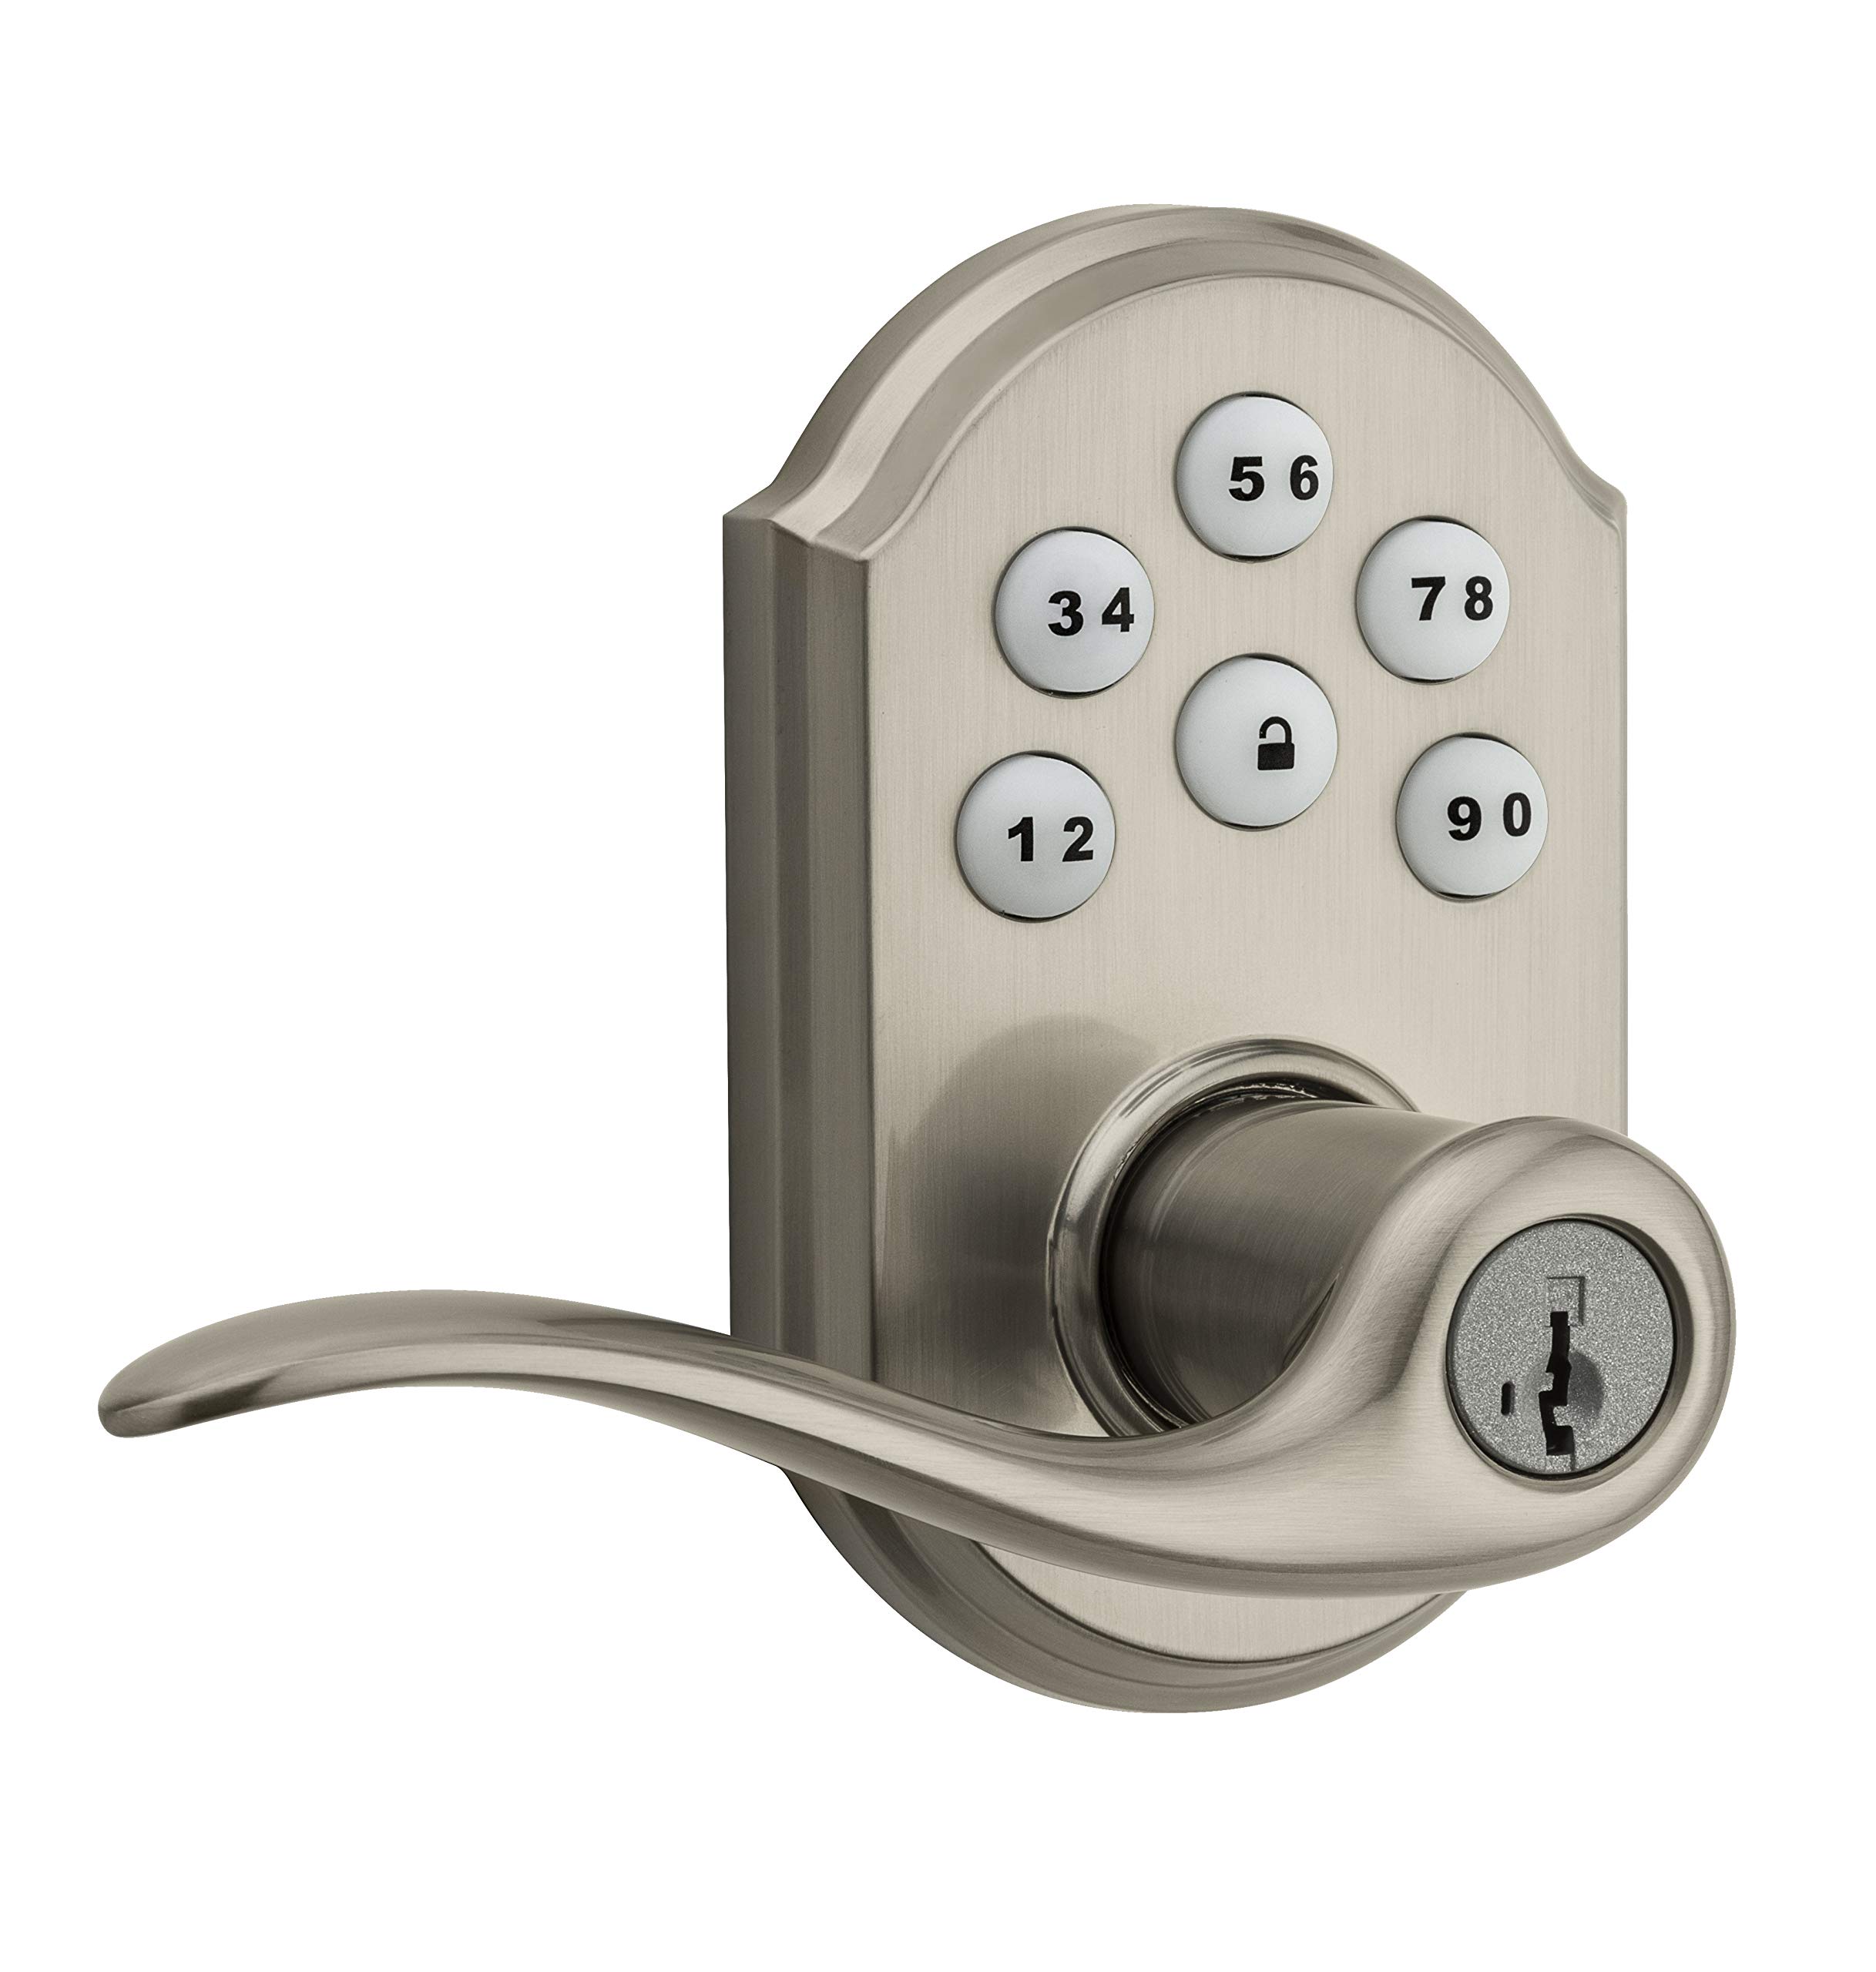
Image 1: Weiser SmartCode 5 Lever Electronic Lock in Satin Nickel finish. This image displays the complete lock assembly, including the exterior keypad and interior lever components.
2. Awọn ẹya Ọja
- Iwọle Alailowaya: Backlit keypad for convenient code access.
- Z-Wave 500 Home Connect Technology: Enables wireless communication with other smart home devices.
- Wiwọle Latọna jijin: Remotely check lock status, lock/unlock, and receive notifications via web-enabled devices.
- Ibamu Ile Smart: Works with Z-Wave certified controllers, including Samsung SmartThings and Wink for Amazon Alexa integration.
- Ìmọ̀-ẹ̀rọ Àtúnṣe SmartKey: Allows re-keying the lock to a new key in seconds.
- Titiipa Ifọwọkan Kan: Motorized locking with a single touch.
- Titiipa Aifọwọyi: Customizable automatic re-locking after 30 seconds for added security.
- Awọn koodu olumulo: Supports up to 30 unique user access codes and 1 master code.
- Iduroṣinṣin: ANSI/BHMA Grade 2 certified.
- Fifi sori Rọrun: Designed to fit most standard residential door preparations (1-3/8" to 1-3/4" door thickness, adjustable 2-3/8" or 2-3/4" backset, 2-1/8" cross bore).
- Aabo: Full 128-bit encryption.
3. Package Awọn akoonu
Kí o tó bẹ̀rẹ̀ sí í fi sori ẹrọ, rí i dájú pé gbogbo àwọn èròjà wà níbẹ̀. Àpò náà sábà máa ń ní:
- Ode Keypad Apejọ
- Apejọ Lefa inu
- Latch
- Kọlu Awo
- Iṣagbesori Hardware
- Itọsọna Fifi sori ẹrọ / Awoṣe Liluho
Note: 4 AA alkaline batteries are required and sold separately.
4. Itọsọna fifi sori ẹrọ
Installation of the SmartCode 5 Lever lock is designed to be straightforward, typically requiring only a Phillips head screwdriver. Ensure your door meets the following specifications:
- Sisanra ilekun: 1-3/8" sí 1-3/4" (35 mm - 44 mm)
- Agbelebu Bore: 2-1/8" (54 mm)
- Àpò ẹ̀yìn ìdènà: Adjustable 2-3/8" or 2-3/4" (60 mm or 70 mm)
- Gbigbe ilekun: Universal (can be installed on left or right-handed doors)
Awọn igbesẹ fifi sori ẹrọ:
- Ṣetan ilẹkun: If necessary, use the provided template to drill holes. Ensure the door is properly aligned and the existing latch bore is clear.
- Fi sori ẹrọ Latch: Insert the latch into the door edge and secure it with screws. Ensure the latch bolt faces the door frame.
- Fi Apejọ Bọtini Ita sori ẹrọ: Route the cable through the cross bore and position the exterior keypad assembly on the door.
- Fi sori ẹrọ Apejọ inu inu: Connect the cable from the exterior assembly to the interior assembly. Secure the interior assembly to the door using the provided mounting screws.
- Fi sori ẹrọ Levers: Attach the interior and exterior levers according to the instructions, ensuring they operate smoothly.
- Fi Awọn batiri sii: Insert 4 new AA alkaline batteries into the battery pack.
- Ṣe Ilana Gbigbe ilẹkun: This step is crucial for the lock to learn the orientation of your door. Follow the specific instructions in your physical installation guide to ensure correct operation.
5. Initial Setup & Programming
After installation, the lock requires initial setup, including setting the Master Code and User Codes.
Titunto si koodu:
The Master Code is a critical security feature. It is used to add, delete, and modify User Codes and other lock settings. It does not unlock the door. It is highly recommended to create a Master Code immediately after installation.
Awọn koodu olumulo:
The lock supports up to 30 unique 4-8 digit User Codes for family members, guests, or service personnel.
Programming Steps (General):
- Ṣeto koodu Titunto: Refer to your specific programming guide for the sequence to establish your Master Code.
- Ṣafikun koodu olumulo:
- Tẹ koodu Titunto rẹ sii.
- Press the Program button (usually located on the interior assembly).
- Tẹ Kóòdù Olùlò tuntun ti o ni nọmba 4-8 sii.
- Tẹ bọtini Titiipa.
- Test the new User Code to ensure it unlocks the door.
- Pa koodu olumulo rẹ: Follow the specific instructions in your programming guide, typically involving the Master Code and the User Code to be deleted.
6. Z-Wave Integration
The SmartCode 5 Lever lock features Z-Wave 500 Home Connect Technology, allowing it to integrate with compatible smart home systems.
Enrollment (Adding to Z-Wave Network):
To add the lock to your Z-Wave network, initiate the 'Add Device' or 'Inclusion' process on your Z-Wave controller/hub. Then, follow the lock's specific instructions to put it into inclusion mode (often by pressing the Program button once). The lock will communicate with the controller to join the network.
Exclusion (Removing from Z-Wave Network):
To remove the lock from a Z-Wave network, initiate the 'Remove Device' or 'Exclusion' process on your Z-Wave controller/hub. Then, follow the lock's specific instructions to put it into exclusion mode.
Functionality with Z-Wave:
- Remotely lock and unlock the door.
- Check the current lock status (locked/unlocked).
- Receive notifications for lock activity (e.g., door locked/unlocked, low battery).
The lock is compatible with Z-Wave certified controllers, including those that support Amazon Alexa integration via Samsung SmartThings and Wink.
7. Isẹ
Operating your SmartCode 5 Lever lock is simple and intuitive.
Titiipa ilẹkun:
- Láti Òde: Press the Lock button on the keypad. The motorized deadbolt will extend.
- Láti inú ilé: Rotate the interior thumb turn to the locked position.
Ṣii ilẹkun:
- Láti Òde: Enter a valid 4-8 digit User Code on the keypad. The motorized deadbolt will retract.
- Láti inú ilé: Rotate the interior thumb turn to the unlocked position.
Titiipa Aifọwọyi:
If enabled, the lock will automatically re-lock approximately 30 seconds after being unlocked from the exterior. This feature provides peace of mind, ensuring your door is always secured.
8. Itọju
Proper maintenance ensures the longevity and reliable operation of your electronic lock.
Rirọpo Batiri:
The lock requires 4 AA alkaline batteries. When the batteries are low, the lock will typically provide an audible and/or visual low battery warning. Replace all four batteries simultaneously with new, high-quality alkaline batteries. Avoid using rechargeable batteries, as they may not provide sufficient voltage.
Ninu:
Nu oriṣi bọtini ati titiipa ara pẹlu asọ, damp Aṣọ. Yẹra fún lílo àwọn ohun ìfọṣọ, àwọn ohun olómi, tàbí àwọn ohun ìfọṣọ kẹ́míkà, nítorí pé wọ́n lè ba àwọn ohun èlò ìfọṣọ àti àwọn ẹ̀rọ itanna jẹ́.
Àtúnṣe ìkọ́ SmartKey:
If you need to re-key your lock to a new key, follow the specific instructions provided with your SmartKey tool. This process allows you to re-key the lock yourself in seconds without removing it from the door.
9. Laasigbotitusita
If you encounter issues with your lock, refer to the following common troubleshooting steps:
- Titii Ko Dahun: Check that the batteries are correctly installed and fully charged. Replace batteries if necessary. Ensure all cables are securely connected inside the interior assembly.
- Awọn koodu Ko Ṣiṣẹ: Verify that the Master Code is set. Ensure User Codes are entered correctly and are active. Try deleting and re-adding the User Code.
- Àwọn Ìṣòro Ìsopọ̀mọ́ra Z-Wave: Ensure your Z-Wave controller/hub is powered on and within range of the lock. Try performing a Z-Wave exclusion and then re-inclusion process.
- Grinding Noise / Latch Not Extending: This can indicate door misalignment or an obstruction. Check that the door frame and strike plate are properly aligned with the latch. Ensure the latch operates freely without resistance.
- Bọtini bọtini ko tan ina: Check battery power. If batteries are new, ensure they are inserted with correct polarity.
For more detailed troubleshooting, consult the full product manual or contact Weiser customer support.
10. Awọn pato
| Nọmba awoṣe | 9GED14550-005 |
| Brand | Weiser |
| Ohun elo | Nickel |
| Pari | Didan |
| Àwọ̀ | Didan yinrin Nickel |
| Ara | Igbalode |
| Titiipa Iru | Bọtini foonu |
| Pataki Ẹya | Aini bọtini |
| Sisanra ilekun | 1-3/8" sí 1-3/4" (35 mm - 44 mm) |
| Latch Backset | Adjustable 2-3/8" or 2-3/4" (60 mm or 70 mm) |
| Àgbélébùú | 2-1/8" (54 mm) |
| Orisun agbara | Awọn batiri Alkaline 4 AA (kii ṣe pẹlu) |
| Awọn iwe-ẹri | Ipele 2 ANSI / BHMA |
| Iwọn Nkan | 1.51 kg |
| Approximate Dimensions (Parcel) | 25.3 x 14.1 x 9.2 cm |
| Ibamu Adarí | Amazon Alexa, SmartThings, Wink (via Z-Wave hub) |
11. Atilẹyin ọja & Atilẹyin
Weiser stands behind the quality of its products.
Alaye Atilẹyin ọja:
- Mechanical & Finish Warranty: Igba aye
- Atilẹyin ọja Electronics: Odun kan
These warranties apply to the original residential user of the product. Please retain your proof of purchase for warranty claims.
Atilẹyin Onibara:
For detailed warranty terms, technical assistance, or further support, please visit the official Weiser website or contact their customer service department. Contact information can typically be found on the Weiser webaaye tabi ni awọn ohun elo apoti.