вступ
The Honeywell Home T6 Pro Z-Wave Thermostat offers a simple, familiar, and intuitive solution for managing your home's climate. Designed to integrate seamlessly with any Z-Wave-compatible controller, hub, or gateway, this thermostat provides reliable temperature control and energy savings. Its large, nearly 7-inch touchscreen display ensures ease of use, while Z-Wave Plus certification guarantees improved range, battery life, and bandwidth. The device can be powered by 3 AA batteries or hardwired via a C-wire, offering flexible installation options. This manual provides essential information for setting up, operating, and maintaining your T6 Pro Z-Wave Thermostat.
Ключові характеристики
- Time-based 7-day, 5-1-1, or 5-2 day programmable options, non-programmable, or occupancy controlled with Z-Wave panel/app integration.
- Supports up to 3 Heat/2 Cool Heat Pump systems or up to 2 Heat/2 Cool Conventional systems.
- Z-Wave Plus certified for enhanced range, battery life, and bandwidth.
- Features backwards compatibility, selectable range stops, keypad lockout, and Daylight Saving Time (DST) enabled.
- Large touchscreen display for easy interaction.
Що включено
Your Honeywell Home T6 Pro Z-Wave Thermostat package includes the following components:
- T6 PRO Z-Wave Thermostat unit
- UWP mounting system
- Покривна пластина
- Монтажна фурнітура
- Literature (User Manual, Installation Guide, etc.)
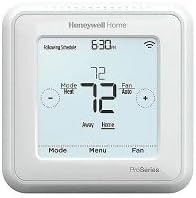
Image: The Honeywell Home T6 Pro Z-Wave Thermostat, showing its white casing and digital touchscreen display.
Налаштування
Встановлення завершеноview
Installation of the T6 Pro Z-Wave Thermostat involves mounting the UWP system, connecting wiring, and attaching the thermostat unit. It is recommended to consult a qualified HVAC professional if you are unsure about any steps. Ensure power to your HVAC system is turned off at the circuit breaker before beginning installation.
- Вимоги до живлення: The thermostat can be powered by 3 AA batteries or hardwired through a C-wire. A C-wire connection is recommended for consistent power and Z-Wave communication.
- Монтаж: The UWP (Universal Wiring Plate) mounting system simplifies installation. Wires from your HVAC system connect to the UWP, and the thermostat unit then snaps onto the UWP.
- Електропроводка: Carefully label and disconnect wires from your old thermostat. Connect them to the corresponding terminals on the T6 Pro Z-Wave UWP. Refer to the detailed wiring diagrams in the included literature for specific system types (e.g., conventional, heat pump).
- Початкова конфігурація: After installation and power restoration, the thermostat will guide you through initial setup, including system type, date, and time settings.
Операційна
Основна операція
- Регулювання температури: Use the '+' and '-' buttons on the touchscreen to increase or decrease the desired temperature setting.
- Зміна режиму: Press the 'Mode' button to cycle through available system modes: Heat, Cool, Auto, Off, or Em Heat (Emergency Heat, if applicable).
- Параметри вентилятора: Press the 'Fan' button to select fan operation: Auto (fan runs only when heating/cooling is active) or On (fan runs continuously).
- Доступ до меню: Press the 'Menu' button to access advanced settings, programming options, and system information.
Програмування розкладів
The T6 Pro Z-Wave Thermostat supports various programming options to optimize comfort and energy efficiency:
- Програмовані розклади: Choose from 7-day, 5-1-1 (weekday/Saturday/Sunday), or 5-2 day (weekday/weekend) programming. This allows you to set different temperature schedules for various times of the day and week.
- Непрограмований: Operate the thermostat manually without a set schedule.
- Z-Wave Integration: When connected to a Z-Wave compatible hub, you can control and program the thermostat remotely via your smart home application, enabling advanced automation and occupancy-based control.
Технічне обслуговування
- Заміна батареї: If using battery power, replace the 3 AA batteries when the low battery indicator appears on the display. Ensure to use fresh alkaline batteries.
- Прибирання: Clean the thermostat's touchscreen and casing з м'яким, damp тканиною. Уникайте абразивних засобів для чищення або розчинників, які можуть пошкодити поверхню.
- Оновлення прошивки: For Z-Wave connected systems, check your Z-Wave hub's documentation for information on potential firmware updates for the thermostat, which can improve performance and add features.
Усунення несправностей
| проблема | Можлива причина | Рішення |
|---|---|---|
| Дисплей термостата порожній. | No power (batteries dead or C-wire issue). | Replace batteries or check C-wire connection and circuit breaker. |
| Система опалення, вентиляції та кондиціонування повітря не реагує. | Incorrect wiring, system mode, or Z-Wave communication issue. | Verify wiring, ensure correct mode (Heat/Cool/Auto), check Z-Wave network status. |
| Показники температури здаються неточними. | Thermostat location, drafts, or internal sensor issue. | Ensure thermostat is not in direct sunlight or near heat sources/drafts. Consult support if issue persists. |
| Не вдається підключитися до мережі Z-Wave. | Out of range, interference, or incorrect pairing procedure. | Move thermostat closer to hub, check for interference, follow Z-Wave pairing instructions carefully. |
Технічні характеристики
| Атрибут | Деталь |
|---|---|
| Бренд | Honeywell |
| Назва моделі | T6 Pro |
| Номер моделі | TH6320ZW2007/U |
| Тип контролера | Z-Wave, smartphone app |
| Колір | Білий |
| Тип контролю температури | Програмований, розумний/дистанційний |
| Технологія підключення | Z-хвиля |
| Джерело живлення | Battery Powered (3 AA batteries required), Hardwired (C-wire) |
| Вага товару | 1.6 унції |
| томtage | 24 вольт |
| Розміри продукту | 4.09 x 4.09 x 1.06 дюймів |
| Тип дисплея | Сенсорний екран |
| Розмір екрана | 7 Inches (approximate diagonal) |
| Тип монтажу | Настінне кріплення |
| UPC | 194159007819 |
Гарантія та підтримка
For warranty information and technical support, please refer to the official Honeywell Home website or the contact details provided in the literature included with your product. Keep your purchase receipt as proof of purchase for warranty claims. Online resources, FAQs, and customer service contact information are typically available through the manufacturer's support channels.