
1. Вступ
The Yaxun YX-9205 Digital Multimeter is a versatile and reliable instrument designed for measuring various electrical parameters. It is suitable for professional electricians, hobbyists, and students for testing and troubleshooting electronic circuits and devices. This manual provides essential information for safe and effective operation of your multimeter.
2. Інформація про безпеку
Always observe safety precautions when using any electrical testing equipment. Failure to do so may result in injury or damage to the multimeter or the equipment under test.
- Перед використанням переконайтеся, що мультиметр знаходиться у справному стані.
- Не застосовувати обtagе або струм, що перевищує максимальні задані межі для кожного діапазону.
- Завжди від'єднуйте вимірювальні дроти від кола перед зміною функцій або діапазонів.
- Будьте обережні при роботі з обtagвище 30 В змінного струму (RMS), 42 В пікового значення або 60 В постійного струму, оскільки це створює небезпеку ураження електричним струмом.
- Замініть батарейку, коли з'явиться індикатор низького заряду батареї, щоб забезпечити точність показань.
- Do not operate the multimeter in explosive atmospheres or in the presence of flammable gases or dust.
- Keep fingers behind the probe barriers during measurements.
3. Особливості продукту
The Yaxun YX-9205 Digital Multimeter offers a range of functions and features for comprehensive electrical testing:
- Multi-scale measurements for various electrical parameters.
- Вимірювання постійного струму Voltage, AC Voltage, DC Current, AC Current, Resistance, Capacitance, Diode, and Continuity.
- Transistor hFE gain test function.
- Large LCD display with 4 digits, maximum reading 1999.
- Data Hold function to freeze displayed values.
- Auto Power Off function to conserve battery life.
- Audible continuity signal.
- Індикатор низького заряду батареї.
- Integrated kickstand for convenient viewінж.
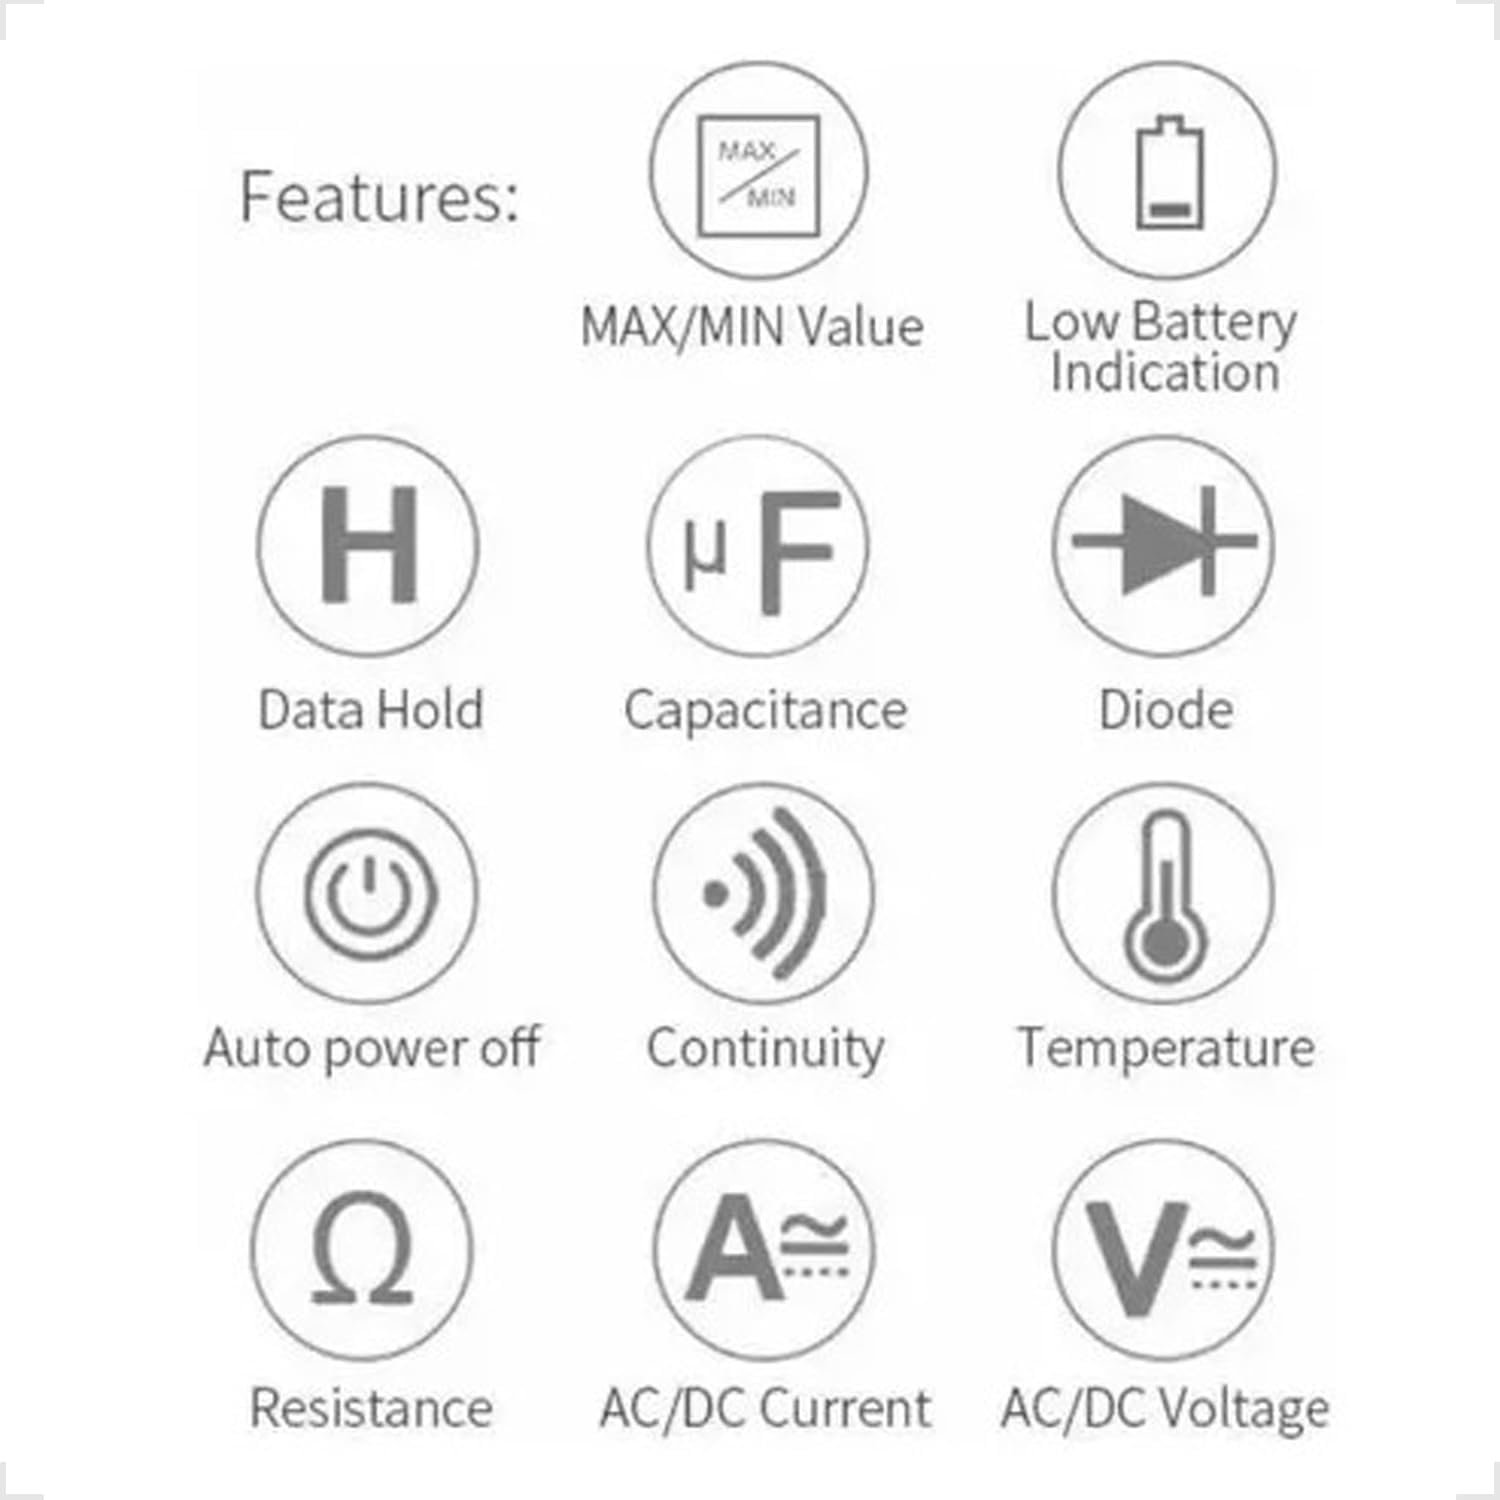
Figure 3.1: Feature Icons. This image displays a set of icons illustrating the key functions and capabilities of the Yaxun YX-9205 Digital Multimeter, such as data hold, capacitance measurement, diode testing, and auto power off.
4. Вміст упаковки
Перевірте наявність усіх предметів у вашій упаковці:
- Yaxun YX-9205 Digital Multimeter
- Вимірювальні дроти (червоний та чорний)
- 9V Battery (6F22 type)
- Temperature Probe (K-type thermocouple, if included)
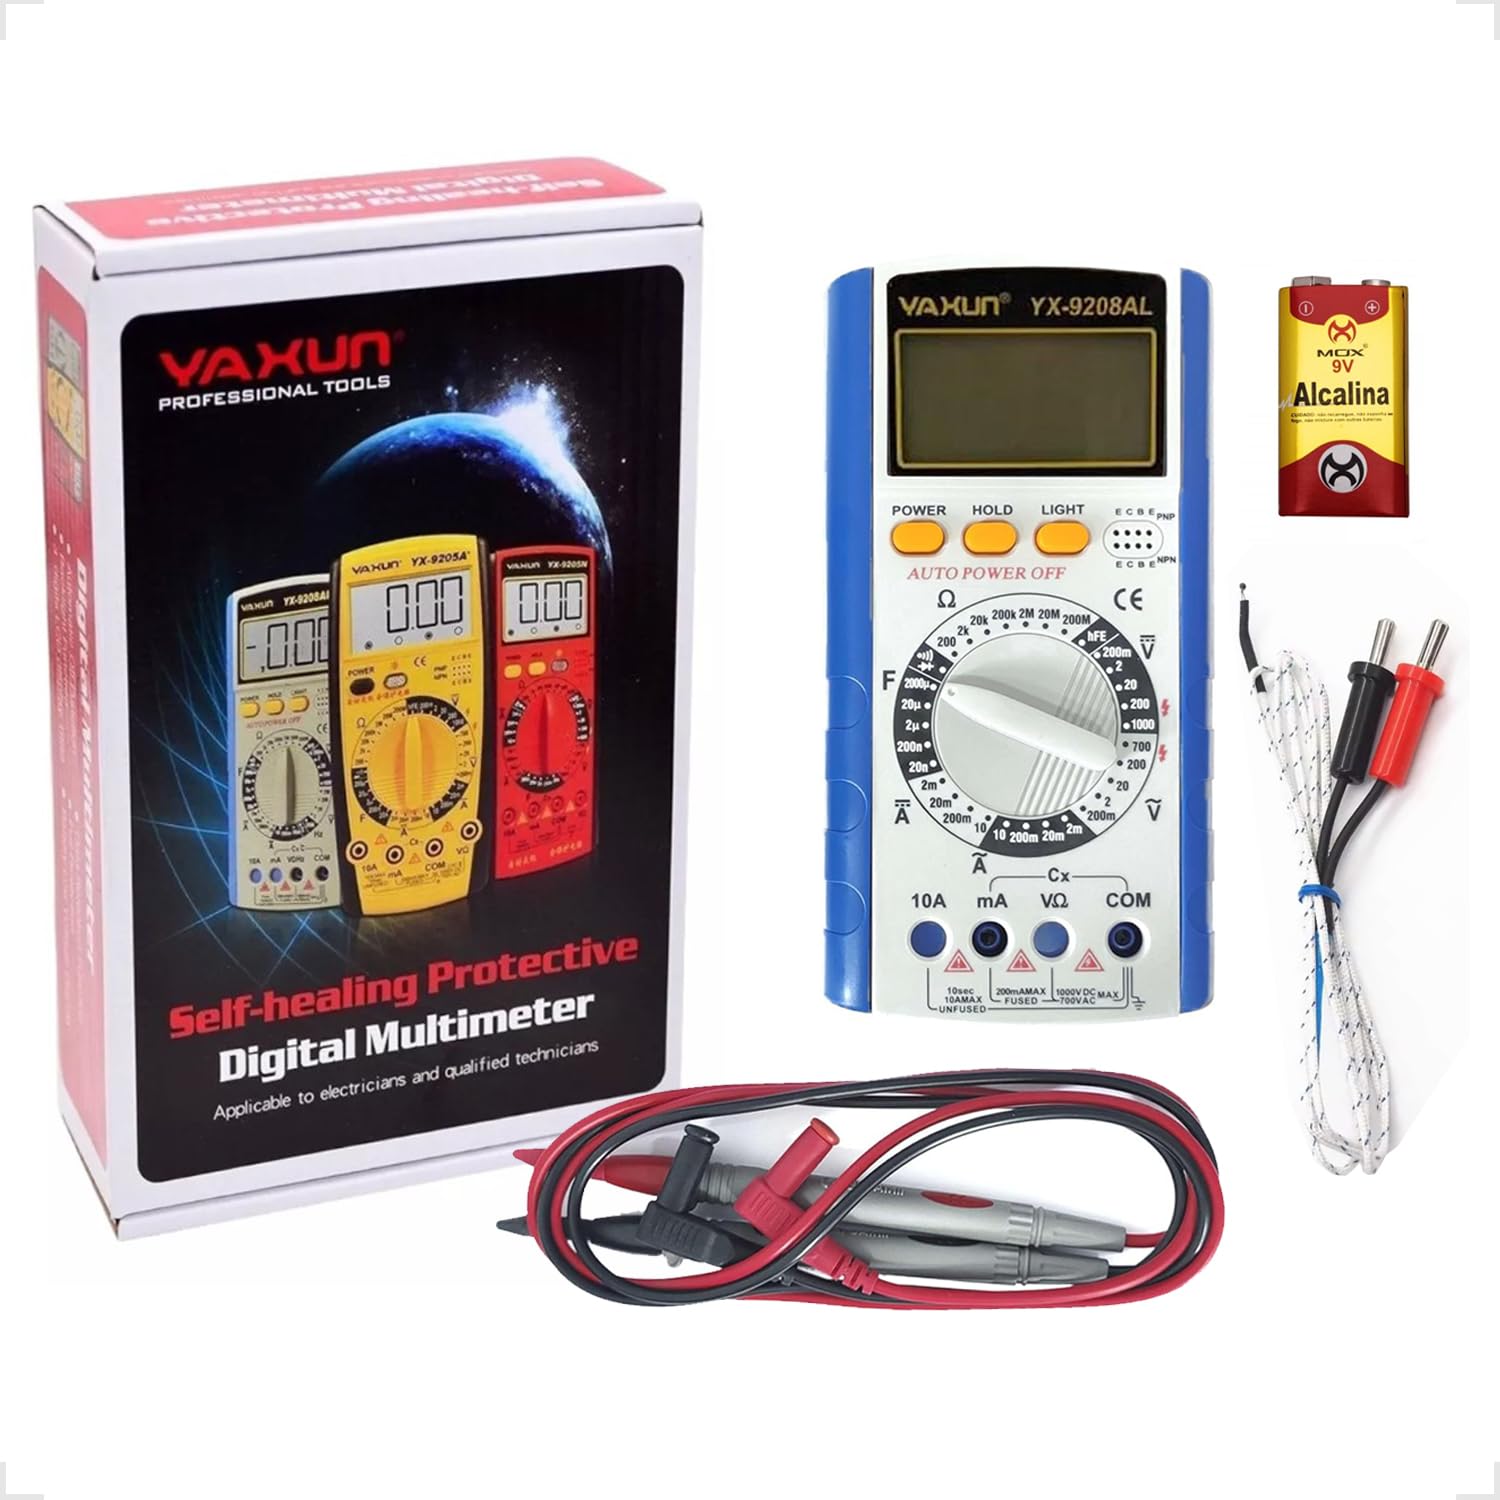
Figure 4.1: Package Contents. This image shows the Yaxun YX-9205 Digital Multimeter, along with its included red and black test leads and a 9V battery.
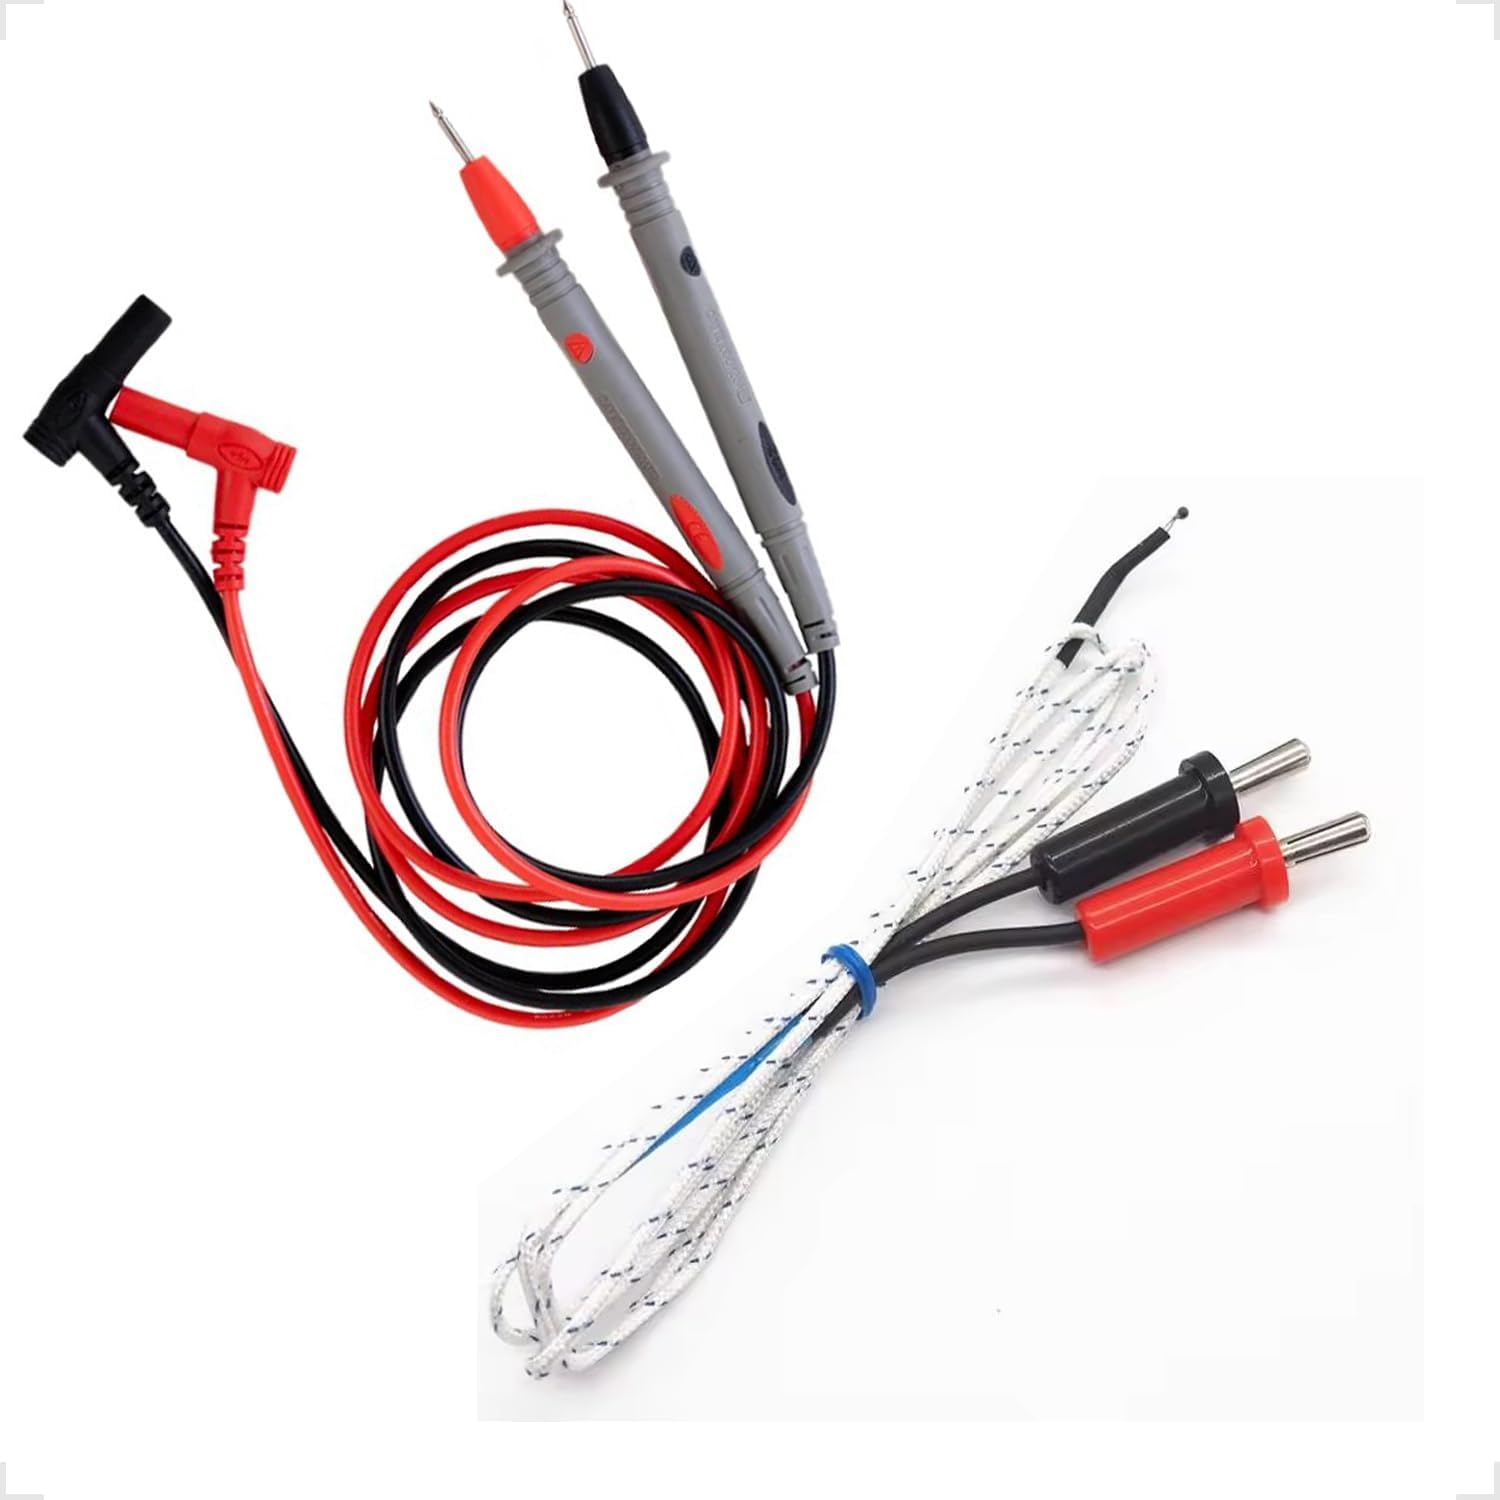
Figure 4.2: Test Leads and Temperature Probe. This image details the included red and black test leads, essential for making electrical measurements, and a white temperature probe.
5. Налаштування
5.1 Встановлення батареї
The multimeter requires a 9V battery for operation. Follow these steps to install or replace the battery:
- Переконайтеся, що мультиметр вимкнено, а вимірювальні дроти від'єднані.
- Знайдіть кришку відсіку для батарейок на задній панелі мультиметра.
- Use a screwdriver to remove the screw securing the cover, then lift the cover off.
- Підключіть батарейку 9 В до затискача батареї, дотримуючись правильної полярності.
- Вставте батарейку у відсік та закрийте кришку, закріпивши її гвинтом.

Figure 5.1: Battery Compartment. This image shows the rear of the multimeter, highlighting the battery compartment cover, which needs to be opened for battery installation or replacement.
5.2 Підключення вимірювальних щупів
Proper connection of test leads is crucial for accurate and safe measurements:
- Вставте чорний вимірювальний дріт у гніздо "COM" (Common).
- Для більшості об'ємівtage, resistance, and continuity measurements, insert the red test lead into the "VΩmA" jack.
- For high current measurements (up to 10A), insert the red test lead into the "10A" jack. Ensure the rotary switch is set to the appropriate current range.
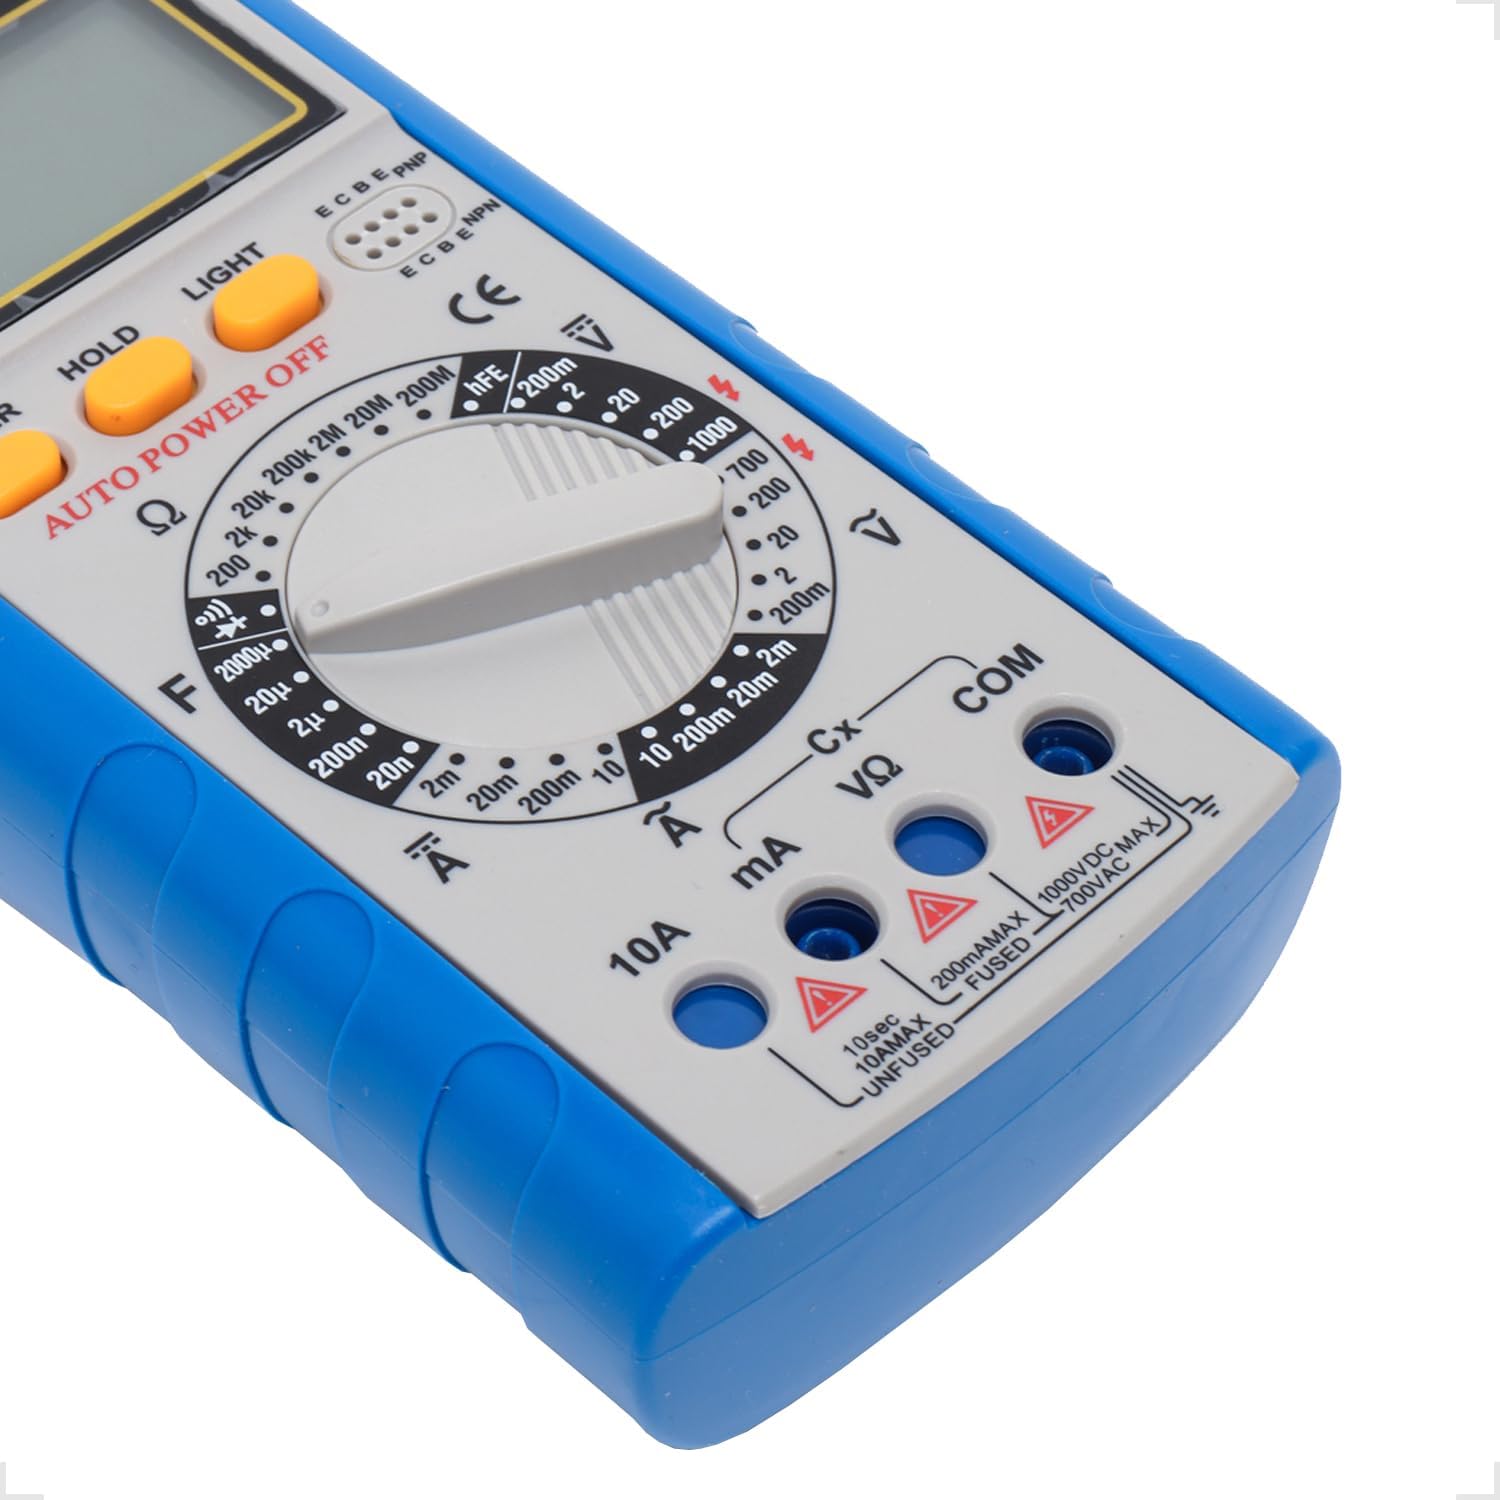
Figure 5.2: Input Jacks. This image provides a detailed view of the multimeter's input jacks: COM (common), VΩmA (for voltage, resistance, and low current), and 10A (for high current measurements).
5.3 Використання підставки
The multimeter features a built-in kickstand for hands-free operation and improved viewing angle. Simply pull out the kickstand from the back of the unit to deploy it.

Figure 5.3: Multimeter with Kickstand. This image shows the multimeter standing upright with its integrated kickstand extended, providing a stable and convenient viewing angle during use.
6. Інструкція з експлуатації
6.1 Загальні операції
The YX-9205 multimeter is operated primarily using the rotary switch and function buttons.
- Поворотний перемикач: Selects the desired measurement function (e.g., VDC, VAC, ADC, AAC, Ω, F, Diode, Continuity, hFE).
- Кнопка живлення: Turns the multimeter on or off.
- Кнопка HOLD: Фіксує поточне значення на дисплеї. Натисніть ще раз, щоб відпустити.
- Кнопка LIGHT: Activates the display backlight for better visibility in low-light conditions.

Рисунок 6.1: Панель керування. Це зображення надає детальне view of the multimeter's main controls, including the central rotary switch for function selection and the Power, Hold, and Light buttons.
6.2 Вимірювання постійного струму Voltagе (VDC)
- Insert the black lead into the COM jack and the red lead into the VΩmA jack.
- Поверніть поворотний перемикач на потрібний рівень гучності постійного струмуtagдіапазон (наприклад, 200 мВ, 2 В, 20 В, 200 В, 1000 В). Якщо об'ємtagЯкщо e невідоме, почніть з найвищого діапазону та зменшуйте його за потреби.
- Підключіть вимірювальні щупи до компонента або кола, що вимірюватиметься, дотримуючись полярності.
- Прочитайте томtagзначення e на РК-дисплеї.
6.3 Вимірювання AC Voltage (VAC)
- Insert the black lead into the COM jack and the red lead into the VΩmA jack.
- Поверніть поворотний перемикач на потрібний рівень гучності змінного струмуtagдіапазон (наприклад, 200 мВ, 2 В, 20 В, 200 В, 700 В). Якщо об'ємtage is unknown, start with the highest range.
- Підключіть вимірювальні щупи до компонента або кола, що вимірюватиметься. Полярність не є критичною для напруги змінного струму.tage.
- Прочитайте томtagзначення e на РК-дисплеї.
6.4 Measuring DC Current (ADC)
Caution: Always connect the multimeter in series with the circuit when measuring current. Never connect it in parallel across a voltage source, as this can damage the multimeter and the circuit.
- Determine the expected current. For currents up to 200mA, use the VΩmA jack for the red lead. For currents up to 10A, use the 10A jack for the red lead. The black lead always goes into COM.
- Turn the rotary switch to the appropriate DC Current range (e.g., 2mA, 20mA, 200mA, 10A).
- Open the circuit where current is to be measured and connect the test leads in series.
- Прочитайте поточне значення на РК-дисплеї.
6.5 Measuring AC Current (AAC)
Caution: Always connect the multimeter in series with the circuit when measuring current. Never connect it in parallel across a voltage source, as this can damage the multimeter and the circuit.
- Determine the expected current. For currents up to 200mA, use the VΩmA jack for the red lead. For currents up to 10A, use the 10A jack for the red lead. The black lead always goes into COM.
- Turn the rotary switch to the appropriate AC Current range (e.g., 2mA, 20mA, 200mA, 10A).
- Open the circuit where current is to be measured and connect the test leads in series.
- Прочитайте поточне значення на РК-дисплеї.
6.6 Вимірювання опору (Ом)
Caution: Ensure the circuit or component under test is completely de-energized before measuring resistance. Disconnect power and discharge any capacitors.
- Insert the black lead into the COM jack and the red lead into the VΩmA jack.
- Turn the rotary switch to the desired Resistance range (e.g., 200Ω, 2kΩ, 20kΩ, 200kΩ, 2MΩ, 20MΩ, 200MΩ).
- Підключіть вимірювальні щупи до компонента, який потрібно виміряти.
- Зчитайте значення опору на РК-дисплеї.
6.7 Вимірювання ємності (F)
Caution: Ensure capacitors are fully discharged before testing. High voltage capacitors can store dangerous charges.
- Insert the black lead into the COM jack and the red lead into the VΩmA jack.
- Turn the rotary switch to the Capacitance (F) function and select the appropriate range (e.g., 20nF, 200nF, 2µF, 20µF, 200µF).
- Підключіть вимірювальні щупи до клем конденсатора.
- Зчитайте значення ємності на РК-дисплеї.
6.8 Діодне випробування
- Insert the black lead into the COM jack and the red lead into the VΩmA jack.
- Turn the rotary switch to the Diode symbol.
- Підключіть червоний щуп до анода, а чорний щуп до катода діода. На дисплеї відобразиться пряма напруга.tagпадіння напруги (зазвичай від 0.5 В до 0.8 В для кремнієвих діодів).
- Reverse the probes. The display should show 'OL' (Open Loop) for a good diode. A reading in both directions or 'OL' in both directions indicates a faulty diode.
6.9 Тест безперервності
- Insert the black lead into the COM jack and the red lead into the VΩmA jack.
- Turn the rotary switch to the Continuity symbol (often shared with the Diode function).
- Підключіть випробувальні щупи до кола або компонента.
- If the resistance is below approximately 50Ω, the buzzer will sound, indicating continuity. The display will also show the resistance value.
6.10 Випробування транзистора hFE
- Поверніть поворотний перемикач у положення hFE.
- Визначте, чи є транзистор NPN чи PNP.
- Insert the transistor's emitter, base, and collector leads into the corresponding holes in the hFE socket on the multimeter.
- Зчитайте значення hFE (коефіцієнт посилення постійного струму) на РК-дисплеї.
7. Технічні характеристики
| Параметр | Діапазон | Точність |
|---|---|---|
| DC Voltage | 200 мВ, 2 В, 20 В, 200 В, 1000 В | ±(0.5% + 1 цифри) |
| AC Voltage | 200 мВ, 2 В, 20 В, 200 В, 700 В | ±(0.8% + 3 цифр) |
| Постійний струм | 2 мА, 20 мА, 200 мА, 10 А | ±(0.5% + 1 цифри) |
| Змінного струму | 2 мА, 20 мА, 200 мА, 10 А | ±(1.0% + 3 цифр) |
| опір | 200Ω, 2kΩ, 20kΩ, 200kΩ, 2MΩ, 20MΩ, 200MΩ | ±(0.8% + 1 цифри) |
| Ємність | 20nF, 200nF, 2µF, 20µF, 200µF | ±(4.0% + 3 цифр) |
| Дисплей | 1999 counts, 60 x 31.5mm LCD | |
| Джерело живлення | 9-вольтова батарея (6F22) | |
| Розміри (Д x Ш x В) | 180 x 86 x 35 мм | |
8. Технічне обслуговування
8.1 Очищення
Щоб очистити мультиметр, протріть корпусamp тканиною та м’яким миючим засобом. Не використовуйте абразивні засоби або розчинники. Перед використанням переконайтеся, що мультиметр повністю сухий.
8.2 Заміна батареї
When the low battery indicator appears on the display, replace the 9V battery as described in the 'Battery Installation' section (5.1). A weak battery can lead to inaccurate readings.
8.3 Заміна запобіжника
Caution: Always disconnect test leads and turn off the multimeter before replacing the fuse. Use only fuses of the specified type and rating.
If the multimeter fails to measure current, the fuse may be blown. To replace the fuse:
- Вимкніть мультиметр і від'єднайте всі вимірювальні дроти.
- Open the battery compartment cover as described in section 5.1.
- Обережно вийміть старий запобіжник.
- Install a new fuse of the correct type and rating (e.g., F200mA/250V for mA ranges, F10A/250V for 10A range). Refer to the markings near the fuse holder if available.
- Встановіть на місце кришку батарейного відсіку та закріпіть її гвинтом.
9. Вирішення проблем
| проблема | Можлива причина | Рішення |
|---|---|---|
| Немає дисплея або дисплей тьмяний | Розряджений або слабкий акумулятор | Замініть акумулятор 9 В. |
| Неправильні показання | Incorrect range selected, poor lead connection, weak battery | Select the correct range, ensure leads are firmly connected, replace battery. |
| Немає вимірювання струму | Blown fuse, incorrect lead connection | Check and replace fuse if necessary, ensure leads are in correct current jacks and connected in series. |
| Відображається «OL» (перевантаження) | Measurement exceeds selected range, open circuit | Select a higher range, check for open circuit. |
10. Гарантія та підтримка
This Yaxun YX-9205 Digital Multimeter is designed for reliability and performance. For specific warranty information, please refer to the purchase documentation or contact your retailer. For technical support or inquiries, please reach out to the Yaxun customer service department or your local distributor.