Dapper Supply DP-WPFS1204
User Manual: Dapper Supply Battery Powered Walk Behind Mini Automatic Floor Scrubber Machine
Model: DP-WPFS1204
1. Giriş
Welcome to the Dapper Supply family! This user manual provides essential information for the safe and efficient operation, maintenance, and troubleshooting of your new Battery Powered Walk Behind Mini Automatic Floor Scrubber Machine. Please read this manual thoroughly before operating the machine to ensure optimal performance and longevity.
2. Güvenlik Bilgileri
Sizin ve başkalarının güvenliği her şeyden önemlidir. Lütfen her zaman aşağıdaki güvenlik kurallarına uyun:
- Cihazı kullanmadan önce tüm talimatları okuyun.
- Do not operate the machine with wet hands or in wet conditions unless specifically designed for it.
- Çalışma sırasında çocukları ve evcil hayvanları makineden uzak tutun.
- Use only Dapper Supply approved accessories and replacement parts.
- Ensure the machine is unplugged before performing any maintenance or cleaning.
- This machine is designed for tile, vinyl, hardwood, laminate, concrete, and other sealed hard floors. It is not intended for use on carpets or rugs.
- Do not use flammable or combustible liquids with the machine.
- Makineyi kullanılmadığı zamanlarda kuru ve güvenli bir yerde saklayın.
3. Ürün Bittiview
3.1 Bileşenler
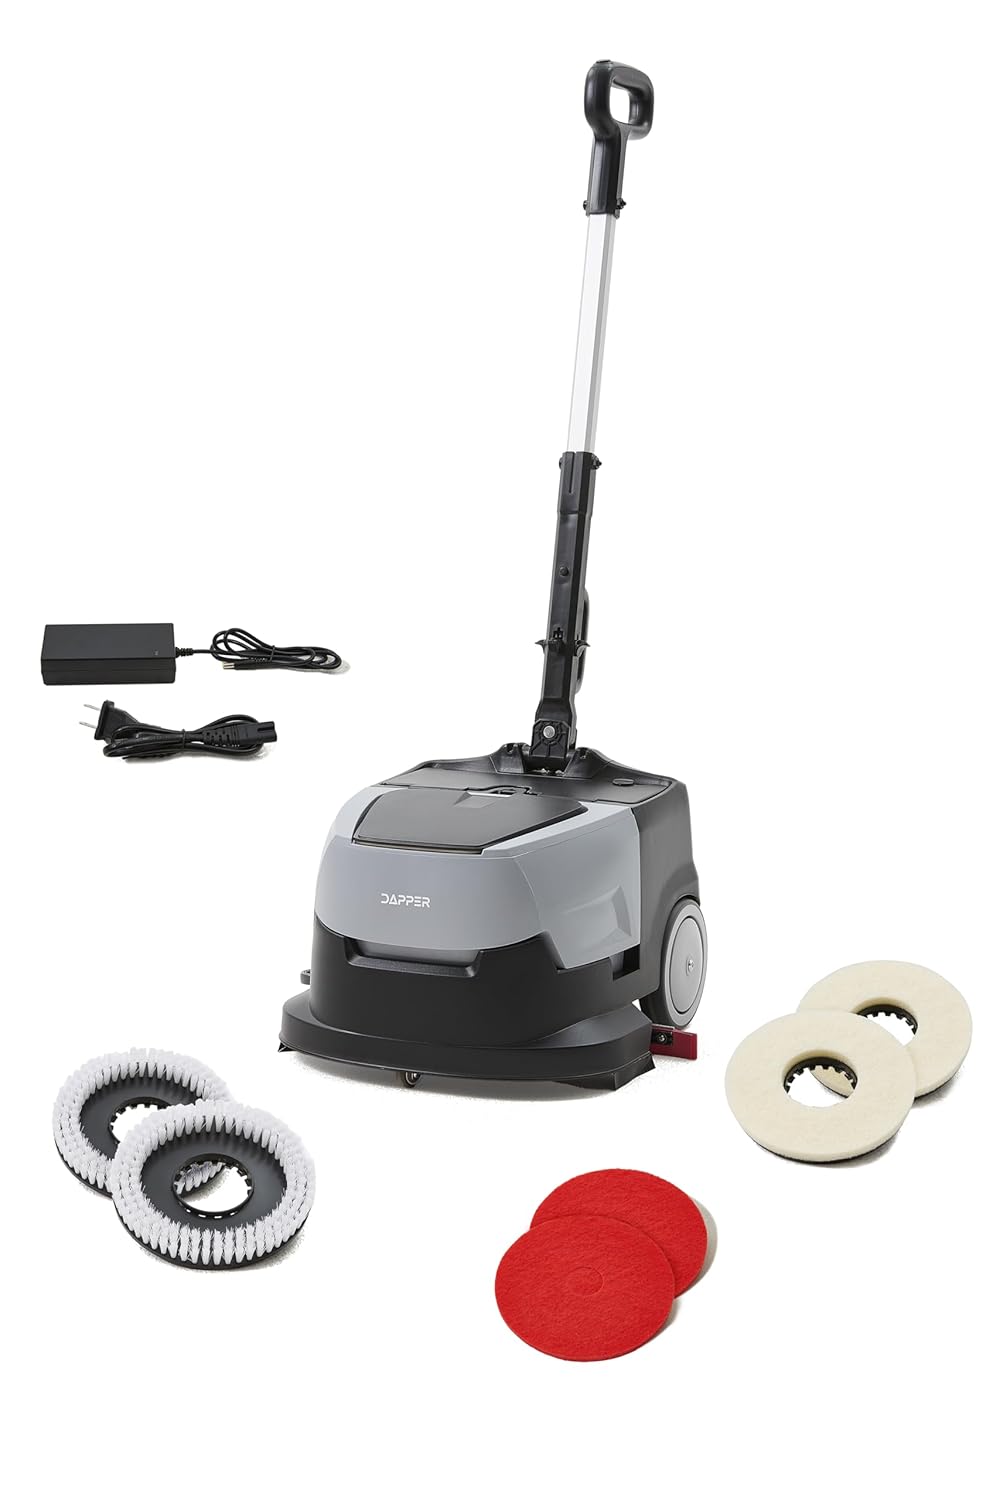
The Dapper Supply Mini Automatic Floor Scrubber comes with the following components:
- Main Scrubber Unit
- Ayarlanabilir Sap
- Solution Tank (1.2-gallon capacity)
- Recovery Tank (1.5-gallon capacity)
- Şarj Cihazı ve Güç Kablosu
- Set of White Scouring Pads (included)
- Scrubbing Brushes (optional/additional purchase)
- Polishing Pads (optional/additional purchase)


3.2 Temel Özellikler
- Compact & Efficient Cleaning: 15-inch cleaning width and 170 RPM brush speed.
- Yüksek Verimlilik: Covers up to 12,900 ft² per hour.
- Uzun Ömürlü Performans: Powerful 24V system with up to 90 minutes runtime and 100-minute charge time.
- Çift Tank: 1.2-gallon solution tank and 1.5-gallon recovery tank for efficient water management.
- Sessiz Çalışma: Operates at just 65 dB, suitable for daytime cleaning.
- Superior Drying Performance: 17-inch squeegee and 70W suction motor ensure quick water recovery.
- Lightweight & Easy to Maneuver: Weighs 22 lbs, easy to transport and operate in tight spaces.
- Versatile Floor Compatibility: Designed for tile, vinyl, hardwood, laminate, concrete, and other sealed hard floors.
4. Kurulum
4.1 Paketin açılması
Tüm bileşenleri ambalajından dikkatlice çıkarın. Taşıma sırasında herhangi bir hasar olup olmadığını kontrol edin. Gelecekteki depolama veya nakliye için ambalajı saklayın.
4.2 Montaj
- Attach the adjustable handle to the main scrubber unit, ensuring it clicks securely into place.
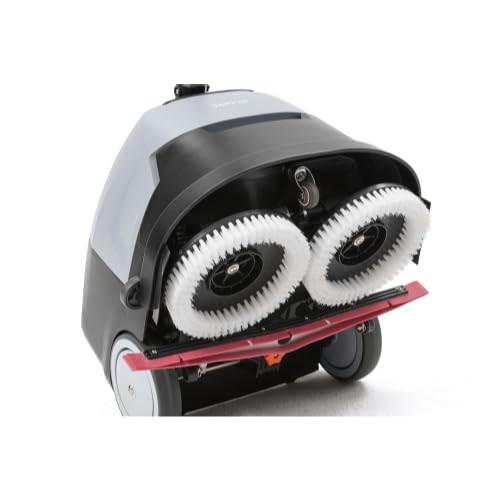
- Open the brush/pad compartment on the underside of the machine.
- Install the desired scrubbing brushes or polishing pads by aligning them with the mounting points and securing them. (Refer to Figure 3.7 for brushes and Figure 3.8 for pads).
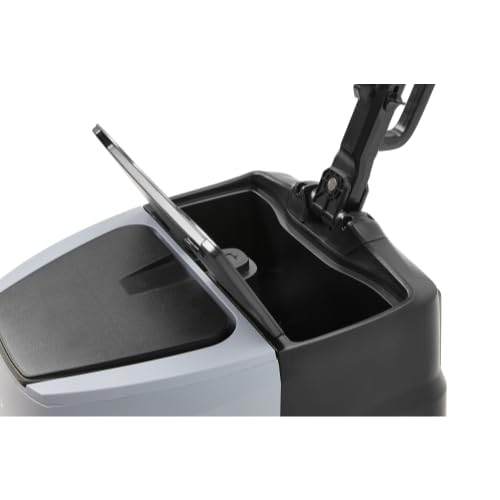
- Ensure the recovery tank is properly seated in its compartment. (Refer to Figure 3.3).
4.3 İlk Şarj
Before first use, fully charge the machine's battery. The powerful 24V system requires approximately 100 minutes for a full charge.
- Locate the charging port on the machine.
- Connect the charger to the machine and then plug the power cord into a standard electrical outlet.
- Şarj göstergesi şarj durumunu gösterecektir. Tamamen şarj olduğunda bağlantıyı kesin.
Video 4.1: Official product video demonstrating features including charging and operation. This video is provided by Dapper Supply.
5. Kullanım Talimatları
5.1 Çözelti Tankının Doldurulması
- Makinenin kapalı olduğundan emin olun.
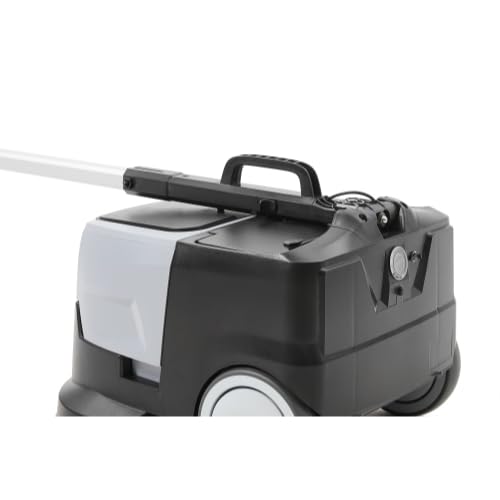
- Open the lid of the solution tank located on the top of the unit. (Refer to Figure 3.4).
- Fill the tank with clean water and an appropriate, low-foaming floor cleaning solution. Do not overfill.
- Securely close the solution tank lid.
5.2 Makinenin Çalıştırılması
- Makinenin düz ve sağlam bir yüzey üzerinde olduğundan emin olun.
- Press and hold the power button on the handle for approximately 3 seconds until the machine powers on.
- Adjust the handle to a comfortable operating height.
5.3 Temizleme İşlemi
The machine is designed for efficient cleaning of hard floor surfaces.
- Gently push the machine forward to begin scrubbing. The solution will be dispensed, and the brushes/pads will rotate to clean the floor.
- The 17-inch squeegee and 70W suction motor will recover the dirty water into the recovery tank, leaving floors dry and safe to walk on.
- Move the machine in overlapping passes to ensure complete coverage.
- The machine can cover up to 12,900 ft² per hour, making it ideal for small commercial spaces.
5.4 Emptying the Recovery Tank
It is crucial to empty the recovery tank after each use or when it reaches its maximum capacity (1.5 gallons).
- Makineyi kapatın.
- Remove the recovery tank from the main unit. (Refer to Figure 3.3 and Figure 3.5).
- Carefully pour the dirty water into a suitable drain.
- Rinse the recovery tank with clean water to prevent residue buildup.
- Reinstall the clean recovery tank securely.
6. Bakım
6.1 Günlük Bakım
- After each use, empty and rinse both the solution and recovery tanks thoroughly.
- Clean the squeegee blade to ensure effective water pickup. Inspect for wear and tear.
- Makinenin dışını reklamla silinamp Kumaş.
6.2 Brush/Pad Replacement
Regularly inspect the scrubbing brushes or polishing pads for wear. Replace them when they show signs of reduced effectiveness.
- Turn off the machine and tilt it back to access the underside.
- Remove the worn brushes/pads by twisting or unlatching them. (Refer to Figure 3.7 and Figure 3.8).
- Install new brushes/pads, ensuring they are securely fastened.
6.3 Depolama
When storing the machine for extended periods:
- Ensure both tanks are empty and clean.
- Store the machine in a dry, temperature-controlled environment.
- For optimal battery life, charge the battery fully before storage and recharge every 3-6 months if not in use.
7. Sorun Giderme
Yaygın sorunlar ve çözümleri için aşağıdaki tabloya bakın.
| Sorun | Olası Neden | Çözüm |
|---|---|---|
| Makine açılmıyor. | Pil zayıf veya bitmiş. Güç düğmesine yeterince uzun süre basılmadı. | Pili tamamen şarj edin. Güç düğmesini 3 saniye basılı tutun. |
| Poor water pickup (squeegee not working). | Alım deposu dolu. Squeegee blade is dirty or worn. Suction motor issue. | Alım deposunu boşaltın ve temizleyin. Clean or replace the squeegee blade. Contact customer support if suction motor is faulty. |
| Brushes/Pads not rotating. | Brushes/pads not installed correctly. Obstruction in brush area. | Reinstall brushes/pads securely. Herhangi bir kalıntı olup olmadığını kontrol edin ve çıkarın. |
| Machine leaves streaks. | Dirty solution tank. Incorrect cleaning solution concentration. Squeegee blade issue. | Clean the solution tank. Adjust solution concentration as per manufacturer's guidelines. Clean or replace squeegee blade. |
8. Özellikler
Technical specifications for the Dapper Supply Mini Automatic Floor Scrubber:
| Özellik | Şartname |
|---|---|
| Ürün Boyutları | 17 x 17 x 44 inç |
| Ağırlık | 22 Pound |
| Model Numarası | DP-WPFS1204 |
| Pil Türü | 1 x 12V pil (dahil) |
| Çalışma zamanı | 90 dakikaya kadar |
| Şarj Süresi | Yaklaşık 100 dakika |
| Temizleme Genişliği | 15 inç |
| Fırça Hızı | 170 RPM |
| Çözüm Tank Kapasitesi | 1.2 galon |
| Geri Kazanım Tank Kapasitesi | 1.5 galon |
| Gürültü Seviyesi | 65 dB |
| Silecek Genişliği | 17 inç |
| Emiş Motoru Gücü | 70W |
| Üretici | Dapper Supply |
| Menşei ülke | Çin |
9. Garanti ve Destek
9.1 Ürün Garantisi
The Dapper Supply Mini Automatic Floor Scrubber is backed by a full 1-Year Warranty from the date of purchase. This warranty covers defects in materials and workmanship under normal use. Please retain your proof of purchase for warranty claims.
9.2 Müşteri Desteği
For technical assistance, troubleshooting not covered in this manual, or warranty inquiries, please contact Dapper Supply customer support:
- Webalan: Visit the Dapper Supply Store on Amazon
- E-posta: support@dappersupply.com (Examp(E-posta)
- Telefon: 1-800-XXX-XXXX (Örnek)ample Phone Number)
İlgili Belgeler - DP-WPFS1204
 |
Dapper Ticari Oto Fırçalama Makinesi DP-WPFS1204 Kullanım Kılavuzu Dapper Ticari Oto Fırçalama Makinası, model DP-WPFS1204 için güvenlik önlemlerini, işletim prosedürlerini, bakım yönergelerini ve sorun giderme adımlarını ayrıntılı olarak açıklayan kapsamlı kullanıcı kılavuzu. |
 |
DAPPER 13 İnç Ticari Zemin Parlatma Makinesi Kullanım Kılavuzu | Model DP-FM1302 DAPPER 13 inç Çok Amaçlı Ticari Zemin Parlatma Makinesi (Model DP-FM1302) için kapsamlı kullanıcı kılavuzu. Teknik özellikleri, kullanım talimatlarını, güvenlik önlemlerini ve ayrıntılı bir makine şemasını bulun. |
 |
Emotor Zemin Yıkama Makinesi Sorun Giderme Kılavuzu Emotor zemin yıkama makineleri için kapsamlı sorun giderme kılavuzu, aküler, şarj cihazları ve elektrik bağlantılarıyla ilgili yaygın sorunları ele alır. Adım adım çözümler ve teknik destek iletişim bilgileri içerir. |
 |
Numatic Nu-Clean Compact 440NX NCC.440.NX Scrubber Dryer Kullanım Kılavuzu Bu kılavuz, Numatic Nu-Clean Compact 440NX NCC.440.NX zemin temizleme ve kurutma makinesi için kurulum, çalıştırma, bakım ve sorun giderme konularını kapsayan kapsamlı talimatlar sunmaktadır. |
 |
LAVEX 274AFS9BAT 17" 9 Gallon Walk-Behind Auto Floor Scrubber User Manual Comprehensive user manual for the LAVEX 274AFS9BAT 17" 9 Gallon Walk-Behind Auto Floor Scrubber. This guide provides detailed information on safety rules, technical specifications, installation, operation, maintenance, component structure, and wiring diagrams for commercial janitorial use. |
 |
SUNMAX RT-50D Zemin Temizleme Makinesi Kullanım Kılavuzu: Çalıştırma ve Bakım SUNMAX RT-50D Kendinden Tahrikli Akülü Otomatik Zemin Temizleme Makinesi için kapsamlı kılavuz. Çalıştırma, bakım, sorun giderme ve montaj hakkında bilgi edinin. |
Ask a question about this manual
Ask about setup, troubleshooting, compatibility, parts, safety, or missing instructions. Manuals+ will review the question and use this page’s manual context to help answer it.