1. Ürün Bittiview
The YITAHOME 12000 BTU Mini Split Air Conditioner Heat Pump System is a versatile and energy-efficient solution for climate control in spaces up to 750 square feet. This system provides both cooling and heating capabilities, along with dehumidification and fan-only modes. It features innovative inverter technology for optimal performance and energy savings, and is equipped with smart functionalities including WiFi connectivity and compatibility with Alexa.

Resim 1.1: Üzeriview of the YITAHOME Mini Split Air Conditioner Heat Pump System, showing the indoor unit, outdoor unit, remote control, and installation accessories.
- Enerji Verimliliği: Equipped with a high-power compressor and heat pump, featuring inverter technology for up to 25% energy savings. ETL and AHRI certified.
- Five Operating Modes: Auto, Cool, Dry, Heat, and Fan.
- Akıllı Kontrol: WiFi-enabled and Alexa-compatible for convenient remote operation.
- Sessiz Performans: Operates with noise levels below 41 decibels, ensuring a tranquil environment.
- All-Weather Response: Designed to perform in temperatures from 5°F to 118°F.
- Gelişmiş Özellikler: Automatic defrosting, self-diagnosis/cleaning, iFEEL mode, 24-hour timer, sleep mode, energy-saving mode, and "HEALTH" mode (negative ions, electrostatic dust removal, PM2.5 removal).
2. Güvenlik Bilgileri
Please read all safety warnings and instructions carefully before installation and operation to prevent injury or damage. Professional installation is required for this system.
- Güç kaynağının cihazın gereksinimlerine uygun olduğundan emin olun (208-230V).
- Do not install the unit near heat sources, steam sources, or in areas with flammable/explosive gases or corrosive gases.
- Maintain proper clearance around indoor and outdoor units for optimal airflow and safety.
- Always turn off power before performing any maintenance or troubleshooting.
- Wear appropriate personal protective equipment (PPE) during installation, especially when working at heights.
3. Kurulum ve Kurulum
Proper installation is crucial for the performance and longevity of your mini split system. It is highly recommended that installation be performed by a qualified professional.
Video 3.1: Official installation guide for the YITAHOME Mini Split Air Conditioner Heat Pump System. This video provides a step-by-step visual walkthrough of the installation process.
3.1. Kurulum Öncesi Hususlar
- Lokasyon Seçimi: Choose a hard, flat, and firm wall for the indoor unit to avoid vibration. Ensure adequate clearance from ceiling (min. 15cm) and obstacles (min. 20cm). The outdoor unit must be installed on a firm, flat surface to prevent vibration and noise, with sufficient clearance for airflow.
- Araçlar ve Malzemeler: Ensure all necessary tools and materials are available, including a hole saw, multimeter, pipe cutter, hex wrenches, refrigerant (if needed), torque wrench, adjustable wrench, tape measure, pressure gauge, safety belt, flaring tool, brackets, level, Phillips screwdriver, electroprobe, vacuum pump, pliers, and copper tubing.

Image 3.1: Diagram illustrating recommended clearances for indoor and outdoor unit placement to ensure optimal performance and safety.
3.2. İç Ünite Kurulumu
- Montaj Plakası Kurulumu: Securely fix the mounting plate to the wall using expansion screw kits. Use a level to ensure it is horizontal.
- Duvar Deliği Matkap: Drill a wall hole for piping, inclined outward by 5-10 degrees, with a diameter of 60-80mm. Avoid wires, plumbing, and gas lines.
- Connection Cable Installation: Pass the power cable from the back of the indoor unit and fix it to the terminal board according to the wiring diagram. Secure cables with a clamp.
- Knock-out Panel: Remove the knock-out panel with a knife according to piping direction, removing burrs to prevent drain pipe damage.
- Soğutucu Boru Bağlantısı: Carefully turn the refrigerant pipes in the desired direction using both hands. Connect the taper nuts to the pipe center, tightening with fingers, then with two wrenches. Refer to the torque specifications provided in the manual for proper tightening.
- Tahliye Hortumunun Kurulumu: Connect the drain hose to the water outlet pipe and fix it firmly with adhesive tape. The length should be more than 5cm. Ensure the drain hose is sloped downwards and never submerged in water.
- Wrap Piping: Wrap refrigerant piping, wires, and the drain pipe with wrapping tape for insulation and protection.
- İç Üniteyi Monte Edin: Put the refrigerant piping out of the wall hole. Place the indoor unit onto the mounting plate, pushing the lower part until a 'click' sound is heard, ensuring it is firmly fixed.
- Pipe Protecting Ring and Putty: Install a pipe protecting ring and seal with putty to protect piping and wires where they pass through the wall.
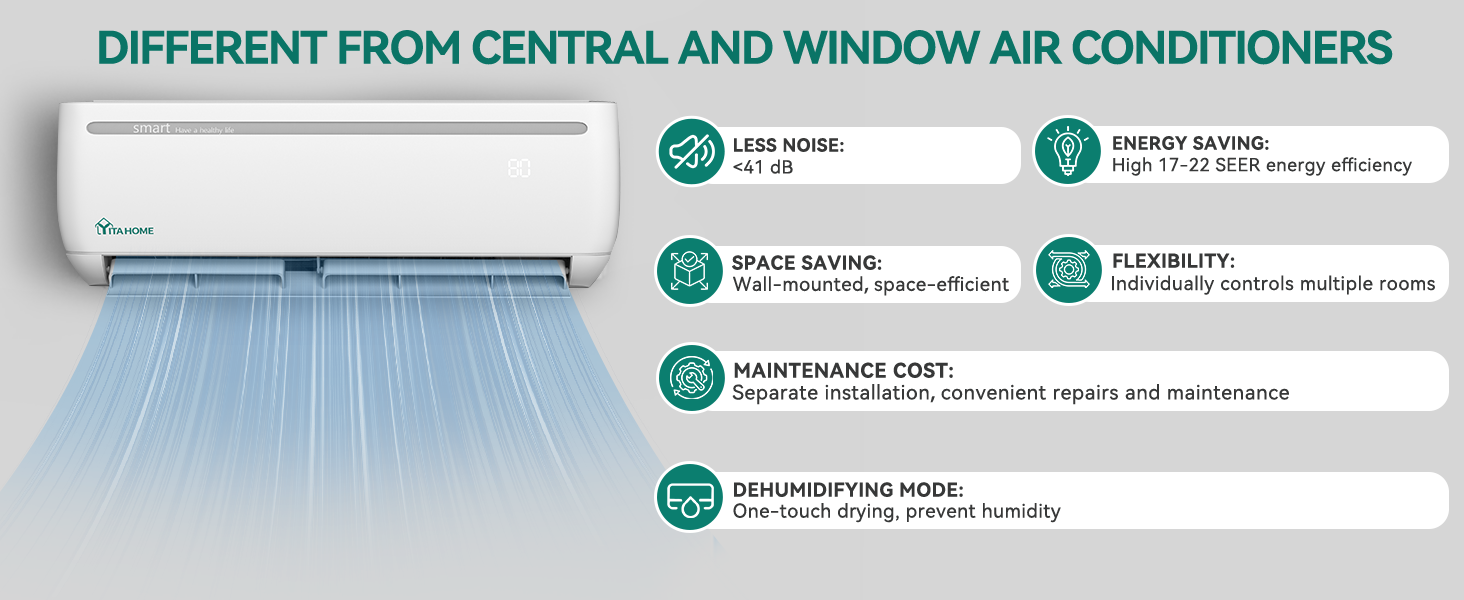
Image 3.2: Illustration of the components included in the installation package, such as power line, copper connection pipes, user guide, remote control, and drain hose.
3.3. Dış Ünite Kurulumu
- Install Outdoor Unit Bracket: Use a level to ensure the bracket is horizontal and vertical. Use at least 6 expansion bolts to fix the brackets firmly on the wall.
- Dış Üniteyi Monte Edin: Put the outdoor unit onto the brackets. Use 4 screws to fix the feet of the outdoor unit to the brackets.
- Connect Refrigerant Piping: Remove the nuts from the stop valves. Aim at the pipe center of the stop valve, tighten the taper nut with fingers, then with two wrenches. Refer to the torque specifications provided in the manual. Screw the 2 caps back on.
- Elektrik Bağlantıları: Remove the electrical box cover. Fix cables to the terminal board according to the wiring diagram on the E-parts cover. Use a clamp to fix the cables. Replace the electrical box cover.
3.4. Vacuumizing
Before vacuuming, ensure all nuts of the indoor and outdoor units are tightened. Connect the stop valve, charging hose, manifold valve, and vacuum pump as shown in the diagram in your full manual.
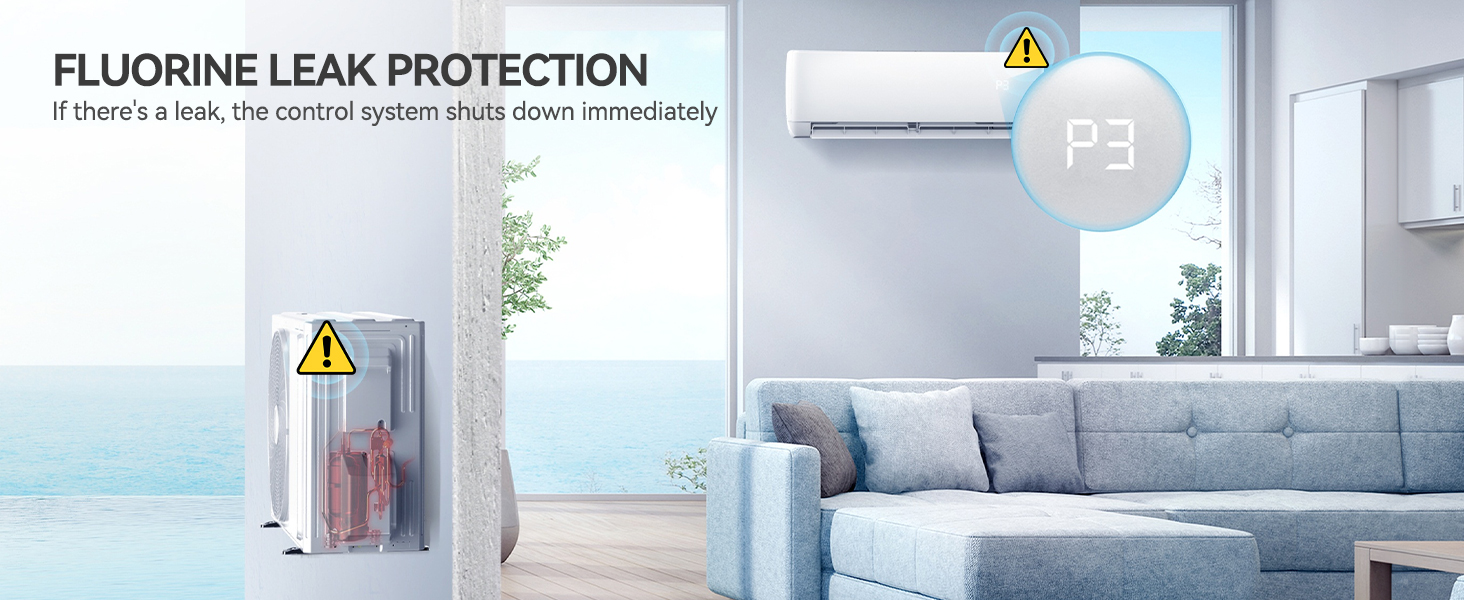
Image 3.3: The outdoor unit with pre-loaded R32 refrigerant, highlighting its environmental benefits.
- Turn on handle Lo to vacuumize.
- Vacuumize for at least 15 minutes, ensuring the pressure gauge value is ≤0.1MPa.
- Keep pressure for 3-5 minutes after vacuumizing. Pressure springback should be ≤0.05MPa.
- Open the 1/4 liquid valve and remove the charging hose.
- Open all the liquid valves and gas valves. Screw all the caps and tighten them up.
4. Kullanım Talimatları
Your YITAHOME Mini Split AC can be controlled via the included remote control or through the dedicated mobile application.
Video 4.1: Demonstration of controlling the YITAHOME Mini Split AC with the mobile application.
4.1. Uzaktan Kumanda İşlevleri
- Güç Açma/Kapatma: Üniteyi başlatmak veya durdurmak için AÇMA/KAPAMA düğmesine basın.
- Mod Seçimi: Cycle through Auto, Cool, Dry, Heat, and Fan modes using the MODE button.
- Sıcaklık Ayarı: Set desired temperature between 60°F and 90°F using the UP/DOWN arrows.
- Fan Hızı: Adjust fan speed (Low, Mid, High, Auto) using the FAN SPEED button.
- Salınım Fonksiyonu: Control the horizontal and vertical airflow direction.
- Zamanlayıcı: Set a 24-hour timer for automatic on/off operations.
- Uyku modu: Konforlu bir uyku ve enerji tasarrufu için sıcaklığı ve fan hızını optimize eder.
- iFEEL Mode: Uzaktan kumanda, bulunduğu konumdaki sıcaklığı algılayarak daha hassas bir konfor sağlamak için termostat görevi görür.

Image 4.1: Visual representation of the five operating modes: Cool, Dry, Fan, and Heat.
4.2. Mobile App Control (AC Freedom)
Download the "AC Freedom" app from your device's app store. Follow the in-app instructions to pair your mini split unit. The app allows for comprehensive control, including mode selection, temperature adjustment, fan direction, timers, and monitoring of power consumption.
5. Bakım
Düzenli bakım, cihazınızın verimli çalışmasını sağlar ve ömrünü uzatır.
5.1. Hava Filtresi Temizliği
The air filter is washable and easy to clean. Remove the filter from the indoor unit, wash it with water, and allow it to dry completely before reinserting.
5.2. Kendi Kendini Temizleme Fonksiyonu
The unit features a 5th-Gen Auto-Cleaning function that uses 57°C high-temperature application for fresher air. Refer to your remote control or app for activating this feature.

Image 5.1: Diagram illustrating the 5th-Gen Auto-Cleaning process, including indoor unit condensation, frosting, defrosting, and high-temperature cleaning.
5.3. Genel Temizlik
- Ünitenin iç ve dış yüzeylerini yumuşak bir bezle silin.amp Kumaş.
- Sert kimyasallar veya aşındırıcı temizleyiciler kullanmayın.
6. Sorun Giderme
If you encounter issues with your unit, refer to the following common problems and solutions. For complex issues, contact a qualified technician.
- Ünite Açılmıyor: Güç kaynağını ve devre kesiciyi kontrol edin ve uzaktan kumandanın pillerinin bitmediğinden emin olun.
- Yetersiz Soğutma/Isıtma: Check temperature settings, ensure air filters are clean, and verify no obstructions are blocking airflow. Low refrigerant levels can also cause this; professional inspection is required.
- Alışılmadık Sesler: Minor noises during operation are normal. Excessive or unusual noises may indicate loose parts or internal issues requiring professional attention.
- Su Kaçağı: Ensure the drain hose is properly installed and sloped to allow water to flow out. Check for blockages in the drain pan or hose.
- Fluorine Leak Protection: If a leak is detected, the control system will shut down immediately. This requires professional service.
- WiFi Bağlantı Sorunları: Ensure your router is working correctly and the unit is within range. Re-pair the unit with the mobile app if necessary.
7. Özellikler
| Özellik | Şartname |
|---|---|
| Marka | YİTAHOME |
| Model Numarası | MAYIHmZGYP |
| Kapasite | 12000 BTU (1 Ton) |
| Kapsama Alanı | 750 Metrekareye kadar Ft. |
| Cilttage | 208-230 Volt |
| SEER2 Derecelendirmesi | 17 SEER2 |
| Ses Seviyesi | 41 dB |
| Boyutlar (İç Ünite) | 7.9"D x 31.2"G x 11.5"Y |
| Ağırlık (Ürün) | 21.1 pound |
| Malzeme | Iron, Aluminum, Plastic |
| Özel Özellikler | Inverter Compressor, WiFi Enabled, Sleep Mode, Air Purification Filter, Auto Clean |
8. Garanti ve Destek
YITAHOME provides a comprehensive warranty for your peace of mind:
- 5 Yıllık Garanti on parts.
- 7 Yıllık Garanti kompresör üzerinde.
For technical support, warranty claims, or further assistance, please refer to the contact information provided in your product packaging or visit the official YITAHOME webalan.