1. Giriş
Thank you for choosing the KNIPEX 97 52 09 Crimping Pliers. This tool is designed for reliable, solder-free electrical connections using insulated and non-insulated end sleeves (ferrules) with conductor diameters of 10, 16, and 25 mm². This manual provides essential information for the safe and effective use, setup, operation, and maintenance of your crimping pliers.
2. Güvenlik Talimatları
Yaralanmaları ve aletin hasar görmesini önlemek için her zaman aşağıdaki güvenlik önlemlerine uyun:
- Göz Koruması: Always wear appropriate eye protection when using crimping tools to guard against flying debris.
- Yalıtım: Bu penseler Olumsuz insulated for live electrical work. Do not use on live circuits.
- Doğru Kullanım: Use the tool only for its intended purpose: crimping end sleeves. Do not use as a hammer, pry bar, or cutting tool.
- Aracı Denetle: Before each use, inspect the pliers for any damage, cracks, or deformities. Do not use a damaged tool.
- Temizlik: Keep the tool clean and free from grease or oil to ensure a secure grip.
- Depolamak: Store the tool in a dry place, out of reach of children.
3. Ürün Bittiview
The KNIPEX 97 52 09 Crimping Pliers feature robust construction and ergonomic handles for comfortable and efficient operation. Key components include the crimping dies, adjustment mechanism, and handles.

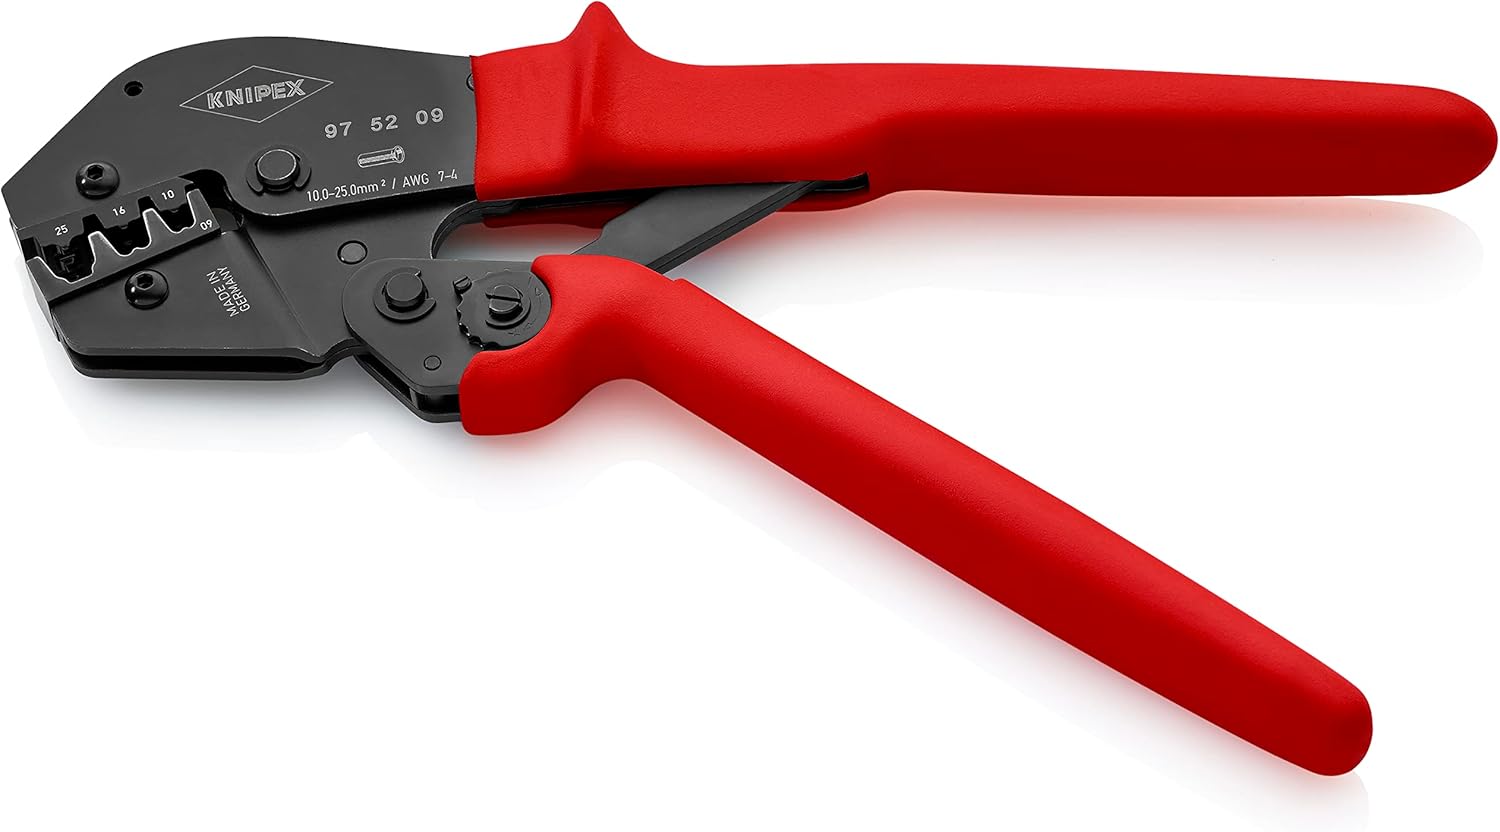
Şekil 1: Tepe view of the KNIPEX 97 52 09 Crimping Pliers, showing the red ergonomic handles and the black crimping head with size markings.

Şekil 2: Açılı view of the crimping pliers, highlighting the robust construction and the pivot points.
Şekil 3: Taraf view of the crimping pliers, showing the full length of the handles and the crimping mechanism.
4. Kurulum
The KNIPEX 97 52 09 Crimping Pliers are ready for use out of the box. No assembly is required. Ensure the crimping dies are clean and free from obstructions before use.
5. Kullanım Talimatları
Follow these steps for proper crimping of end sleeves:
- Select Correct Die: Identify the appropriate crimping die size (10, 16, or 25 mm²) on the pliers that matches the end sleeve and conductor diameter.
- Orkestra şefini hazırlayın: Strip the insulation from the end of the electrical conductor to the length required by the end sleeve. Ensure the conductor strands are neat and untwisted.
- Insert Conductor into Sleeve: Insert the stripped conductor fully into the end sleeve.
- Position Sleeve in Pliers: Place the end sleeve with the conductor into the selected crimping die. Ensure the sleeve is seated correctly and the conductor is fully within the crimping area.
- Sıkıştırma İşlemini Gerçekleştirin: Apply firm, even pressure to the handles. For larger conductor diameters, a two-hand operation may be necessary to achieve a complete crimp. Continue squeezing until the pliers' mechanism releases, indicating a full crimp cycle.
- Crimp'i inceleyin: After crimping, visually inspect the connection. The end sleeve should be securely fastened to the conductor, and the crimp should appear uniform and tight. Gently tug on the conductor to ensure it is firmly held by the sleeve.

Şekil 4: Kapatmak view demonstrating the insertion of a conductor with an end sleeve into the crimping die.

Şekil 5: The crimping pliers engaged in the process of crimping an end sleeve onto a conductor.

Şekil 6: A completed crimped connection, showing the secure attachment of the end sleeve to the conductor.
6. Bakım
Proper maintenance ensures the longevity and performance of your crimping pliers:
- Temizlik: After each use, wipe the pliers clean with a dry cloth to remove any dirt, dust, or debris.
- Yağlama: Makinenin sorunsuz çalışmasını sağlamak için, periyodik olarak dönme noktalarına ve hareketli parçalara hafif bir makine yağı uygulayın.
- Depolamak: Store the pliers in a clean, dry environment to prevent rust and corrosion.
7. Sorun Giderme
Sorunlarla karşılaşırsanız, aşağıdakileri göz önünde bulundurun:
- Kötü Sıkıştırma Kalitesi:
- Ensure the correct die size is selected for the end sleeve and conductor.
- Verify the conductor is fully inserted into the end sleeve and positioned correctly in the die.
- Apply sufficient pressure to complete the crimp cycle.
- Pliers Sticking:
- Clean the pliers thoroughly.
- Lubricate the pivot points.
8. Özellikler
| Özellik | Detay |
|---|---|
| Model Numarası | 97 52 09 |
| Marka | BIÇAK |
| Sıkma Kapasitesi | 10, 16, 25 mm² (AWG 7-4) |
| Başvuru | Insulated and non-insulated end sleeves (ferrules) |
| Operasyon | Two-hand operation for large diameters |
| Sap Malzemesi | Plastic (Red) |
| Ürün Ağırlığı | 1.32 Pound (yaklaşık 0.6 kg) |
| Ürün Boyutları | 9.84 x 3.07 x 1.02 inç (yaklaşık 250 x 78 x 26 mm) |
| Üretici | Knipex |
9. Garanti ve Destek
For warranty information and customer support, please refer to the documentation provided with your purchase or visit the official KNIPEX webSite. Satın alma belgenizi herhangi bir garanti talebi için saklayın.