
ซัมซุง เอสเอ็ม-เอ็กซ์230
Samsung Galaxy Tab A11+ SM-X230 User Manual
รุ่น : SM-X230
1. บทนำ
This manual provides essential information for setting up, operating, maintaining, and troubleshooting your Samsung Galaxy Tab A11+ SM-X230 tablet. Please read this manual carefully to ensure safe and optimal use of your device.
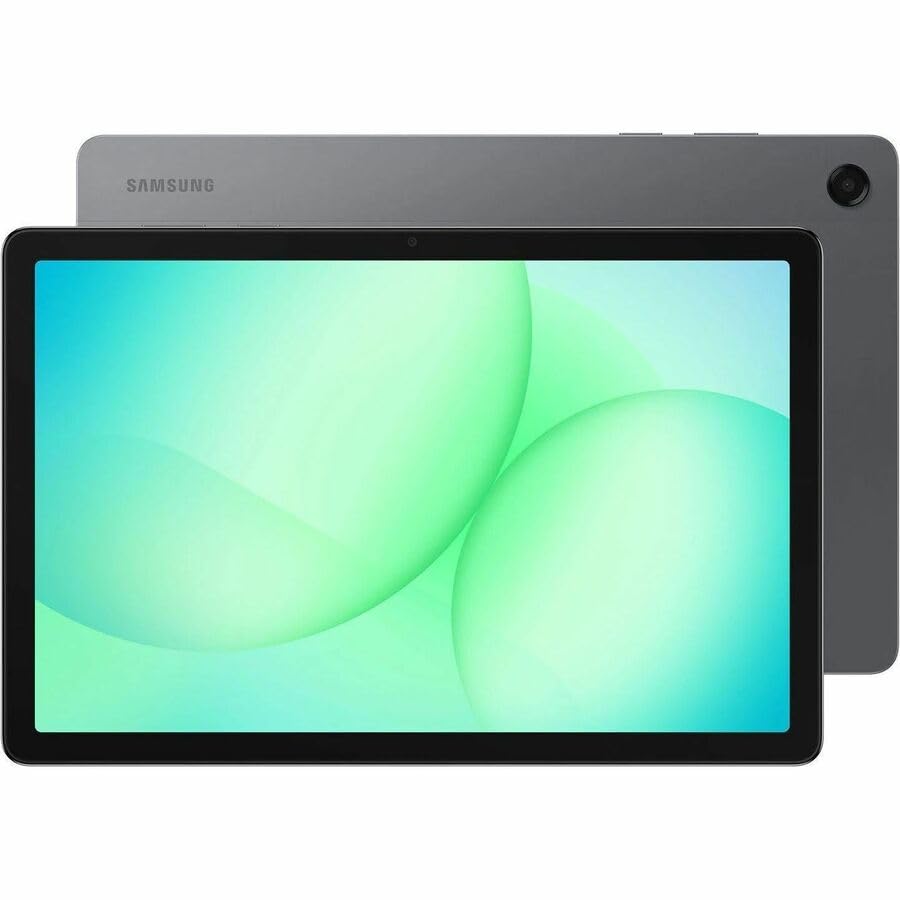
Image: Samsung Galaxy Tab A11+ tablet, showcasing its sleek design and available colors.
The Samsung Galaxy Tab A11+ SM-X230 is an 11-inch WUXGA tablet powered by a MediaTek Dimensity 7300 Octa-core processor, offering 6 GB of RAM and 128 GB of internal storage, expandable via microSD. It features a modern design, a vibrant 90 Hz display, and Dolby-engineered Quad Speakers for an immersive experience.
2. การเริ่มต้นใช้งาน (การตั้งค่า)
2.1 การแกะกล่องและการตรวจสอบเบื้องต้น
Carefully remove all components from the packaging. Verify that all items are present: the Samsung Galaxy Tab A11+ tablet, a USB-C charging cable, and any included documentation. Inspect the tablet for any physical damage before proceeding.
2.2 การชาร์จอุปกรณ์
Before first use, fully charge your tablet. The device is equipped with a 7040 mAh battery and supports 25W Super Fast Charging.
- เสียบสาย USB-C เข้ากับพอร์ตชาร์จของแท็บเล็ต
- Connect the other end of the cable to a compatible power adapter (not always included) and plug it into a wall outlet.
- The charging indicator will appear on the screen. Allow the tablet to charge until the battery icon shows a full charge.

Image: Visual representation of the tablet charging, highlighting its 7040mAh battery and 25W Super Fast Charging capability.
2.3 การเปิด/ปิดเครื่อง
- การเปิดเครื่อง: กดปุ่มเปิด/ปิดค้างไว้ (อยู่ด้านข้าง) จนกระทั่งโลโก้ Samsung ปรากฏขึ้น
- วิธีปิดเครื่อง: กดปุ่มเปิด/ปิดค้างไว้ จากนั้นเลือก "ปิดเครื่อง" จากตัวเลือกที่ปรากฏบนหน้าจอ
2.4 ตัวช่วยการตั้งค่าเริ่มต้น
Upon first power-on, the tablet will guide you through an initial setup process:
- เลือกภาษาที่คุณต้องการ
- เชื่อมต่อกับเครือข่าย Wi-Fi
- Review และยอมรับข้อตกลงอนุญาตสิทธิ์การใช้งานสำหรับผู้ใช้ปลายทางและนโยบายความเป็นส่วนตัว
- ลงชื่อเข้าใช้ด้วยบัญชี Google ของคุณหรือสร้างบัญชีใหม่ ซึ่งถือเป็นสิ่งสำคัญสำหรับการเข้าถึง Google Play Store และบริการอื่น ๆ ของ Google
- ตั้งค่าล็อคหน้าจอ (PIN, รูปแบบ, รหัสผ่าน)
- Follow any additional prompts to customize your device settings.
2.5 การใส่การ์ด microSD
The Galaxy Tab A11+ supports microSD cards up to 2 TB for expanded storage.
- หาช่องใส่ซิมการ์ด/ไมโคร SD ที่ด้านข้างของแท็บเล็ต
- Insert the ejection pin (if provided, or a paperclip) into the small hole on the tray to eject it.
- วางการ์ด microSD ลงในถาดโดยให้ด้านที่เป็นขั้วสีทองหันลง
- ค่อยๆ ดันถาดกลับเข้าไปในช่องจนกระทั่งล็อคเข้าที่
3. การใช้งานแท็บเล็ตของคุณ
3.1 การนำทางแบบหน้าจอสัมผัส
The tablet's primary interface is its 11-inch WUXGA (1920 x 1200 pixels) touchscreen with a 90 Hz refresh rate for smooth interactions.
- แตะ: เลือกรายการหรือเปิดแอป
- แตะค้างไว้: เข้าถึงเมนูบริบทหรือย้ายรายการ
- ปัด: Navigate through screens, scroll lists, or dismiss notifications.
- บีบเพื่อซูม: ขยายหรือลดขนาด view ของภาพและ web หน้า
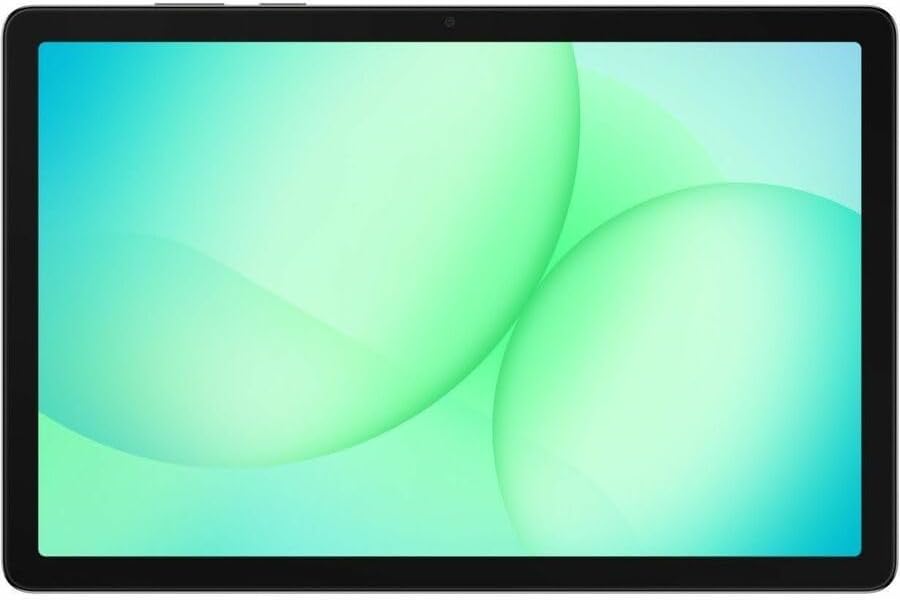
Image: The Samsung Galaxy Tab A11+ display, showcasing its vibrant and clear screen.
3.2 การปฏิบัติงาน
The tablet is powered by a MediaTek Dimensity 7300 (4 nm) Octa-core processor with 6 GB of RAM, ensuring responsive performance for various tasks, from gaming to multitasking.

Image: A visual representation of the tablet's enhanced CPU and GPU performance.
3.3 การจัดการการจัดเก็บข้อมูล
Your tablet comes with 128 GB of internal storage. You can expand this by up to 2 TB using a microSD card.
- To check storage: Go to การตั้งค่า > การดูแลแบตเตอรี่และอุปกรณ์ > ที่เก็บข้อมูล.
- To free up space: Delete unnecessary fileถอนการติดตั้งแอปที่ไม่ใช้งาน หรือย้ายไฟล์ขนาดใหญ่ fileบันทึกข้อมูลไปยังที่เก็บข้อมูลบนคลาวด์หรือการ์ด microSD ภายนอก

Image: The tablet displaying various media, illustrating its ample internal storage and microSD expansion capabilities.
3.4 ฟังก์ชันกล้อง
The tablet features an 8 MP rear camera and a 5 MP front camera for photos and video calls.
- เปิด กล้อง แอปจากหน้าจอหลักหรือลิ้นชักแอป
- แตะปุ่มชัตเตอร์เพื่อถ่ายภาพ
- สลับระหว่างกล้องด้านหน้าและด้านหลังโดยใช้ไอคอนสวิตช์กล้อง
- Select video mode to record videos (up to HD 720p).
3.5 การตั้งค่าเสียง
Experience rich, multidimensional audio with Dolby-engineered Quad Speakers. The tablet also includes a 3.5 mm audio jack for wired headphones.
- ปรับระดับเสียงโดยใช้ปุ่มปรับระดับเสียงทางกายภาพที่ด้านข้างแท็บเล็ต
- Access detailed audio settings via การตั้งค่า > เสียงและการสั่น.
- Connect wired headphones to the 3.5 mm jack for private listening.

ภาพ: แท็บเล็ตที่แสดง...asing its immersive audio experience with Dolby Atmos technology.
3.6 การเชื่อมต่อ (Wi-Fi, Bluetooth)
- ไวไฟ : ไปที่ การตั้งค่า > การเชื่อมต่อ > Wi-Fi to connect to available networks. The tablet supports 802.11ac wireless compatibility.
- บลูทูธ: ไปที่ การตั้งค่า > การเชื่อมต่อ > บลูทูธ เพื่อจับคู่กับอุปกรณ์บลูทูธ เช่น หูฟังหรือลำโพง
3.7 Using Google Gemini
The Galaxy Tab A11+ integrates with Google Gemini. You can interact with Gemini to get assistance based on what you see on your screen or through your camera.
- To activate: Long press the side button to launch Google Gemini.
- Share your screen or camera view to ask for advice or information.

Image: The tablet demonstrating Google Gemini's capability to provide real-time assistance based on visual input.
3.8 File การแบ่งปัน
แบ่งปันได้อย่างง่ายดาย files between your tablet and other compatible devices.
- Use built-in sharing options within apps (e.g., Gallery, Files) to send content via Bluetooth, Wi-Fi Direct, or cloud services.
- Connect to a computer via USB-C cable to transfer fileโดยตรงเลย

Image: Multiple Samsung devices illustrating the ease of file sharing across the ecosystem.
4. การบำรุงรักษาและการดูแล
4.1 การทำความสะอาดแท็บเล็ตของคุณ
- ใช้ผ้านุ่มไม่เป็นขุยทำความสะอาดหน้าจอและตัวเครื่อง
- สำหรับรอยเปื้อนฝังแน่น ให้เช็ดออกเล็กน้อยampเทน้ำหรือน้ำยาทำความสะอาดหน้าจอที่ออกแบบมาสำหรับอุปกรณ์อิเล็กทรอนิกส์โดยเฉพาะลงบนผ้า
- หลีกเลี่ยงการใช้สารเคมีรุนแรง วัสดุที่มีฤทธิ์กัดกร่อน หรือความชื้นที่มากเกินไป
4.2 การอัปเดตซอฟต์แวร์
ตรวจสอบและติดตั้งการอัปเดตซอฟต์แวร์เป็นประจำเพื่อให้มั่นใจถึงประสิทธิภาพ ความปลอดภัย และการเข้าถึงฟีเจอร์ใหม่ๆ ที่เหมาะสมที่สุด
- ไปที่ การตั้งค่า > อัปเดตซอฟต์แวร์.
- แตะ ดาวน์โหลดและติดตั้ง.
- Ensure your tablet is connected to Wi-Fi and has sufficient battery charge before starting an update.
4.3 อายุการใช้งานแบตเตอรี่
เพื่อยืดอายุการใช้งานแบตเตอรี่ให้สูงสุด:
- หลีกเลี่ยงอุณหภูมิที่สูงหรือต่ำเกินไป
- อย่าปล่อยให้แท็บเล็ตชาร์จเต็มหรือปล่อยประจุจนหมดเป็นเวลานาน
- Adjust screen brightness and use power-saving modes when possible.
4.4 การเพิ่มประสิทธิภาพการจัดเก็บข้อมูล
รีเป็นระยะๆview your storage to remove unnecessary files and apps. This helps maintain device performance.
- Utilize cloud storage for backups of photos and videos.
- เคลื่อนย้ายสื่อขนาดใหญ่ files to an inserted microSD card.
5 การแก้ไขปัญหา
5.1 ปัญหาทั่วไปและแนวทางแก้ไข
- อุปกรณ์ไม่เปิดเครื่อง:
- Ensure the battery is charged. Connect the tablet to a charger for at least 30 minutes.
- ดำเนินการรีสตาร์ทแบบบังคับโดยกดปุ่มเปิด/ปิดเครื่องและปุ่มลดระดับเสียงพร้อมกันค้างไว้ประมาณ 7-10 วินาที
- ปัญหาการเชื่อมต่อ Wi-Fi:
- ปิดและเปิด Wi-Fi ในการตั้งค่า
- รีสตาร์ทเราเตอร์ Wi-Fi ของคุณ
- ลืมเครือข่ายและเชื่อมต่อใหม่อีกครั้ง
- ประสิทธิภาพช้า:
- ปิดแอปที่ไม่ได้ใช้ที่ทำงานอยู่เบื้องหลัง
- ล้างข้อมูลแคชสำหรับแอปที่ใช้บ่อย
- ตรวจสอบพื้นที่จัดเก็บข้อมูลที่มีอยู่ และล้างพื้นที่ว่างหากจำเป็น
- รีสตาร์ทแท็บเล็ต
- แอปขัดข้อง:
- ล้างแคชและข้อมูลของแอป (การตั้งค่า > แอป > [ชื่อแอป] > พื้นที่จัดเก็บ)
- ถอนการติดตั้งและติดตั้งแอปใหม่อีกครั้ง
- ตรวจสอบให้แน่ใจว่าแอปได้รับการอัปเดตเป็นเวอร์ชันล่าสุด
5.2 รีเซ็ตเป็นค่าโรงงาน
หากคุณพบปัญหาอย่างต่อเนื่อง การรีเซ็ตเป็นค่าโรงงานสามารถแก้ไขปัญหาที่เกี่ยวข้องกับซอฟต์แวร์ได้หลายอย่าง คำเตือน: การดำเนินการนี้จะลบข้อมูลทั้งหมดบนแท็บเล็ตของคุณ โปรดสำรองข้อมูลสำคัญก่อนดำเนินการต่อ
- ไปที่ การตั้งค่า > การจัดการทั่วไป > รีเซ็ต > รีเซ็ตข้อมูลเป็นค่าเริ่มต้นจากโรงงาน.
- Review ข้อมูลและแตะ รีเซ็ต.
- ป้อนข้อมูลการล็อกหน้าจอของคุณหากระบบถาม
- แตะ ลบทั้งหมด to confirm. The tablet will restart and begin the reset process.
6. ข้อมูลจำเพาะผลิตภัณฑ์
| คุณสมบัติ | ข้อมูลจำเพาะ |
|---|---|
| ยี่ห้อ | ซัมซุง |
| ชื่อรุ่น | กาแล็คซี่แท็บ A11+ |
| หมายเลขรุ่น | SM-X230 |
| ขนาดหน้าจอ | 11 นิ้ว |
| ประเภทจอภาพ | ทีเอฟทีแอลซีดี |
| ความละเอียดดั้งเดิม | 1920 x 1200 พิกเซล (WUXGA) |
| อัตราการรีเฟรชการแสดงผล | 90 เฮิรตซ์ |
| โปรเซสเซอร์ | MediaTek Dimensity 7300 (4 nm) Octa-core, 2.5 GHz |
| หน่วยความจำแรม | 6GB |
| การจัดเก็บข้อมูลภายใน | 128GB |
| พื้นที่เก็บข้อมูลแบบขยายได้ | microSD (สูงสุด 2 TB) |
| ระบบปฏิบัติการ | แอนดรอยด์ |
| กล้องหลัง | 8 MP |
| กล้องหน้า | 5 MP |
| ความละเอียดในการจับภาพวิดีโอ | เอชดี 720p |
| ความจุของแบตเตอรี่ | 7040 mAh (ลิเธียมโพลิเมอร์) |
| อายุการใช้งานแบตเตอรี่โดยเฉลี่ย | 10 ชั่วโมง |
| การชาร์จไฟ | ชาร์จเร็วสุดๆ 25 วัตต์ |
| การเชื่อมต่อ | Wi-Fi (802.11ac), Bluetooth, USB Type C |
| ฟังก์ชั่น GPS | GPS-Enabled (GLONASS, Galileo, Beidou, QZSS) |
| คุณสมบัติด้านเสียง | Dolby-engineered Quad Speakers, 3.5 mm audio jack |
| ขนาด (ยาว x กว้าง x หนา) | ยาว 0.3 นิ้ว x กว้าง 10.1 นิ้ว x หนา 6.6 นิ้ว |
| น้ำหนักสินค้า | 1.4 ปอนด์ |
7. ข้อมูลการรับประกัน
The Samsung Galaxy Tab A11+ SM-X230 comes with a 12-month Manufacturer Warranty. This warranty covers defects in materials and workmanship under normal use. For specific terms and conditions, please refer to the warranty card included with your product or visit the official Samsung support webเว็บไซต์.
เก็บหลักฐานการซื้อของคุณไว้เพื่อเรียกร้องการรับประกัน
8. การสนับสนุนและบริการ
หากต้องการความช่วยเหลือเพิ่มเติม การสนับสนุนทางเทคนิค หรือสอบถามข้อมูลเกี่ยวกับการบริการ โปรดติดต่อฝ่ายบริการลูกค้าของ Samsung ผ่านช่องทางต่อไปนี้:
- การสนับสนุนทางออนไลน์: เยี่ยมชมฝ่ายสนับสนุน Samsung อย่างเป็นทางการ webไซต์สำหรับคำถามที่พบบ่อย คำแนะนำในการแก้ไขปัญหา และการดาวน์โหลดซอฟต์แวร์ www.samsung.com/us/support/
- การสนับสนุนทางโทรศัพท์: ดูที่บรรจุภัณฑ์ผลิตภัณฑ์ของคุณหรือฝ่ายสนับสนุนของ Samsung webเว็บไซต์สำหรับหมายเลขติดต่อในภูมิภาค
- ศูนย์บริการ: ค้นหาศูนย์บริการ Samsung ที่ได้รับอนุญาตเพื่อรับความช่วยเหลือโดยตรง
When contacting support, please have your tablet's model number (SM-X230) and serial number ready.
เอกสารที่เกี่ยวข้องSM-X230


Ask a question about this manual
Ask about setup, troubleshooting, compatibility, parts, safety, or missing instructions. Manuals+ will review the question and use this page’s manual context to help answer it.