1. บทนำ
This manual provides detailed instructions for the installation, operation, and maintenance of your Vanxse VS-NXS612 2K 4MP PoE AI Box Bullet IP Security Camera. This camera features 4-megapixel resolution, a 6-12mm varifocal lens, Power over Ethernet (PoE) capability, and advanced AI functions for human and vehicle detection. Please read this manual thoroughly before using the product to ensure proper setup and functionality.
2. สินค้าหมดview
คุณสมบัติหลัก:
- ความละเอียด 2K 4MP Ultra HD: Provides clear 2304x1296 resolution for detailed surveillance.
- 6-12mm F1.6 Varifocal Lens: Allows for adjustable wide-angle to long-distance viewการไอเอ็นจี
- จ่ายไฟผ่านอีเทอร์เน็ต (PoE): Simplifies installation by transmitting power and data through a single Ethernet cable.
- การตรวจจับด้วย AI ขั้นสูง: Supports human and vehicle motion detection, face record, and alerts.
- Multi-platform Remote Access: View live feeds and recordings via mobile app (Xmeye), PC client, or web เบราว์เซอร์
- Compatible with NVRs: Works with multiple 4K PoE NVRs.
อะไรอยู่ในกล่อง:
- 1x Vanxse VS-NXS612 Network Box Camera with 6-12mm Lens
- 1x USB Disk (contains CMS software and user manual)
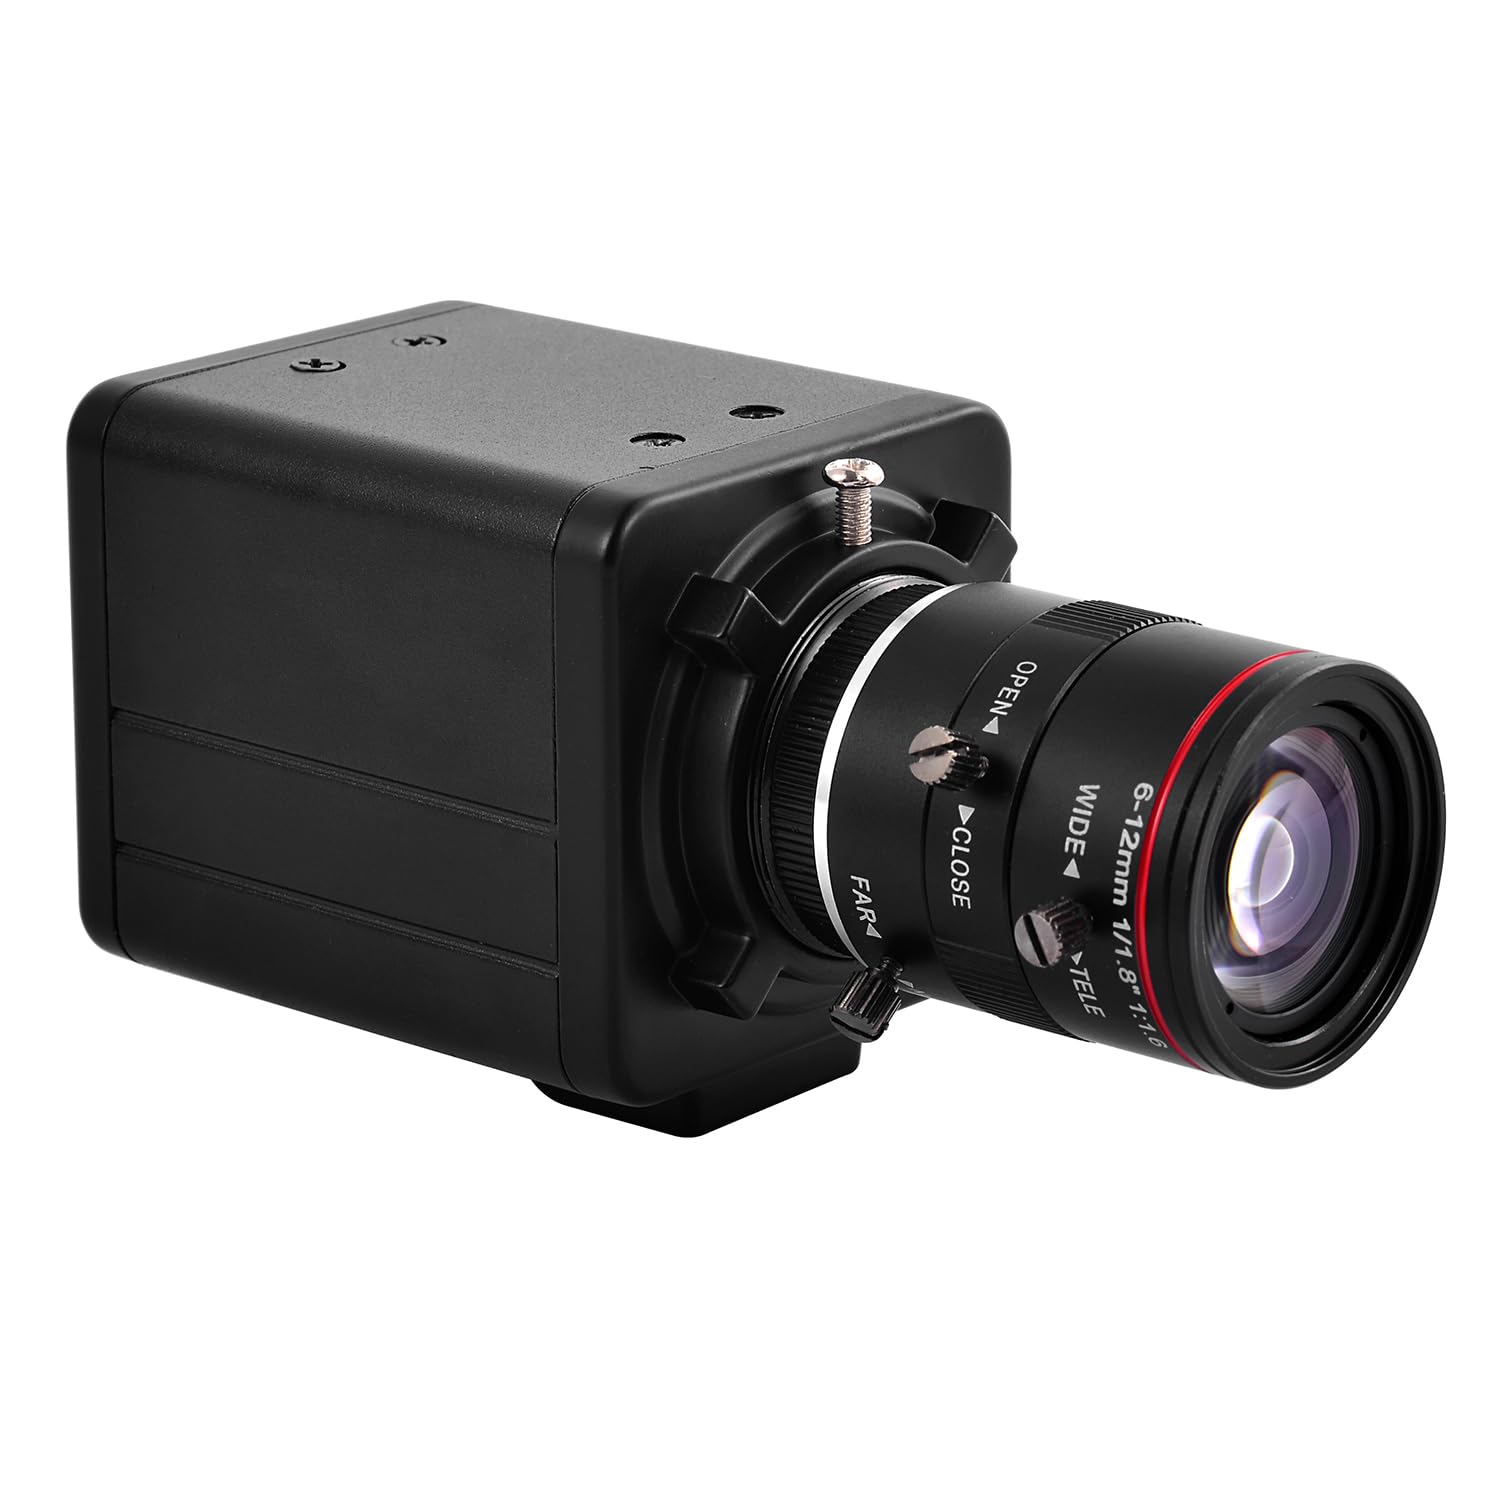
รูปที่ 2.1 : ด้านหน้า view of the Vanxse VS-NXS612 camera with its varifocal lens.

รูปที่ 2.2: เกินview of the camera's main features including human/vehicle detection, motion detection, PoE, and 2K 4MP resolution.
3. การตั้งค่า
3.1 การติดตั้งทางกายภาพ
The camera supports various mounting options including hoisting, wall mounting, and vertical mounting. The bracket hole installation block can be repositioned on the front or bottom of the camera for flexibility.

Figure 3.1: Camera dimensions for planning installation space.

Figure 3.2: Details on bracket installation and interface connections, including the DC 48V PoE Ethernet port and spare DC12V power input.
3.2 Power and Network Connection (PoE Plug and Play)
This camera supports Power over Ethernet (PoE), allowing both power and data transmission through a single Ethernet cable. This simplifies installation, especially in locations without a nearby power outlet. Connect the camera to a PoE NVR, PoE switch, or a router with a PoE injector.

Figure 3.3: Connection diagrams illustrating how to connect the camera with a PoE NVR, PoE switch, or a standard router.
3.3 Mobile App Connection
สำหรับรีโมท viewing and management, download the 'Xmeye' mobile application (or 'Linklemo' as shown in some diagrams) on your iPhone or Android smartphone. Follow the in-app instructions to register an account and add your camera.
- Download the 'Xmeye' or 'Linklemo' app from the App Store or Google Play.
- เปิดแอป ลงทะเบียนบัญชี และเข้าสู่ระบบ
- Add devices by connecting the camera to your NVR or switch first.
- Successfully add the camera to enjoy live video.

Figure 3.4: Step-by-step guide for connecting the camera to the mobile application.
Download Linklemo for iOS: แอปสโตร์
Download Linklemo for Android: Google Play
3.4 PC Client and Web การเข้าถึงเบราว์เซอร์
The camera can also be accessed via a PC client (CMS software provided on the USB disk) or through a web browser (e.g., IE, Chrome, Firefox) by typing www.star4live.com. The CMS software allows for managing multiple cameras in one place.

Figure 3.5: Remote access options including mobile app, PC client, and web เบราว์เซอร์
4. คู่มือการใช้งาน
4.1 Adjusting Zoom and Focus
The camera features a 6-12mm varifocal lens, allowing you to manually adjust the zoom and focus to suit different installation positions and viewing requirements. This adjustment is done directly on the lens barrel.

รูปที่ 4.1: ระยะใกล้ view of the 6-12mm varifocal lens, showing adjustment rings for wide/tele and near/far focus.

Figure 4.2: Illustrates how zoom and focus can be adjusted for different surveillance needs.
4.2 AI Human and Vehicle Motion Detection
The camera's advanced AI technology supports human and vehicle motion detection. When human or vehicle movements are detected, they are marked on the screen, and the camera sends alerts to your phone or mailbox. This feature helps reduce false alarms from non-relevant movements.

รูปที่ 4.3: อดีตample of a human detection alert displayed on a mobile phone, highlighting the detected human in a red box.
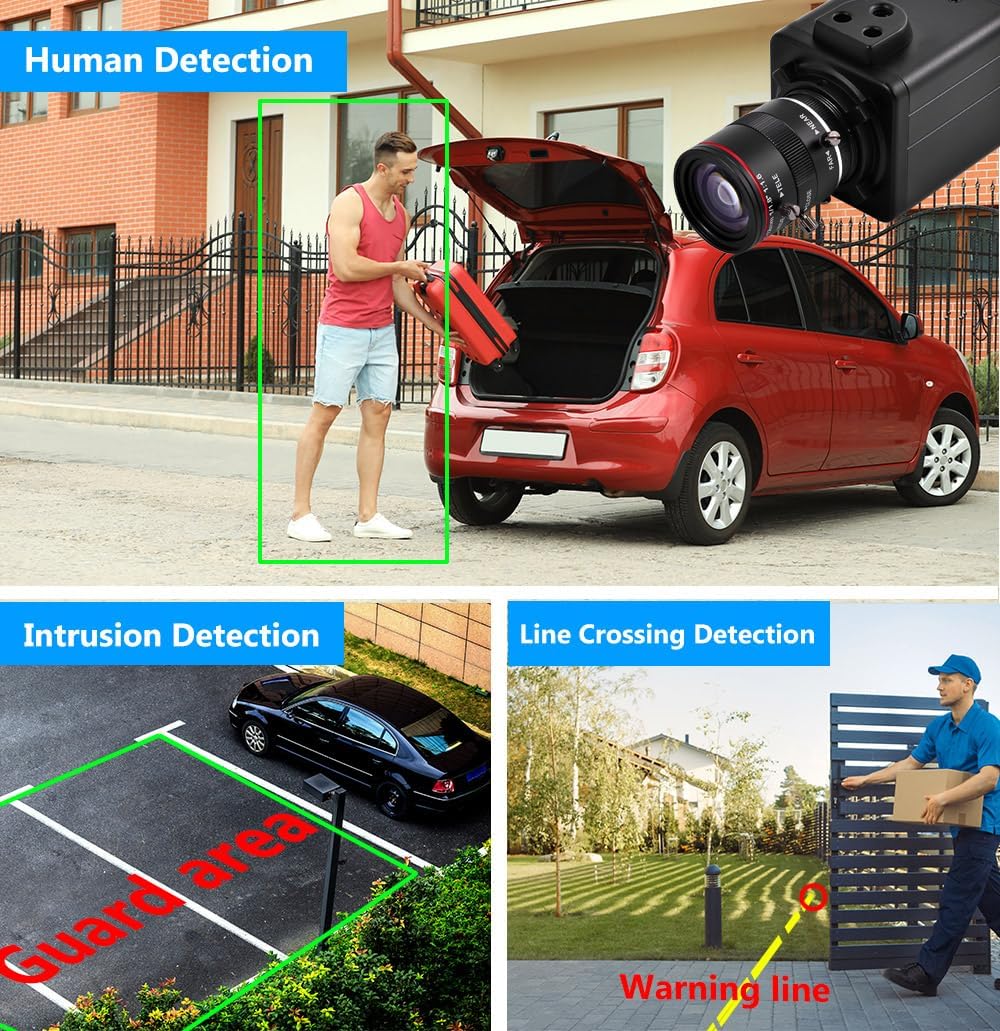
รูปที่ 4.4: ภาพตัวอย่างamples of human detection, intrusion detection (guard area), and line crossing detection.
4.3 Face Record and Playback
The camera supports face record functionality, allowing it to detect and record faces. This feature can be used for later playback and identification.

Figure 4.5: Demonstrates face detection and the ability to playback recorded video segments based on detected faces.
5. การบำรุงรักษา
การบำรุงรักษาตามปกติจะช่วยให้กล้องรักษาความปลอดภัยของคุณมีประสิทธิภาพสูงสุดและมีอายุการใช้งานยาวนาน
- การทำความสะอาดเลนส์: Gently clean the camera lens with a soft, lint-free cloth. For stubborn dirt, use a lens cleaning solution designed for optical surfaces. Avoid abrasive materials that could scratch the lens.
- การทำความสะอาดที่อยู่อาศัย: เช็ดตัวกล้องด้วยผ้านุ่มๆamp ผ้า. อย่าใช้สารเคมีหรือตัวทำละลายที่รุนแรง
- อัพเดตเฟิร์มแวร์: ตรวจสอบผู้ผลิตเป็นระยะ website or app for available firmware updates. Keeping the firmware updated can improve performance, add new features, and enhance security.
- การตรวจสอบสายเคเบิล: Regularly inspect all cables for any signs of wear, damage, or loose connections. Ensure all connections are secure.
- การปกป้องสิ่งแวดล้อม: While rated for indoor/outdoor use, ensure the camera is installed in a location that minimizes direct exposure to extreme weather conditions to prolong its lifespan.
6 การแก้ไขปัญหา
If you encounter issues with your Vanxse VS-NXS612 camera, refer to the following common troubleshooting steps.
6.1 No Video Feed / Offline Camera
- ตรวจสอบพลังงาน: Ensure the camera is receiving power. If using PoE, verify the PoE NVR or switch is functioning correctly and the Ethernet cable is securely connected. If using a DC12V adapter, ensure it is plugged in and working.
- ตรวจสอบการเชื่อมต่อเครือข่าย: Confirm the Ethernet cable is properly connected to both the camera and the network device (NVR/switch/router). Test the cable if possible.
- การกำหนดค่าเครือข่าย: Verify the camera's IP address and network settings are correct and not conflicting with other devices on your network. Use the CMS software or ONVIF tools to check network parameters.
- รีบูตอุปกรณ์: Try restarting the camera, NVR/switch, and router.
6.2 Poor Image Quality / Unclear Video
- ทำความสะอาดเลนส์: Ensure the camera lens is clean and free from dust, smudges, or condensation.
- Adjust Focus and Zoom: Manually adjust the varifocal lens for optimal focus and desired zoom level.
- สภาพแสง: Ensure adequate lighting in the surveillance area. The camera has WDR (Wide Dynamic Range) for challenging lighting, but extreme conditions can still affect quality.
- การตั้งค่าความละเอียด: Check the video resolution settings in the app or CMS software to ensure it is set to 2K 4MP.
6.3 Motion Detection Not Working / False Alarms
- การตั้งค่าความไว: Adjust the motion detection sensitivity in the camera's settings via the app or CMS software.
- โซนการตรวจจับ: Configure specific detection zones to exclude areas with constant, irrelevant movement (e.g., trees swaying).
- การเปิดใช้งานฟีเจอร์ AI: Ensure human and vehicle detection features are enabled in the settings.
6.4 Video Lag / Delay
- แบนด์วิธเครือข่าย: Check your network's bandwidth. Insufficient bandwidth can cause video lag, especially with high-resolution streams.
- ความแออัดของเครือข่าย: Reduce other network activities that might be consuming bandwidth.
- NVR/Viewing Device Performance: Ensure your NVR or viewing device has sufficient processing power to handle the 4MP video stream.
- เฟิร์มแวร์: ตรวจสอบให้แน่ใจว่าเฟิร์มแวร์ของกล้องเป็นเวอร์ชันล่าสุด
6.5 Web Interface Issues
- ความเข้ากันได้ของเบราว์เซอร์: ลองเข้าไปที่ web interface with different browsers (e.g., IE, Chrome, Firefox). Some interfaces may require specific browser plugins.
- การติดตั้งปลั๊กอิน: If prompted, install any necessary browser plugins or drivers for the web interface to function correctly.
- การเข้าถึงเครือข่าย: Ensure the camera has proper network access and is not blocked by firewalls.
7. ข้อมูลจำเพาะ
| หมายเลขรุ่น | VS-NXS612 |
| ปณิธาน | 4 ล้านพิกเซล (2304x1296) |
| เลนส์ | 1/1.8" F1.6 6-12mm Varifocal Lens |
| การเชื่อมต่อ | Ethernet, Wired, PoE |
| คุณสมบัติพิเศษ | 6-12mm Varifocal Lens, Face Recognize, HD Resolution, Mini Size, Motion Sensor, Human/Vehicle Detection, WDR |
| การใช้งานภายใน/ภายนอกอาคาร | ในร่ม, กลางแจ้ง |
| อุปกรณ์ที่รองรับ | คอมพิวเตอร์ตั้งโต๊ะ, เครื่องบันทึกวิดีโอดิจิตอล, แล็ปท็อป, สมาร์ทโฟน, แท็บเล็ต |
| ประเภทตัวควบคุม | เอ็กซ์มีอาย |
| ประเภทการติดตั้ง | ติดตั้งบนเพดาน/ติดตั้งบนผนัง |
| ฟอร์มแฟกเตอร์ | กระสุน |
| ประเภทการแจ้งเตือน | การเคลื่อนไหวเท่านั้น |
| ความละเอียดของภาพนิ่งที่มีประสิทธิภาพ | 4 MP |
| วิธีการควบคุม | ระยะไกล |
| เทคโนโลยีไร้สาย | โพอี |
| ความละเอียดในการจับภาพวิดีโอ | 1920p (Note: Product title states 2K 4MP, 1920p is 2MP. Please refer to product packaging for exact resolution.) |
| แหล่งพลังงาน | Corded Electric/POE |
| ขนาดรายการ | 4 x 1.8 x 1.8 นิ้ว |
| รูปแบบการจับภาพวิดีโอ | MPEG-4 |
8. การรับประกันและการสนับสนุน
8.1 ข้อมูลการรับประกัน
Warranty details for the Vanxse VS-NXS612 camera are typically provided at the point of purchase or included with the product packaging. Please retain your proof of purchase for warranty claims. For specific warranty terms and conditions, refer to the documentation provided by your retailer or contact Vanxse customer support.
8.2 การสนับสนุนลูกค้า
For technical assistance, troubleshooting, or any questions regarding your Vanxse security camera, please contact Vanxse customer support through their official website or the contact information provided in your product documentation. You may also find helpful resources and FAQs on the Vanxse brand store page on Amazon.