DOACT DOACT9032k7umed
DOACT 433MHz Universal Garage Door Remote Control User Manual
Brand: DOACT | Model: DOACT9032k7umed
1. บทนำและเรื่องอื่นๆview
This manual provides detailed instructions for the DOACT 433MHz Universal Garage Door Remote Control. This device is designed to copy existing remote control signals, offering a convenient and reliable solution for operating various automated systems such as garage doors, automatic gates, windows, and car alarms. Its compact design and robust construction ensure ease of use and durability.
2. คุณสมบัติของผลิตภัณฑ์
- โครงสร้างทนทาน: Made of high-quality plastic, providing a comfortable and secure grip.
- ระยะขยาย: Capable of controlling devices from a significant distance with stable performance.
- การออกแบบพกพา: Equipped with a keychain and a clip for easy carrying, minimizing the risk of loss.
- ความเข้ากันได้กว้าง: Versatile application for auto doors, garage doors, windows, and car alarm systems.
- รีโมทที่เข้ากันได้: PHOENIX 2, PHOENIX 4, PHOX 2, PHOX 4, TXC, TRC, TSC4, HAND.
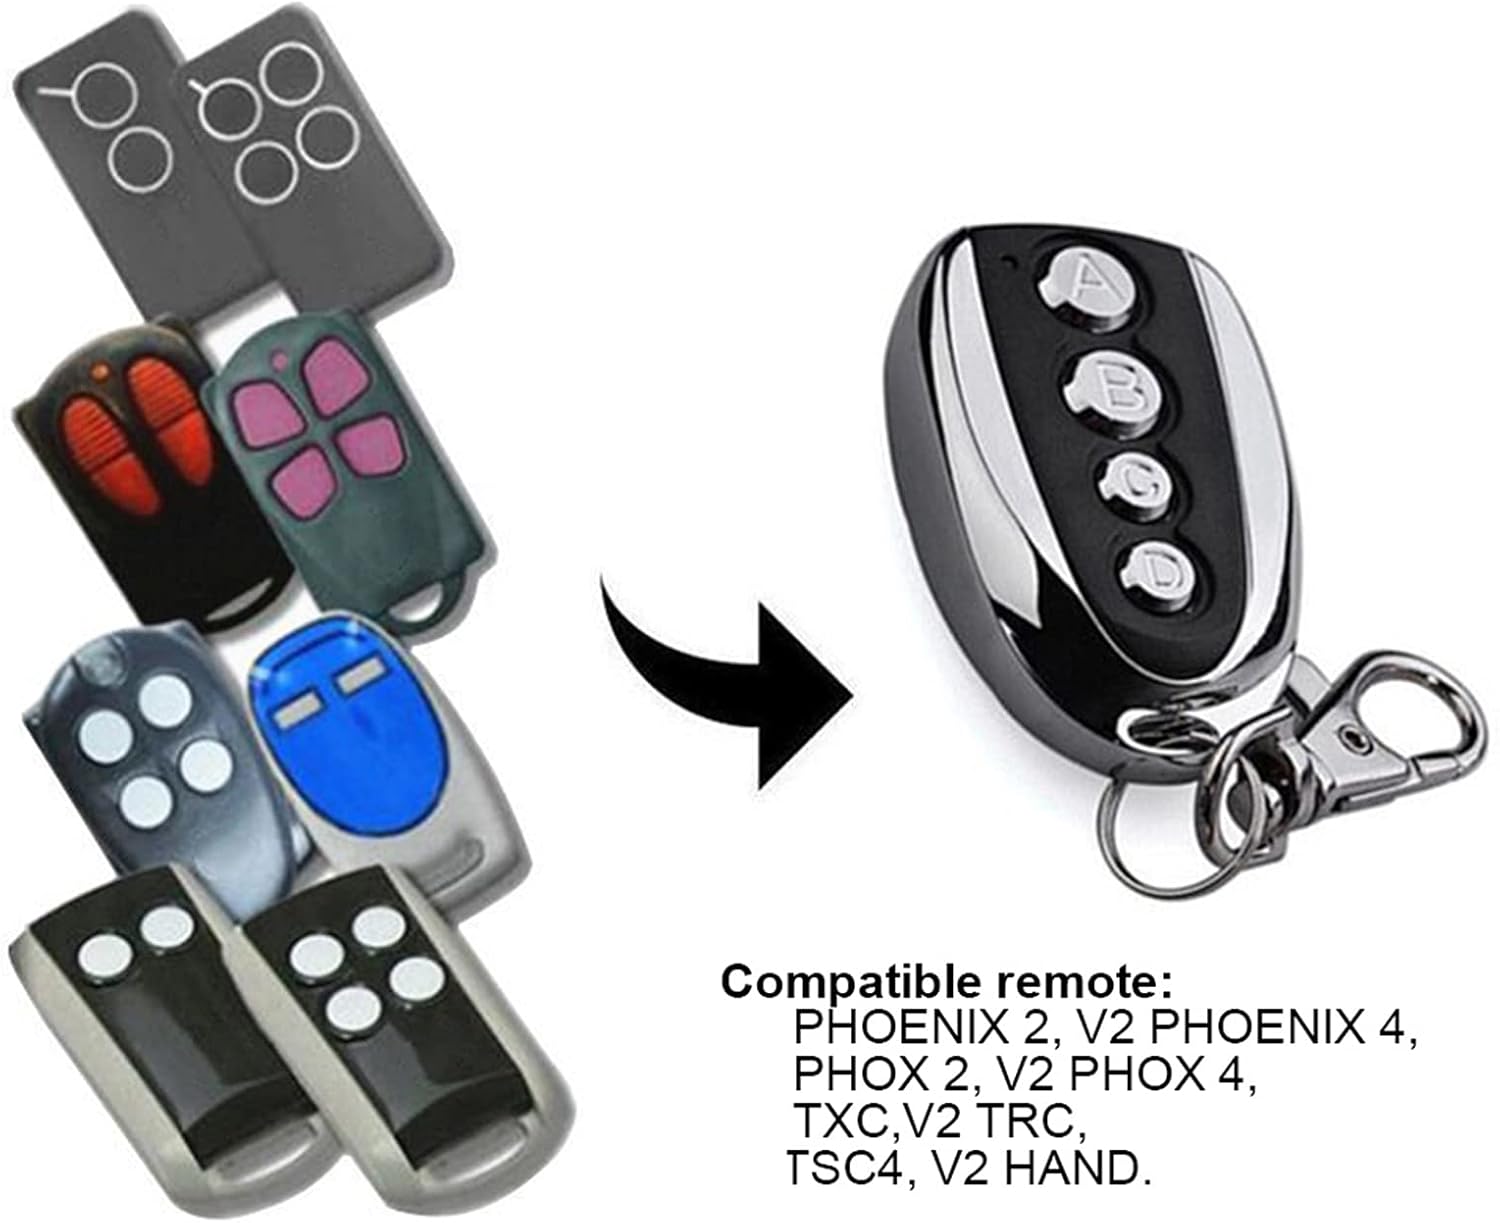
Figure 2.1: The DOACT remote control is compatible with a range of existing remote models, including PHOENIX 2, PHOENIX 4, PHOX 2, PHOX 4, TXC, TRC, TSC4, and HAND.
3. ข้อมูลจำเพาะ
| คุณลักษณะ | ค่า |
|---|---|
| วัสดุ | พลาสติก |
| พลัง | 10วัตต์ |
| ความถี่ | 433.92เมกะเฮิรตซ์ |
| ความแม่นยำ | ± 0.2MHz |
| ระยะทางไกล | สูงสุด 100 เมตร (กลางแจ้ง) |
| ฉบับทำงานtage | 12V 27A |
| กระแสไฟฟ้าทำงาน | ≤12มิลลิแอมป์ |
| ขนาด (โดยประมาณ) | 5.3 cm / 2.1 inches (length) |
| น้ำหนักสินค้า | 1.38 ออนซ์ |
| ขนาดแพ็คเกจ | 2.36 x 1.57 x 0.39 นิ้ว |

รูปที่ 3.1: ขนาดโดยประมาณของรีโมทคอนโทรล
4. Setup: Copying Code from Original Transmitter
Follow these steps carefully to program your new DOACT remote control by copying the signal from an existing, compatible remote.
ขั้นตอนที่ 1: ล้างรหัสประวัติจากเครื่องคัดลอก
- กดปุ่มค้างไว้ A และ B simultaneously on the DOACT remote until the LED indicator flashes three times.
- ปุ่มปล่อย B (while continuing to press button A).
- กดปุ่ม B slowly three times. The LED indicator will flash continuously.
- ปุ่มปล่อย A. The code clearance process is now complete.
Step 2: Copy Code from the Original Transmitter
- Place the DOACT remote control as close as possible to your original transmitter.
- กดปุ่มค้างไว้ A on your original transmitter.
- While still holding button A on the original transmitter, press and hold button A on the DOACT remote control. Continue holding both buttons until the DOACT remote's LED indicator flashes rapidly.
- Release both buttons. The code for button A ตอนนี้ก็ถูกคัดลอกแล้ว
- Repeat the same process for other buttons (B, C, D) if desired, using the corresponding buttons on both the original and DOACT remotes.
บันทึก: Button A typically functions as the lock button, and Button B as the unlock button, but this can vary depending on the original remote's configuration.
Video 4.1: This video demonstrates the physical appearance of the remote control and its general use, providing a visual aid for understanding the device.
5. คู่มือการใช้งาน
Once programmed, operating the DOACT remote control is straightforward:
- การเปิดใช้งาน: Simply press the desired button (A, B, C, or D) that you have programmed to activate the corresponding function (e.g., open/close garage door, lock/unlock car).
- พิสัย: Ensure you are within the effective operating range of approximately 100 meters (in open air) for optimal performance. Environmental factors such as walls, structures, and electromagnetic interference can affect the actual range.

Figure 5.1: Using the remote control to operate a garage door.

Figure 5.2: The remote control can also be used for other automated entrances.
6. การบำรุงรักษา
To ensure the longevity and optimal performance of your DOACT remote control, consider the following maintenance tips:
- การทำความสะอาด: เช็ดรีโมตด้วยผ้านุ่มและแห้ง หลีกเลี่ยงการใช้น้ำยาทำความสะอาดหรือสารละลายที่มีฤทธิ์กัดกร่อน
- พื้นที่จัดเก็บ: เก็บรีโมทไว้ในที่แห้ง หลีกเลี่ยงแสงแดดโดยตรงและอุณหภูมิที่สูงหรือต่ำเกินไป
- การเปลี่ยนแบตเตอรี่: The remote uses a 12V 27A battery. If the remote's range decreases significantly or the LED indicator does not light up, it may be time to replace the battery. To replace, carefully open the remote's casing (typically by unscrewing the back panel as shown in Figure 6.1), remove the old battery, and insert a new one, ensuring correct polarity.
- หลีกเลี่ยงความเสียหายทางกายภาพ: Protect the remote from drops, impacts, and excessive pressure.

รูปที่ 6.1: ด้านหลัง view of the remote control, showing screws for accessing the battery compartment.
7 การแก้ไขปัญหา
If you encounter issues with your DOACT remote control, try the following troubleshooting steps:
- รีโมตไม่ตอบสนอง:
- Ensure the remote is properly programmed. If unsure, repeat the code copying steps (Section 4).
- Check the battery. Replace it if it's low or dead (refer to Section 6 for battery replacement).
- Ensure you are within the effective operating range and there are no significant obstructions between the remote and the receiver.
- ช่วงการทำงานสั้น:
- Replace the battery, as a weak battery can reduce range.
- Check for sources of interference (e.g., other wireless devices, large metal objects) near the receiver or the remote.
- Ensure the antenna on your receiver unit is unobstructed and properly positioned.
- ไฟแสดงสถานะ LED ไม่ติดสว่าง:
- The battery is likely dead. Replace it immediately.
8. การรับประกันและการสนับสนุน
DOACT is committed to providing high-quality products. While specific warranty details are not provided in this manual, please retain your proof of purchase for any warranty claims. For technical support, troubleshooting assistance, or inquiries regarding your DOACT remote control, please contact the seller or manufacturer directly through the platform where the product was purchased. They will be able to provide the most accurate and timely support.
Ask a question about this manual
Ask about setup, troubleshooting, compatibility, parts, safety, or missing instructions. Manuals+ will review the question and use this page’s manual context to help answer it.