
การแนะนำ
This manual provides detailed instructions for the setup, operation, and maintenance of your AW BM-700 Studio Recording Condenser Microphone Kit. This kit is designed to provide clear, optimized audio for various applications, including voice recording, podcasting, and studio use. Please read this manual thoroughly before using the product to ensure proper functionality and longevity.
มีอะไรอยู่ในกล่อง
Your AW BM-700 Studio Recording Condenser Microphone Kit includes the following components:
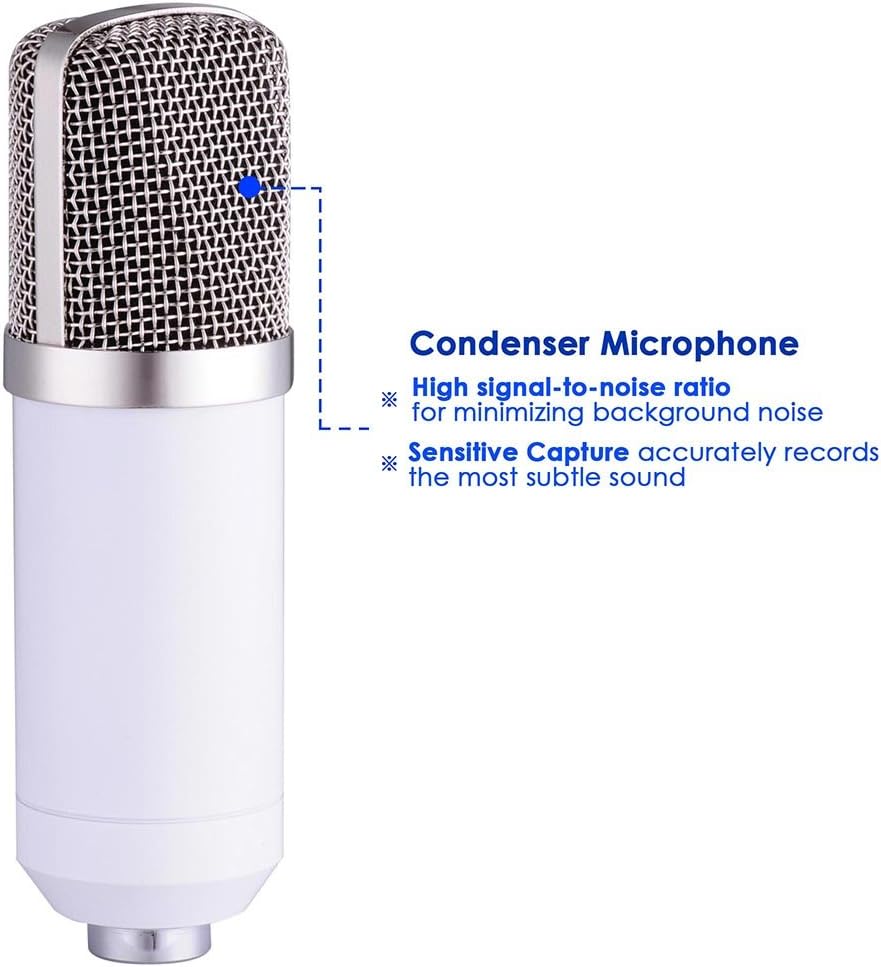
- 1x คอนเดนเซอร์ไมโครโฟน
- 1x Microphone Cap (Foam Windscreen)
- 1x ตัวยึดกันกระแทก
- 1x Boom Suspension Scissor Arm Stand
- 1x Pop Filter Mask Shield
- 1x Power Cord (3.5mm audio cable)
- 1x คู่มือผู้ใช้ (เอกสารนี้)

คำแนะนำการตั้งค่า
Follow these steps to assemble and set up your microphone kit:
- Attach the Arm Stand: รักษาความปลอดภัย clamp of the boom suspension scissor arm stand to a sturdy table or desk. Ensure the table thickness is less than 1 1/2" (3.7 cm). Adjust the arm to your desired position.
- ติดตั้งตัวยึดกันกระแทก: Attach the solid metal anti-vibration shock mount to the end of the arm stand. Tighten securely to prevent movement.
- เสียบไมโครโฟน: Carefully place the condenser microphone into the shock mount. The shock mount holds the microphone in place and isolates it from vibrations.
- ติดตั้งแผ่นกรองเสียง (Pop Filter): Mount the pop filter with its 360-degree adjustable gooseneck to the arm stand or desk. Position it approximately 2-3 inches in front of the microphone to effectively eliminate popping sounds and protect the microphone from saliva.
- เชื่อมต่อสายไฟ: Plug the 3.5mm audio interface end of the power cord into the microphone's output interface. Connect the other end to your desktop PC or laptop's 3.5mm microphone input.
- ความต้องการพลังงาน: The microphone requires 5V to 9V of power, or 48V phantom power supply. It is highly recommended to use this microphone with an external audio card for optimal performance.



คำแนะนำการใช้งาน
Once assembled, your microphone kit is ready for use. Follow these guidelines for optimal performance:
- การจัดวาง: Position the microphone directly in front of the sound source (e.g., your mouth for vocals) to utilize its cardioid polar pick-up pattern, which focuses on sound from the front and minimizes side and rear noise.
- การใช้ป๊อปฟิลเตอร์: Always use the pop filter to prevent plosive sounds (like 'p' and 'b') from causing harsh audio spikes.
- การปรับค่าเกน: If using an external audio interface, adjust the gain settings to achieve a strong signal without clipping or distortion.
- การตั้งค่าซอฟต์แวร์: Ensure your computer's audio settings recognize the microphone as the input device. Most recording software will allow you to select the microphone from a list of available inputs.


การซ่อมบำรุง
Proper maintenance ensures the longevity and performance of your microphone kit:
- การทำความสะอาด: ใช้ผ้าแห้งเนื้อนุ่มเช็ดทำความสะอาดตัวไมโครโฟนและขาตั้ง หลีกเลี่ยงการใช้น้ำยาทำความสะอาดโดยตรงกับไมโครโฟน
- ตัวกรองป๊อป: The pop filter can be gently cleaned with a damp ใช้ผ้าเช็ดทำความสะอาดหากจำเป็น ตรวจสอบให้แน่ใจว่าแห้งสนิทก่อนติดกลับเข้าไปใหม่
- พื้นที่จัดเก็บ: When not in use, store the microphone in a clean, dry place away from dust and extreme temperatures.
- การดูแลสายเคเบิล: หลีกเลี่ยงการโค้งงอหรือหักงอของสายสัญญาณเสียงเพื่อป้องกันความเสียหายภายใน
การแก้ไขปัญหา
If you encounter issues with your microphone kit, refer to the following common solutions:
- ไม่มีเสียง/ระดับเสียงต่ำ:
- ตรวจสอบให้แน่ใจว่าสายเคเบิลทั้งหมดเชื่อมต่ออย่างแน่นหนา
- Verify the microphone is selected as the input device in your computer's sound settings and recording software.
- Check the gain levels on your audio interface or computer.
- Confirm that the microphone is receiving adequate power (5V-9V or 48V phantom power).
- Humming/Hissing Noise:
- ตรวจสอบให้แน่ใจว่าการเชื่อมต่อทั้งหมดแน่น
- Try using a different USB port or power outlet for your computer/audio interface.
- ควรวางอุปกรณ์อิเล็กทรอนิกส์อื่นๆ ไว้ใกล้ไมโครโฟนให้น้อยที่สุด เพื่อป้องกันปัญหาการรบกวน
- Using an external audio card is highly recommended for best performance and noise reduction.
- Microphone Not Fitting Stand:
- Ensure you are using the correct adapter if the microphone's thread size does not match the stand's. Some microphones may require a thread adapter (not included in this kit) for universal compatibility.
- Incompatibility with Mobile Phones: This microphone cannot be used with mobile phones as a power supply. Do not attempt to connect it directly to a phone for power.
- Incompatibility with Apple Computers: This microphone is not directly compatible with Apple computers. An external sound card must be equipped for use with Apple computers.
ข้อมูลจำเพาะ
| คุณสมบัติ | ข้อมูลจำเพาะ |
|---|---|
| ประเภทไมโครโฟน | คอนเดนเซอร์ |
| รูปแบบขั้ว | คาร์ดิออยด์ (ทิศทางเดียว) |
| การตอบสนองความถี่ | 20 เฮิรตซ์ ถึง 20 กิโลเฮิรตซ์ |
| ความไวต่อความรู้สึก | -32 dB ± 3 dB (0 dB = 1 V/Pa at 1 kHz) |
| อิมพีแดนซ์เอาต์พุต | ≤100โอห์ม |
| โหลดอิมพีแดนซ์ | ≥1000 Ω |
| ระดับเสียงที่เท่ากัน | ≤20 dBA (IEC 581-5) |
| อัตราส่วนสัญญาณต่อเสียงรบกวน | 78 เดซิเบล |
| สูงสุด SPL | 130 dB (ที่ 1 kHz ≤ 1% THD) |
| Usage Voltage | 5V to 9V (or 48V phantom power supply) |
| กระแสไฟฟ้า | 3มิลลิแอมป์ |
| Microphone Output Interface | 3.5 มม. (1/8 นิ้ว) |
| ความยาวสายเคเบิล | 8.2 ฟุต (2.5 ม.) |
| วัสดุไมโครโฟน | โลหะ |
| Scissor Arm Stand Size (LxW) | 13 3/4" x 13 3/4" (35 x 35 cm) |
| Suitable Table Thickness (Stand) | Less than 1 1/2" (3.7 cm) |
| น้ำหนักสุทธิรวม | 3.2 ปอนด์ (1.4 กก.) |
| Item Dimensions (Product) | 19.29 x 8.23 x 3.54 นิ้ว |

การรับประกันและการสนับสนุน
This product does not come with a specified warranty. For any product-related inquiries or support, please refer to the retailer or manufacturer's customer service channels.