
పరిచయం
This manual provides comprehensive instructions for the safe and effective use of your Bresser Junior Microscope 8851300E8G000. Designed for beginners, this transmitted light microscope offers magnification from 40x to 640x, featuring LED illumination and a wide range of accessories to facilitate initial explorations into the microscopic world.

Image: A collection of Bresser Junior Microscopes in various colors, showcasing ఉత్పత్తి రూపకల్పన.
భద్రతా సమాచారం
Please read and understand all safety instructions before using the microscope. Keep this manual for future reference.
- This device contains small parts that could be swallowed by children. Keep the microscope and accessories out of reach of small children.
- Batteries must be inserted with correct polarity. Do not mix old and new batteries or different types of batteries. Remove batteries if the device will not be used for an extended period.
- Do not look directly into the sun or other bright light sources through the microscope, as this can cause permanent eye damage.
- Avoid exposing the microscope to high temperatures or direct sunlight.
- Handle glass slides and cover slips with care to prevent cuts. Adult supervision is recommended for younger users.
ప్యాకేజీ విషయాలు
క్రింద జాబితా చేయబడిన అన్ని వస్తువులు మీ ప్యాకేజీలో చేర్చబడ్డాయని ధృవీకరించండి:
- సూక్ష్మదర్శిని
- 3 Permanent Slides
- 8 Microscope Slides, Labels, and Cover Slips
- 2 ఎస్ample Materials (Yeast, Shrimp Eggs)
- 1 ఇంక్యుబేటర్
- 3 ఎస్ample Vials
- 1 Microcut
- 1 పట్టకార్లు
- 1 పైపెట్
- 1 Small Hand Magnifier
- 1 కొలిచే కప్పు
- 1 పోస్టర్
- 3 AA బ్యాటరీలు
- ఇన్స్ట్రక్షన్ మాన్యువల్
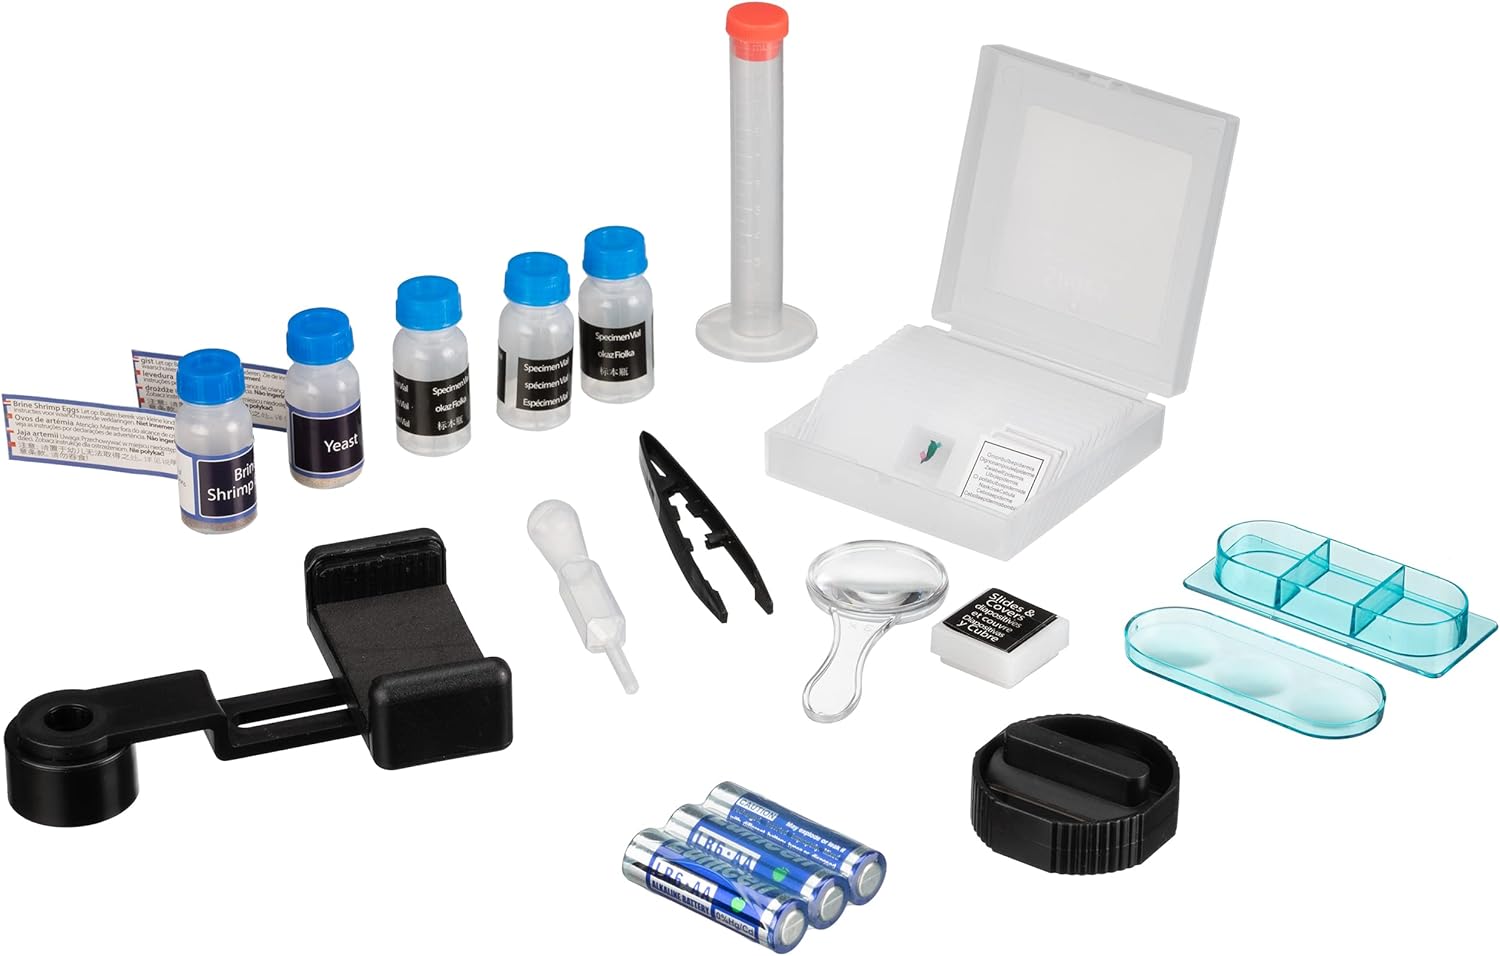
Image: All included accessories for the Bresser Junior Microscope.
సెటప్
- బ్యాటరీ ఇన్స్టాలేషన్: Locate the battery compartment at the base of the microscope. Open it and insert the 3 AA batteries, ensuring correct polarity (+/-). Close the compartment securely.
- ప్లేస్మెంట్: మైక్రోస్కోప్ను స్థిరమైన, చదునైన ఉపరితలంపై ఉంచండి.
- Eyepiece Insertion: Insert the eyepiece (WF10x-WF16x) into the top tube of the microscope.
- Objective Lens Selection: Rotate the revolving nosepiece to select the lowest magnification objective lens (e.g., 4x).
- Stagఇ క్లిప్లు: లను ఎత్తండిtage clips and place a prepared slide onto the stage, securing it with the clips.
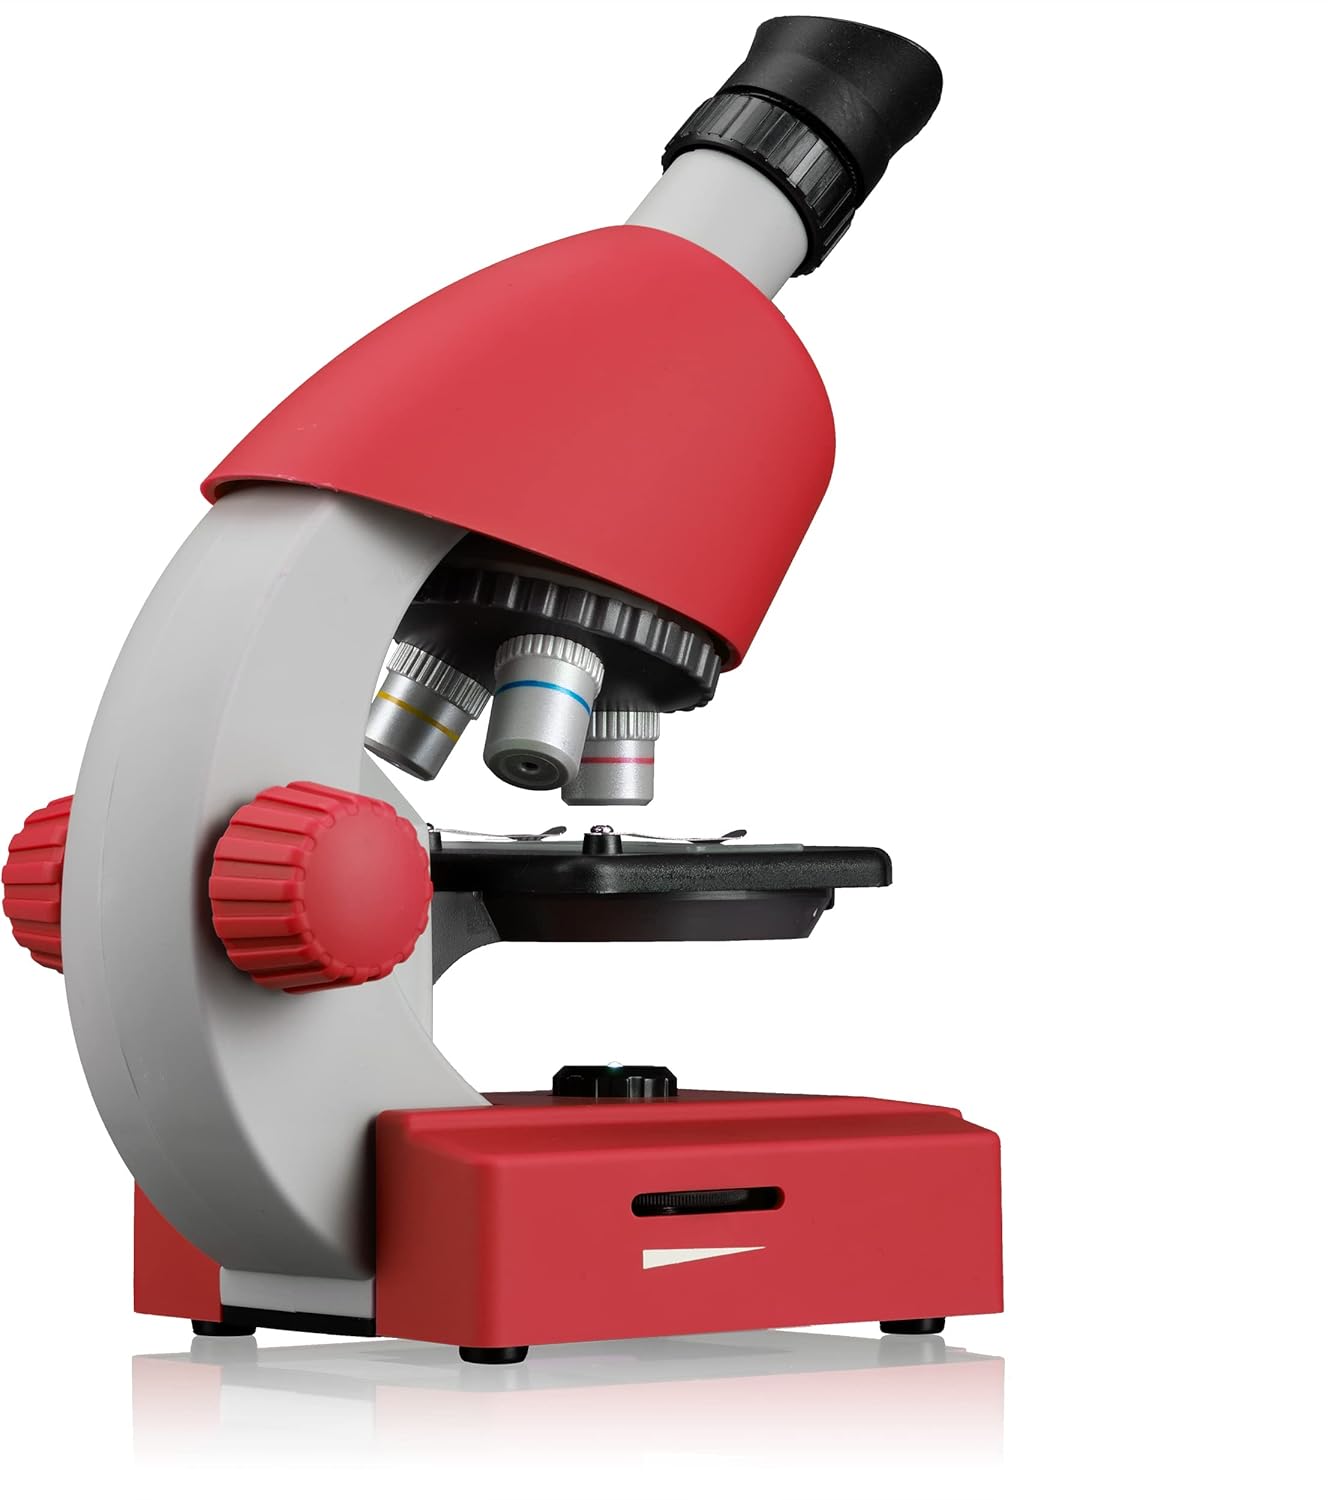
చిత్రం: వైపు view of the microscope, illustrating the objective lenses and focusing mechanism.
Operating the Microscope
- Turn On Illumination: Locate the LED illumination switch at the base of the microscope and turn it on. Adjust the brightness if a dimmer is present.
- దృష్టి కేంద్రీకరించడం: While looking through the eyepiece, slowly turn the coarse focus knob (larger knob on the side) to bring the specimen into approximate focus. Then, use the fine focus knob (smaller knob, if present) for sharper detail.
- మాగ్నిఫికేషన్ను మార్చడం: To increase magnification, rotate the revolving nosepiece to a higher power objective lens (e.g., 10x, 40x). Re-adjust focus as needed. The eyepiece itself can also be adjusted for different magnifications (WF10x-WF16x).
- స్మార్ట్ఫోన్ అడాప్టర్ని ఉపయోగించడం:
- Attach the smartphone adapter to the eyepiece.
- Secure your smartphone in the adapter, aligning the phone's camera with the eyepiece.
- Open your phone's camera app to view and capture images or videos of your specimen.

Image: Microscope with smartphone adapter for digital viewing.
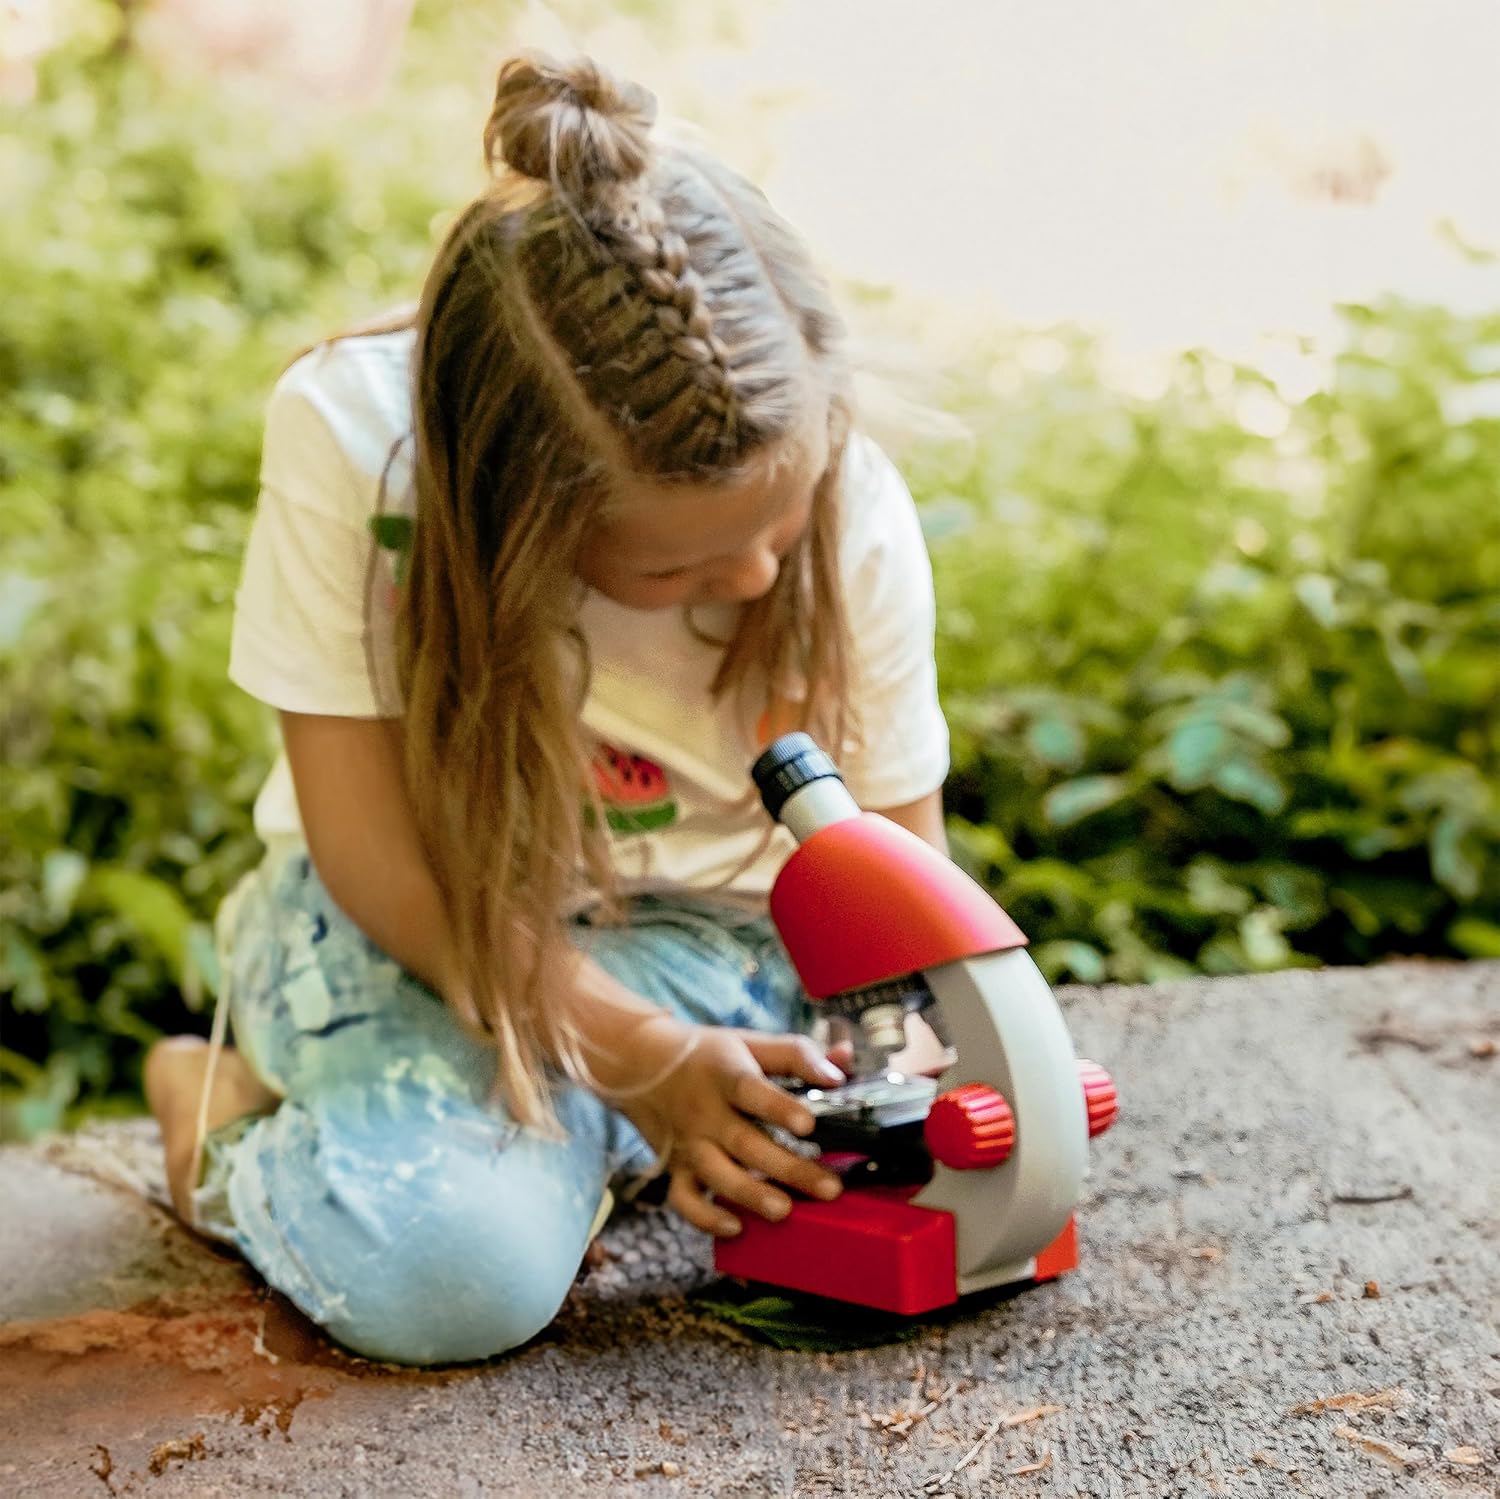
Image: A child using the Bresser Junior Microscope.
నిర్వహణ
- లెన్స్లను శుభ్రపరచడం: ఐపీస్ మరియు ఆబ్జెక్టివ్ లెన్స్లను శుభ్రం చేయడానికి ఆప్టికల్ లెన్స్ల కోసం ప్రత్యేకంగా రూపొందించిన మృదువైన, లింట్-ఫ్రీ వస్త్రాన్ని ఉపయోగించండి. రాపిడి పదార్థాలు లేదా కఠినమైన రసాయనాలను ఉపయోగించవద్దు.
- శరీరాన్ని శుభ్రపరచడం: మైక్రోస్కోప్ బాడీని మృదువైన, d తో తుడవండి.amp వస్త్రం. ఎలక్ట్రానిక్ భాగాలలోకి తేమ రాకుండా చూసుకోండి.
- నిల్వ: When not in use, store the microscope in a clean, dry, dust-free environment. Cover it with a dust cover if available. Remove batteries if storing for extended periods.
- Handling Slides: Always handle slides by their edges to avoid fingerprints on the viewing ప్రాంతం.
ట్రబుల్షూటింగ్
| సమస్య | సాధ్యమైన కారణం | పరిష్కారం |
|---|---|---|
| వెలుతురు లేదు | బ్యాటరీలు డెడ్ అయ్యాయి లేదా తప్పుగా చొప్పించబడ్డాయి. | Check battery polarity, replace batteries if necessary. Ensure illumination switch is ON. |
| చిత్రం అస్పష్టంగా లేదా అస్పష్టంగా ఉంది | Incorrect focus, wrong objective lens, dirty lens, or slide not properly placed. | Adjust focus knobs. Ensure objective lens is clicked into place. Clean lenses. Re-position slide. |
| Dark field of view | Objective lens not aligned, illumination too low, or aperture not open. | Rotate nosepiece until objective clicks into position. Check illumination. Adjust diaphragm/aperture. |
స్పెసిఫికేషన్లు
| మోడల్ పేరు | జూనియర్ మైక్రోస్కోప్ |
| మాగ్నిఫికేషన్ పరిధి | 40ఎక్స్ - 640ఎక్స్ |
| ప్రకాశం రకం | LED |
| మెటీరియల్ | ప్లాస్టిక్ |
| రంగు | ఎరుపు |
| ఉత్పత్తి కొలతలు (L x W x H) | 16 x 10 x 22 సెం.మీ |
| Viewing యాంగిల్ | 45 డిగ్రీలు |
| వాల్యూమ్tage | 4.5 Volts (3x AA Batteries) |
| అనుకూల పరికరాలు | Laptop, Smartphone (with adapter) |
వారంటీ మరియు మద్దతు
For warranty information, technical support, or service inquiries, please refer to the official Bresser webసైట్లో లేదా వారి కస్టమర్ సర్వీస్ విభాగాన్ని సంప్రదించండి. కొనుగోలు రుజువుగా మీ కొనుగోలు రసీదును ఉంచండి.
మీరు సందర్శించవచ్చు Bresser Store on Amazon మరింత సమాచారం కోసం.