SolaX Power X3 Three-Phase EPS Box Installation Guide

1. Introduction
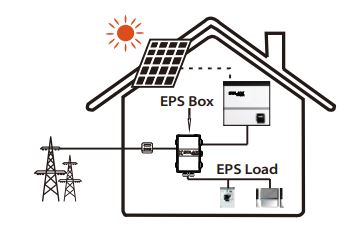 Three-phase EPS Box integrates two contactors which provide power steering for users. It is compatible with Three-phase EPS change-over application. Configured with Three-phase EPS Box, customers need to connect 13 wires to complete the steering circuit. It can simplify the operation and improve security.
2. Overview

3. Preparation
3.1 Packing List Checking
Before installation, make sure that nothing inside the package is damaged. The following items should be inside the package.

3.2 Tools
Before you start, get the following tools ready.

4. Mounting
Step 1:
Make sure the installation site does not expose to direct sunlight. Then install the four cushion blocks on Three-phase EPS Box with self-tapping screws.
Step 2:
Use Three-phase EPS Box with cushion blocks as a template to mark the four holes’ position on the wall with marker pen.
Step 3:
Drill holes with 6 driller carefully, make sure the holes are deep enough for installing. Install the expansion tubes through cushion blocks into the holes and tighten them.

Step 4:
Install the expansion screws with screwdriver to fix the Three-phase EPS Box.

5. Wiring Connection
5.1 Wires making

5.2 Grid-Wires Connection
Use the manual wrench to screw off the cap on cable nut, then insert Grid-L wires and Grid-N wires into the ports (L1,L2,L3,L4) of contactor A through the cable nut and tighten them with screwdriver.

Please prevent other wires from getting loose during operation.
5.3 EPS-Wires Connection
Screw off the cap on cable nut, then insert EPS-L wires and EPS-N wires into ports (L1,L2,L3,L4) of contactor B through the cable nut and tighten them with screwdriver.

5.4 Load-Wires Connection
Screw off the cap on cable nut, then insert Load-L wires and Load-N wires into ports ( T1, T2, T3, T4) of contactor C through the cable nut and tighten them with screwdriver.
5.5 Earth-Wire Connection
In EU, insert GND wire into port of contactor (B: L4) through the cable nut and tighten it with screwdriver. In AU, insert N wire into ports of contactor(A: L4&B: L4) .

5.6 Checking
Please make sure all wires are tightened. Wire connection in Three-phase EPS-Box.

Overview of Three-phase EPS Box

6. Technical Parameters

* : The output current will be reduced when the operating temperature exceeds 40. At 50, the output current drops to 95% . At 60,itdropsto80%.
Documents / Resources
 | SolaX Power X3 Three-Phase EPS Box [pdf] Installation Guide X3 Three-Phase EPS Box, Three-Phase EPS Box, Phase EPS Box, EPS Box, Box |