![]() CI4 AC
CI4 AC
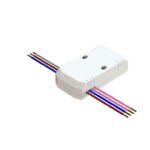
Casambi Input Controller 4C
installation guide
Important: Notice all safety instructions and related documents for Installation and operation. Names, brand marks, products or companies can be claimed. All rights are on their respective owners.
| Valid from Version | |||
| Type: | Item No. | Hard- | I Firmware |
| CI4 AC | 11. | H 1 | |
| Document: 10805_IN_de-en_CI4AC_20211221 | |||
 Fig. 1 – Icons functions |
Fig. 2 – Housing dimensions and installation |

 Fig. 3 – Block diagram
| L | Spannung 230V AC | 1 | Tasteingang 1 |
| N | Neutralleiter | 2 | Tasteingang 2 |
| N | Neutralleiter / COM | 3 | Tasteingang 3 |
| 4 | Tasteingang 4 |
 | 0,5…1,5mm² starr | single wire |
 | 0,5…1,5mm² flexibel | fine wire 0,5…0,75mm² flexibel mit Aderendhülse | fine wire with ferrule  |
 Fig. 4 – Screenshot „Add to my network“
 | Controls an element Light – meeting room | > |
| Cycle Scenes Up -stop -down -stop | > |
| Control Scene Main light 50% | > |
| Controls a luminaire CRD400 | > |
Controls what happens when a push button is used.
| Use toggle |  |
Tapping the button will switch the configured target between OFF and ON (100% or last dim level)
| INFORMATION | |
| Name | CI4 AC |
Fig. 5 – Screenshot „Configure switches (pushbuttons)“
Functions and features
See figure 1 – Icons functions
| Product | Item No. | Features | Construction design |
| CI4 AC | 10.805 | 4CH pushbutton inputs | Installation housing mini (INS|UP) |
Intended use
PushButton interface with 4 inputs for PushButtons connected to mains voltage potential to control 4 Casambi functions.
- Only approved for dry indoor use
- Mini installation housing for dry interiors for installation or mounting in walls, ceilings or other cavities
- Operation is only allowed on 1 phase
 | Further information and applicable documents http://qr.maintronic.de/10273de |
Installation
See figure 2 – Housing dimensions and connections![]() NOTE – Even if the device has tiny dimensions, a deep installation box (>60 mm) is highly recommended. Depending on which push-button is used, up to 30 mm of the available space must be deducted.
NOTE – Even if the device has tiny dimensions, a deep installation box (>60 mm) is highly recommended. Depending on which push-button is used, up to 30 mm of the available space must be deducted.
Connections – mains powered
See figure 3 – Block diagram![]() DANGER – All wiring and pushbuttons must be insulated for maximum supply voltage. Ensure the appropriate contact protection after installation. All pushbuttons of the well-known switch manufacturers are suitable. DO NOT connect mains (L) to COM/1/2/3/4. Ignoring leads to the destruction of the device.
DANGER – All wiring and pushbuttons must be insulated for maximum supply voltage. Ensure the appropriate contact protection after installation. All pushbuttons of the well-known switch manufacturers are suitable. DO NOT connect mains (L) to COM/1/2/3/4. Ignoring leads to the destruction of the device.
| L | Input Voltage 230V AC | 1 | PushButton input 1 |
| N | Neutral conductor | 2 | PushButton input 2 |
| N | Neutral conductor / COM | 3 | PushButton input 3 |
| 4 | PushButton input 4 |
Initial operation
5.1 Add to a Casambi network
See figure 4 – Screenshot „Add to my network“ First you need to add the device to a Casambi network. Therefore the following steps are required:
- Open the Casambi app and select a network
- Click on devices nearby
- Add found CI4 AC to a network
5.2 PushButton configuration in Casambi
See figure 5 – Screenshot „Configure switches (pushbuttons)“ As soon as the device is added into a Casambi network, the buttons can be configured with functions. Therefore the following steps are required:
- Open Casambi App and click on „… More“
- Open item „Switches“
- Select CI4 AC
- Now you can link the buttons with functions
![]() © 2021 – maintronic® GmbH reserve the right to make technical changes and product improvement without prior notice. Mistakes and typing errors are reserved. All rights reserved. MTC intronic GmbH Carl-Zeiss-Str. 10-14D-97424 Schweinfurt/Germany
© 2021 – maintronic® GmbH reserve the right to make technical changes and product improvement without prior notice. Mistakes and typing errors are reserved. All rights reserved. MTC intronic GmbH Carl-Zeiss-Str. 10-14D-97424 Schweinfurt/Germany
Tel: +49 (0)9721-7766-0
www.maintronic.de
support@maintronic.de
Documents / Resources
 | maintronic CI4 AC Casambi Input Controller 4CH [pdf] Installation Guide CI4 AC, Casambi Input Controller 4CH, Input Controller 4CH, CI4 AC, Controller 4CH |