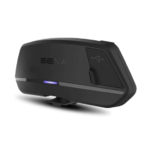
Fanvil A12 Audio Intercom

Product Information
Specifications
- Model: A12 Audio Intercom
- Version: V1.0
- Power Port: DC12V~24V/2A input
- Interface: Ethernet port (RJ45), USB port, Lineout port, Micro SD card slot
- Dimensions: 120mm x 47mm x 205mm
Product Usage Instructions
Mounting the A12 Audio Intercom
Wall-mounted installation
- Paste the mounting template of the wall-mounted bracket on the wall.
- Use an electric drill to make the corresponding hole position based on the template.
- Fix the sealing silicone ring on the back of A12 according to the hole position.
- Connect the power cables, network cables, and security interface cables.
- Place the A12 on the wall-mounted bracket.
- Power on the device and if it works normally, use screws to fix A12 to the bracket
Frequently Asked Questions (FAQ)
Q: What is the recommended SD card capacity for the Micro SD card slot?
A: The Micro SD card slot supports SD cards up to 256GB Capacity.
A12 Audio Intercom
Quick Installation Guide
Package contents

Physical specification
Dimensions 205 × 120 × 47 (mm)
- Dimensions

- Interface description


Installation diagram
A12 series intercom has two types of accessories: WM612 wall-mounted bracket and EX612 flush-mounted bracket. You need to select the corresponding installation accessories before installation.
The standard product comes with a WM612 wall-mounted bracket as the default installation accessory. If an EX612 flush-mounted bracket is needed, it must be purchased separately!
WM612 Wall-mounted bracket

EX612 Flush-mounted bracket
Wall-mounted installation
- Paste the mounting template of the wall-mounted bracket on the wall, and then use the electric drill to make the corresponding hole position.

- The white rubber plugged into the wall and the wall-mounted bracket fixed with screws to the wall.

- Fix the sealing silicone ring on the back of A12 according to the hole position.

- After connecting the power cables, network cables, and security interface cables, place the A12 on the wall-mounted bracket.

- Power on the device, If it works normally, then use the screws to fix A12 to the wall-mounted bracket, and the installation is complete.
Flush-mounted installation:
- Make a hole of the corresponding size on the wall (recommended size: the length range is 199-201mm, the width range is 114-116mm, the depth range is 20-25mm), and paste the mounting template of the flush-mounted bracket on the wall, and then use an electric drill to make the corresponding hole position.

- The white rubber plugged into the wall and the flush-mounted bracket fixed with screws to the wall, and insert the flush-mounted bracket cover plate stuck on the flush-mounted bracket.

- Fix the sealing silicone ring on the back of A12 according to the hole position.

- After connecting the power cables, network cables, and security interface cables, place the A12 on the flush-mounted bracket.

- Power on the device, If it works normally, then use the screws to fix A12 to the flushl-mounted bracket, and the installation is complete.
Searching IP address
There are two methods as shown below to search the device.
- Methods 1:
The default WAN mode is DHCP, querying the IP address with the Device Manager: Download link for Device Manager:
https://www.fanvil.com.cn/downfile.aspx?filepath=https://www.fanvil.com.cn/upload/files/firmware/tools/20230919/DeviceManager_1.0.6(Installation_free).tar.gz&filename=DeviceManager_1.0.6(Installation_free).tar.gz
- Method 2:
Press and hold the Call-Button for 3 seconds(after power-on for 30 seconds), and when the speaker beeps rapidly, press Call-Button again quickly, the beeps stop, the intercom will report the IP address by itself.
In addition, device provides the device surface Call-Button operation to switch IP address acquisition mode:
Press and hold the Call-Button for 3 seconds, and when the speaker beeps rapidly, and then press the Call-Button three times, after the success of the system automati-cally broadcast the current IP address.
Intercom configuration
- Step 1: Log in the WEB admin interface of the device
Input IP address (e.g.http://172.18.26.7) into address bar of PC’s web browser. The default user name and password are both admin. - Step 2: Add SIP account
【Line】>>【SIP】
Set SIP server address, port, username, password and SIP user with assigned SIP account parameters. Select click to take effect. - Step 3: Set the Intercom parameters
【Intercom Settings】>>【Media Settings】>>【Media Settings】>>Set the volume of the device >> Click 【Apply】to take effect.
Speakerphone Volume:Set the speaker output volume.
Handfree Mic Gain:Set the microphone volume. - Step 4: Set Call Button
- 【Call Button】>>【Call Button Settings】>> Set speed dial parameters for Call Buttons >> Click 【Apply】to take effect.
- Type: Memory Button.
- Value: The Call Button will dial to this Number 1.
- Line: Working line.
- Subtype: Speed Dial.
- Step 5: Set the security function
【Security Settings】>>【Input Settings 】/【Output Settings 】
Two short circuits input and output configuration, trigger ring, tamper detection configuration.
Documents / Resources
 | Fanvil A12 Audio Intercom [pdf] Installation Guide A12 Audio Intercom, A12, Audio Intercom, Intercom |