KALERM KLM1601
KALERM KLM1601 Automatic Coffee Maker User Manual
Model: KLM1601
1. Uvod
Thank you for choosing the KALERM KLM1601 Automatic Coffee Maker. This machine is designed to provide a variety of coffee beverages, including Americano, Cappuccino, Espresso, and Latte, with ease and convenience. This manual provides essential information for the safe and efficient operation, maintenance, and troubleshooting of your coffee maker. Please read it thoroughly before first use and keep it for future reference.
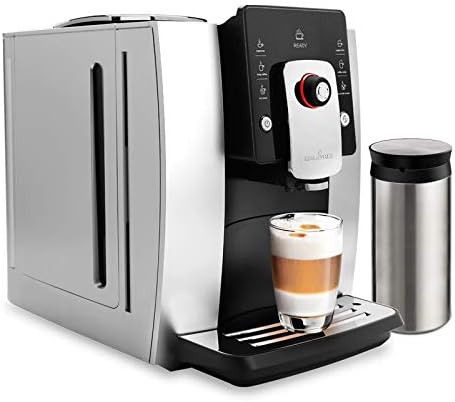
Image 1.1: The KALERM KLM1601 Automatic Coffee Maker, showcasing its sleek design, control panel, and a prepared latte in a glass, alongside a stainless steel milk container.
2. Pomembna varnostna navodila
- Pred uporabo aparata preberite vsa navodila.
- Naprave, napajalnega kabla ali vtiča ne potapljajte v vodo ali druge tekočine.
- Zagotovite voltagNapajanje, navedeno na napravi, se ujema z vašim lokalnim napajanjem.
- Aparat hranite izven dosega otrok.
- Izvlecite vtič iz vtičnice, ko ga ne uporabljate in pred čiščenjem.
- Ne uporabljajte nobene naprave s poškodovanim kablom ali vtičem ali po tem, ko naprava ne deluje pravilno ali je bila kakor koli poškodovana.
- Uporabljajte samo dodatke, ki jih priporoča proizvajalec.
- Ne uporabljajte na prostem.
- Izogibajte se stiku z vročimi površinami. Uporabljajte ročaje ali gumbe.
- Pred uporabo vedno preverite, ali je rezervoar za vodo napolnjen do ustrezne ravni.
- Pri ravnanju z vročimi tekočinami in paro bodite previdni.
3. Sestavni deli izdelka
Familiarize yourself with the main parts of your KALERM KLM1601 coffee maker.

Slika 3.1: Spredaj view of the coffee maker, highlighting the control panel with various beverage selection buttons and the central rotary knob. A glass with a layered latte is positioned on the drip tray.
- Nadzorna plošča: Intuitiven zaslon za izbiro napitkov in nastavitev.
- Izliv za kavo: Dispenses brewed coffee. Adjustable height (80-140 mm).
- Milk Frother/Steam Wand: Za pripravo napitkov na osnovi mleka.
- Rezervoar za vodo: Removable tank with 1.8L capacity.
- Posoda za fižol: Vsebuje do 250 g kavnih zrn.
- Predal za mleto kavo: For pre-ground coffee (e.g., decaffeinated).
- Pladenj za kapljanje: Zbira odvečno tekočino.
- Waste Coffee Container: Stores used coffee grounds (capacity: 15 servings).
- Thermoblocks: Two independent thermoblocks for water and steam.

Slika 3.2: Stran view of the coffee maker, clearly showing the transparent water tank on the left side, allowing for easy monitoring of the water level.
4. Začetna nastavitev
- Razpakiranje: Carefully remove the coffee maker and all accessories from the packaging. Retain packaging for future transport or service.
- Umestitev: Napravo postavite na stabilno, ravno in toplotno odporno površino, stran od virov vode in neposredne sončne svetlobe. Zagotovite zadostno prezračevanje okoli naprave.
- Čiščenje: Before first use, clean the water tank, drip tray, and waste coffee container with warm water and mild detergent. Rinse thoroughly.
- Polnjenje rezervoarja za vodo: Fill the water tank with fresh, cold drinking water up to the MAX level indicator. Insert the tank securely into the machine.
- Nadev za fižol: Odprite pokrov posode za kavo v zrnju in vanjo stresite sveža kavna zrna. Ne prenapolnite.
- Napajalni priključek: Plug the power cord into a grounded electrical outlet (127V - 50/60Hz).
- Cikel prve uporabe: Sledite navodilom na zaslonu za začetni cikel izpiranja. S tem se sistem napolni in očistijo notranje komponente.
5. Navodila za uporabo
5.1. Kuhanje kave
- Prepričajte se, da je rezervoar za vodo napolnjen in da so v posodi za kavo kavna zrna kavna zrna.
- Pod izpust kave postavite skodelico. Po potrebi prilagodite višino izpusta.
- Vklopite stroj z gumbom za vklop.
- Select your desired beverage (e.g., Espresso, Americano) from the control panel.
- Aparat bo samodejno zmlel zrna in skuhal kavo.
- To use pre-ground coffee, open the ground coffee compartment, add one scoop of pre-ground coffee, then select the pre-ground coffee option on the display before brewing.

Image 5.1: The coffee maker actively brewing a beverage into a cup, demonstrating the dispensing process. Coffee beans and bags are visible in the background.
5.2. Preparing Milk-Based Beverages (Cappuccino, Latte)
- Fill the included steel flask or a suitable milk container with cold milk.
- Position the milk frother tube into the milk container.
- Pod nastavek za kavo postavite skodelico.
- Select your desired milk-based beverage (e.g., Cappuccino, Latte) from the control panel.
- The machine will first brew the espresso, then automatically froth and dispense milk into your cup.
- After use, clean the milk frother system immediately to prevent milk residue buildup.
5.3. Točenje tople vode
- Pod dulec za vročo vodo postavite skodelico.
- Select the "Hot Water" option from the control panel.
- Aparat bo natočil vročo vodo za čaj ali druge vroče napitke.
6. Vzdrževanje in čiščenje
Redno čiščenje in vzdrževanje zagotavljata optimalno delovanje in dolgo življenjsko dobo vašega kavnega aparata.
6.1. Dnevno čiščenje
- Drip Tray and Waste Coffee Container: Empty and rinse daily. The machine will prompt you when the waste container needs emptying (after approximately 15 servings).
- Penilec mleka: After each use, run a quick rinse cycle for the milk frother to prevent blockages. Disassemble and clean thoroughly with warm water and mild detergent regularly.
- Zunanjost: Obrišite zunanje površine z mehko damp krpo. Ne uporabljajte abrazivnih čistil.
6.2. Weekly/Bi-Weekly Cleaning
- Rezervoar za vodo: Clean the water tank with warm water and mild detergent. Rinse thoroughly to remove any residue.
- Skupina za kuhanje: The machine features a self-cleaning function for the brew group. Follow the on-screen prompts for this cycle.
6.3. Odstranjevanje vodnega kamna
The machine will indicate when descaling is required. Use a descaling solution specifically designed for coffee machines and follow the instructions provided with the descaling agent and on the machine's display. Regular descaling prevents mineral buildup and maintains brewing performance. The machine records descaling cycles.
7. Odpravljanje težav
Če imate težave s kavnim aparatom, si oglejte spodnjo tabelo za pogoste težave in rešitve.
| Težava | Možen vzrok | rešitev |
|---|---|---|
| Kava se ne toči. | Water tank empty; brew group clogged; no coffee beans. | Fill water tank; perform a cleaning cycle; fill bean hopper. |
| Kava je prešibka/močna. | Napačna nastavitev mletja; nastavitev količine kave. | Adjust grinder fineness (5 levels available); adjust coffee strength setting on display. |
| Mleko se ne peni pravilno. | Milk frother clogged; milk too warm; incorrect milk type. | Clean milk frother thoroughly; use cold, fresh milk; try different milk types (e.g., whole milk). |
| Machine displays "Descale". | Kopičenje mineralov v sistemu. | Izvedite cikel odstranjevanja vodnega kamna, kot vas pozove aparat. |
| Stroj je hrupen. | Normal operation (grinding); air in the system. | This is normal during grinding. If persistent, run a hot water cycle to clear air. |
Če težava po poskusu teh rešitev še vedno obstaja, se obrnite na podporo strankam.
8. Tehnične specifikacije
| Funkcija | Specifikacija |
|---|---|
| Številka modela | KLM1601 |
| Znamka | KALERM |
| Moč | 1400 W |
| voltage | 127 V |
| Pogostost | 50/60 Hz |
| Tlak črpalke | 19 barov |
| Kapaciteta rezervoarja za vodo | 1.8 litra |
| Prostornina vsebnika za kavna zrna | 250 gramov |
| Waste Coffee Container Capacity | 15 porciji |
| Cup Height Adjustment | 80 - 140 mm |
| Dimenzije izdelka (Š x D x V) | 30.2 x 45 x 47.5 cm (približno) |
| Teža predmeta | 15.1 kg |
| Dolžina napajalnega kabla | 1.5 m |
| Mlinček za kavo | Integrated, 5 adjustment levels |
| Thermoblocks | Two (1 for water, 1 for steam) |
9. Garancija in podpora
For warranty information and technical support, please refer to the documentation provided with your purchase or contact KALERM customer service. Keep your proof of purchase for warranty claims.
Ask a question about this manual
Ask about setup, troubleshooting, compatibility, parts, safety, or missing instructions. Manuals+ will review the question and use this page’s manual context to help answer it.