1. Uvod
This manual provides essential information for the safe and efficient operation, maintenance, and troubleshooting of your Timbertech MNFS01 Wall Chaser. Please read these instructions carefully before using the tool and keep them for future reference. The Timbertech MNFS01 is a high-quality wall chaser designed for precise groove cutting in various masonry materials. It features a powerful 1700W motor, an integrated laser guide for accuracy, and adjustable settings for cutting depth and width.
2. Varnostna navodila
Vedno upoštevajte osnovne varnostne ukrepe, da zmanjšate tveganje požara, električnega udara in telesnih poškodb. Neupoštevanje teh navodil lahko povzroči resne poškodbe ali materialno škodo.
- Preberite vsa navodila: Familiarize yourself with the tool's controls and proper operation.
- Nosite osebno zaščitno opremo (OZO): Always wear safety glasses, hearing protection, a dust mask, and heavy-duty gloves when operating the wall chaser.
- Zavarujte obdelovanec: Ensure the material being cut is stable and securely clampza preprečevanje premikanja med delovanjem.
- Vzdržujte čisto delovno območje: Cluttered areas invite accidents. Keep your work area well-lit and free of debris.
- Izogibajte se nevarnim okoljem: Ne uporabljajte električnega orodja v damp or wet locations, or expose them to rain. Keep the work area well-ventilated.
- Prevent Accidental Starting: Preden orodje priključite v vtičnico, se prepričajte, da je stikalo v položaju IZKLOP.
- Uporabite pravo orodje: Ne silite orodja; uporabite pravilno orodje za vašo nalogo.
- Odklop napajanja: Pred kakršnimi koli nastavitvami, menjavo pribora ali shranjevanjem orodja vedno izključite orodje iz vira napajanja.
- Preverite poškodovane dele: Before use, inspect the tool for any damaged parts. Ensure all guards and safety features are in working order.
- Odsesavanje prahu: Always connect the dust extraction adapter to a suitable vacuum cleaner to minimize dust exposure.
3. Vsebina paketa
Your Timbertech MNFS01 Wall Chaser package includes the following items:
- 1 x Wall Chaser with Laser
- 1 x torbica
- 2 x Diamond Cutting Discs (Ø 150mm)
- 1 x Groove Chisel
- 1 x ključ za ključe
- 1 x Dust Extractor Adapter
- 1 x Navodila za uporabo

Figure 1: The Timbertech MNFS01 Wall Chaser shown with its main components and included accessories, such as diamond discs, wrenches, and the dust extraction adapter, all neatly arranged.
4. Tehnične specifikacije
| Funkcija | Specifikacija |
|---|---|
| voltage | 230 V - 240 V ~50 Hz |
| Poraba energije | 1700 W |
| Zaščitni razred | II |
| Hitrost | 4000 min-1 (RPM) |
| Premer rezalne plošče | 150 mm |
| Bore Capacity | 22.2 mm |
| Groove Depth | Pribl. 10 – 40 mm |
| Širina utora | Approx. 14, 19, and 26 mm |
| Laserska valovna dolžina | 650 nm |
| Laserska izhodna moč | 1 mW |
| Laser Divergence Angle | 1.5 mrad |
| Teža | 7.91 kg |
| Dimenzije (paket) | 39.1 x 37.79 x 23.4 cm |
5. Nastavitev in montaža
5.1 Installing Diamond Discs
To install the diamond cutting discs:
- Prepričajte se, da je orodje izklopljeno iz vira napajanja.
- Odprite zaščitni pokrov.
- Place the first diamond disc onto the spindle, ensuring the rotation arrow on the disc matches the arrow on the tool.
- Add the appropriate spacers to achieve the desired cutting width (14mm, 19mm, or 26mm).
- Place the second diamond disc, again matching the rotation arrow.
- Secure the discs and spacers with the flange and nut, tightening with the provided spanner wrench.
- Zaščitni pokrov tesno zaprite.
Video 1: Detailed instructions on how to correctly install the diamond cutting discs and spacers into the wall chaser for various groove widths.

Slika 2: Bližnji posnetek view of the diamond cutting discs and the various spacers used to adjust the groove width, illustrating the different size options available.
5.2 Attaching Dust Extraction Adapter
For a cleaner work environment and to reduce dust exposure, attach the dust extraction adapter to a suitable vacuum cleaner.
- Locate the dust extraction port on the wall chaser.
- Securely attach the provided dust extractor adapter to this port.
- Connect a vacuum cleaner hose to the adapter.

Figure 3: The dust extraction adapter is shown connected to the wall chaser, ready to be attached to a vacuum cleaner for effective dust management during operation.
6. Navodila za uporabo
6.1 Adjusting Cutting Depth and Width
The wall chaser allows for precise adjustment of both cutting depth and width:
- Prilagoditev globine: Use the depth adjustment screw to set the desired cutting depth between 10mm and 40mm. Refer to the markings on the tool for accurate setting.
- Prilagoditev širine: Adjust the groove width by adding or removing spacers between the diamond discs during installation. Available widths are 14mm, 19mm, and 26mm.

Slika 4: Podroben view of the wall chaser highlighting the depth adjustment mechanism, showing the screw and scale for precise control over cutting depth.
6.2 Uporaba laserskega vodila
The integrated laser guide assists in achieving straight and accurate cuts:
- Locate the laser ON/OFF button on the tool.
- Press the button to activate the laser line, which will project onto your workpiece.
- Align the laser line with your marked cutting path for precise guidance.
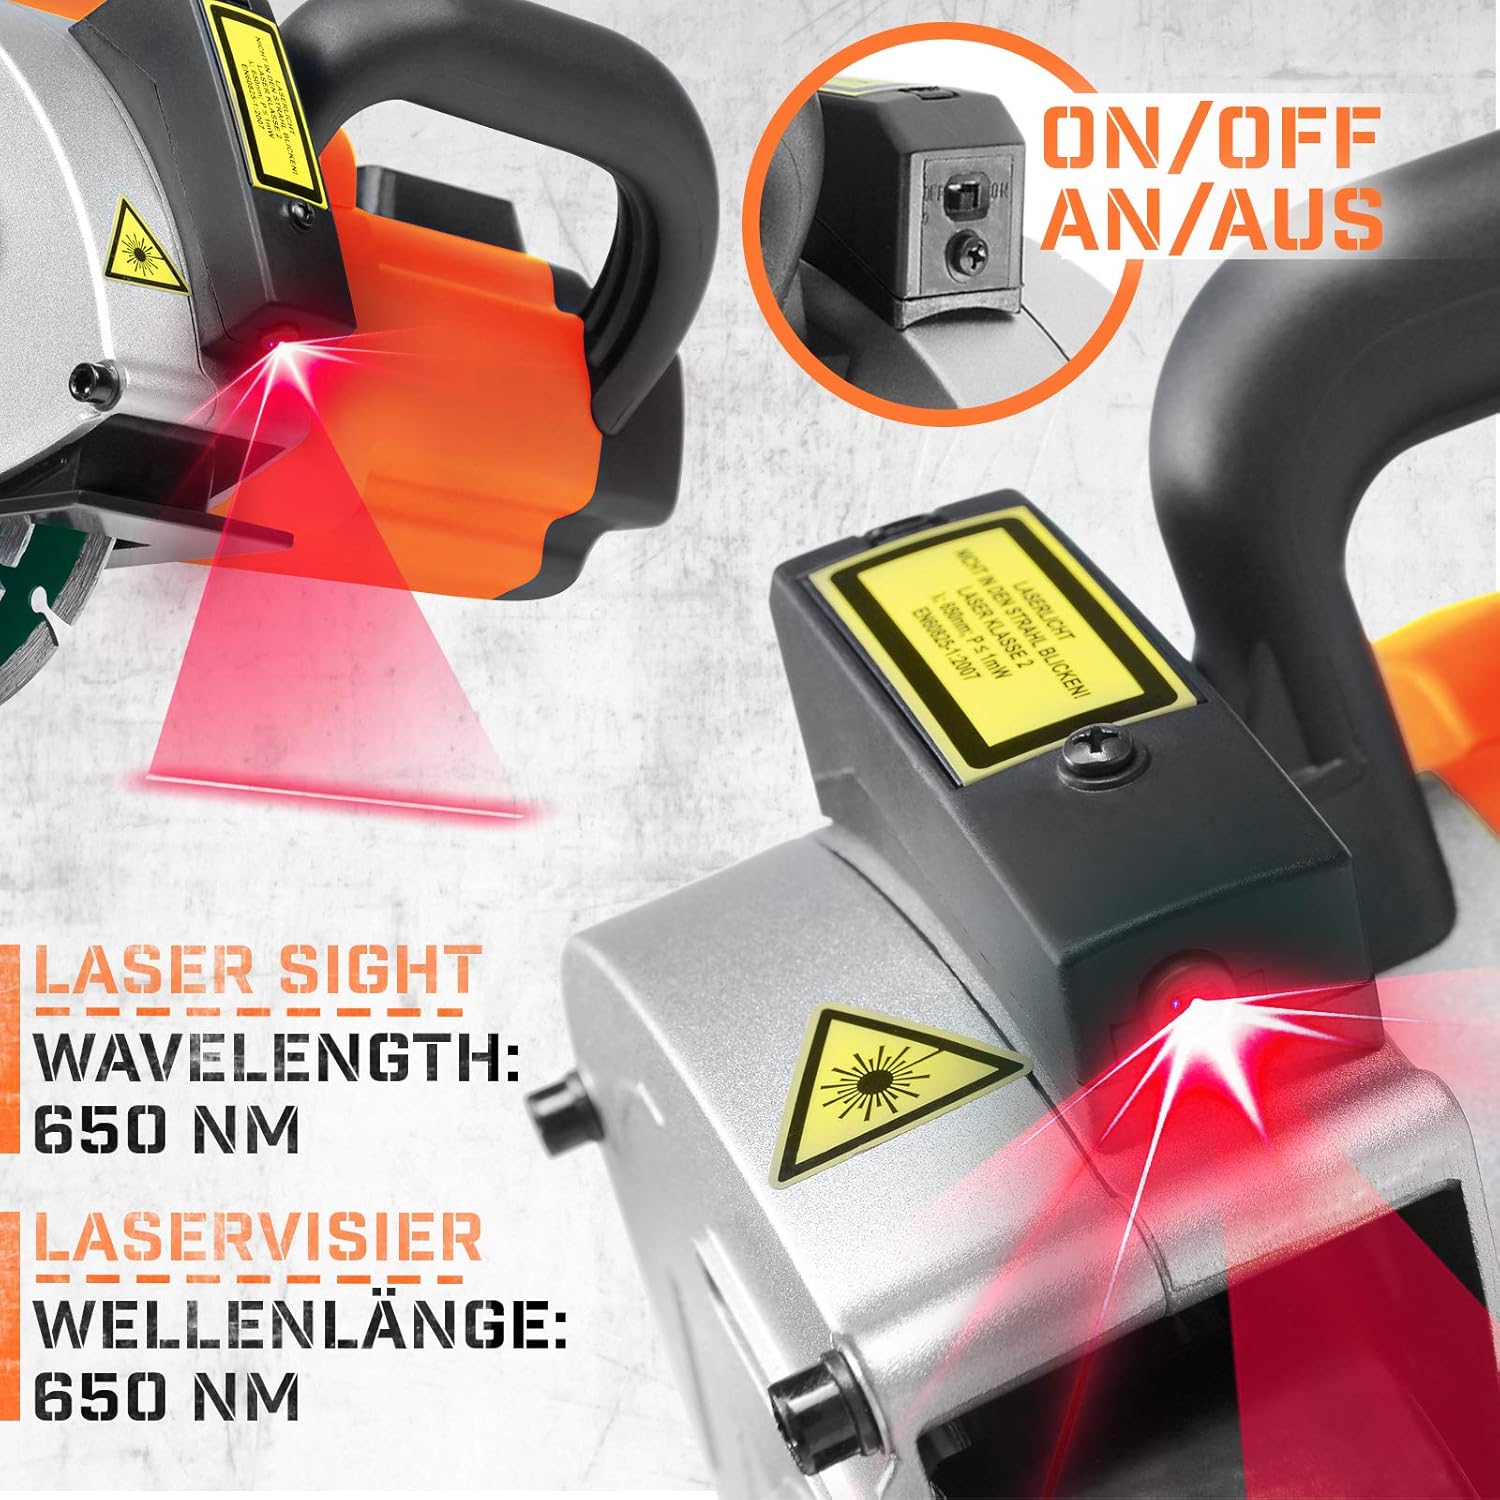
Figure 5: A close-up image of the wall chaser's laser sight, showing the laser beam projecting a guide line for accurate cutting.
6.3 Splošni nasveti za uporabo
- Funkcija mehkega zagona: The tool is equipped with a soft start function to prevent sudden jolts upon startup, ensuring smoother operation and extending motor life.
- Zaščita pred preobremenitvijo: An integrated overload protection system will automatically shut down the tool if it detects excessive load, preventing damage to the motor. Allow the tool to cool down before resuming operation.
- Working Direction: Always pull the wall chaser towards you or push it downwards along the marked line for optimal control and safety.
Video 2: Demonstration of the FERM WSM1008 Wall Slotter (similar to MNFS01) in operation, showing how to make precise cuts in a wall.
Video 3: An operational video showcasing the wall chaser in action, demonstrating its effectiveness in creating grooves for various applications.
7. Vzdrževanje in nega
Regular maintenance ensures the longevity and optimal performance of your wall chaser.
- Čiščenje: After each use, clean the tool thoroughly. Remove any dust and debris from the ventilation slots and the protective cover. Use a soft brush or compressed air.
- Pregled rezila: Regularly inspect the diamond cutting discs for wear or damage. Replace worn or chipped discs immediately to maintain cutting efficiency and safety.
- Pregled kabla: Check the power cable for any signs of damage, cuts, or fraying. Do not use the tool if the cable is damaged.
- Shranjevanje: Store the wall chaser in its carrying case in a dry, secure place, out of reach of children.
8. Odpravljanje pogostih težav
If you encounter problems with your wall chaser, refer to the following troubleshooting guide:
- Orodje se ne zažene:
- Preverite, ali je napajalni kabel varno priključen v delujočo vtičnico.
- Verify that the ON/OFF switch is fully engaged.
- Preverite, ali so se sprožila stikala ali pregorele varovalke.
- Zmanjšana zmogljivost rezanja:
- Inspect diamond discs for wear or damage. Replace if necessary.
- Ensure the cutting depth and width settings are appropriate for the material.
- Prekomerna količina prahu:
- Ensure the dust extraction adapter is properly connected to a functional vacuum cleaner.
- Check if the vacuum cleaner bag is full or the filter is clogged.
- Tool Shuts Off During Operation:
- This may indicate the overload protection has activated. Reduce pressure on the tool and allow it to cool down.
- Check for blockages around the cutting discs.
9. Garancija in podpora strankam
For warranty information, service, or technical support, please refer to the contact details provided in your product packaging or visit the official Timbertech webspletnega mesta. Račun shranite kot dokazilo o nakupu za morebitne garancijske zahtevke.