
1. تعارف
Welcome to the HyperX Armada 25 Gaming Monitor user manual. This document provides essential information for setting up, operating, maintaining, and troubleshooting your new monitor. The HyperX Armada 25 is designed for competitive gaming, featuring a 24.5-inch Full HD (1920x1080) IPS panel, a 240Hz refresh rate, and a 1ms response time, ensuring smooth and responsive visuals. It also includes NVIDIA G-SYNC compatibility to eliminate screen tearing and minimize input latency. A desk mount is included for convenient setup and to maximize desk space.
اهم خاصيتون:
- آل-ان-ون پيڪيج: Includes an ergonomic arm and desk mount for easy setup and space-saving.
- هاءِ ريفريش ريٽ ۽ جوابي وقت: 240Hz refresh rate and 1ms response time for ultra-smooth gaming.
- Vibrant IPS Panel: 24.5-inch Full HD (1920x1080) IPS panel delivers stunning visuals with accurate colors and wide viewing angles.
- NVIDIA G-SYNC مطابقت رکندڙ: Eliminates screen tearing and reduces stuttering for a fluid gaming experience.

سرڪاري پراڊڪٽ وڊيو:
2. سيٽ اپ
This section guides you through the initial setup of your HyperX Armada 25 Gaming Monitor, including assembly and connection to your computer.
2.1. Assembling the Desk Mount
The HyperX Armada 25 comes with an integrated ergonomic desk mount. Follow the instructions provided in the separate quick start guide for detailed assembly steps. The monitor head easily snaps into the arm, allowing for quick and secure installation.

2.2. مانيٽر کي ڳنڍڻ
Connect the monitor to your computer using the appropriate cables. The HyperX Armada 25 supports both HDMI and DisplayPort connections.
- Connect one end of the HDMI or DisplayPort cable to the corresponding port on your computer's graphics card.
- Connect the other end of the cable to an available HDMI 2.0 or DisplayPort 1.4 port on the back of your monitor.
- پاور ڪنڊ کي مانيٽر سان ڳنڍيو ۽ پوءِ پاور آئوٽليٽ سان.
- مانيٽر تي پاور بٽڻ د Pressايو ان کي آن ڪرڻ لاءِ.

3. مانيٽر کي هلائڻ
This section covers basic operation and navigation of the monitor's On-Screen Display (OSD) menu.
3.1. آن اسڪرين ڊسپلي (او ايس ڊي) نيويگيشن
The OSD menu is controlled using a joystick located on the back of the monitor. This joystick allows you to power on/off the monitor and navigate through various settings.
- جوائس اسٽڪ کي دٻايو: او ايس ڊي مينيو کولڻ يا چونڊ جي تصديق ڪرڻ لاءِ.
- جوائس اسٽڪ کي مٿي/هيٺ/کاٻي/ساڄي منتقل ڪريو: To navigate through menu options and adjust settings.
- Hold the joystick: To power off the monitor.

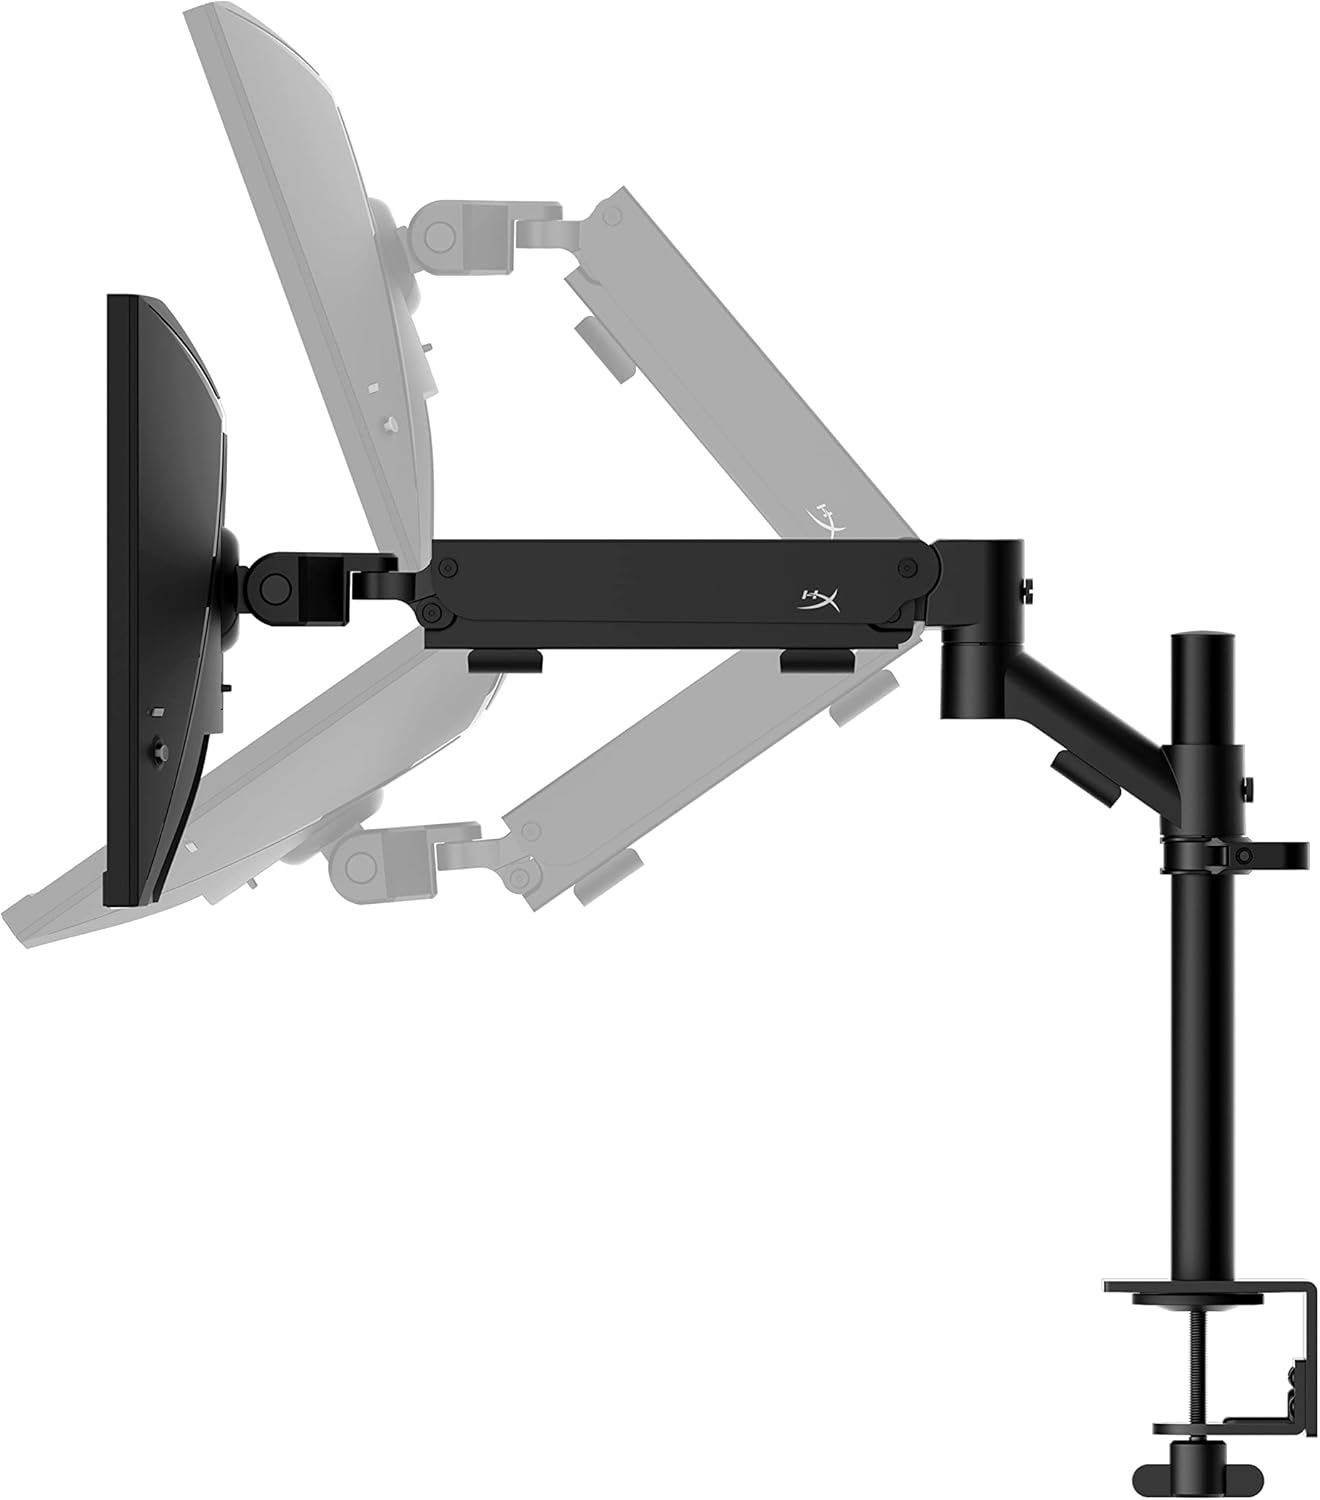
3.2. مانيٽر جي پوزيشن کي ترتيب ڏيڻ
The ergonomic desk mount allows for flexible positioning of your monitor. You can adjust the height, tilt, swivel, and pivot to find your optimal viewزاويه.

4. سار سنڀال
Proper maintenance ensures the longevity and optimal performance of your HyperX Armada 25 Gaming Monitor.
- اسڪرين جي صفائي: استعمال ڪريو نرم، lint-آزاد ڪپڙو روشنيءَ سان ڊيampened with water or a specialized screen cleaner. Avoid using harsh chemicals, abrasive materials, or direct spraying onto the screen.
- سي جي صفائيasing: مانيٽر صاف ڪريو casing نرم، سڪل ڪپڙي سان.
- وينٽيليشن: پڪ ڪريو ته مانيٽر جي وينٽيليشن جا سوراخ بند نه آهن ته جيئن وڌيڪ گرم ٿيڻ کان بچي سگهجي.
- پاور آف جڏهن استعمال ۾ نه هجي: جڏهن مانيٽر ڊگهي عرصي تائين استعمال ۾ نه هجي ته توانائي بچائڻ ۽ ان جي عمر وڌائڻ لاءِ ان کي بند ڪريو.
5. مسئلا حل ڪرڻ
جيڪڏهن توهان کي پنهنجي مانيٽر سان مسئلا درپيش اچن ٿا، ته هيٺ ڏنل عام مسئلا حل ڪرڻ واري قدمن جو حوالو ڏيو.
- طاقت ناهي:
- چيڪ ڪريو ته پاور ڪيبل محفوظ طور تي ٻنهي مانيٽر ۽ پاور آئوٽ سان ڳنڍيل آهي.
- پڪ ڪريو ته پاور آئوٽليٽ صحيح طريقي سان ڪم ڪري رهيو آهي.
- مانيٽر تي پاور بٽڻ کي دٻايو.
- ڪوبه سگنل:
- Verify that the HDMI or DisplayPort cable is securely connected to both the monitor and your computer.
- پڪ ڪريو ته توهان جو ڪمپيوٽر آن آهي ۽ سليپ موڊ ۾ نه آهي.
- او ايس ڊي مينيو استعمال ڪندي صحيح ان پٽ سورس چونڊيو.
- Flickering Screen or Image Issues:
- Check the display cable for damage or loose connections.
- پڪ ڪريو ته توهان جا گرافڪس ڪارڊ ڊرائيور اپ ٽو ڊيٽ آهن.
- پنهنجي ڪمپيوٽر جي ڊسپلي سيٽنگز ۾ ريفريش ريٽ کي ترتيب ڏيو.
- If G-SYNC is enabled, try disabling it temporarily to see if the issue persists.
- Buttons Not Responding (OSD Joystick):
- پڪ ڪريو ته مانيٽر فعال آهي.
- Try restarting the monitor by unplugging and replugging the power cable.
- Clean around the joystick to ensure no debris is obstructing its movement.
6. وضاحتون
Detailed technical specifications for the HyperX Armada 25 Gaming Monitor.
| خاصيت | تفصيل |
|---|---|
| پيداوار جي ماپ | 21.94 x 25.79 x 31.12 انچ؛ 16.98 پائونڊ |
| شيون ماڊل نمبر | HyperX Armada 25 |
| تاريخ پهرين دستياب | آگسٽ 24، 2022 |
| ٺاهيندڙ | HP Inc. |
| ASIN | B0B2C1G356 |
| ڊسپلي سائيز | 24.5-انچ ڊاگونل |
| قرارداد | FHD (1920x1080) |
| ريفريش جي شرح | 240Hz |
| پينل جو قسم | پي ايس ايس پينل |
| جوابي وقت | 1ms |
| هم وقت سازي جي ٽيڪنالاجي | NVIDIA® G-SYNC® مطابقت رکندڙ |
| Included Mount | Desk Mount Included |
| رابطي | HDMI and Display Port |
7. وارنٽي ۽ سپورٽ
For warranty information, technical support, or to access additional resources, please visit the official HyperX webسائيٽ يا انهن جي ڪسٽمر سروس سان رابطو ڪريو.
- Official HyperX Webسائيٽ: www.hyperx.com
- پراڊڪٽ سپورٽ صفحو: Refer to the support section on the HyperX webتوهان جي مخصوص ماڊل لاءِ سائيٽ.