
1. Introduction
This manual provides essential instructions for the safe and efficient operation and maintenance of your VEVOR 4.8 CFM Single-Stage Vacuum Pump with Manifold Gauge Kit. Please read this manual thoroughly before operating the equipment and retain it for future reference. This kit is designed for evacuating air conditioning and refrigeration systems.
2. Important Safety Instructions
To prevent personal injury or damage to the equipment, always observe the following safety precautions:
- Always wear appropriate personal protective equipment (PPE), including safety glasses and gloves, when operating or maintaining the pump.
- Ensure the work area is well-ventilated to prevent the accumulation of refrigerant vapors.
- Do not operate the pump near flammable liquids or gases.
- Disconnect the power supply before performing any maintenance, cleaning, or when the pump is not in use.
- Handle refrigerants with extreme care. Direct contact can cause frostbite or other injuries.
- Ensure all connections are secure and leak-free before starting the pump.
- Do not use the pump for purposes other than those specified in this manual.
- Keep children and unauthorized personnel away from the operating equipment.
- Use only VEVOR-approved replacement parts and accessories.
3. Product Overview
3.1 Components
The VEVOR 4.8 CFM Single-Stage Vacuum Pump kit includes the following main components:
- Vacuum Pump Unit: A 1/3 HP single-stage rotary vane pump designed for efficient evacuation.
- Manifold Gauge Set: Features high and low-pressure gauges for monitoring system pressures, with corresponding connections and an exhaust vent.
- Color-Coded Hoses: Three durable hoses (red, yellow, blue) for connecting the manifold gauge to the system and vacuum pump.
- Carrying Case: A robust case for convenient storage and transport of the manifold gauge, hoses, and accessories.

This image displays the complete VEVOR vacuum pump kit, including the pump unit, manifold gauge set, hoses, and a protective carrying case.
3.2 Key Features
- High-Quality Construction: Features a robust die-cast aluminum housing and a shock-proof, wear-proof composite rubber base for durability and reduced vibration.
- Efficient Motor: Equipped with an upgraded strong copper motor for stable and reliable operation.
- Oil Sight Window: Allows for easy monitoring of the oil level to prevent lubricant shortage.
- Enlarged Heat-sink Holes: Designed for rapid heat dissipation, ensuring prolonged pump life and stable performance.
- Precise Manifold Gauges: High-quality dual-pressure gauges provide accurate readings for effective system maintenance.

A detailed view highlighting the internal copper motor for stable operation, the robust die-cast aluminum housing for durability, and the shock-proof, wear-proof composite rubber base for stability and noise reduction.
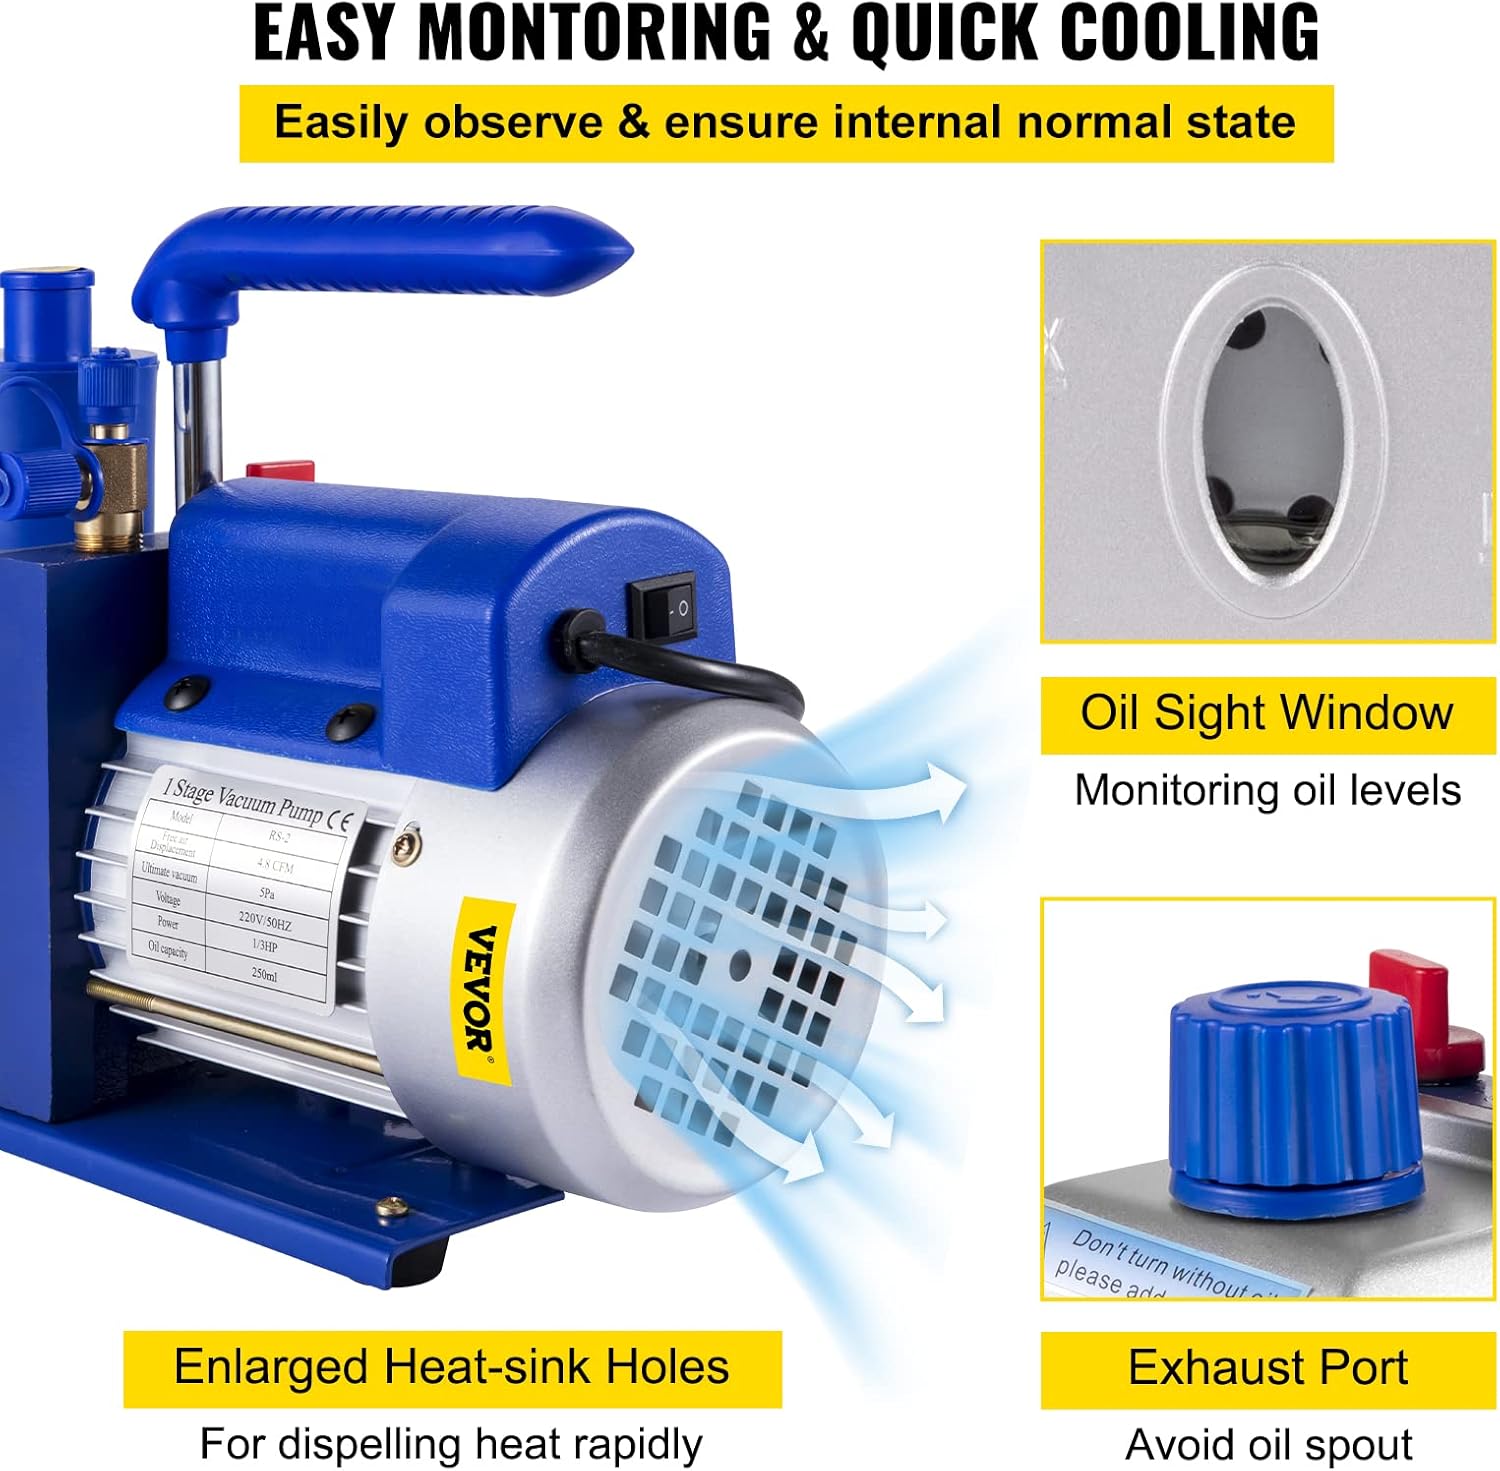
This image highlights the oil sight window for monitoring oil levels and the enlarged heat-sink holes designed for rapid heat dissipation, ensuring efficient and safe operation.

This image provides a close-up of the manifold gauge, showing the low pressure gauge, high pressure gauge, low pressure connection, high pressure connection, and exhaust vent. It also includes a diagram illustrating how to connect the manifold gauge to a vacuum pump and an automotive system.

This image displays the wear-proof, breakage-proof, flexible, and durable color-coded hoses (red, yellow, blue) and demonstrates their connection to the manifold gauge and an air conditioning unit.
4. Specifications
| Specification | Value |
|---|---|
| Model | px55dv (RS-2 on label) |
| Free Air Displacement (FAD) | 4.8 CFM (136 L/min) |
| Stages | 1-Stage |
| Power | 1/3 HP |
| Ultimate Vacuum | 5 Pa |
| Voltage | 220V/50Hz |
| Oil Capacity | 250 ml |
| Product Dimensions (L x W x H) | 40.89 x 33.02 x 29.97 cm |
| Item Weight | 9.98 kg |

A close-up of the vacuum pump's side label, detailing important specifications such as Model (RS-2), Free Air Displacement (4.8 CFM), Ultimate Vacuum (5 Pa), Voltage (220V/50Hz), Power (1/3 HP), and Oil Capacity (250ml).
5. Setup
5.1 Unpacking
- Carefully remove all components from the packaging.
- Inspect the pump and accessories for any signs of damage during transit. If damage is found, do not operate the unit and contact customer support.
- Ensure all listed components are present.
5.2 Adding Vacuum Pump Oil
The vacuum pump is shipped without oil. It is crucial to add vacuum pump oil before first use.
- Locate the oil fill port on the top of the pump (usually marked 'OIL FILL' or similar).
- Remove the oil fill cap.
- Slowly pour appropriate vacuum pump oil into the fill port until the oil level is between the 'MIN' and 'MAX' marks on the oil sight window. Do not overfill. The oil capacity is approximately 250 ml.
- Replace the oil fill cap securely.
5.3 Connecting the Manifold Gauge and Hoses
- Connect the yellow hose to the vacuum pump's inlet port.
- Connect the other end of the yellow hose to the service port (usually the center port) of the manifold gauge.
- Connect the blue hose to the low-pressure side of the manifold gauge.
- Connect the red hose to the high-pressure side of the manifold gauge.
- Ensure all connections are finger-tight, then use a wrench to slightly tighten them to prevent leaks.
6. Operating Instructions
6.1 General Operation
- Ensure the vacuum pump is placed on a stable, level surface.
- Verify the oil level is correct in the oil sight window.
- Connect the power cord to a suitable electrical outlet (220V/50Hz).
- Turn on the power switch. The pump should start running smoothly.
- Allow the pump to run for a few minutes to warm up and circulate the oil.
6.2 Evacuating an AC or Refrigeration System
This procedure outlines a typical evacuation process. Always refer to the specific service manual for the system you are working on.
- Connect the blue hose from the manifold gauge to the low-pressure service port of the AC/refrigeration system.
- Connect the red hose from the manifold gauge to the high-pressure service port of the AC/refrigeration system.
- Ensure the manifold gauge valves (high and low side) are closed.
- Start the vacuum pump.
- Slowly open both the high and low-pressure valves on the manifold gauge.
- Monitor the vacuum gauge. Allow the pump to run until the desired vacuum level is reached (typically 500 microns or lower, depending on system requirements). This may take some time.
- Once the desired vacuum is achieved, close both the high and low-pressure valves on the manifold gauge.
- Turn off the vacuum pump.
- Observe the vacuum gauge for a period (e.g., 15-30 minutes) to ensure the system holds the vacuum, indicating no leaks.
- After confirming no leaks, disconnect the hoses from the system and the vacuum pump.

This image illustrates the VEVOR vacuum pump and manifold gauge set connected to both an automotive air conditioning system and a residential AC unit, demonstrating its practical application.
7. Maintenance
Regular maintenance ensures the longevity and optimal performance of your vacuum pump.
7.1 Checking Oil Level
Check the oil level before each use. The oil should be clear and between the 'MIN' and 'MAX' marks on the oil sight window. If the oil appears cloudy or discolored, it needs to be changed.
7.2 Changing Vacuum Pump Oil
Change the vacuum pump oil regularly, especially after evacuating systems with high moisture content or after prolonged use. Dirty oil reduces pump efficiency and can cause damage.
- Ensure the pump is turned off and disconnected from the power supply.
- Place a suitable container under the oil drain plug (located at the bottom of the oil reservoir).
- Remove the oil drain plug and the oil fill cap to allow the old oil to drain completely.
- Replace the oil drain plug securely.
- Add new, clean vacuum pump oil through the oil fill port until the level is between the 'MIN' and 'MAX' marks on the sight window.
- Replace the oil fill cap.
- Dispose of used oil responsibly according to local regulations.
7.3 Cleaning and Storage
- Wipe down the exterior of the pump with a clean, damp cloth. Do not use harsh chemicals or solvents.
- Store the pump in a clean, dry environment, preferably in its original carrying case, to protect it from dust and damage.
- Ensure all hoses and gauges are clean and properly stored.
8. Troubleshooting
Refer to the table below for common issues and their potential solutions.
| Problem | Possible Cause | Solution |
|---|---|---|
| Pump does not start | No power supply Faulty power switch Motor overload protection activated | Check power connection and outlet Contact qualified technician Allow pump to cool down, then restart |
| Pump not reaching desired vacuum | System leak Dirty or low oil level Contaminated oil Hose connections loose | Check system for leaks Add oil or change oil Change oil Tighten all hose connections |
| Excessive noise or vibration | Low oil level Pump not on a stable surface Internal mechanical issue | Check and add oil Place pump on a firm, level surface Contact qualified technician |
| Oil appears milky or cloudy | Moisture contamination in oil | Change oil immediately and ensure system is dry before next use |
9. Warranty and Support
For warranty information, technical support, or to inquire about replacement parts, please refer to the warranty card included with your product or contact VEVOR customer service directly. Keep your purchase receipt as proof of purchase.


