1. Введение
This manual provides detailed instructions for setting up, operating, and maintaining your AOOSTAR MACO AMD Ryzen 7 H255 Mini PC. Please read this manual thoroughly before using the device to ensure proper functionality and safety. The AOOSTAR MACO Mini PC is designed for high performance, featuring an AMD Ryzen 7 H255 processor, Radeon 780M graphics, and extensive connectivity options.
2. Содержимое упаковки
Убедитесь, что в вашей посылке присутствуют все перечисленные ниже предметы:
- 1 x AOOSTAR MACO AMD Ryzen 7 H255 Mini PC
- 1 x SSD Cooling Pad
- 1 x 120W 19V 6.32A Type-C Power Supply
3. Продукт закончилсяview
The AOOSTAR MACO Mini PC is a compact yet powerful computing solution. Below are key features and an overview of its components and ports.
3.1 Основные характеристики
- Процессор: AMD Ryzen 7 H255 (8-core, 16-thread, up to 4.9 GHz) with Zen 4 architecture and 4nm process.
- Графика: Integrated Radeon 780M graphics (RDNA 3 architecture).
- Память: Dual-channel DDR5 5600MHz (expandable up to 128GB).
- Хранилище: Dual-channel M.2 2280 NVMe PCIe4.0x4 SSD (expandable up to 8TB).
- Безопасность: One-touch fingerprint unlock for secure access.
- Поддержка дисплея: Supports up to four 4K displays simultaneously.
- Связь: OCuLink, Dual USB4, USB 3.2 Gen2, USB 3.0, HDMI, DisplayPort, Dual 2.5G LAN, Wi-Fi 6.
3.2 Внешние компоненты и порты
Familiarize yourself with the various ports and components of your Mini PC.
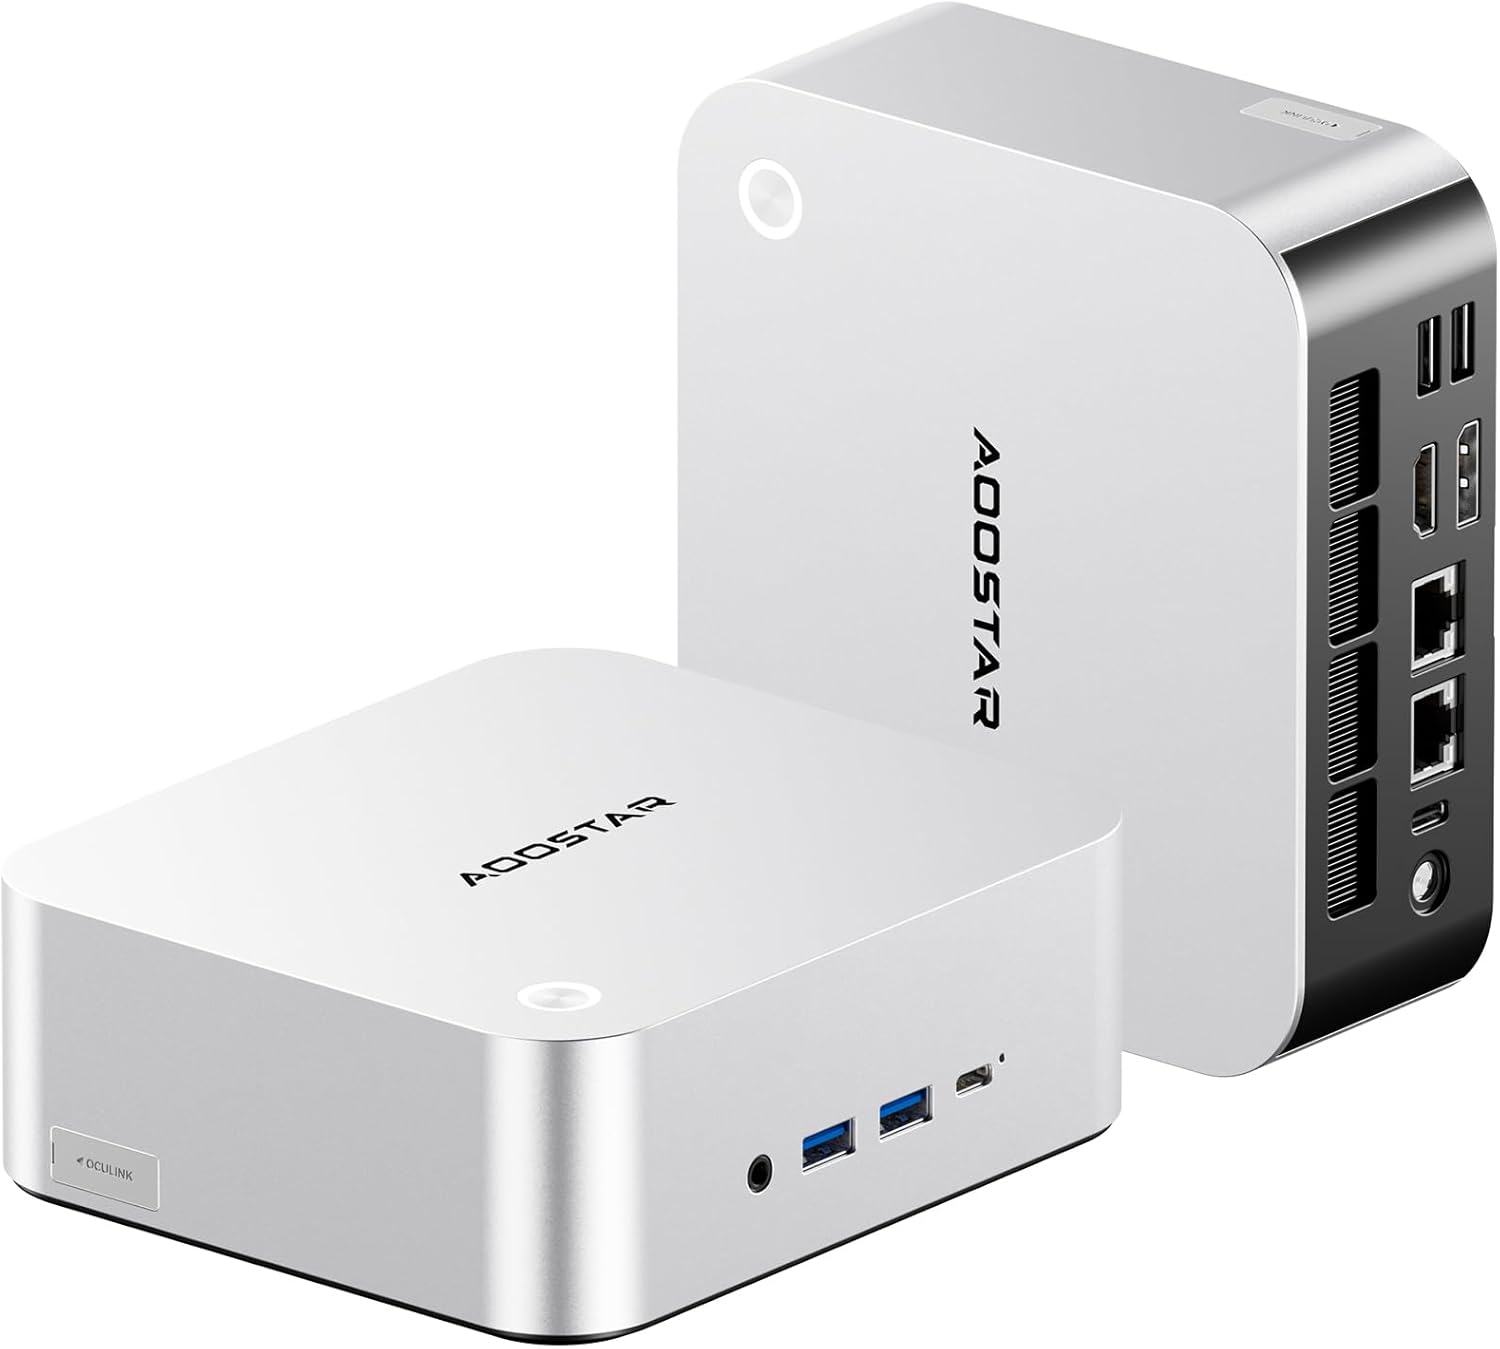
Изображение: спереди и сзади view of the AOOSTAR MACO Mini PC, showcasinг его компактный дизайн и множество портов.

Изображение: подробное view of the AOOSTAR MACO Mini PC's rear ports, including OCuLink, USB4, USB 3.2 Gen2, HDMI, DisplayPort, and Dual 2.5G LAN ports.
- Передняя панель: Power button with fingerprint sensor, USB ports.
- Задняя панель: OCuLink port (1), USB4 ports (2), USB 3.2 Gen2 ports (2), USB 3.0 ports (2), HDMI port (1), DisplayPort (1), 2.5G LAN ports (2), DC power input (1), Audio Jack (1).

Image: Close-up of the one-touch fingerprint sensor on the AOOSTAR MACO Mini PC for secure login.

Image: Visual representation of the AMD Ryzen 7 H255 processor, highlighting its core count, turbo frequency, and architecture.

Изображение: внутреннее view showing the dual DDR5 memory slots and dual M.2 PCIe 4.0 SSD slots for high-speed storage and memory.

Image: The OCuLink port connected to an external GPU enclosure, demonstrating its use for enhanced graphics performance.

Image: Two AOOSTAR MACO Mini PCs side-by-side, highlighting the dual USB4 ports for high-speed data transfer and power delivery.
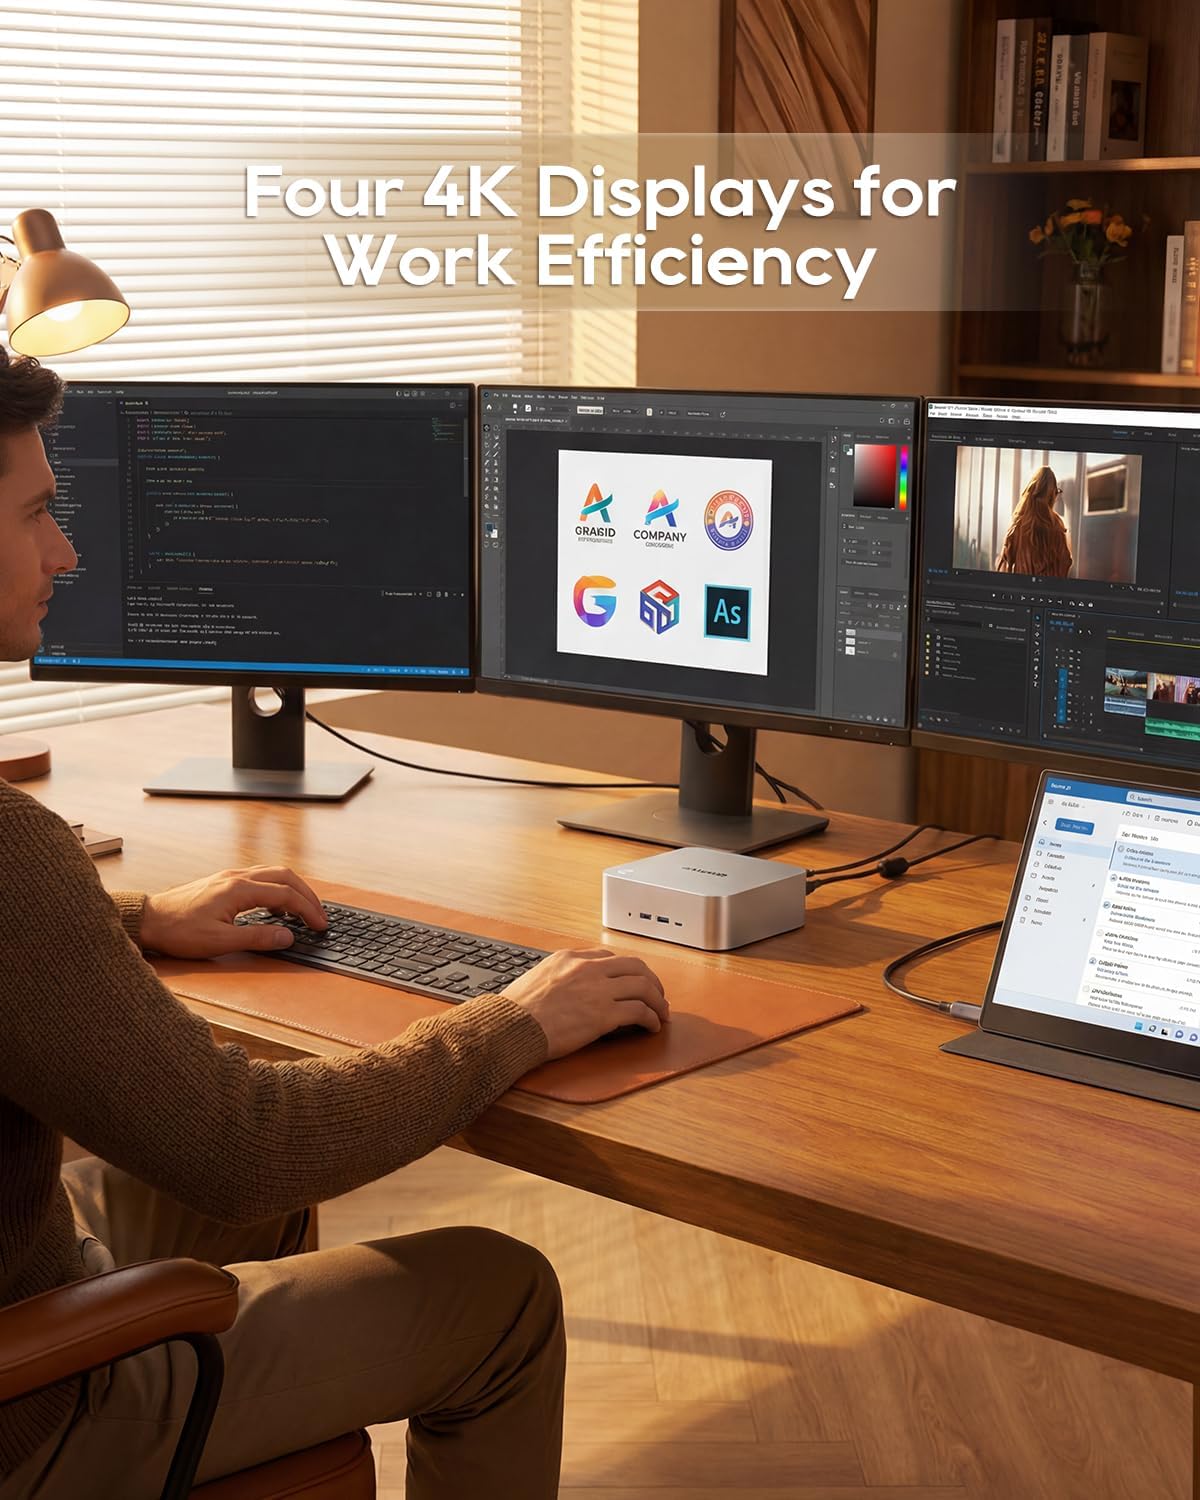
Image: A user working with the AOOSTAR MACO Mini PC connected to four 4K displays, illustrating its multi-display capability for productivity.
Image: The rear of the Mini PC showing the dual 2.5G LAN ports and an external WiFi antenna, emphasizing its high-speed networking capabilities.
Видео: Оверview of the AOOSTAR MACO Mini PC, demonstrating its features such as fingerprint unlock, business applications, gaming performance, and home theater use.
4. Инструкции по настройке
Follow these steps to set up your AOOSTAR MACO Mini PC:
- Подключить дисплей: Connect your monitor(s) to the Mini PC using an HDMI or DisplayPort cable. The Mini PC supports up to four 4K displays.
- Подключите периферийные устройства: Подключите клавиатуру, мышь и любые другие USB-устройства к доступным USB-портам.
- Подключение к сети: For wired internet, connect an Ethernet cable to one of the 2.5G LAN ports. For wireless internet, ensure the Wi-Fi antenna is connected (if external) and the device is powered on to configure Wi-Fi settings.
- Подключение питания: Connect the 120W Type-C power supply to the DC input port on the Mini PC, then plug the power adapter into a wall outlet.
- Включение питания: Нажмите кнопку питания на передней панели мини-ПК. Система загрузится.
- Начальная настройка: Follow the on-screen instructions to complete the operating system setup (e.g., Windows OS).
5. Инструкция по эксплуатации
В этом разделе рассматриваются общие принципы работы и специфические функции вашего мини-ПК.
5.1 Разблокировка отпечатком пальца
The Mini PC features a one-touch fingerprint unlock for enhanced security and quick access. During initial OS setup or via system settings, you can enroll your fingerprints. Once configured, simply touch the power button to wake and log in without needing a password.
5.2 Настройка нескольких дисплеев
The Mini PC supports connecting up to four 4K displays. Connect your monitors to the available HDMI and DisplayPort outputs. You can configure display settings (e.g., extend, duplicate) within your operating system's display settings.
5.3 OCuLink for External Graphics
The OCuLink port provides a high-bandwidth connection (64 Gbps) for external GPU solutions. This allows for significantly improved graphics performance for demanding applications or gaming. Note that OCuLink is not hot-swappable and does not occupy an M.2 2280 PCIe4.0 SSD slot.
5.4 USB4 Ports
The dual USB4 ports offer versatile connectivity with high data transfer speeds and power delivery capabilities (up to 100W). These ports can be used for external graphics card docks, NVMe SSD arrays, or other high-speed peripherals.
6. Техническое обслуживание
Регулярное обслуживание поможет обеспечить долговечность и оптимальную производительность вашего мини-ПК.
- Уборка: Для очистки корпуса мини-ПК используйте мягкую сухую ткань. Для удаления пыли из вентиляционных отверстий используйте сжатый воздух. Перед чисткой убедитесь, что устройство выключено и отсоединено от сети.
- Вентиляция: Ensure the Mini PC is placed in a well-ventilated area. Do not block the ventilation openings.
- Обновления программного обеспечения: Regularly update your operating system, drivers, and applications to maintain security and performance.
7. Поиск Неисправностей
Если у вас возникли проблемы с мини-ПК, воспользуйтесь следующими распространенными шагами по устранению неполадок:
- Нет питания:
- Убедитесь, что адаптер питания надежно подключен как к мини-ПК, так и к работающей розетке.
- Проверьте работоспособность розетки, подключив к ней другое устройство.
- Нет дисплея:
- Check that the display cable (HDMI/DisplayPort) is securely connected to both the Mini PC and the monitor.
- Убедитесь, что монитор включен и настроен на правильный источник входного сигнала.
- Попробуйте подключиться к другому дисплею или использовать другой кабель.
- Нет соединения с интернетом:
- Для проводного подключения проверьте состояние кабеля Ethernet и маршрутизатора.
- For Wi-Fi, ensure Wi-Fi is enabled in the operating system settings and you are connected to the correct network with the correct password.
- Перезагрузите маршрутизатор/модем и мини-ПК.
- Низкая производительность:
- Закройте ненужные приложения, работающие в фоновом режиме.
- Проверьте наличие достаточного свободного места на вашем SSD-диске.
- Ensure the Mini PC is well-ventilated to prevent overheating.
8. Технические характеристики
Detailed technical specifications for the AOOSTAR MACO AMD Ryzen 7 H255 Mini PC:
| Особенность | Спецификация |
|---|---|
| Бренд | АУСТАР |
| Номер модели | MACO AMD Ryzen 7 H255 |
| Модель ЦП | AMD Ryzen 7 H255 |
| Скорость ЦП | 3.8 GHz (Base), up to 4.9 GHz (Max Boost) |
| Графический сопроцессор | Radeon 780M |
| Установленный размер оперативной памяти | 24 ГБ |
| Технология оперативной памяти | DDR5 |
| Скорость памяти | 5600 МГц |
| Максимальный размер оперативной памяти | 128 ГБ |
| Емкость памяти | SSD-накопитель 1 ТБ |
| Интерфейс жесткого диска | PCIE х 4 |
| Операционная система | ОС (предустановленная) |
| Технология связи | HDMI, USB, Wi-Fi 6, 2.5G LAN, OCuLink |
| Интерфейс видеовыхода | DisplayPort, HDMI |
| Разрешение | 4K |
| Общее количество портов USB | 6 (2x USB4, 2x USB 3.2 Gen2, 2x USB 3.0) |
| Размеры товара | 5.12 x 5.12 x 2.36 дюйма |
| Вес товара | 660 грамм |
| Цвет | Черный |
9. Гарантия и поддержка
The AOOSTAR MACO AMD Ryzen 7 H255 Mini PC comes with a 1-year warranty. For warranty claims, technical support, or service inquiries, please contact AOOSTAR customer support through their official channels or the retailer where the product was purchased. Keep your proof of purchase for warranty validation.