ВЕВОР 1215ПБ1
Руководство по эксплуатации термопресса VEVOR 8-в-1
Model: 1215PB1
Введение
This manual provides comprehensive instructions for the safe and efficient operation of your VEVOR 8-in-1 Heat Press Machine. Designed for versatility, this machine allows you to transfer designs onto various items including T-shirts, hats, tumblers, mugs, and plates. Please read this manual thoroughly before initial use to ensure proper setup, operation, and maintenance.
Инструкции по технике безопасности
- Всегда используйте термопресс на устойчивой, термостойкой поверхности.
- Keep hands and fingers clear of the heating plate during operation to prevent burns. Utilize the 360° swing-away arm and pull-out drawer for safe placement and removal of items.
- Обеспечьте надлежащую вентиляцию на рабочем месте.
- Do not leave the machine unattended while powered on.
- Отключайте машину от сети, если она не используется или перед чисткой/обслуживанием.
- Держите детей и домашних животных подальше от машины.
- Не погружайте устройство или его электрические компоненты в воду или другие жидкости.
- Используйте только оригинальные аксессуары и запасные части VEVOR.
Содержимое упаковки
Your VEVOR 8-in-1 Heat Press Machine package should include the following components:
- 12"x15" Heat Press Machine (Main Unit)
- Hat Press Attachment (6"x3")
- Tumbler Press Attachments (6oz, 12oz, 17oz, 30oz)
- Plate Press Attachments (8", 10")
- Силовой кабель
- Руководство пользователя
- Necessary Assembly Tools (e.g., wrenches, screwdriver)

Рисунок 1: Болееview of the VEVOR 8-in-1 Heat Press Machine and its included attachments.
Продукт болееview
The VEVOR 8-in-1 Heat Press Machine is a versatile tool for various heat transfer applications. Key features include:
- 12"x15" Large Heat Plate: Обеспечивает ample space for T-shirts, hoodies, and other flat items.
- Технология двухтрубного нагрева: Ensures fast heating and even heat distribution across the entire plate for consistent results.
- Конструкция с возможностью поворота на 360°: Allows the heating element to be safely moved aside, reducing the risk of accidental contact and providing a clear workspace.
- Pull-Out Drawer: Facilitates easy placement and removal of items, further enhancing safety and convenience.
- Точное цифровое управление: Features a digital display for setting and monitoring temperature (32-480℉ / 0-250℃) and time (0-999s). Includes an auto shut-off function after 30 minutes of inactivity.
- Регулируемая ручка давления: Allows for precise pressure adjustment based on the thickness of the material being pressed.
- Сменные насадки: Easily switch between different press types for diverse projects.
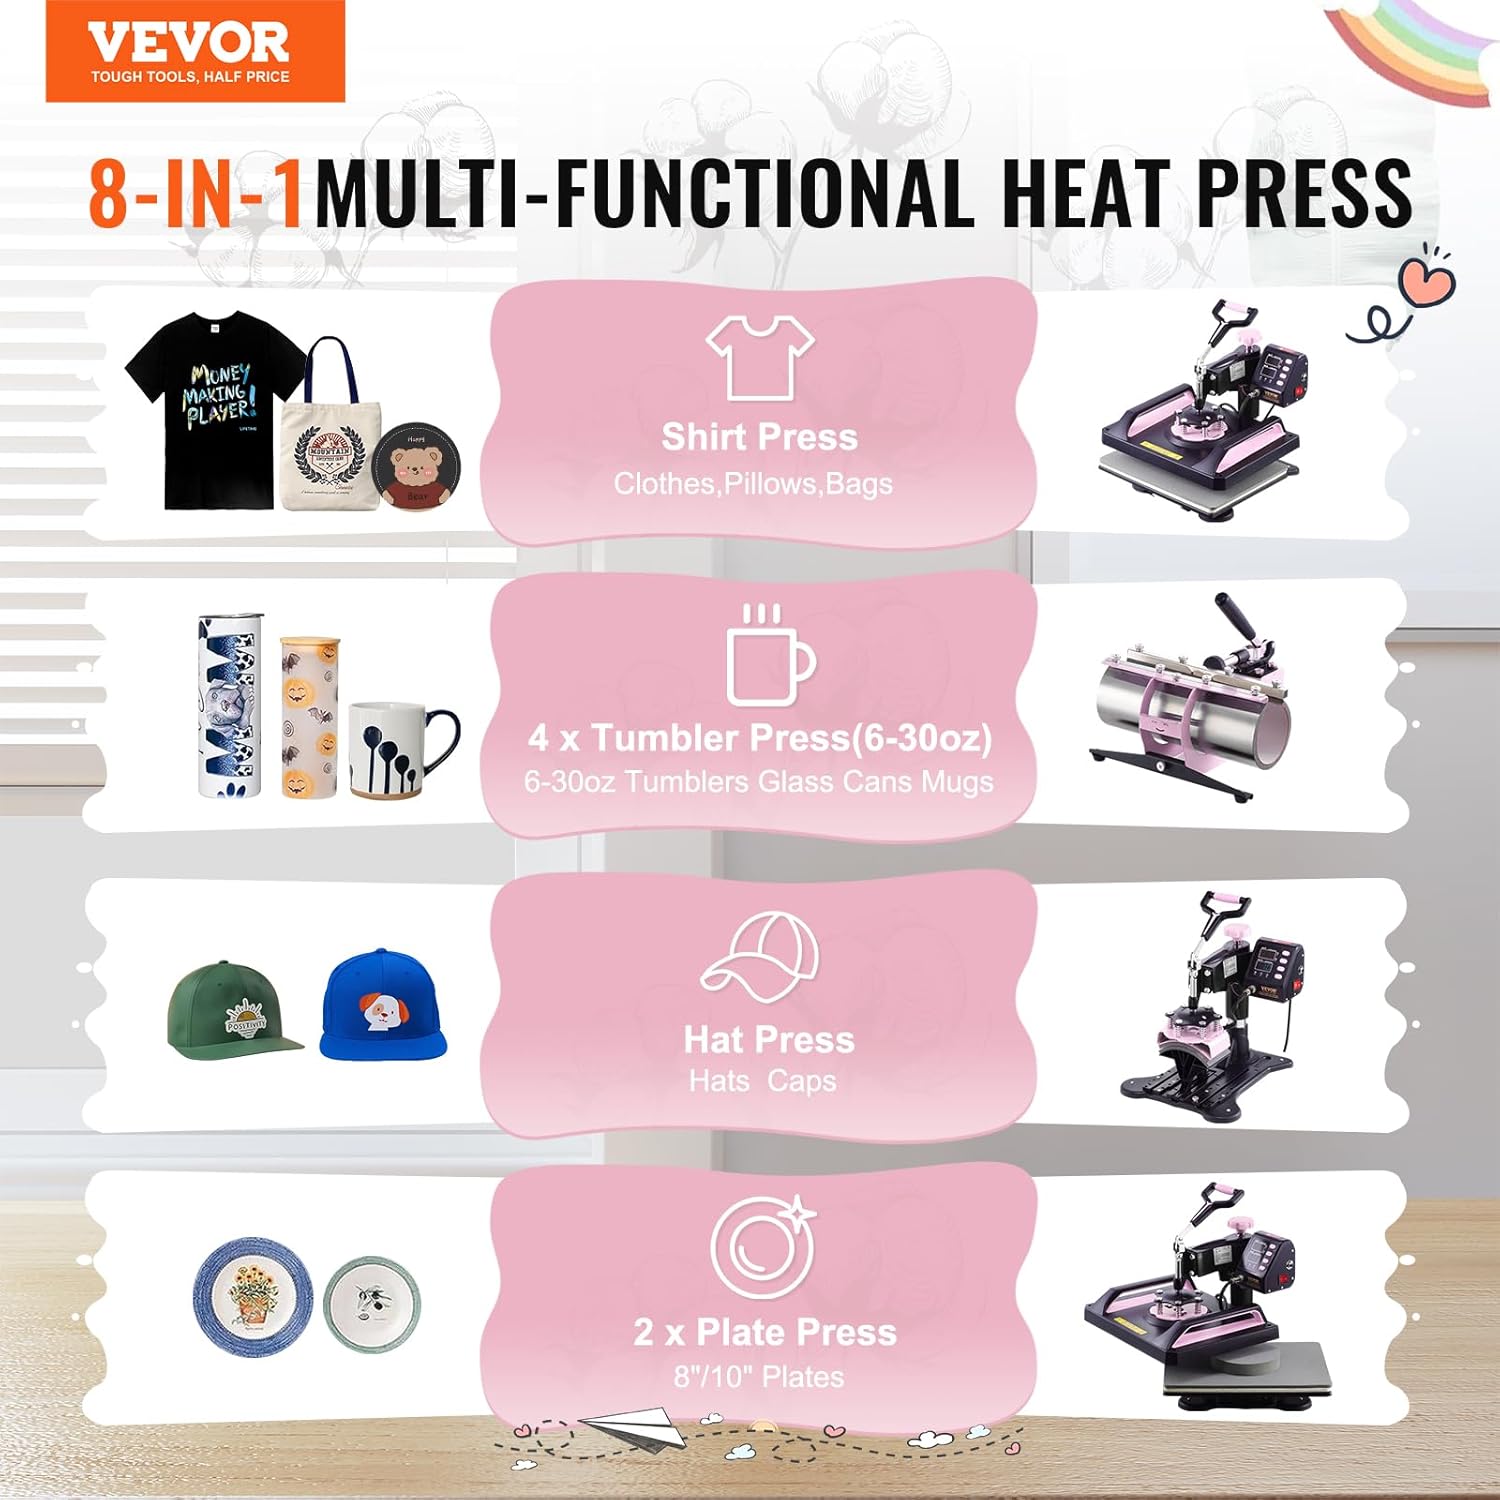
Figure 2: Digital control panel and adjustable pressure knob.

Figure 3: Illustration of dual-tube heating technology.
Инструкции по установке
While the main unit comes largely pre-assembled, some attachments may require minor assembly. Please refer to the following steps and the provided video for detailed guidance.
Initial Assembly (if required)
- Распакуйте все компоненты и сверьте их со списком содержимого упаковки.
- Attach the main heat press unit to its base if not already connected. Secure all screws firmly.
- For specific attachments (e.g., hat press, plate press), follow the individual assembly instructions provided in the manual or refer to the assembly video. Ensure all connections are secure before use.
Подключение вложений
The VEVOR heat press features an easy-to-disassemble and replace design for its various attachments. To switch between different press types:
- Ensure the machine is unplugged and cooled down.
- Carefully unscrew the wing nuts or fasteners holding the current attachment in place.
- Удалите вложение.
- Align the desired attachment (e.g., hat press, plate press) with the mounting points on the main unit.
- Securely fasten the attachment using the provided wing nuts or screws.
- Connect the electrical cable for the new attachment to the main unit's port.

Figure 4: Disassembly and replacement of attachments.
Видеоруководство по сборке
Video 1: This video demonstrates the assembly process for the VEVOR Heat Press Machine, including attaching various components and ensuring proper setup. It provides a visual guide for users who may find written instructions challenging.
Инструкция по эксплуатации
Общие этапы работы
- Включение питания: Plug the machine into a grounded electrical outlet and turn on the power switch.
- Установите температуру и время: Use the digital control panel to set the desired temperature and time according to your transfer material's requirements. Refer to the material-specific guidelines below.
- Разогреть: Allow the machine to preheat until it reaches the set temperature. The alarm will sound when ready.
- Подготовить предмет: Place your item (e.g., T-shirt, mug) on the appropriate platen. For flat items, ensure it's smooth and free of wrinkles.
- Дизайн позиции: Place your transfer design (sublimation paper, HTV, etc.) onto the item.
- Применить давление: Swing the heating plate over the item (if using swing-away) or slide the drawer in. Lower the handle to apply pressure. Adjust the pressure knob as needed for optimal contact.
- Нажимать: The timer will start automatically. Once the time elapses, the alarm will sound.
- Удалить элемент: Lift the handle, swing the heating plate away (if applicable), or pull out the drawer. Carefully remove the hot item and peel off the transfer paper according to its instructions (hot peel or cold peel).

Figure 5: General heat press operation for flat items.
Specific Attachment Usage
A. Tumbler/Mug Press
The machine includes multiple tumbler/mug attachments (6oz, 12oz, 17oz, 30oz) to accommodate various sizes. The 30oz attachment can press two mugs simultaneously.
- Install the appropriate tumbler/mug attachment.
- Wrap your sublimation design around the tumbler/mug and secure it with heat-resistant tape.
- Insert the prepared tumbler/mug into the attachment.
- Закрыть кл.amp для оказания давления.
- Set temperature (e.g., 180°C / 356°F) and time (e.g., 180 seconds) as per your blank's specifications.
- Once complete, carefully remove the hot tumbler/mug using heat-resistant gloves and peel the transfer paper.

Figure 6: Tumbler press attachment in use.
B. Hat Press
Use the 6"x3" hat press attachment for caps and hats.
- Установите приспособление для прессования шляп.
- Place the hat onto the curved platen, ensuring it fits snugly.
- Position your design on the hat and secure it with heat-resistant tape.
- Lower the heating element onto the hat.
- Set temperature (e.g., 200°C / 392°F) and time (e.g., 40 seconds).
- After pressing, carefully remove the hat and peel the transfer.

Figure 7: Hat press in action.
C. Plate Press
The machine comes with 8" and 10" plate press attachments.
- Установите соответствующее приспособление для листогибочного пресса.
- Place the plate onto the platen.
- Secure your design onto the plate with heat-resistant tape.
- Lower the heating element onto the plate.
- Set temperature (e.g., 200°C / 392°F) and time (e.g., 420 seconds).
- Once done, carefully remove the hot plate and peel the transfer.

Figure 8: Plate press in operation.
Видеоруководство по эксплуатации
Video 2: This video provides a detailed demonstration of the VEVOR Heat Press Machine's multi-functional capabilities, including pressing T-shirts, tumblers, and hats. It highlights the ease of use and versatility of the machine for various creative projects.
Обслуживание
- Уборка: Ensure the machine is unplugged and completely cool before cleaning. Wipe down the heating plate with a soft, damp cloth. For stubborn residue, use a non-abrasive cleaner specifically designed for heat press platens. The Teflon coating helps prevent scorching and makes cleaning easier.
- Хранилище: Когда термопресс не используется, храните его в сухом, защищенном от пыли месте.
- Регулярный осмотр: Periodically check all screws and connections to ensure they are secure. Inspect the power cord for any signs of damage.
Поиск неисправностей
| Проблема | Возможная причина | Решение |
|---|---|---|
| Машина не включается. | Шнур питания подключен неправильно; выключатель питания выключен; автоматический выключатель сработал. | Проверьте силовые соединения; убедитесь, что выключатель находится в положении «ВКЛ»; сбросьте автоматический выключатель. |
| Неравномерная теплопередача. | Uneven pressure; faulty heating element; incorrect temperature setting. | Adjust pressure knob; ensure item is flat; verify temperature setting. If problem persists, contact support. |
| Design not adhering or peeling. | Incorrect temperature/time; insufficient pressure; wrong peeling method (hot/cold peel). | Adjust temperature/time settings; increase pressure; follow transfer material's peeling instructions. |
| Машина непрерывно подает звуковой сигнал. | Preset temperature/time reached; error code. | This is normal when target temperature/time is reached. If an error code is displayed, consult the specific error code section of the full manual or contact support. |
| Сложности со сборкой. | Missing instructions; unclear diagrams. | Refer to the assembly video provided in the Setup section or contact VEVOR customer service for detailed assembly guides. |
Технические характеристики
- Номер модели: 1215ПБ1
- Heat Plate Size: 12 x 15 дюйма (290 x 380 мм)
- Ватtage: 1250 Вт
- Диапазон температур: 32-480℉ / 0-250℃
- Временной диапазон: 0-999 секунд
- Материал: Алюминий, кремний, металл
- Цвет: Pink & Black
- Размеры продукта: 15"Д x 15"Ш x 16"В (38.1 см Д x 38.1 см Ш x 40.6 см В)
- Вес товара: 36.2 фунта (16.4 кг)
- Производитель: ВЕВОР
- СКП: 197988216247
Гарантия и поддержка
Этот продукт VEVOR поставляется в комплекте с Гарантия производителя 2 года. For any technical assistance, troubleshooting not covered in this manual, or warranty claims, please contact VEVOR customer support directly. You can often find support contact information on the VEVOR official webсайт или через вашу платформу покупок.
Дополнительные планы защиты могут быть доступны для приобретения:
- Двухлетний план защиты
- Двухлетний план защиты
- Комплексная защита (вариант ежемесячного продления)
Для получения более подробной информации посетите официальный магазин VEVOR: Магазин VEVOR на Amazon
Ask a question about this manual
Ask about setup, troubleshooting, compatibility, parts, safety, or missing instructions. Manuals+ will review the question and use this page’s manual context to help answer it.