Введение
This manual provides comprehensive instructions for the safe and effective use of your NCVI Double Electric Breast Pump. Designed for comfort and efficiency, this pump features multiple modes and suction levels to support your breastfeeding journey. Please read this manual thoroughly before first use and retain it for future reference.
Информация по безопасности
- Перед каждым использованием обязательно проверяйте все компоненты насоса на наличие повреждений или износа. Немедленно заменяйте поврежденные детали.
- Ensure all components are clean and sterilized before first use and after each subsequent use.
- Do not immerse the pump motor unit in water or other liquids. Clean with a damp только ткань.
- Хранить в недоступном для детей месте. Это устройство не игрушка.
- Используйте только прилагаемые адаптер питания и зарядный кабель.
- Не используйте во время купания или душа.
- Если во время использования молокоотсоса вы испытываете боль или дискомфорт, прекратите его использование и обратитесь к врачу.
- Все компоненты, контактирующие с грудным молоком, изготовлены из пищевых материалов, не содержащих бисфенол А.
Продукт болееview
Компоненты

Рисунок 1: В разобранном виде view of the NCVI Double Electric Breast Pump components.
The NCVI Double Electric Breast Pump system includes the following main components:
- Pump Body (x2): The main collection unit that connects to the flange.
- Motor (x1): The central control unit with the LED touchscreen.
- Air Tube (x2): Connects the pump body to the motor for suction.
- Диафрагма (2 шт.): Essential for creating vacuum and preventing backflow.
- Upper Cover (x2): Protects the diaphragm.
- Flange 24mm (x2): Standard breast shield size.
- Milk Bottle (x2): Collection bottles for breast milk.
- Duckbill Valve (x4): Ensures one-way milk flow.
- Flange Insert 21mm (x2): Reduces the 24mm flange size for smaller nipple diameters.
- Charging Cord (x1): USB-кабель Type-C для зарядки.
- Nipple (x2): For feeding directly from the collection bottles.
- Breastmilk Storage Bags (x10): Для удобного хранения молока.
Основные характеристики
- Аспирация больничного уровня: Powerful and efficient suction for effective milk expression.
- Multiple Modes & Levels: Features 4 distinct pumping modes and 9 adjustable suction levels for personalized comfort and efficiency.
- Intuitive LED Touchscreen: A highly accurate rainbow touch control LED display for easy operation, including memory function and a 30-minute auto shut-off timer.
- Ультра-тихая работа: Operates at an ultra-low noise level (as low as 45dB) to ensure discretion and avoid disturbing your baby.
- Длительный срок службы батареи: Equipped with a 2200mAh rechargeable battery, providing extended use for home and travel.
- Portable & User-Friendly: Lightweight design, Type-C charging, and included milk storage bags make it convenient for on-the-go use.
- Comfortable & Safe: Includes 21mm and 24mm flanges to fit various breast sizes, and all milk-contact components are made from food-grade, BPA-free materials.
Настраивать
Сборка
Before first use, disassemble, clean, and sterilize all parts that come into contact with breast milk. Ensure all parts are completely dry before assembly.
- Insert the duckbill valve firmly into the bottom of the pump body.
- Place the diaphragm onto the top of the pump body, ensuring it is seated securely.
- Attach the upper cover over the diaphragm, pressing down until it clicks into place.
- Screw the 24mm flange onto the pump body. If using the 21mm insert, place it inside the 24mm flange before attaching.
- Screw the milk bottle onto the bottom of the pump body, ensuring a tight seal.
- Connect one end of the air tube to the port on the upper cover of the pump body.
- Connect the other end of the air tube to the corresponding port on the motor unit. For double pumping, connect both tubes. For single pumping, connect one tube and ensure the other port on the motor is sealed (if applicable, or use a single-port setup).

Figure 2: Anti-backflow design ensures hygiene and pump longevity.

Figure 3: Double and Single Pumping configurations.
Зарядка аккумулятора
The pump motor unit is equipped with a 2200mAh rechargeable lithium-ion battery. Before first use, fully charge the battery.
- Connect the Type-C charging cable to the charging port on the motor unit.
- Connect the other end of the cable to a compatible USB power source (e.g., wall adapter, computer, power bank).
- The battery indicator on the LED screen will show charging status. A full charge provides extended standby time.

Figure 4: Charging options for the pump's rechargeable battery.
Инструкция по эксплуатации
Familiarize yourself with the LED touchscreen controls for optimal use.

Figure 5: Rainbow Smart Touch Screen layout.
- Включение/выключение питания: Press and hold the power button (usually indicated by a power icon) on the motor unit to turn the pump on or off. A short press will pause/resume pumping.
- Выбор режима: The pump features 4 distinct modes. Press the "M" button (Mode Switch) to cycle through the modes:
- Режим массажа: Gentle, rapid suction to stimulate milk let-down.
- Режим всасывания Multitronic: A combination of rapid and slower suctions.
- Режим имитации всасывания: Mimics a baby's natural suckling rhythm.
- Режим экспрессии: Slower, stronger suction for efficient milk expression.
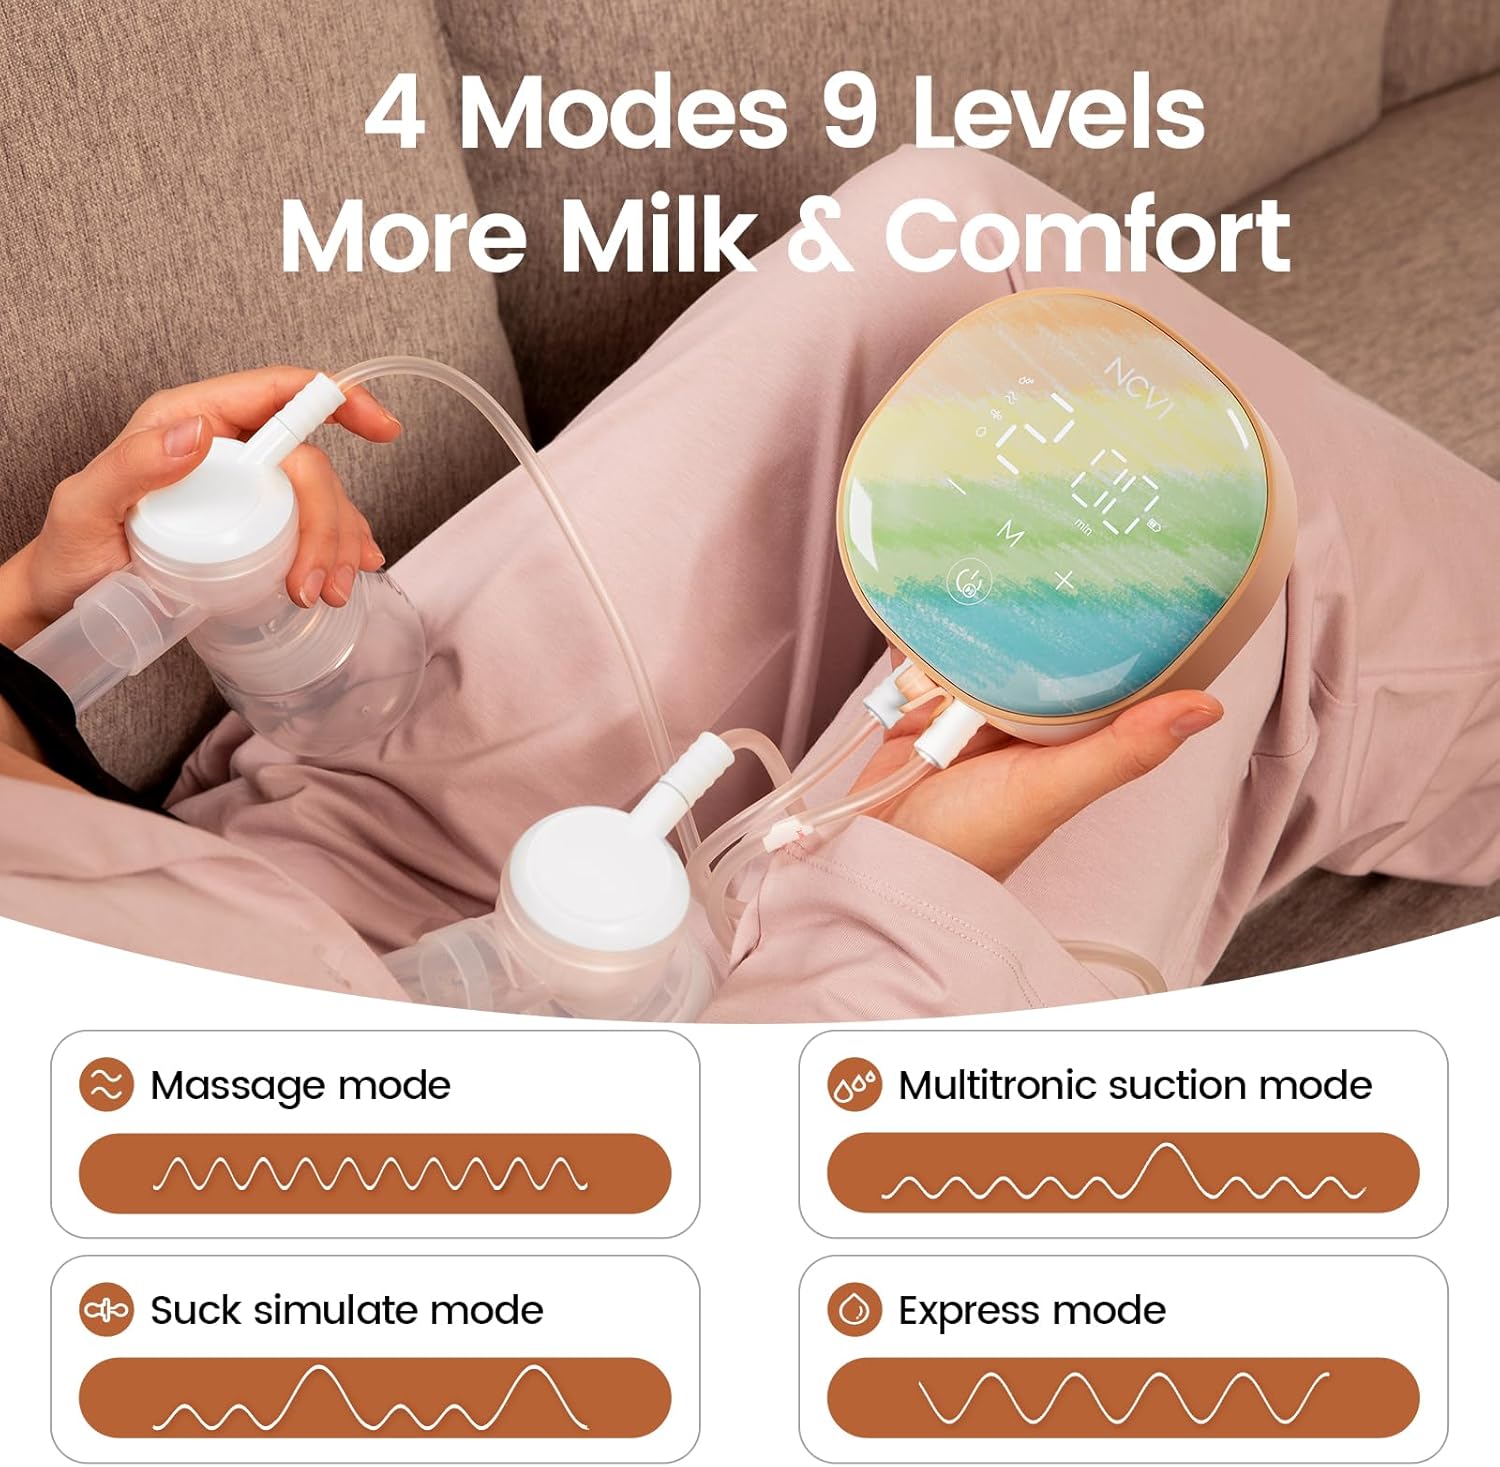
Figure 6: The 4 distinct pumping modes.
- Регулировка уровня всасывания: Each mode has 9 adjustable suction levels. Use the "+" and "-" buttons to increase or decrease the suction intensity to your comfort level. Start with a lower level and gradually increase.
- Функция памяти: The pump automatically remembers your last used mode and suction level for convenience.
- Автоматическое отключение: For safety and convenience, the pump will automatically turn off after 30 minutes of continuous operation.
- Сеанс сцеживания:
- Ensure flanges are centered on your nipples for proper suction.
- Begin with a massage mode to stimulate let-down for 2-5 minutes.
- Once milk begins to flow, switch to an expression mode and adjust suction to a comfortable yet effective level.
- Pump until breasts feel empty or milk flow significantly slows.
Чистка и обслуживание
Правильная чистка и уход имеют решающее значение для гигиены и долговечности вашего молокоотсоса.
Разборка для очистки
After each pumping session, immediately disassemble all parts that came into contact with breast milk: flanges, flange inserts, pump bodies, diaphragms, upper covers, duckbill valves, and milk bottles.
Инструкции по очистке
- Смывать: Промойте все разобранные детали под прохладной проточной водой, чтобы удалить остатки молока.
- Стирать: Промойте детали в теплой мыльной воде, используя специальную щетку. Убедитесь, что удалены все остатки молока.
- Промойте еще раз: Тщательно промойте под чистой проточной водой.
- Стерилизовать: Sterilize parts by boiling for 5 minutes, using a steam sterilizer, or a dishwasher with a sanitizing cycle. Follow sterilizer manufacturer instructions.
- Сухой: Air dry parts on a clean drying rack or use a clean cloth. Ensure all parts are completely dry before reassembly or storage to prevent mold and bacteria growth.
- Блок двигателя: Протрите моторный блок чистой тряпкой.amp ткань. Не погружать в воду.

Figure 7: Bottles can be easily converted for feeding.

Figure 8: Use provided storage bags for milk preservation.
Хранилище
Храните чистые и сухие компоненты насоса в чистом, сухом месте, вдали от прямых солнечных лучей и экстремальных температур.
Поиск неисправностей
| Проблема | Возможная причина | Решение |
|---|---|---|
| Отсутствие или слабое всасывание. |
|
|
| Насос не включается. |
|
|
| Milk flowing back into tubing. |
|
|
| Необычный шум от двигателя. |
|
|
Технические характеристики
- Номер модели: 81222
- Размеры: 8.66 x 5.24 x 5.71 дюйма
- Масса: 10.58 унции
- Аккумулятор: 2200 мАч литий-ионный (в комплекте)
- Режимы: 4 Pumping Modes
- Уровни всасывания: 9 Уровней
- Уровень шума: Всего 45 дБ
- Автоматическое отключение: 30 минуты
- Flange Sizes: 24mm (with 21mm insert)
- Материал: Food-grade, BPA-free
- Порт зарядки: Тип-C USB
- Страна происхождения: Китай
Гарантия и поддержка
For warranty information or technical support, please refer to the product packaging or contact NCVI customer service directly. Contact details are typically available on the manufacturer's official webсайт или через розничного продавца, где был приобретен товар.
For further assistance, you may visit the official NCVI Store on Amazon: NCVI Store.


