Введение
This manual provides detailed instructions for the setup, operation, and maintenance of your groov e Atlas Radio Alarm Clock with Wireless Charger. Please read this manual thoroughly before using the device to ensure proper function and to maximize your user experience. Keep this manual for future reference.
Содержимое упаковки
Проверьте наличие всех предметов в упаковке:
- groov e Atlas Radio Alarm Clock
- Адаптер питания
- Руководство пользователя
Характеристики продукта
- Беспроводная зарядка (5 Вт): Conveniently charge compatible smartphones by placing them on the top surface.
- FM-радио: Настройтесь на ваши любимые FM-станции.
- Светодиодный дисплей: Четкое цифровое отображение времени.
- Питание от сети: Reliable power supply for continuous operation.
- USB-зарядная станция: Additional USB port for charging other devices.
- Двойная сигнализация: Установите два независимых будильника на разное время пробуждения.
- Диммер дисплея: Отрегулируйте яркость светодиодного дисплея.
Настраивать
- Подключите питание: Insert the power adapter into the 'DC IN' port on the back of the alarm clock, then plug the adapter into a wall outlet. The display will light up.
- Установить время:
- Press and hold the 'TIME SET' button located on the back of the unit.
- Use the 'TUN-' or 'TUN+' buttons on the top panel to adjust the hour.
- Нажмите кнопку «УСТАНОВКА ВРЕМЕНИ» еще раз, чтобы подтвердить час и перейти к минутам.
- Use 'TUN-' or 'TUN+' to adjust the minutes.
- Press 'TIME SET' once more to confirm and exit time setting.
- To switch between 12-hour and 24-hour format, press the '12/24H' button on the back.

Изображение: сзади view of the groov e Atlas alarm clock, highlighting the DC IN power input and the USB charging port. The '12/24H TIME SET' and 'SLEEP' buttons are also visible.
Инструкция по эксплуатации
Setting Alarms (ALM1 / ALM2)
- Press the 'ALM1' or 'ALM2' button to select the alarm you wish to set. The alarm icon will flash on the display.
- Use the 'TUN-' or 'TUN+' buttons to adjust the alarm hour.
- Press the 'ALM1' or 'ALM2' button again to confirm the hour and move to minutes.
- Use 'TUN-' or 'TUN+' to adjust the alarm minutes.
- Press the 'ALM1' or 'ALM2' button a third time to confirm the alarm time. The alarm icon will remain lit, indicating the alarm is active.
- To deactivate an alarm, press the corresponding 'ALM1' or 'ALM2' button until the alarm icon disappears from the display.
Работа FM-радио
- Включение/выключение: Press the 'ON/OFF' button to turn the radio on or off.
- Автоматическое сканирование: Нажмите кнопку «СКАНИРОВАТЬ», чтобы автоматически отсканировать и сохранить доступные FM-станции.
- Ручная настройка: Use the 'TUN-' or 'TUN+' buttons to manually adjust the frequency. Press and hold for faster tuning.
- Предустановленные станции: Use 'MEM-' or 'MEM+' to cycle through saved preset stations.
- Отрегулируйте громкость: Use the 'VOL-' or 'VOL+' buttons to control the radio volume.
Изображение: сверху view of the groov e Atlas alarm clock, illustrating the layout of the control buttons for volume, tuning, memory, scan, and power.
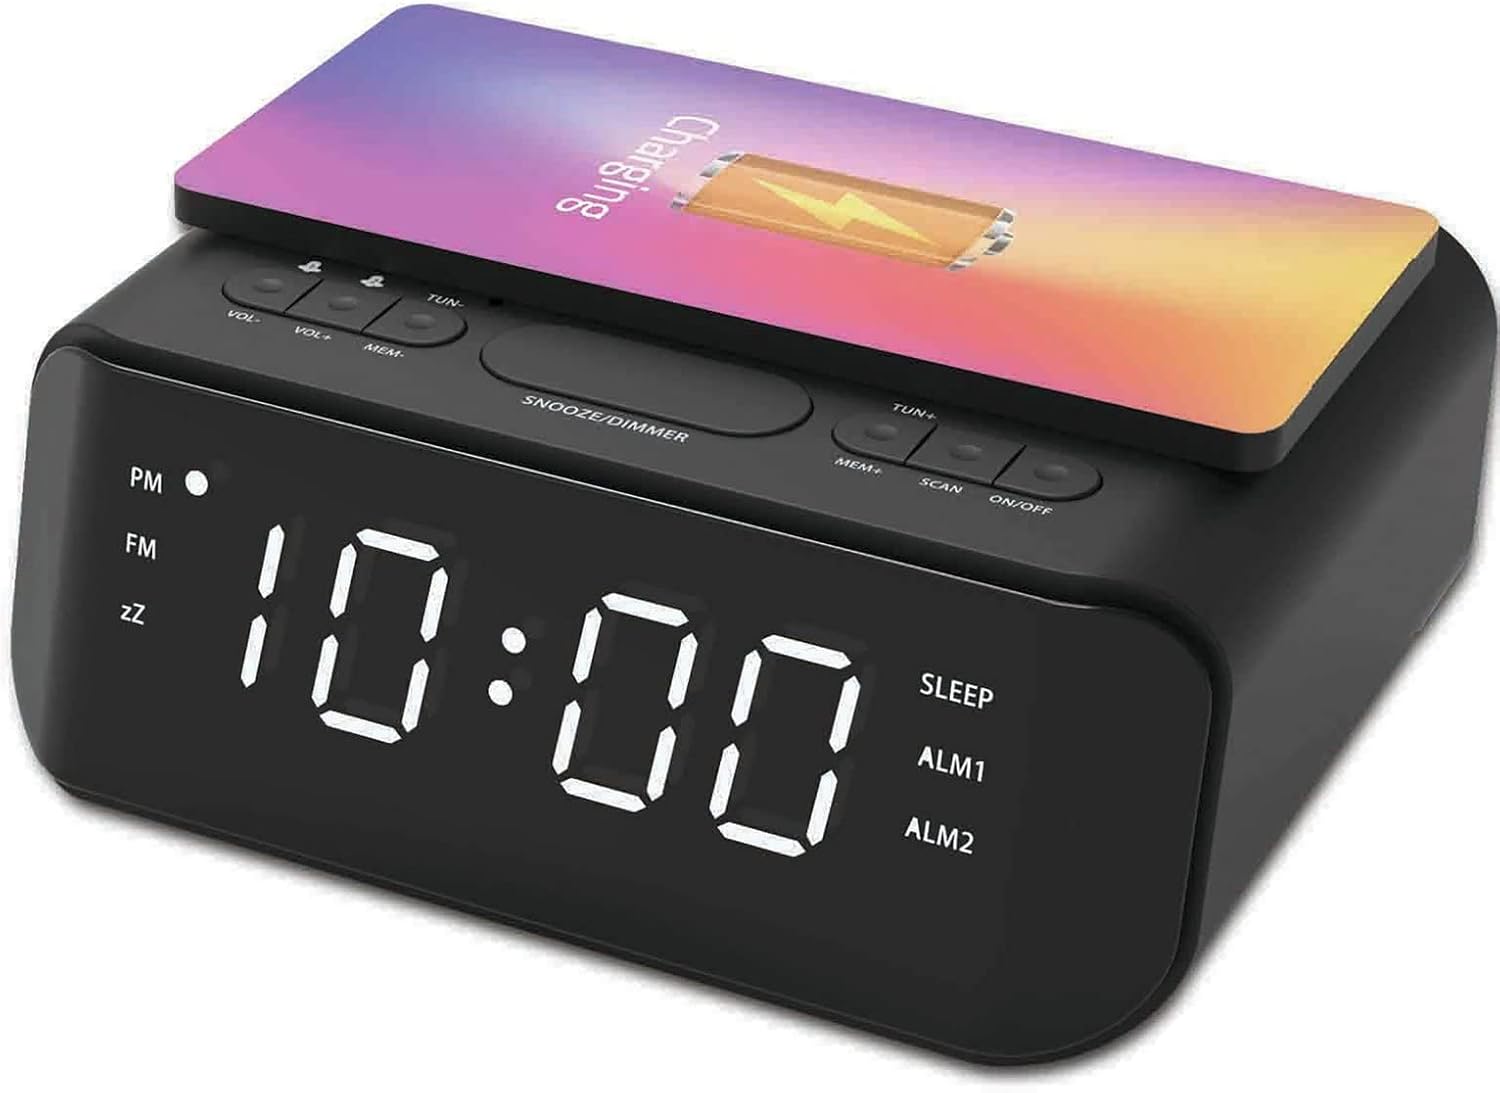
Беспроводная зарядка
- Ensure your smartphone is compatible with 5W Qi wireless charging.
- Place your compatible smartphone centrally on the wireless charging pad located on the top surface of the alarm clock.
- The phone's display should indicate that charging has begun. If not, adjust the phone's position.

Image: A smartphone placed on the groov e Atlas alarm clock's top surface, showing the charging indicator on the phone's screen, confirming wireless charging is active.
USB-зарядка
- Connect a USB charging cable (not included) to the USB port on the back of the alarm clock.
- Подключите другой конец кабеля к устройству.
- Ваше устройство начнет заряжаться.
Диммер дисплея
Press the 'SNOOZE/DIMMER' button to cycle through different brightness levels for the LED display. This allows you to adjust the display to your preferred visibility, especially in dark environments.
Обслуживание
- Уборка: Для очистки поверхности будильника используйте мягкую сухую ткань. Не используйте жидкие чистящие средства или абразивные материалы.
- Хранилище: Если устройство не используется в течение длительного времени, отключите его от сети и храните в сухом прохладном месте.
- Безопасность: Do not expose the device to water, high humidity, or extreme temperatures. Avoid dropping or subjecting the device to strong impacts.
Поиск неисправностей
| Проблема | Возможная причина | Решение |
|---|---|---|
| Устройство не включается. | Адаптер питания не подключен или неисправна розетка. | Убедитесь, что адаптер питания надежно подключен к устройству и к исправной розетке. Попробуйте использовать другую розетку. |
| Беспроводная зарядка не работает. | Телефон несовместим с протоколом Qi или расположен неправильно. | Verify your phone supports Qi wireless charging. Reposition the phone centrally on the charging pad. Remove any thick phone cases. |
| Сигнализация не срабатывает. | Сигнализация не сработала или громкость слишком низкая. | Check if the alarm icon is lit on the display. Increase the alarm volume using the 'VOL+' button. |
| Радиоприем плохой. | Слабый сигнал или неправильное положение антенны. | Extend and adjust the position of the FM antenna wire on the back of the unit for better reception. |
Технические характеристики
- Номер модели: GVWC06BK
- Бренд: groov e
- Цвет: Черный
- Тип дисплея: Цифровой светодиод
- Источник питания: Mains Powered (AC Adapter included)
- Выход беспроводной зарядки: 5W
- USB-выход для зарядки: 5В/1А
- Функции сигнализации: Dual Alarm, Snooze
- Радио: FM
- Материал: Акрилонитрилбутадиенстирол (АБС)
- Форма: Прямоугольный
- Тип крепления: Крепление на стол
- Тип движения: Кварц
- Аккумуляторы: Not included (requires 1 battery for backup, type not specified in data)
Гарантия и поддержка
Your groov e Atlas Radio Alarm Clock GVWC06BK comes with a standard manufacturer's warranty. Please refer to the warranty card included in your package for specific terms and conditions, including the warranty period and coverage details.
For technical support, troubleshooting assistance, or warranty claims, please contact groov e customer service through their official webсайт или контактную информацию, указанную в гарантийном талоне.
Сохраните чек о покупке для обращения по любым вопросам, связанным с гарантией.