Крикут 2007206
Cricut Smart Iron On Vinyl User Manual
Бренд: Cricut | Модель: 2007206
1. Продукт закончилсяview
The Cricut Smart Iron On Vinyl is designed for use with Cricut Joy machines, enabling matless cutting for personalized heat transfer projects. This material is ideal for customizing clothing, accessories, and home decor items with ease and durability.
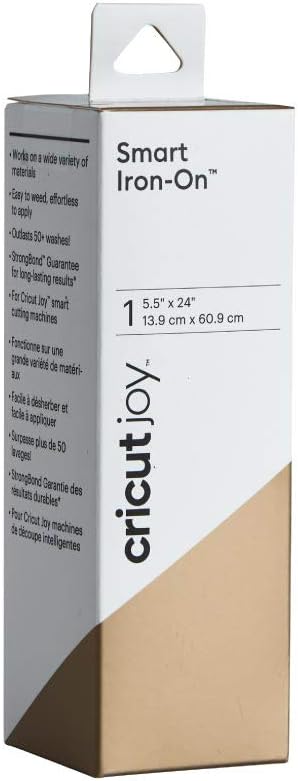
Image: Packaging for the Cricut Smart Iron On Vinyl in Gold, showing the roll dimensions and key features.
Ключевые особенности включают в себя:
- Matless Cutting: Designed for direct loading into Cricut Joy machines, eliminating the need for a cutting mat.
- Универсальное применение: Can be applied to a wide variety of surfaces, including fabrics and wood.
- Простота использования: Simple to cut, weed, and apply, even for intricate designs.
- Durable Results: Features StrongBond Guarantee, ensuring designs outlast 50+ washes when applied correctly.
2. Настройка и подготовка
Before you begin your project, ensure you have the necessary tools and prepare your materials correctly.
2.1 Необходимые инструменты и материалы
- Cricut Joy machine
- Cricut Smart Iron On Vinyl (Gold, 5.5 in x 24 in roll)
- Cricut Heat Press (e.g., Cricut EasyPress) or household iron
- Weeding tool (optional, but recommended for intricate designs)
- Protective sheet (e.g., parchment paper or Teflon sheet)
- Base material (fabric, wood, etc.)
- Design Space app on a compatible device (smartphone, tablet, or computer)
2.2 Preparing the Vinyl
The Smart Iron On Vinyl is designed for matless cutting. Simply unroll the desired length and ensure it is free of wrinkles or creases before loading into your Cricut Joy machine.

Image: A Cricut Joy machine actively cutting a design from a roll of Smart Iron On Vinyl, demonstrating the matless cutting feature.
3. Инструкция по эксплуатации
Follow these steps to create and apply your iron-on designs.
3.1 Design Creation and Cutting
- Создайте свой дизайн: Open the Design Space app on your device. Select or create your desired design.
- Mirror Your Design: For all iron-on projects, it is crucial to mirror your design before cutting. This ensures the design appears correctly when applied.
- Выберите материал: Choose "Smart Iron On" as your material setting in Design Space.
- Load Vinyl: Load the Smart Iron On Vinyl into your Cricut Joy machine, shiny liner side down. The machine will automatically measure the material.
- Начать резку: Follow the prompts in Design Space to begin the cutting process.

Image: A visual guide showing three steps for DIY projects with Cricut Joy: picking a project in the app, the machine cutting, and the finished product (a mug with a fox design).
3.2 Weeding Your Design
After cutting, remove the excess vinyl from around and within your design. This process is called weeding.
- Carefully peel away the excess vinyl from the corner of your design.
- Use a weeding tool to remove small pieces from inside letters or intricate areas.
- The design should remain on the clear liner.

Image: A sleeping bag customized with an iron-on name "EVELYN" in pink vinyl, demonstrating a finished project.
3.3 Applying the Iron-On Vinyl
For best results, refer to the Cricut Heat Guide for precise temperature and time settings for your specific base material and heat press. General steps are as follows:
- Разогреть: Preheat your base material for 5-10 seconds to remove moisture and wrinkles.
- Дизайн позиции: Place the weeded design onto your base material with the shiny liner facing up.
- Применить тепло: Apply heat with your Cricut Heat Press or iron according to the recommended settings. Use firm, even pressure.
- Cool Peel: Allow the material to cool completely before slowly peeling away the clear liner. If the vinyl lifts, re-apply heat for a few more seconds.

Image: A white baby onesie featuring a pink iron-on design that reads "NAP queen" with a crown, showcasing a personalized garment.
4. Техническое обслуживание и уход
To ensure the longevity of your iron-on projects, follow these care instructions:
- Wait 24 hours after application before washing the item.
- Wash and tumble dry inside out.
- Use cold water and mild detergent.
- Не отбеливать.
- If ironing is necessary, iron the garment inside out.
5. Поиск Неисправностей
Here are some common issues and their solutions when working with Smart Iron On Vinyl:
5.1 Vinyl Not Sticking
- Insufficient Heat/Pressure: Ensure your heat press or iron is at the correct temperature and you are applying firm, even pressure. Refer to the Cricut Heat Guide.
- Not a Cool Peel: Smart Iron On is a cool peel material. Ensure the design has cooled completely before removing the liner.
- Совместимость материалов: Verify that your base material is suitable for iron-on application.
5.2 Vinyl Peeling After Washing
- Improper Application: Re-evaluate your heat and pressure settings during application.
- Инструкции по стирке: Ensure you are following the recommended care instructions (wash inside out, cold water, no bleach, wait 24 hours).
5.3 Cutting Issues (e.g., not cutting through, tearing)
- Состояние лезвия: Ensure your Cricut Joy blade is clean and sharp. Replace if dull.
- Материальная установка: Double-check that "Smart Iron On" is selected in Design Space.
- Loading Correctly: Make sure the vinyl is loaded shiny liner side down and is flat and aligned.
6. Технические характеристики продукта
| Атрибут | Деталь |
|---|---|
| Бренд | Крикут |
| Номер модели | 2007206 |
| Цвет | Золото |
| Размеры (рулон) | 5.5 дюймов x 24 дюймов (13.9 см x 60.9 см) |
| Тип материала | Heat Transfer Vinyl (HTV) |
| Совместимость | Cricut Joy machines |
| Прочность | Outlasts 50+ washes (StrongBond Guarantee) |
| Тип отделки | Матовый |
| Вес товара | 1.76 унции |
7. Гарантия и поддержка
For detailed warranty information and customer support, please refer to the official Cricut website or contact Cricut customer service directly. The product is designed for single use application, and its durability is covered by the StrongBond Guarantee when applied according to instructions.
Производитель: Provo Craft & Novelty
Онлайн поддержка: cricut.com/help
Ask a question about this manual
Ask about setup, troubleshooting, compatibility, parts, safety, or missing instructions. Manuals+ will review the question and use this page’s manual context to help answer it.