
NB ERGONOMIC J5
NB ERGONOMIC J5 Heavy Duty Gaming Monitor Arm Instruction Manual
Model: J5
Introducere
Thank you for choosing the NB ERGONOMIC J5 Heavy Duty Gaming Monitor Arm. This manual provides detailed instructions for the safe and efficient installation, operation, and maintenance of your monitor arm. Please read this manual thoroughly before installation and retain it for future reference.
This monitor arm is designed to support flat, ultrawide, and curved monitors ranging from 27 to 50 inches, with a load capacity of 2 to 18 kg. It features a robust mechanical spring for flexible adjustments and ergonomic positioning.
Informații de siguranță
- Capacitate de greutate: Do not exceed the maximum load capacity of 18 kg (39.6 lbs). Exceeding this limit may result in instability and potential injury.
- Dimensiune monitor: Ensure your monitor falls within the recommended size range of 27 to 50 inches.
- Desk Stability: Verify that your desk is stable and strong enough to support the combined weight of the monitor arm and your monitor.
- Instalare: Follow all installation steps carefully. Improper installation can lead to product failure or personal injury. If you are unsure about any step, seek professional assistance.
- Piese mobile: Be aware of pinch points when adjusting the monitor arm. Keep hands and fingers clear of moving parts.
- Copii: Păstrați piesele mici departe de copii pentru a preveni pericolele de sufocare.
Conținutul pachetului
Vă rugăm să verificați dacă toate componentele sunt prezente și nedeteriorate. Dacă lipsesc sau sunt deteriorate piese, contactați serviciul de asistență pentru clienți.
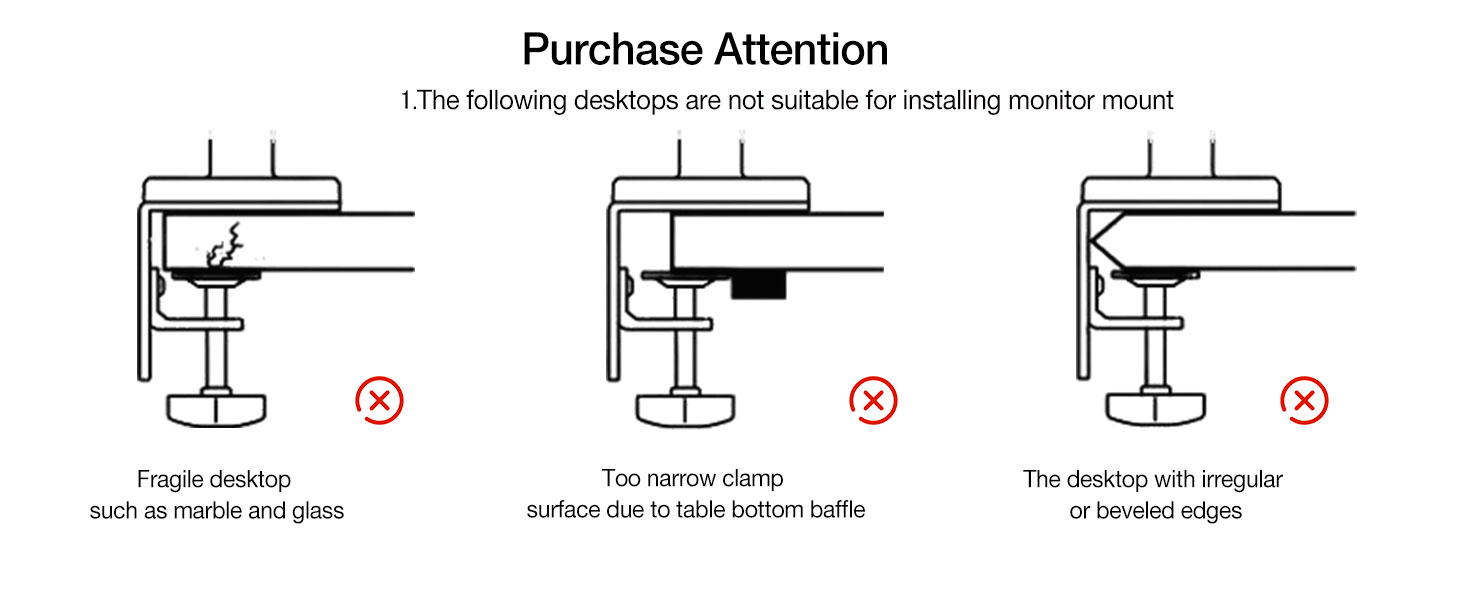
Image: All components of the NB ERGONOMIC J5 monitor arm, including the base, arm sections, VESA plate, C-clamp, grommet mount parts, and various screws and tools.
- Monitor Arm Assembly (Upper and Lower Arms)
- Birou Clamp (C-Clamp)
- Grommet Mount Base
- Placă VESA
- Kit de accesorii (șuruburi, șaibe, distanțiere)
- Unelte (chei Allen)
- Manual de instructiuni
Specificații
| Parametru | Valoare |
|---|---|
| Model | J5 |
| Compatibilitate cu dimensiunea ecranului | 27 până la 50 inci |
| Capacitate de încărcare | 2 până la 18 kg (4.4 până la 39.6 lbs) |
| Compatibilitate VESA | 75x75mm, 100x100mm |
| Material | Aluminum alloy, Cold-rolled steel, ABS |
| Tip de montare | C-Clamp sau Grommet |
| Unghiuri de rotație | 360° |
| Unghiuri de înclinare | ±50° |
| Swivel Angles | ±90° |
| Ridicare verticală | 250 mm (9.8 inchi) |
| Extensie maximă | 630 mm (24.8 inchi) |

Image: Detailed product parameters for the J5 monitor arm, including dimensions and adjustment ranges.
Configurare și instalare
1. Verificarea compatibilității biroului
Before installation, ensure your desktop is suitable for mounting. The monitor arm supports C-Clamp și opțiuni de montare cu inele de etanșare.

Imagine: Examples of desktop types unsuitable for monitor arm installation.
- Unsuitable Desktops: Fragile materials like marble or glass, desktops with insufficient clamping surface due to bottom baffles, or desktops with irregular/beveled edges are not suitable.
- C-Clamp Tip: Requires desk thickness of 20-90mm (0.8"-3.5") and a bottom depth above 50mm (1.97").
- Grommet Type: Requires desk thickness of 20-90mm (0.8"-3.5") and a hole diameter of 10-60mm (0.4"-2.3").
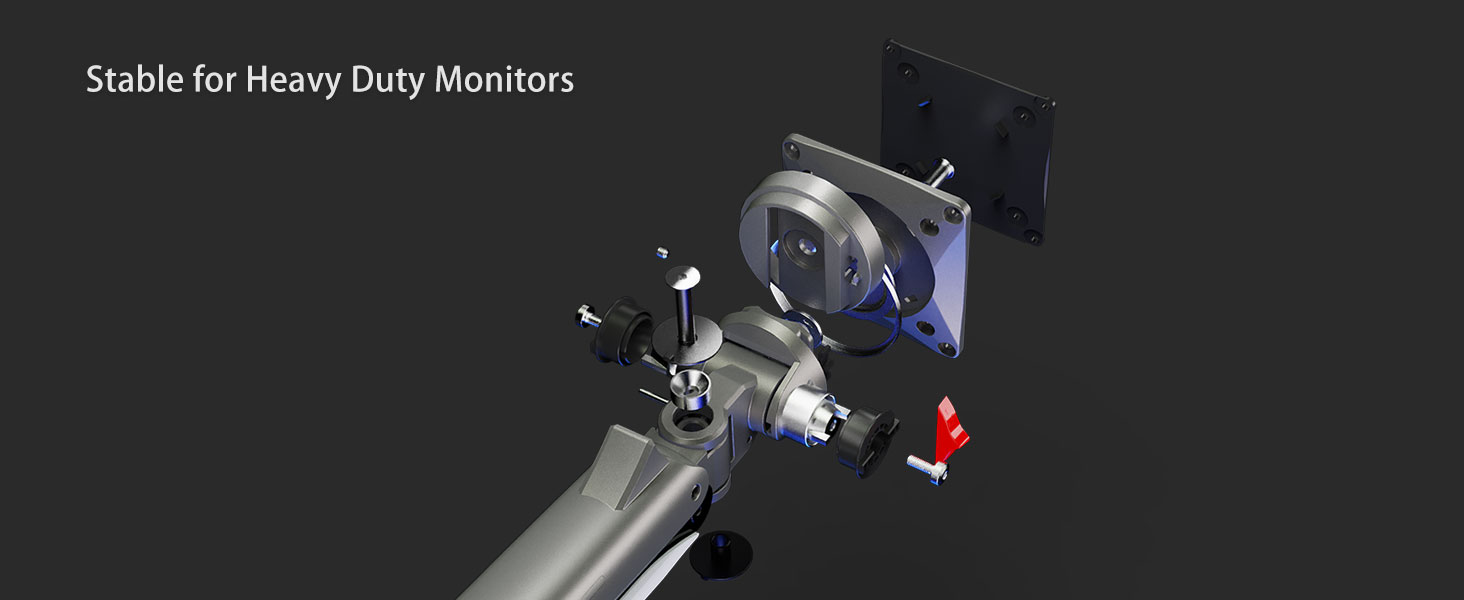
Image: Specifications for C-Clamp și opțiuni de montare cu inele de etanșare.
2. Confirm VESA Hole Position
Locate the VESA mounting holes on the back of your monitor. The monitor arm supports VESA patterns of 75x75mm and 100x100mm.
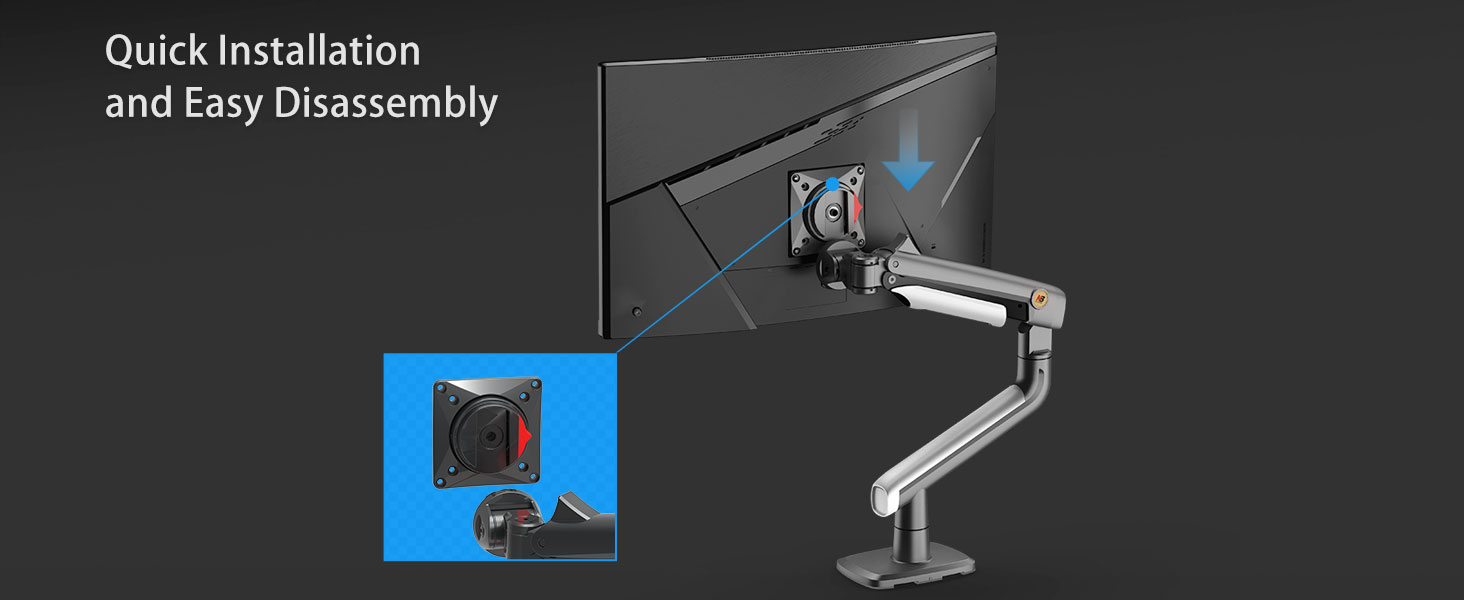
Image: Guide to finding and confirming VESA hole positions on your monitor.
- If your monitor has an embedded hole, the panel can be placed directly.
- If the embedded position is small or the panel cannot be placed inside, use the heightening pads and lengthened screws provided in the screw package.
3. Assemble the Desk Mount
Choose either the C-Clamp or Grommet mount based on your desk and assemble the base according to the instructions provided in the package.
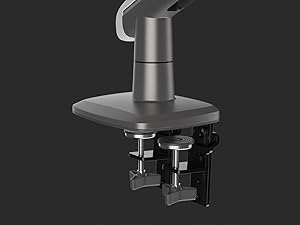
Image: Detail of the C-Clamp montare pe birou.
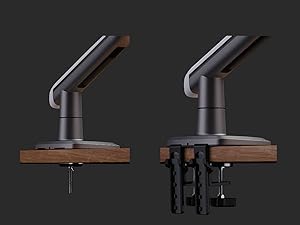
Image: Detail of the Grommet desk mounting.
4. Attach VESA Plate to Monitor
Secure the VESA plate to the back of your monitor using the appropriate screws from the hardware kit. Ensure it is tightly fastened.
5. Mount Monitor to Arm
Slide the VESA plate with the attached monitor onto the arm's mounting head until it clicks securely into place. Ensure the monitor is firmly seated.

Image: Quick installation and easy disassembly of the monitor from the arm.

Imagine: Detaliată view of the VESA plate and arm connection for stable mounting.
Instrucțiuni de operare
1. Reglarea poziției monitorului
The NB ERGONOMIC J5 monitor arm offers extensive flexibility for optimal viewconfort.
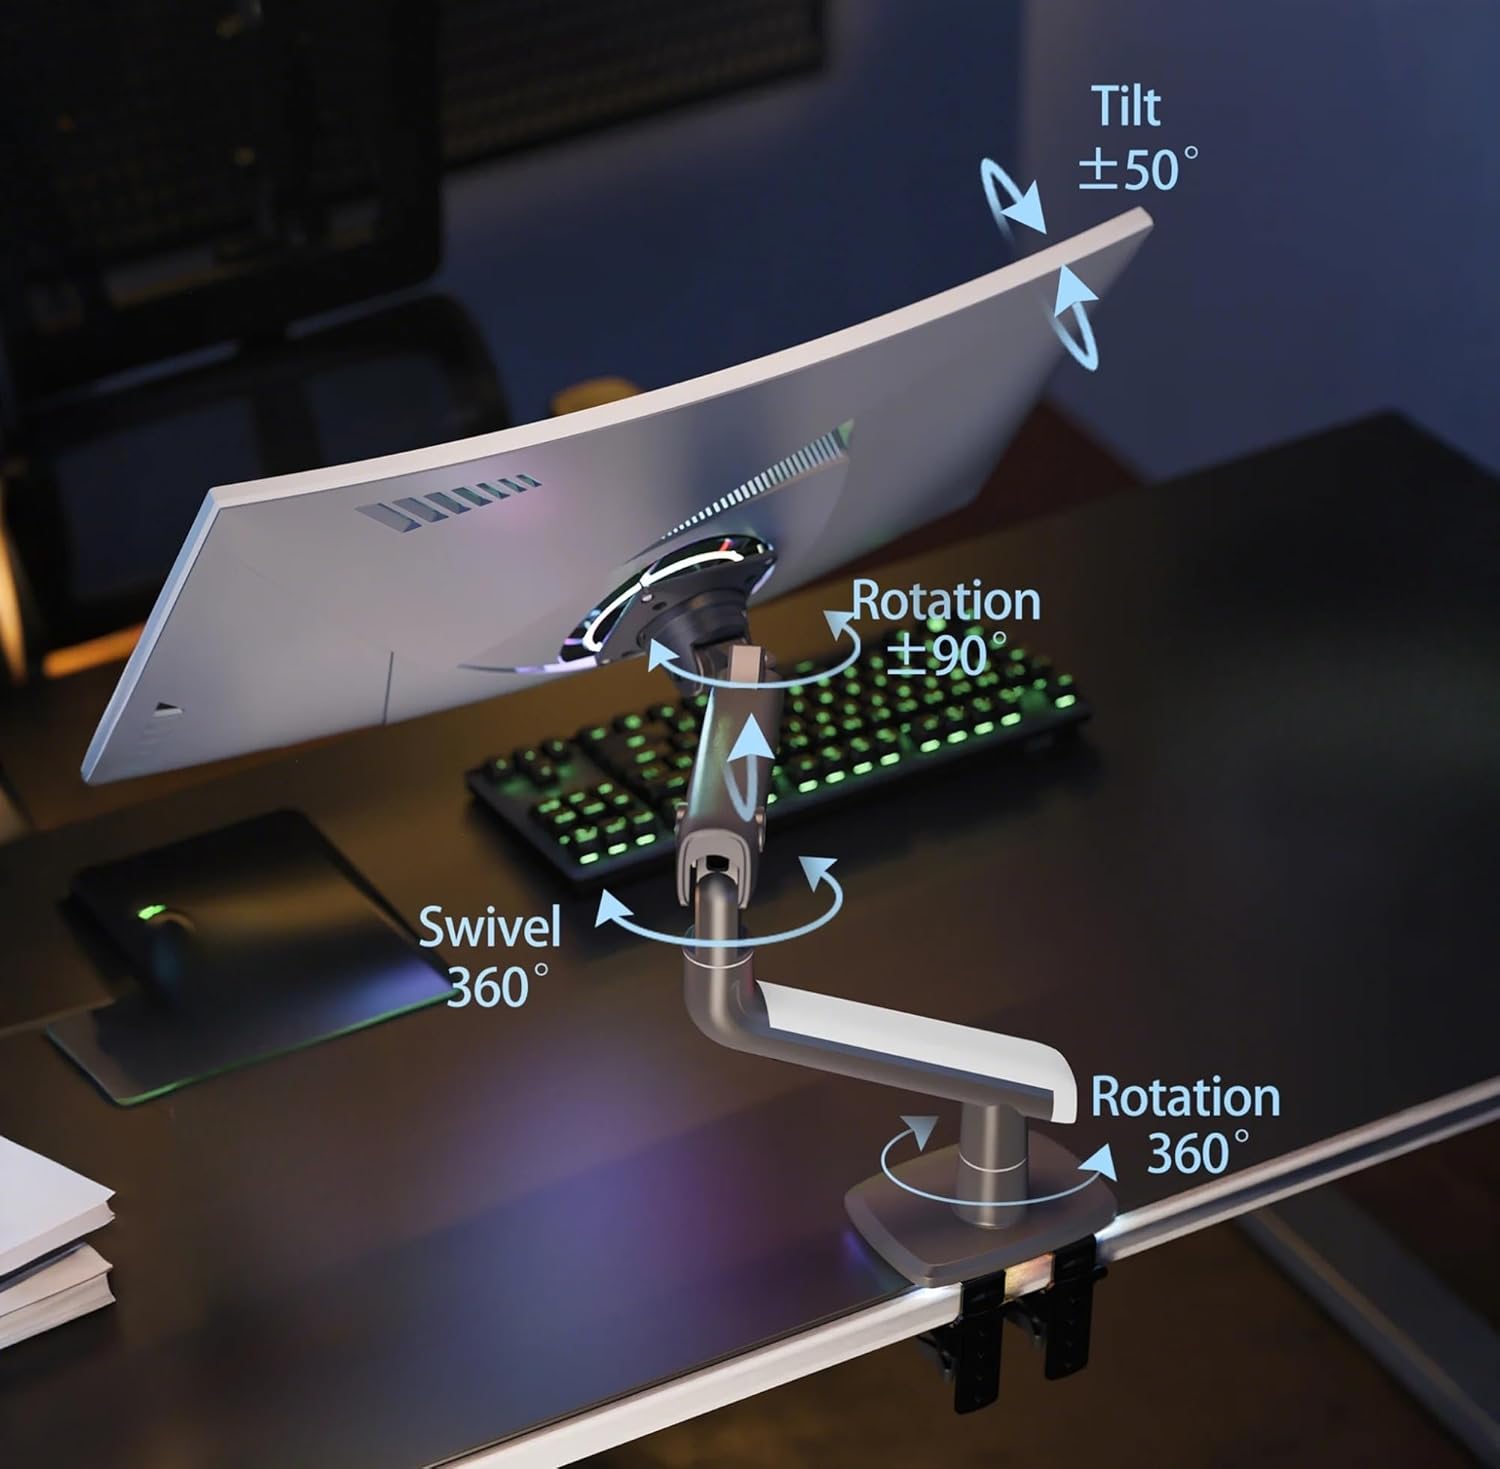
Image: Full range of motion for the monitor arm, including tilt, swivel, and rotation.
- Reglarea înălțimii: The arm allows for a vertical lift of up to 250mm (9.8 inches). Gently push or pull the monitor to the desired height.
- Extensie: The arm can extend up to 630mm (24.8 inches) from the base.
- Înclinare: Adjust the monitor tilt from -50° to +50° to reduce glare and optimize viewunghiuri de ing.
- pivotare: Swivel the monitor ±90° horizontally.
- Rotaţie: Rotate the monitor 360° for portrait or landscape orientation.
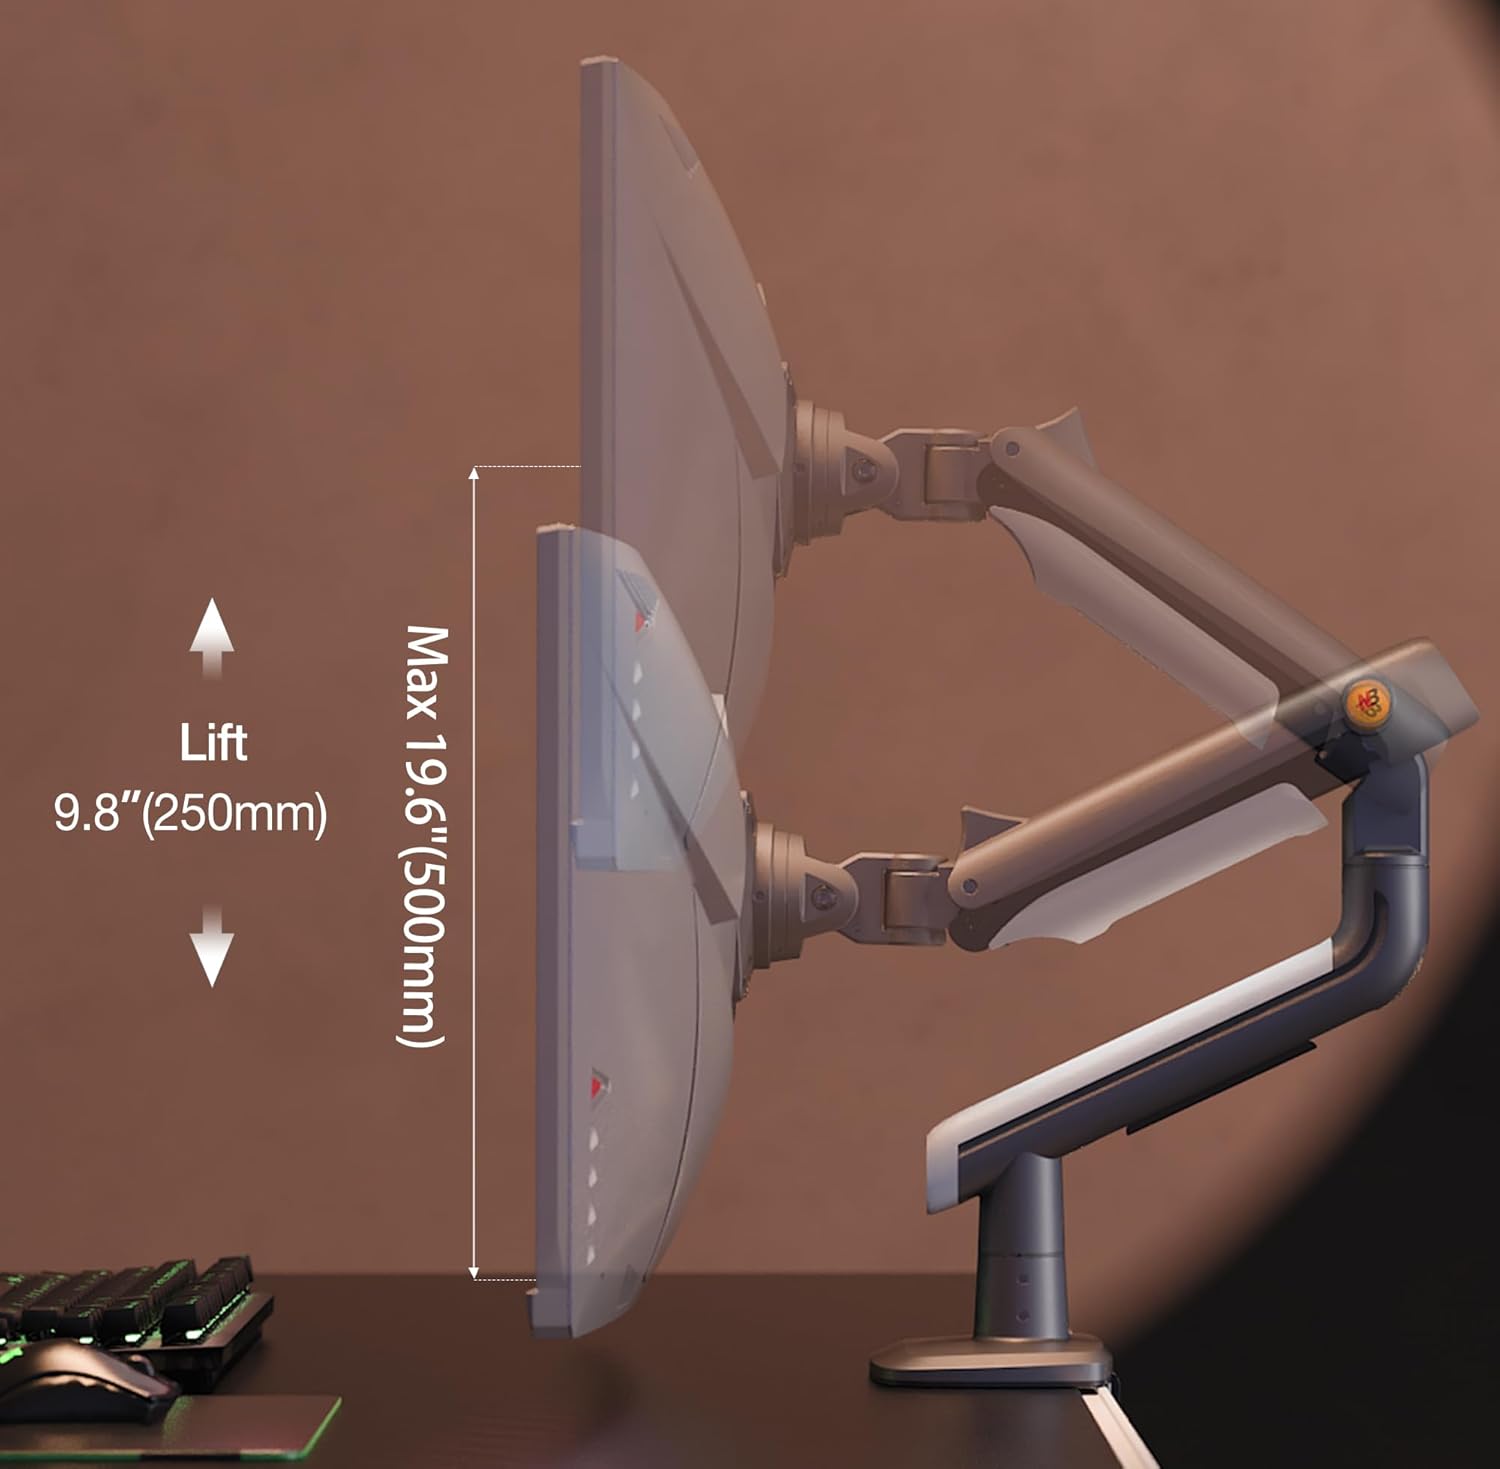
Image: Vertical lift capability of the monitor arm.
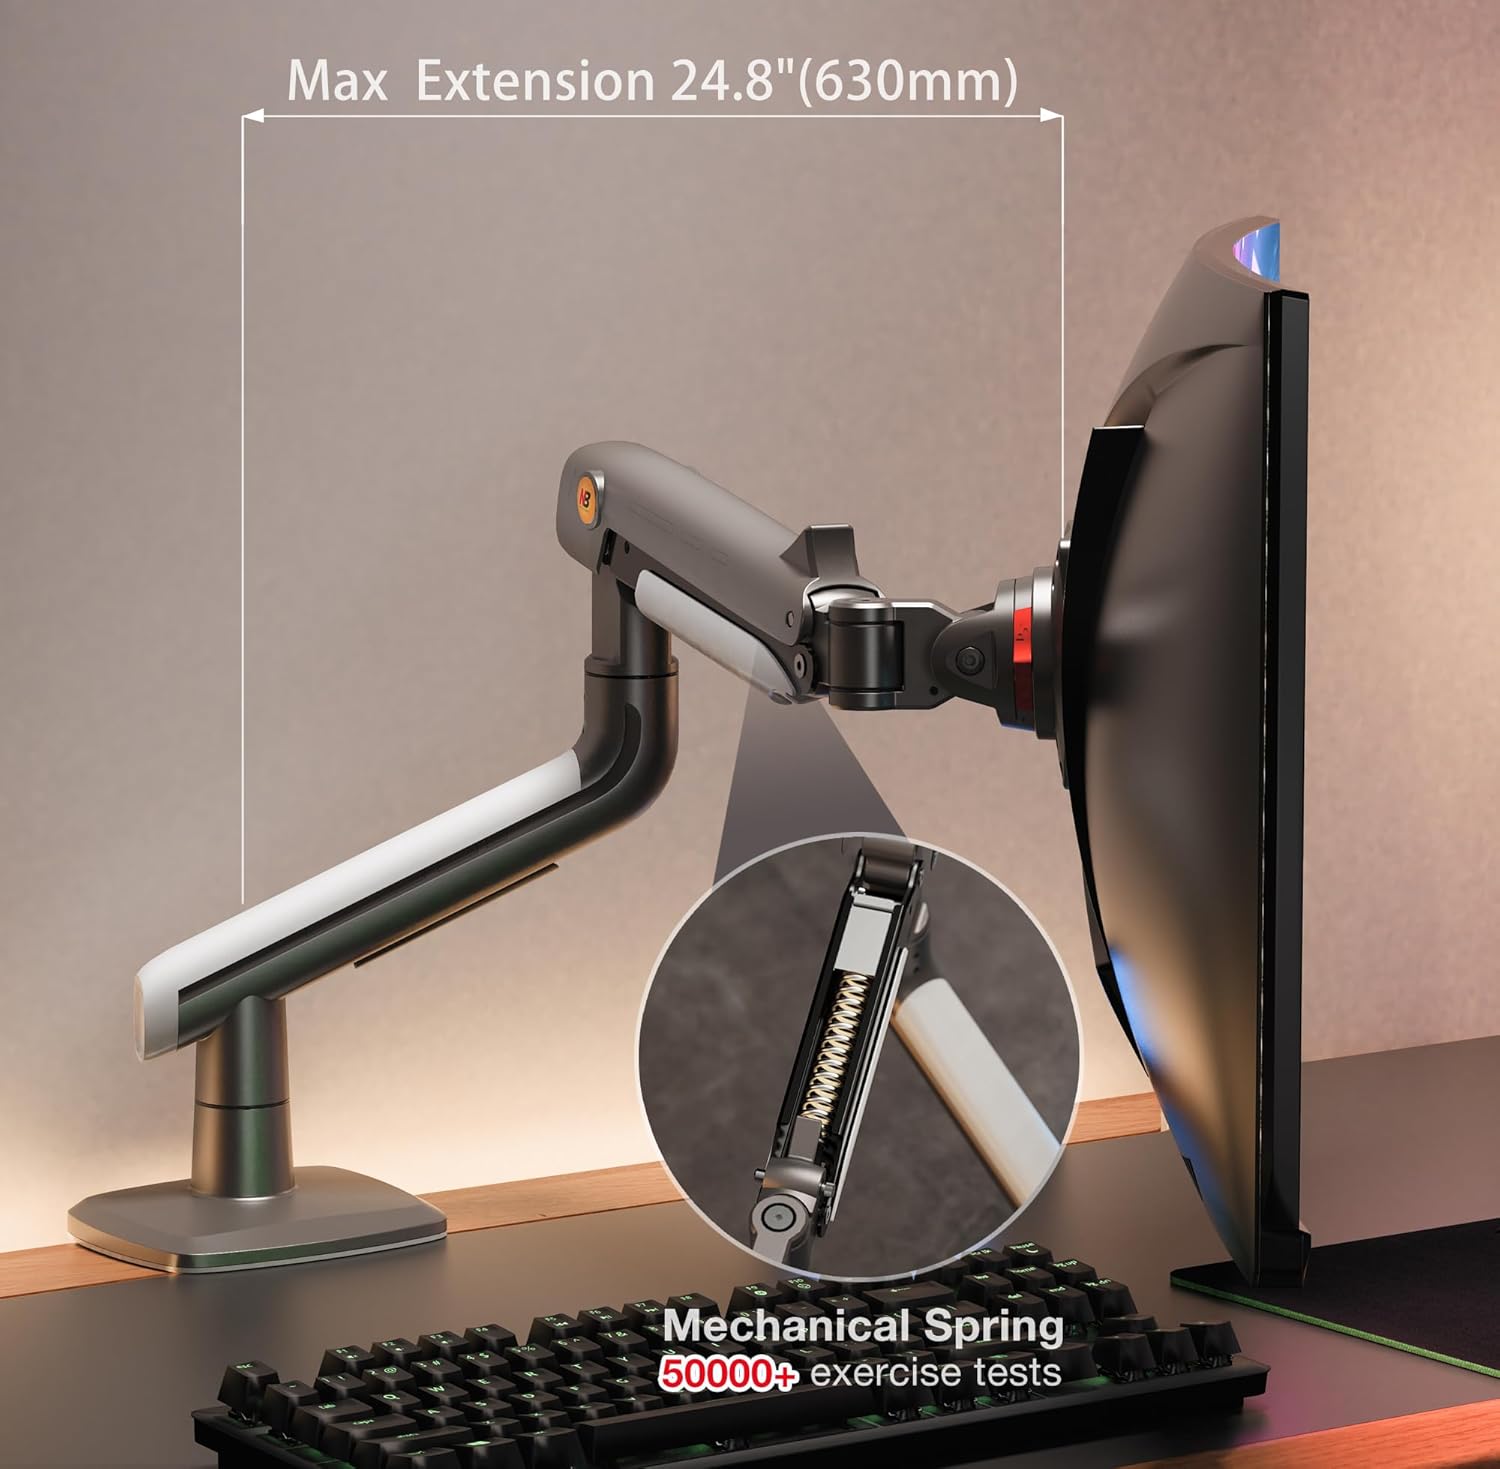
Image: Maximum extension of the monitor arm and its mechanical spring.
2. Reglarea tensiunii
The monitor arm features a mechanical spring for smooth adjustments. The tension may need to be adjusted based on your monitor's weight to ensure it holds its position.
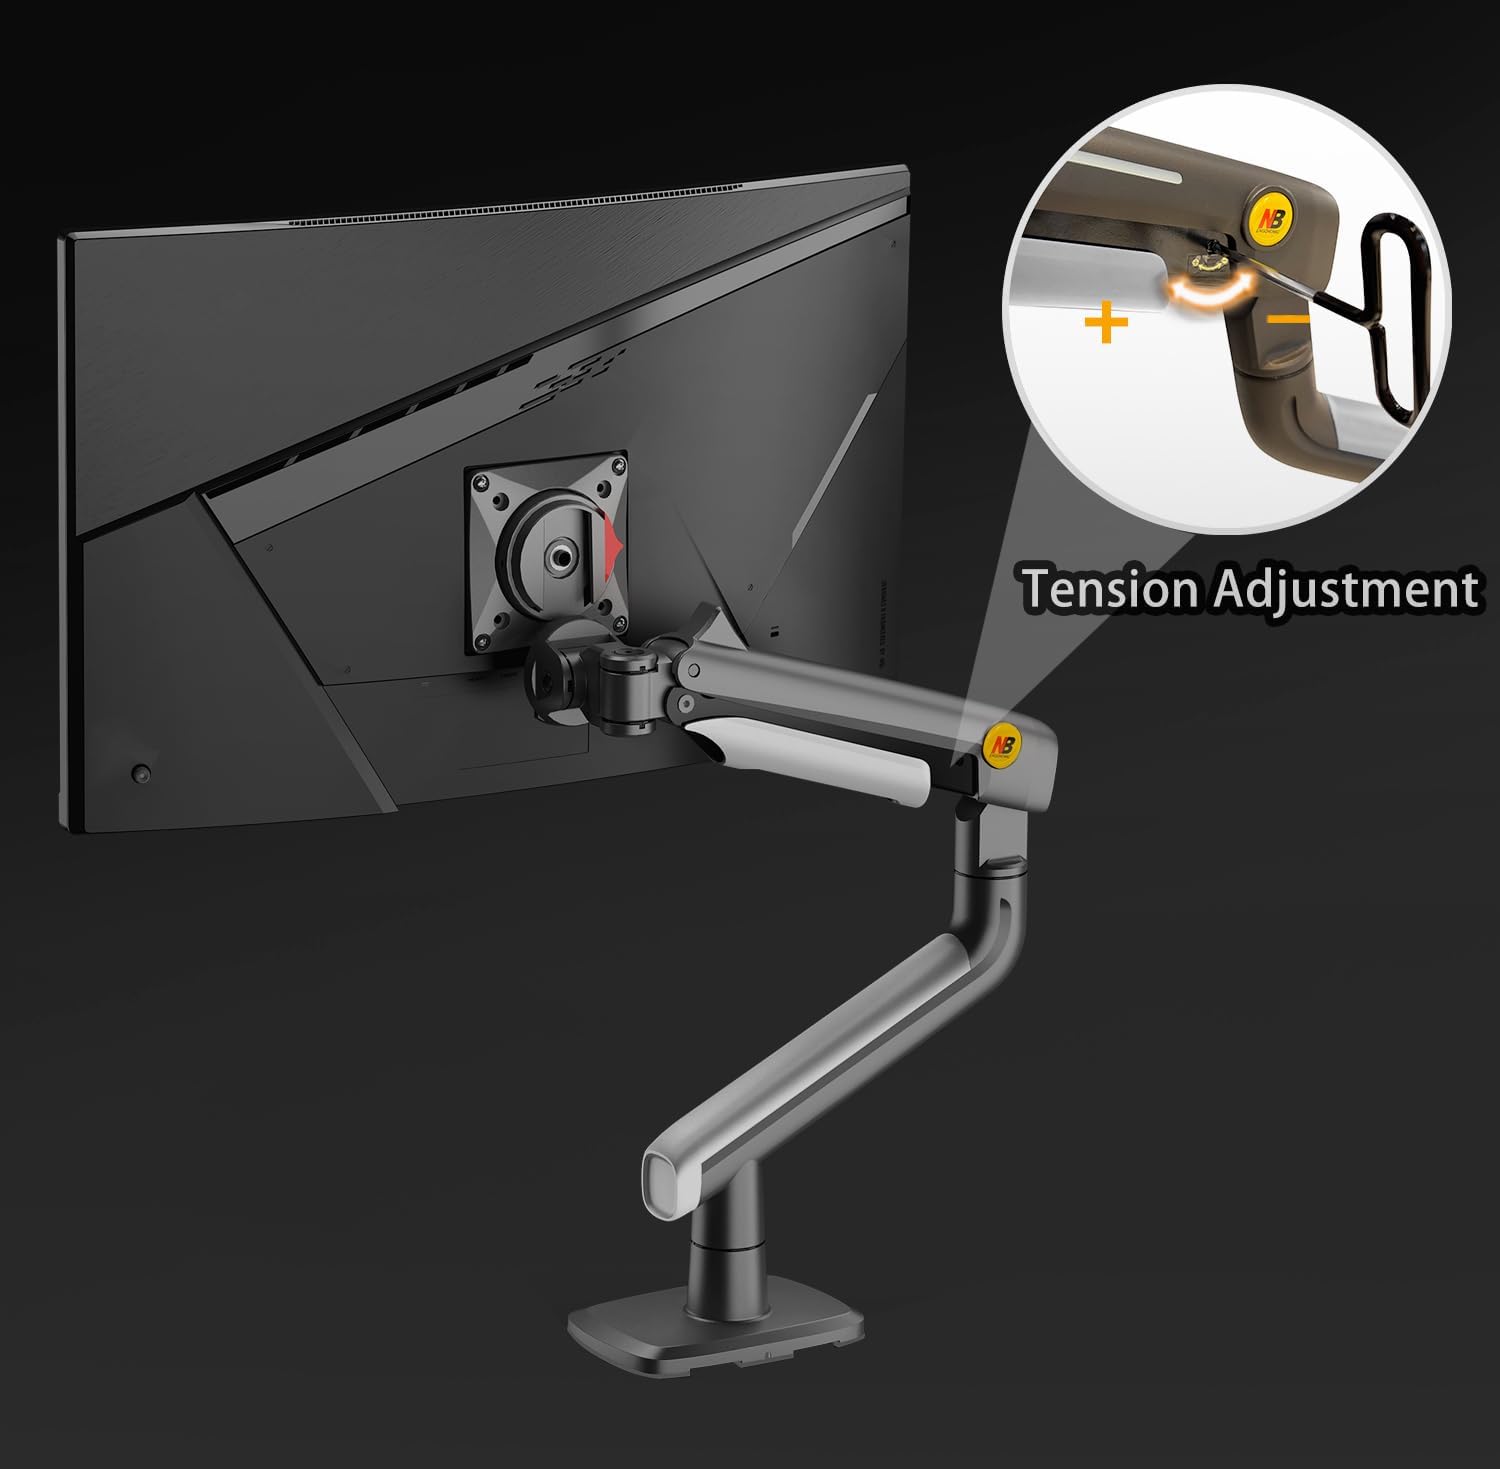
Image: Guide for adjusting the arm's tension.
- Important: Always attach your monitor to the arm before adjusting the tension.
- Dacă monitorul ridică on its own, turn the tension screw in the '–' direction to reduce tension for a lighter monitor.
- Dacă monitorul cade, turn the tension screw in the '+' direction to increase tension for a heavier monitor.
- Use the provided Allen wrench to make small, incremental adjustments until the monitor stays in the desired position.
3. Gestionarea cablurilor
The monitor arm includes integrated cable management channels to keep your workspace tidy and organized.

Image: Organized cable management feature of the monitor arm.
- Route your display and power cables through the designated cable slots along the arm.
- This helps protect cables and reduces clutter on your desktop.
Întreţinere
- curatenie: Ștergeți brațul monitorului cu o lavetă moale șiamp Evitați utilizarea de produse de curățare abrazive sau solvenți care ar putea deteriora finisajul.
- Verificări periodice: Verificați periodic toate șuruburile și conexiunile pentru a vă asigura că rămân strânse. Strângeți-le din nou dacă este necesar.
- Lubrifiere: The mechanical spring mechanism is designed for long-term use and generally does not require lubrication. If you notice any stiffness, contact customer support.
Depanare
- Monitor does not stay in position (sags or floats): This indicates incorrect tension adjustment. Refer to the "Tension Adjustment" section and adjust the spring tension using the provided Allen wrench until the monitor holds its position. Remember to adjust with the monitor attached.
- Arm is difficult to move: The tension might be too high for your monitor's weight, or the pivot points might be stiff. Try reducing the tension slightly. If stiffness persists, ensure all assembly bolts are not overtightened.
- Monitorul se oscilează: Ensure all mounting screws (VESA plate to monitor, arm to base, and base to desk) are securely tightened. Check that your desk is stable.
- Piese lipsă sau componente deteriorate: Do not proceed with installation. Contact NB ERGONOMIC customer support immediately for assistance.
Garanție și suport
For warranty information and customer support, please refer to the documentation included with your purchase or visit the official NB ERGONOMIC website. If you encounter any issues or have questions regarding your J5 monitor arm, our support team is available to assist you.
Producător: KUNSHAN HONGJIE ELECTRONICS CO., LTD
Ask a question about this manual
Ask about setup, troubleshooting, compatibility, parts, safety, or missing instructions. Manuals+ will review the question and use this page’s manual context to help answer it.