1. Introducere
Thank you for choosing the VONFORN 700W HVLP Electric Spray Paint Gun. This manual provides essential information for the safe and efficient operation, maintenance, and troubleshooting of your new paint sprayer. Please read this manual thoroughly before first use and keep it for future reference.

Figure 1: VONFORN 700W HVLP Electric Spray Paint Gun
2. Instrucțiuni de siguranță
Always observe basic safety precautions to reduce the risk of fire, electric shock, and personal injury. This product is designed for 110V US standard outlets only. Do not use with 220V systems.
2.1 Siguranța generală
- Citiți toate instrucțiunile: Familiarizați-vă cu comenzile și utilizarea corectă.
- Zona de lucru: Ensure the work area is well-ventilated and free from flammable materials. Keep children and bystanders away.
- Echipament individual de protecție (EIP): Always wear eye protection (safety glasses or goggles), a respirator or face mask to prevent inhalation of paint fumes, and gloves.
- Siguranta electrica: Do not expose the sprayer to rain or wet conditions. Do not abuse the cord. Keep the cord away from heat, oil, sharp edges, or moving parts.
- Materiale inflamabile: Do not spray flammable liquids near open flames, pilot lights, or other ignition sources.
- Ventilatie corespunzatoare: Ensure adequate ventilation to prevent the buildup of hazardous vapors.
3. Produs terminatview și Componente
The VONFORN 700W HVLP Electric Spray Paint Gun comes with several components designed for versatile painting tasks.

Figura 2: Componentele incluse
3.1 Componente incluse
- 1X Paint Sprayer Unit
- 4X Size Nozzles (1.0mm, 1.5mm, 2.0mm, 3.0mm)
- 5X Paint Filters
- 1X Viscosity Cup
- 1X Nozzle Cleaning Needle
- 1X perie de curățare
- 1X Dust Blowing Joint
- 1X Clean Connector
- 1X Pot Lid
- 1X manual de utilizare
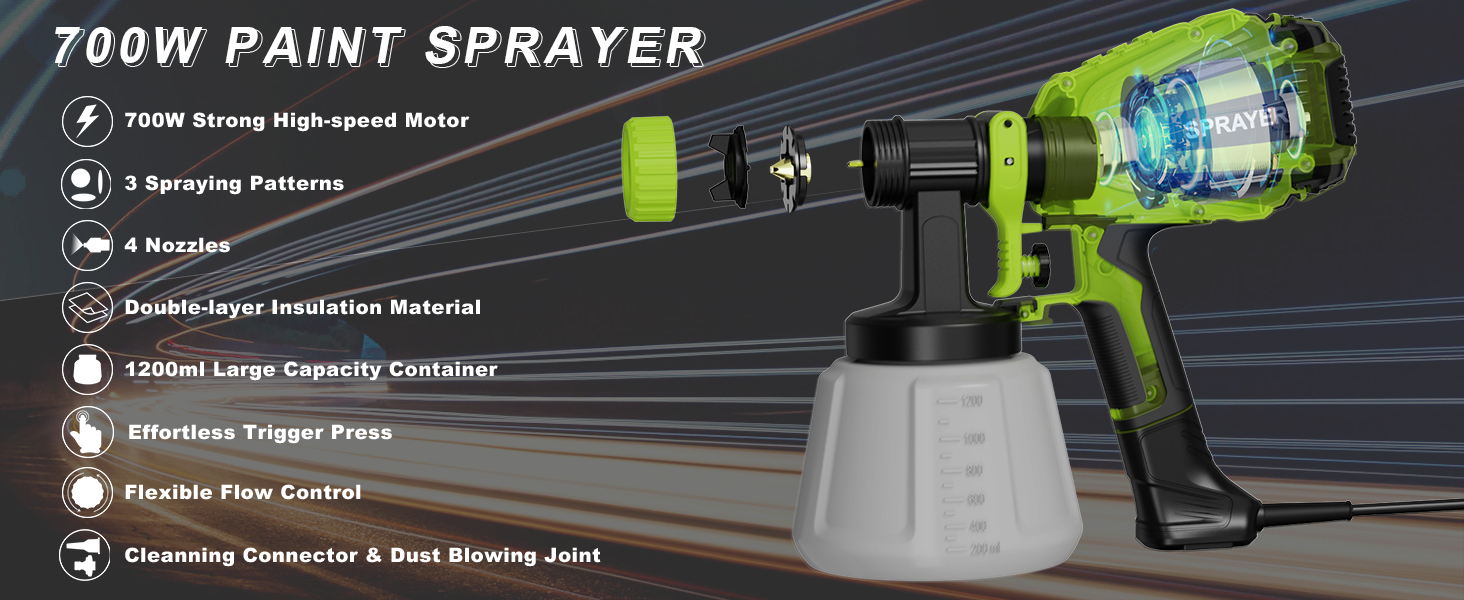
Figura 3: Componente și caracteristici interne
The sprayer features a 700W strong motor, 3 spraying patterns, 4 nozzles, a 1200ml container, easy cleaning, and flexible flow control.
4. Configurare
Proper setup ensures optimal performance and prevents issues during operation.
4.1 Asamblare
The paint sprayer is designed for easy assembly. Connect the paint sprayer body to the container and ensure all parts are securely fastened.

Figure 4: Easy Assembly
4.2 Nozzle Selection and Paint Preparation
Select the appropriate nozzle size based on the viscosity of your paint and the desired spray pattern. Use the included viscosity cup to test your paint. Thin the paint as needed until it flows through the viscosity cup within the recommended time for your chosen nozzle.

Figure 5: Nozzle Sizes and Recommendations
- 1.0mm Nozzle: For wooden artwork, DIY projects (15-25 DIN-S).
- 1.5mm Nozzle: For chairs, shutters, cabinets (25-35 DIN-S).
- 2.0mm Nozzle: For railings, window frames (35-50 DIN-S).
- 3.0mm Nozzle: For walls, decks, fences, wooden artwork, DIY (50-80 DIN-S).
Use the included paint filters to ensure no particles clog the nozzle.
4.3 Visual Guide: Setup and Features
Video 1: This official seller video provides a comprehensive overview of the paint sprayer, including unboxing, assembly, nozzle types, spray patterns, flow control, and cleaning procedures. It demonstrates the ease of installation and various features.
5. Instrucțiuni de utilizare
Achieve optimal results by understanding the spray patterns and flow control.
5.1 modele de pulverizare
The sprayer offers three adjustable spray patterns: horizontal, circular, and vertical. Rotate the air cap to switch between patterns to best suit your project needs.
- Orizontală: For wide surfaces.
- Circular: For small areas or intricate details.
- Vertical: For tall or narrow surfaces.
5.2 Flexible Flow Control
Adjust the flow control knob to regulate the paint output. Turn clockwise for more flow and counter-clockwise for less flow. This allows for precise application and prevents overspray.

Figure 6: Flexible Flow Control
5.3 Cerere Examples
The VONFORN paint sprayer is suitable for a wide range of applications, including doors, wardrobes, chairs, fences, cabinets, and more.
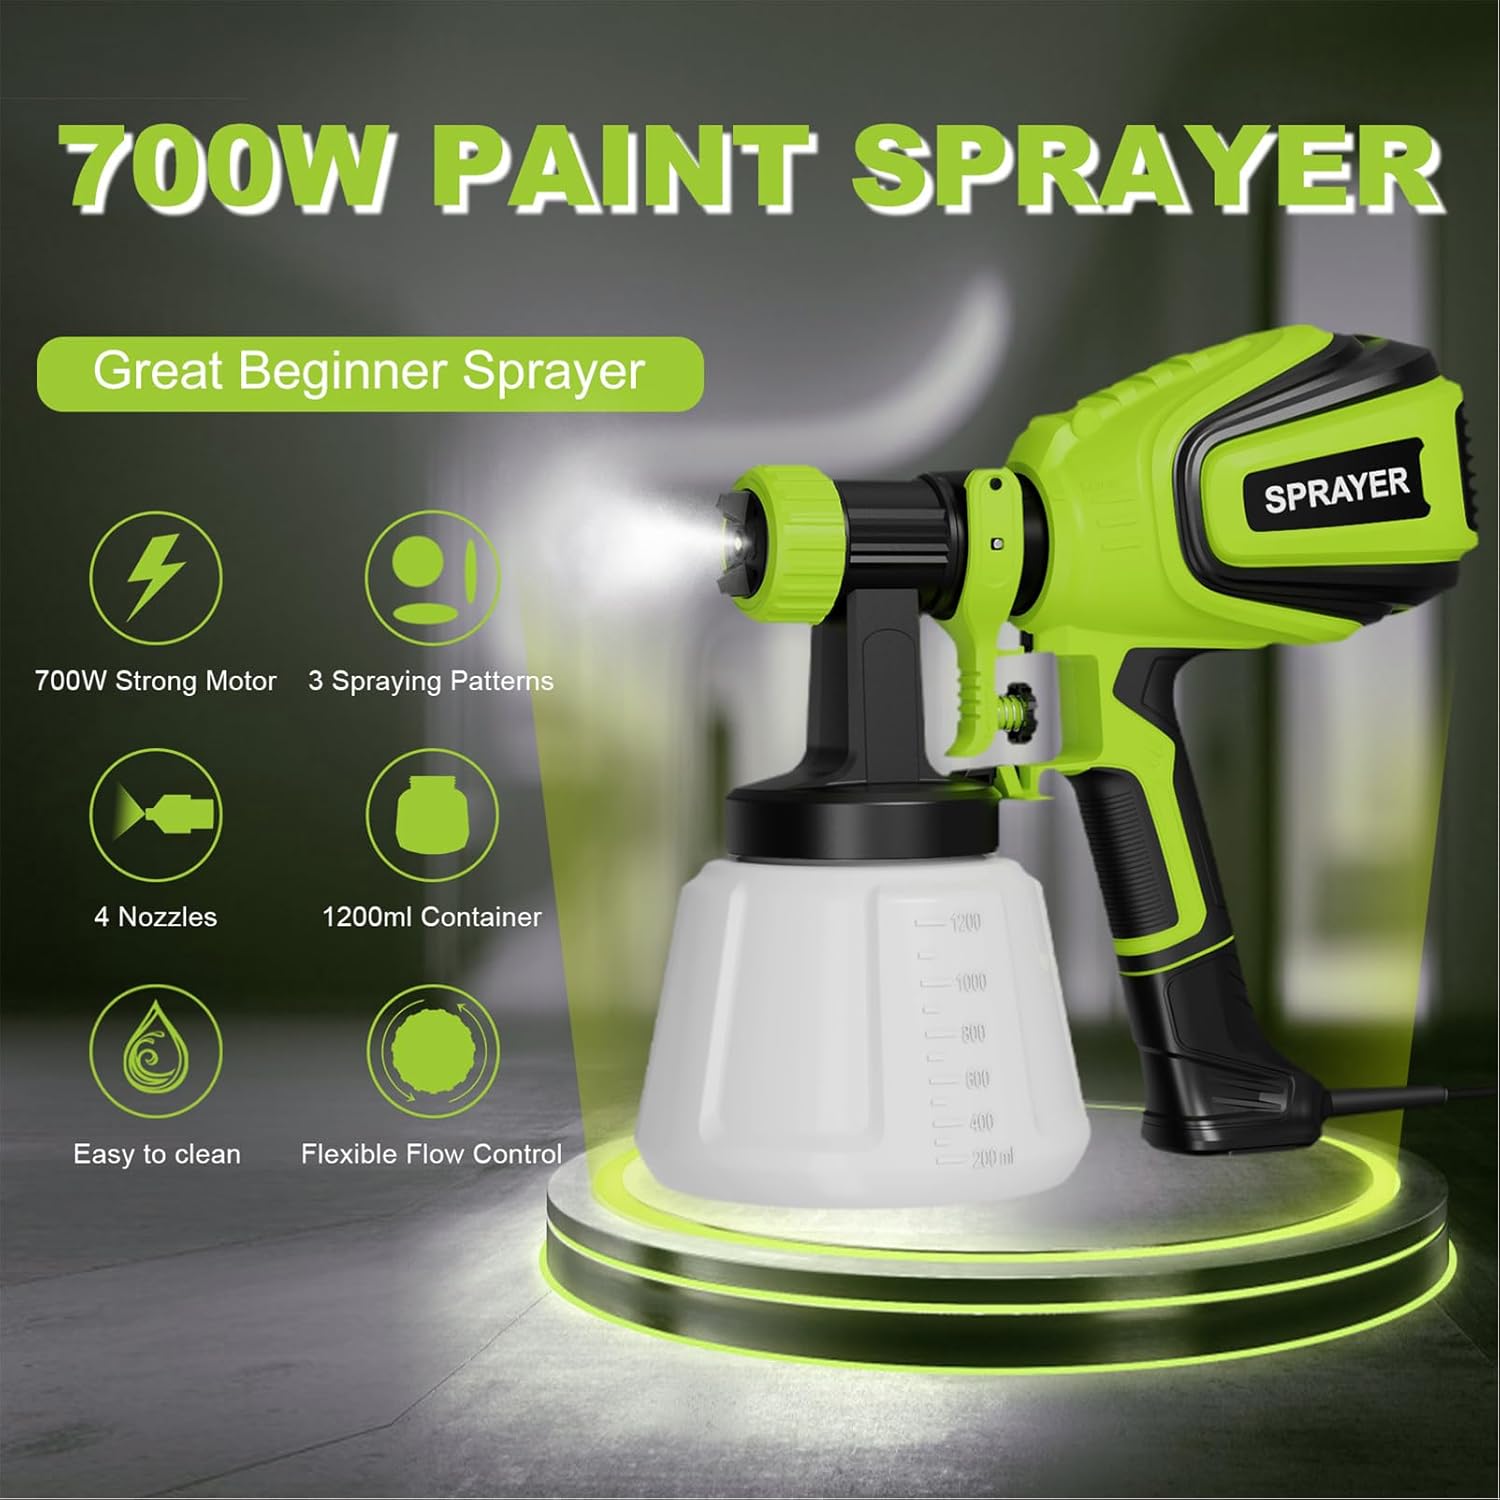
Figure 7: Key Features of the Paint Sprayer
6. Întreținere și curățare
Regular cleaning is crucial for maintaining the sprayer's performance and extending its lifespan. A small amount of lubricating oil on the black nozzle is normal.
6.1 Procedura de curățare
After each use, thoroughly clean the sprayer. Disassemble the nozzle and container. Use the provided cleaning needle to clear any paint residue from the nozzle and the cleaning brush for the straw and other components. Rinse all parts with appropriate cleaning solution (water for water-based paints, mineral spirits for oil-based paints).

Figure 8: Easy Cleaning Steps
6.2 Unique Blowing & Cleaning Functions
The sprayer includes a dust blowing joint and a clean connector for added convenience in cleaning and preparing surfaces.

Figure 9: Unique Blowing & Cleaning Functions

Figure 10: Cleaning Connector

Figure 11: Dust Blowing Joint
7. Depanare
Dacă întâmpinați probleme cu pulverizatorul de vopsea, consultați următoarele probleme și soluții comune:
| Problemă | Cauza posibila | Soluţie |
|---|---|---|
| Fără pulverizare sau pulverizare slabă | Nozzle clogged; Paint too thick; Air cap loose; Suction tube blocked. | Clean nozzle with cleaning needle; Thin paint to correct viscosity; Tighten air cap; Clear suction tube. |
| Model de pulverizare neuniform | Duză parțial înfundată; Setare incorectă a modelului de pulverizare; Mișcare inconsistentă. | Clean nozzle; Adjust air cap for desired pattern; Maintain consistent distance and speed. |
| Paint sputtering or spitting | Low paint level; Air leak; Nozzle not fully tightened. | Refill paint container; Check all connections for tightness; Ensure nozzle is securely fastened. |
| Motorul nu funcționează | No power; Overheating. | Check power connection and outlet; Allow unit to cool down if it has been used continuously. |
8. Specificații
| Caracteristică | Caietul de sarcini |
|---|---|
| Marca | VONFORN |
| Numele modelului | Paint Pulverizator |
| Numărul piesei | VF803 |
| Sursa de alimentare | AC (110V US Standard) |
| Putere de intrare | 700W |
| Volumul rezervorului | 1200 de mililitri |
| Dimensiuni duze | 1.0 mm, 1.5 mm, 2.0 mm, 3.0 mm |
| Modele de pulverizare | Horizontal, Circular, Vertical |
| Greutatea articolului | 3.74 lire sterline |
| Dimensiunile produsului | 5.9 cm lățime x 11.42 cm înălțime |
| Material | Plastic |
9. Garanție și asistență
VONFORN is committed to providing high-quality products and customer satisfaction. If you have any questions about the product, require assistance with setup, operation, or troubleshooting, please do not hesitate to contact us. Our customer support team is ready to help.
Vă rugăm să consultați documentația de achiziție pentru detalii specifice despre garanție și informații de contact.