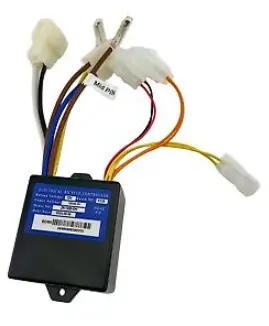
Razor V1 Control Module
Specifications
- Model: Ground Force (V1+)
- Tools Required: Phillips head screwdriver, 4mm Allen wrench, 5mm Allen wrench, 8mm open wrench
- Manufacturer: Razor
Product Usage Instructions
Step 1: Remove Control Module
Disconnect the white plastic connector from the battery to access the screws holding the control module. Carefully remove the batteries from the tray.
Step 2: Replace Control Module
Cut the zip tie holding the wires together. Disconnect the white plastic connectors from the control module. Loosen and remove the screws holding the control module in place.
FAQ
Q: What should I do if I encounter issues during installation?
A: For any assistance or troubleshooting, visit our website at www.razor.com or call toll-free at 866-467-2967 during our operating hours.
NOTE: If you received a control module AND throttle, make sure to replace BOTH parts on your unit.
Tools Required: (Not included)
- Phillips head screwdriver
- 4mm Allen wrench
- 5mm Allen wrench
- 8mm open wrench
CAUTION: To avoid potential shock or other injury, turn power switch OFF and disconnect charger before removing or installing the batteries. Failure to follow these steps in the correct order may cause irreparable damage.
Usage Instructions
Step 1: Remove Battery Cover
Using a 5mm Allen wrench, remove the four hex bolts on the battery cover located behind the seat and remove.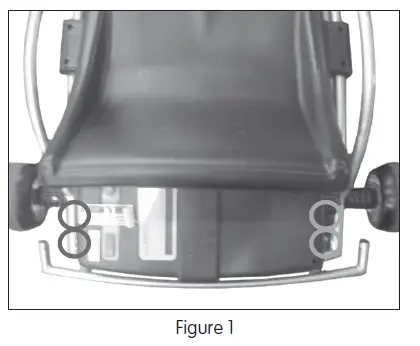
Step 2: Detach Battery Bracket
Cut the zip tie holding the wires to the battery bracket. Using a 4mm Allen wrench, loosen the two bolts on the battery bracket and remove it from the battery. 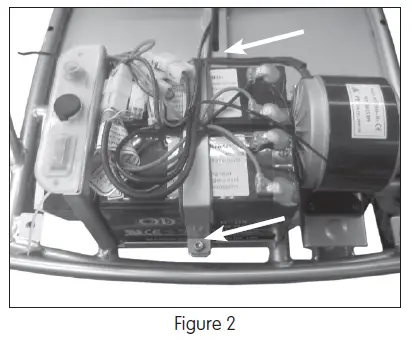
Step 3
To remove the control module, you will need to remove the batteries in order to gain access to the screws that hold the control module in place. Locate the white plastic connector on the battery and disconnect it from the white plastic connector attached to the control module by depressing the tab (See insert). Using both hands, carefully remove the batteries from the battery tray.

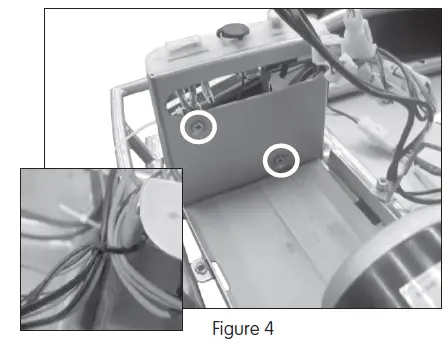
Step 4
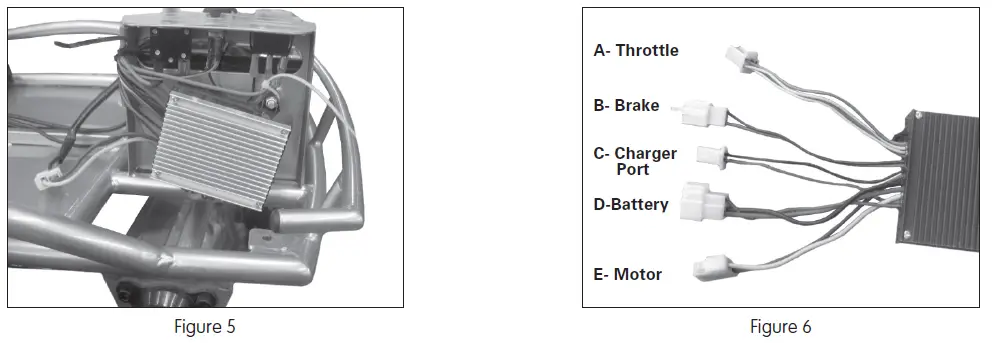
Carefully cut the zip tie holding the wires together (See Insert). Disconnect the remaining four white plastic connectors attached to the control module by depressing the tabs. Using a phillips head screwdriver and 8mm open wrench, loosen the two screws and locknuts holding the control module in place and remove.
Step 5: Install New Control Module
Install the new control module using the removed screws. Reconnect all white plastic connectors. Place the batteries back into the tray and reconnect the battery connector to the control module.
Step 6: Finalize Installation
- Reattach the battery bracket over the batteries in place.
- Place the battery cover back over the batteries and secure it with the hex bolts previously removed.
Attention: Charge the unit for at least 18 hours before riding.
Need Help? Visit our website at www.razor.com or call toll-free at 866-467-2967 Monday – Friday 8:00am – 5:00pm Pacific Time.
Documents / Resources
 | Razor V1 Control Module [pdf] Installation Guide V1, V1 Control Module, V1, Control Module, Module |


